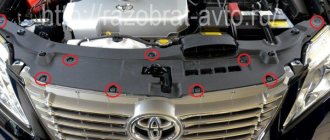
The need to remove the rear shelf may arise for various reasons, such as replacing the shelf itself if it breaks or simply wears out and loses its presentable appearance.
Replacement of standard audio system speakers. Additional sound insulation of the car, analysis of the car interior, and so on. To remove it, it is better to use a special fork for removing plastic fasteners and a slotted screwdriver.
The average price of a used shelf for a Toyota Camry xv40 fluctuates around 2,500 rubles; a new shelf is much more difficult to find, and its price will be welded in the range of 9,000 + - 500 rubles.
The shelf itself is made of plastic and is attached exclusively to plastic clips; it has 2 cutouts for standard speakers, which are mounted on a metal beam and are not attached in any way to the rear shelf of the machine itself.
To remove the shelf on the Camry 40, you need to remove the trim on the rear pillar, they are held on by clips, since plastic loses elasticity with age, there is a high probability of breakage of these clips themselves. Therefore, it is worth considering that new clips will be needed to reassemble the car interior. Remove the pads over the area, smoothly, without bending the edges, the main thing here is patience. After removing the covers, you can proceed to the shelf itself.
Replacing front and rear struts on Camry 40
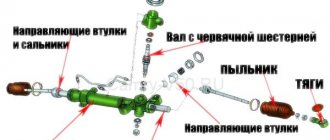
The main component of the car's chassis is the shock absorber strut.
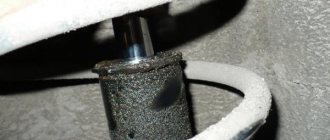
It consists of a shock absorber body, a spring, an upper support and a rod boot. This mechanism is responsible for good controllability and ensures smooth running. The high comfort of the Toyota Camry 40 is ensured by the correctly selected characteristics of the individual elements of the rack.
If one of the elements fails, movement ceases to be comfortable and safe. It is necessary to check the condition of the struts at least once a year or after a run of 20,000 kilometers.
If the car is operated in difficult conditions: uneven dirt roads or roads with increased pollution, it is recommended to carry out chassis diagnostics twice a year or every 10,000 kilometers.
Most often, when diagnosing a strut, the shock absorber, boot and upper support are rejected. It is recommended to replace a defective element as soon as possible. Replacement of such elements occurs in pairs along the axis. An unpaired shift entails uneven distribution of the load and will quickly render the new part unusable.
What spare parts and tools are needed?
Rear suspension spring
| Manufacturer | vendor code | Average price, rub. |
| Original | ||
| TOYOTA | 48231-33651 | 7400 |
| Analogs | ||
| DOLZ | N148 | 1600 |
| MASUMA | CS-1082 | 3100 |
| KYB | RK 7665 | 2300 |
Left rear shock absorber strut
| Manufacturer | vendor code | Average price, rub. |
| Original | ||
| TOYOTA | 48540-39755 | 6500 |
| Analogs | ||
| SACHS | 317192 | 3400 |
| KYB | 339026 | 4300 |
Right rear shock absorber strut
| Manufacturer | vendor code | Average price, rub. |
| Original | ||
| TOYOTA | 48530-89025 | 6500 |
| Analogs | ||
| SACHS | 317193 | 3400 |
| KYB | 339025 | 4300 |
To replace, we use a non-original support spring from the manufacturer MASUMA CS-1082, shock absorber struts are also analogues: right - SACHS 317193; left - SACHS 317192.
Replacing a shelf
Having thrown away the old shelf (or simply put it aside), we take a new shelf and begin to install it.
Let's start in reverse order:
We thread the seat belts through the holes in the shelf. We return the shelf to its original place and fasten it with clips. We return the shelf to the hooks, installing it at a slight angle, inserting the hooks into place, and release the shelf to its original position. Next, we return the brake light to its place, first we connect it (This is important!), and then we insert all the hooks into place and move the stop body to the left. Everything should be in place as before. We screw back the seat belt fastenings from below, and return the guides of these same belts to their original place. Raise the backs of the rear sofa. We insert the rear sofa seat into place, making sure that all the latches are inserted into place and “CLICKED”
If there is no characteristic sound, then while driving the rear passengers along with the sofa will roll around the cabin.
This manual is only suitable for the Toyota Camry XV40 and is not suitable for the earlier Camry 30 or later Camry 50 body.
There the procedure and fastenings are completely different. Also, the shelf itself often needs to be soundproofed if you like to listen to music at a volume above average, and if you install a more powerful musical accompaniment, and also a subwoofer, then sound insulation is simply necessary. Since sound waves travel through the plastic, which cause vibrations in the shelf, spoil the sound from the audio system and add rattling to the car interior when listening to music.
As you can see, there is nothing difficult in removing the shelf; it does not require any special preparation or any special knowledge. But still, in inept and irresponsible hands, this procedure can still end in some kind of breakdown, both the shelf itself and its fastenings.
Elsheep-Team
Camry in the previous body. Those. an even more recent version in a new body is now on sale. In V70, in my opinion, and this one is like V55.
Worth JBL. It's written about it everywhere. Nameplates are everything. Feel exclusive. You have JibiEL!
There is one “but” - something is completely dull in the car in terms of sound. And this is understood by the owner, who considers himself neither a music lover nor an audiophile.
By the way, I don’t consider myself that way either and I confirm - on board - UG.
Our task is to do significantly better in a minimal budget.
The car comes to us for inspection (before the start of the project). I put on a test disk (since uncovering the Bit tune and removing the electrical frequency response from the speakers is a whole story) and what do I hear?
Something is playing in front. The mids are blaring in the doors, the wide ones are squealing in the dashboard. There is also a central channel. Where would we be without it in the “premium segment”? a feeling of the depth of the scene, the presence of this very scene is created. Everything is beautiful. And you can also write in the booklet - the car has a premium JBL audio system with, attention. 8 speakers (or with 8 amplification channels) - whichever you like best.
But how is all this implemented? in the front doors there is a midbass in the form factor of 6 X 9 inches, standard for Toyota. There are three broadbands in the dashboard. Left, right and center. It's like HF + center channel.
But in the back is Costmas.
On the shelf there is a 6 x 9 format pancake - this is - officially - a subwoofer. Crap. with paper diffuser. on the shelf. in Free air design. ahhhh.
Nearby (in the shelf) there are two broadband speakers, . Well, 8 cm in diameter. Not more.
All . These are all rear speakers.
There is nothing at the door. No midbass or even a hint of it.
There is a standard amp under the driver.
Let's see what we came up with immediately after the inspection. I repeat - we are extremely limited by budget and we have not yet disassembled or inspected the car in detail.
The idea is that we want to find a broadband signal in the car behind the standard amplifier (more precisely, we hope that this is the case in this configuration), then feed it at a high level to the new amplifier, which will play to the front + rear.
We will implement the front with acoustics, which we often go with Toyota upgrades - CDT Audio CL69C, and at the back we will install CDT Audio CL6X pancakes.
This is all - a budget line from our favorite American brand. We have no doubt that it will get better.
Let's look at the patient
Sorry for the photos, but the photos are taken by the installer, who has no understanding that if you need to take a photo of the car, then the whole thing, and not just the hood. I'll fix it later
Well, tilting your head a little to the side you can see the head unit
from somewhere there, from the rear shelf, squeaks and squeals are heard from the rear speakers
there is nothing in the rear doors at all. But usually they still put rear speakers here
in the front doors, in standard places, standard 6 x 9
We start disassembling and come across a broken brake light on the rear shelf. When they tinted it, they broke it. Happens
front door. A piece of white standard vibration isolation peeks out modestly. kind of embarrassed that he’s even here
We are doing simple soundproofing of the front 2 doors. According to the "standard" class. Processing door trim with bitoplast
The inside of the door is treated with Aura M1 material
we take out our printer and print stickers that will mark the wiring on the amplifier
remove the rear shelf. There is one hole for a pancake, but the other is not, and in the shelf itself there is a hole in the metal for both speakers
Here it is a standard amplifier - under the driver. Nearby lies a very compact DLS CC44 on the basis of which the system was originally planned
we remove signals from the standard amplifier and label the outputs
The problem is that, as often happens on Toyotas, the front speakers are 4 channels. 2 channels are midbass in the doors, which receive a heavily cut signal (there will be pictures just below), and in the dashboard there are “wides”, which receive 2 more channels from the amplifier. And the signal is also cut. Those. We will not be able to remove a full-fledged broadband signal from a standard amplifier.
Oh, you're so cunning. I think I'll unpack the Audison Bit tune. to remove the electrical frequency response of channels
Well, we are still doing soundproofing. External layer - Aura M1
and here is the same “shirik” that is in the rear shelf
but this, from the point of view of Toyota marketers, is a subwoofer
who makes sounds right here
and here is the second problem.
Toyota changed the door trims. I've already made them. And what used to fit in the front doors with modifications now doesn’t fit there.
On the left is a pancake from CDT Audio (the midbass is absolutely the same in size. The pancake just happened to be at hand at the time of the photo)
between the points of attachment of the speakers to the door plane - a difference of 5 cm minimum
where the ruler is, the metal of the door begins. And everything above is inside the door. And right behind the magnet is glass
and here is the same line. And our new magnet. The speaker won't fit in the door
We are thinking about what to put in place. Most likely we will install Audison APK 165, because... playing acoustics, with a small seating depth. Even an ordinary standard mid-section with a planting depth of 7 cm is not guaranteed to fit into such a door
Well, for now, let's go back to our amplifier and remove the electrical frequency response from it
This is our “subwoofer”. Indeed, it has a subwoofer range
rear “shirik”, which is located in the rear parcel shelf. Here we see that from 80 Hz something begins to make sounds and gradually fades away at about 12 kHz. Those. the guys made such a cheap sound system at the back. For Mayak and Radio Retro will do
frontal pancakes. Cut at 200 Hz. But they mumble as they should at 80-100 Hz
shirik, which is in the dashboard (instead of the high frequency). About the same as in the back on the shelf, but with more mid/high frequency range.
and - central channel. Everything is simple here - it is needed in order to deceive the user’s ears and localize the sound from the center of the dashboard. We turn it off completely
It's all sad, really. It's sad if there is no processor. But we don't have it. It doesn't fit the budget.
Therefore, the current situation was announced to the client and tomorrow we will put together a system “on the snot” in which there will be no processor and the signal from the front and rear wide receivers will be sent at a high level to DLS. And let's see how it all starts making sounds. We will invite a client and demonstrate. And we will decide whether we will take the path of increasing the cost of the estimate and installing an amplifier with a built-in processor - AMP Panacea
- Login to post comments
the project is finished. More precisely, the first approach to the car has been completed. Perhaps a subwoofer will appear in the system, but that will come later.
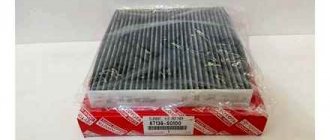
We are soundproofing the rear shelf, because we have new acoustics installed in it
The front doors are also treated according to the “Standard” class and Audison APK 165 acoustics are installed in them, because I already wrote above - the seating depth does not allow installing the CL69C kit from CDT Audio in these doors. Too little depth
The beepers are in their normal places
removed from JBL machine
Audison APK 165
“on the snot” they launched DLS. The result disappointed us. But the miracle did not happen. There is no low-frequency range on the front widths, although the frequency response shows something there
As an experiment, we sent a signal not via a remote control (as in the photo), but directly from a smartphone to all channels. It started playing much more fun, because... the smartphone still outputs almost the full spectrum to the headphone jack
from under the hood we pull back new power
and, in the end, after discussing the situation with the client, AMP Panacea settled under the shelf. 2 channels work for the front speakers, and the remaining 4 are bridged to the rear pancakes that are in the shelf.
The result is quite standard: we got a serious increase in undistorted power. The foundation is completely different. High frequencies and airiness appeared. At the same time, we lost the buzz that the pancakes gave at the front doors. And which the owner perceived as low frequencies.
The problem in this case is that it is impossible to find component acoustics with mids in the form of classic “pancakes”, in a budget of up to 15,000 and with the seating depth we need. it simply doesn't exist. Resp. There are two options - don’t touch anything at all (not our case); install 16 cm component acoustics in front, use standard places in the shelf for coaxial pancakes. And get at the output a fairly loud system (compared to what it was) that does not mumble, but purely plays out its honest range: from 50 Hertz and above.
But. the person has spent money and is expecting a full return. But there is no subwoofer. I wish I could. After all, the dreams were that “now it will start playing.” But these are slightly different budgets and a different system concept.
Therefore, now the car went to warm up the acoustics and to understand the situation with the subwoofer. Again, there are 2 options: hang something not particularly powerful and at the same time extremely compact (and preferably inexpensive) on 2 channels of Panacea and get an increase in the low frequency range at low/medium volume levels; Place a separate monoblock and any subwoofer behind it. Panacea allows you to implement both options. The only question is the budget
Rear shelf Toyota Camry XV40
The need to remove the rear shelf may arise for various reasons, such as replacing the shelf itself if it breaks or simply wears out and loses its presentable appearance.
Replacement of standard audio system speakers. Additional sound insulation of the car, analysis of the car interior, and so on. To remove it, it is better to use a special fork for removing plastic fasteners and a slotted screwdriver.
The average price of a used shelf for a Toyota Camry xv40 fluctuates around 2,500 rubles; a new shelf is much more difficult to find, and its price will be welded in the range of 9,000 + - 500 rubles.
The shelf itself is made of plastic and is attached exclusively to plastic clips; it has 2 cutouts for standard speakers, which are mounted on a metal beam and are not attached in any way to the rear shelf of the machine itself.
To remove the shelf on the Camry 40, you need to remove the trim on the rear pillar, they are held on by clips, since plastic loses elasticity with age, there is a high probability of breakage of these clips themselves. Therefore, it is worth considering that new clips will be needed to reassemble the car interior. Remove the pads over the area, smoothly, without bending the edges, the main thing here is patience. After removing the covers, you can proceed to the shelf itself.
Soundproofing Toyota Camry V40 (Toyota Camry V40)
A Toyota Camry V40 arrived at our car service center. It is required to completely soundproof it. The work will take a day, so the owner went about his business to pick up the car in the evening.
The car will be disassembled, covered with special materials and reassembled. Masters wear clean gloves. Everything is ready to start working.
Soundproofing doors Toyota Camry V40
Let's start with the doors. First of all, the craftsmen carefully disassemble them: take out the speakers, remove the protective film and remove other door elements. Four craftsmen will work at once, each on one door - this will speed up the work by an order of magnitude.
The protective film has been removed, all that remains is to remove the speakers. The wires will remain, they will not interfere with the craftsmen carefully gluing soundproofing materials inside the door.
The first layer will be "SGM M2". This vibration dampening material is carefully applied to the inside of the door. Craftsmen try to glue “SGM M2” in solid pieces, avoiding seams and joints.
On top of “SGM M2” the second layer is glued “Spleen” - noise and heat insulating material, 4 mm thick.
The third layer, on the outer part of the door, is an additional layer of “SGM M2”. The craftsmen cut out and glued a single piece without seams or joints, exactly along the contour.
The final fourth layer will be the Bibiton material. This is a lightweight noise-absorbing material with a porous structure. Like the previous layer, a single piece was cut out and glued without seams or joints. This concludes the soundproofing of the doors. Four layers are enough - the craftsmen calculated the optimal amount of material for optimal noise protection.
Ceiling sound insulation Camry V40
You can move on to soundproofing the ceiling. This is one of the most material-intensive areas. First, the craftsmen will have to remove the standard trim from the ceiling.
The standard casing was carefully removed and placed away from the work site so as not to stain or damage it.
You can start gluing materials. The first layer is “Comfort”. It suppresses unnecessary vibrations from the ceiling metal.
Felt is glued on top of the “Comfort”. This material requires space - if it is compressed, the sound insulation properties will be lost. The stock sheathing will be carefully attached on top of the felt.
Soundproofing the floor of Toyota Camry 40
The craftsmen move on to soundproofing the car floor. Here, as on the ceiling, you will need a lot of material. Everything is prepared - you can get to work!
The first layer is the “SGM M3” material, which will absorb vibrations from the metal of the car’s underbody.
White Bibiton is glued to the SGM M3. This is a porous material that bends easily, making it convenient to glue to the curves of the car floor. "Bibiton" perfectly absorbs noise.
The craftsmen have completed soundproofing the floor and are now carefully putting it back together.
Soundproofing the trunk and wheel arches of Toyota Camry 40
Let's move to the back of the car. All standard trim is removed from the trunk, and sound insulation can begin.
Wheel arches are the thinnest part of the car body, which means they transmit the most noise. It is worth especially carefully gluing these areas with soundproofing materials.
An interesting move - first the craftsmen placed two vibration-proofing materials at once - “SGM M2” and “SGM M3”.
“SGM M3” is glued to the side arches. Reliable protection against vibrations of the metal car body.
On top of the vibration isolation, the entire trunk and wheel arches are covered with “Bibiton”.
The rear wheel arches are also covered with “bibiton” over “SGM M3”.
Soundproofing of the trunk is completed. The craftsmen return the standard coating to its place.
Soundproofing the trunk lid of Toyota Camry V40
We are starting the final part of the sound insulation - only the trunk lid and hood remain. Free craftsmen have already begun to put back the car interior. Vibration-insulating material “SGM M2” is glued inside the trunk lid.
“Bibiton” is glued on top of “SGM M2”. The trunk lid has become a little heavier; when it is closed, a characteristic dull sound will be heard.
Soundproofing the hood of Toyota Camry V40
The final stage of sound insulation will be the hood cover. Craftsmen carefully remove the standard casing.
- The casing has been removed, you can start gluing vibration and sound insulation.
- Apply the first layer of glue to vibration isolation “SGM M2” into the technological holes.
- Sound-absorbing porous “Bibiton” is glued on top of “SGM M2”.
Completion of soundproofing work on Camry 40
The work is completed. The craftsmen have finished assembling the car. You can return it to the owner.
Typically, after soundproofing, the weight of the car increases by only 50 kg. Now the inside of the car is quiet and comfortable. Bring your car to us for soundproofing - we will do it efficiently and inexpensively!
See you at 12 Volt!
Source: https://12v-auto.ru/noiseprotect/noiseprotect-toyotacamryv40.html
Components of the rack
The suspension strut includes several elements:
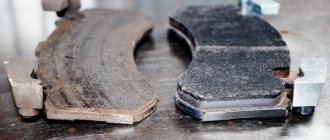
- Spring. Untimely replacement leads to subsidence, which means a decrease in load capacity and ground clearance. In rare cases, the spring coils break off and further operation of such a vehicle is impossible. The average replacement interval is about 150 thousand kilometers.
- Shock absorber. There are oil and gas-oil types. Designed to stabilize roll and prevent swaying, as well as absorb impacts from uneven surfaces. The average replacement interval for shock absorbers is 60 thousand kilometers.
- Upper support. Fastening element. Absorbs shocks from the shock absorber without transferring them to the body. The front supports are equipped with a bearing.
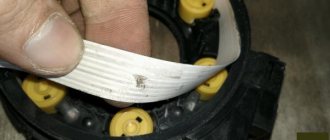
- Shock absorber rod boot. Protects against dirt or dust. A torn boot reduces the life of the shock absorber.
Rack diagnostics
The most accurate way to diagnose the performance of a rack is a special test stand. Such equipment is expensive and not every service station has it.
You can check the racks yourself by following a few simple steps:
actions:
- carry out a visual inspection for mechanical damage to elements and the presence of oil leaks;
- evaluate the speed of stabilization of the car when it swings in a vertical plane - serviceable struts do not allow the car to oscillate up and down;
- make several turns while driving, a strong roll indicates problems with the elements of the struts;
- turn the steering wheel in place, a characteristic crunch in the front of the car may indicate failure of the upper shock absorber mounts.
If malfunctions are detected, it is recommended to eliminate them as quickly as possible. Moving with racks that do not perform their functions is fraught with consequences:
- decreased vehicle controllability at medium and high speeds;
- loss of directional stability in all travel modes;
- reduced load capacity and ground clearance;
- increased load on other elements of the chassis;
- lack of comfort when driving over uneven surfaces;
- increase in braking distance.
The load on the front axle is much greater than on the rear. This is especially noticeable in the Camry with a 3.5 liter engine. For this reason, the front struts will require more frequent replacement.
Video
Removal of the rear sofa begins in 3 minutes 5 seconds.
Hi all!
. It’s been a while since I wrote anything...and there was nothing to write. I had three days off and couldn’t find anything better than to spend them with my beloved. In this topic I will describe my path to disassembling the Camry interior for soundproofing the floor, shelf, ceiling...
Day 1
. 21.00 pm. I started by dismantling the interior, namely, I needed to remove everything as much as possible in one evening. I unscrewed the front seats, disconnected all the connectors... carefully pulled out the seats and started putting everything in the garage.
Then I started removing the back seat. I pulled it up from both edges and it jumped out of its seats. Be very careful, there are connectors for butt-warmers along the edges, which can be torn out if you then drag it up or towards yourself. We also disconnect them accordingly.
Next, I unscrewed the plastic sides and began to unscrew the back of the rear sofa from below.
The back of my sofa is electrically driven and this was the first time I carried out “such” dismantling. I didn’t find any information on the Internet and there were no videos about this either. After “jumping around” a bit with a flashlight, I began to unscrew everything from above, behind the back and from the sides... there isn’t much space there at all and it causes some discomfort. Thanks to the one who invented the “ratchet”; without it, you could easily spend a couple of hours with an open-end wrench and curse everything around you.
Why do you need to remove the second row of Camry?
To reupholster the interior, you will have to remove the rear sofa.
If the car is properly maintained, a similar procedure should be performed at least twice a year in preparation for the winter or summer season. Also, owners of Toyota Camry 40 have to remove the rear seats:
- when completely replacing the second row to update the interior;
- to increase the volume of the luggage compartment;
- during bodywork or painting work;
- if necessary, inspect and repair components and mechanisms located behind them.
The fuel pump is located under the rear seats. If you need to replace the pump, you will need to remove the rear seat on the Camry.
The Camry fuel pump is located under the rear sofa of the Camry.
When you go to a service station for diagnostics and further repair of the mechanism, you can leave everything to the shoulders of the craftsmen. But they will include the removal of the seats in the cost of the work, and it doesn’t cost a penny during the service.
Experienced motorists advise periodically drying the Toyota interior if you often have to overcome water obstacles, that is, puddles, drive in damp weather and store the car in a damp room. And to do this you need to remove the back sofa.
In addition to the indicated reasons for dismantling the second row, Camry seats are also removed when additional sound insulation is performed. During this procedure, the chairs and backrests are removed, since access to the bottom is required.
Instructions for removing the rear shelf
1. Remove the plastic seat belt guides, first unscrew the seat belt fastenings from below.
2. Move the brake light housing to the right, lift it and disconnect the connector:
3. Pull up, remove the front part of the rear parcel shelf from the hooks, tip it into the passenger compartment, pull the seat belts through the holes
I am the owner of a Toyota Camry and, like many car enthusiasts, I had to face some difficulties with this car. In general, at first I thought that disassembling a Toyota Camry was very difficult and that only craftsmen could do it. But it turned out the opposite. I encountered problems with the speakers and wanted to replace them; they didn’t work, as it turned out, the wire came loose after the rear shelf was dismantled. I accidentally came across this site while searching for information and, with the help of the article, I did everything quickly and without anyone else’s help to remove the rear shelf of a Toyota Camry. Many thanks to these articles, with their help you can completely disassemble the car)!
How to remove the back seat of a Toyota Camry
Toyota Camry V40 is a popular car that is important to maintain in good condition.
To do this, you should not only pay attention to the technical equipment, but also to the equipment of the car dealership. For example, it is better to maintain the seats in reliable condition, because the ergonomics of the vehicle interior, and accordingly the level of comfort, depend on this in almost everything
Removing the shelf
- We remove the seat of the rear sofa; to do this, take the seat itself and carefully pull it, simultaneously unclicking the fastenings on the sides. When the fasteners are removed, snap off the connectors using a special slotted screwdriver.
- Reclines the rear seat back.
- We unscrew the seat belt fastenings from the bottom and remove the plastic guides.
- We move the brake light housing to the right (attached to 4 hooks), then lift it and disconnect the connector. (You don’t have to remove it, but for ease of operation it is better to remove it at this stage and disconnect all contacts of the additional brake light)
- Pull the shelf up and remove the front part of the shelf from the hooks, and take out 3 clips.
- Having thrown the shelf into the car interior, pull the seat belts through the holes in the shelf, the fastenings of which we disconnected at the very beginning.
Removing the driver's seat
How to remove the driver's seat of a Camry? In this case, the procedure is slightly different than when disassembling and removing the rear seats. It is required to perform certain operations sequentially:
- Remove the seat trim (on Camry 50, 40, 30)
- Remove the seat adjustment lever, first adjusting it so that the seat is in the highest position;
- Disassemble the seat. To do this, you need to dismantle the chair tilt adjustment handle, the glove box, remove the side bars, having first unscrewed the fixing bolts and removed the plugs;
- The V40 and V50 models are equipped with side airbags and a heating system. If these components are present, it is necessary to dismantle the corresponding blocks and carefully disconnect the wires;
- Disconnect the springs located below from the seat itself;
- Remove the height adjustment mechanism for the driver's seat, having first disconnected the 3 bolts securing it;
- Carefully remove the seat itself, lifting it up.
Assembling and installing the driver's seat occurs in the reverse order.
If you don’t know how to remove the seat on a Camry 50 or previous Toyota Camry models, our recommendations may have helped you. If you still find it difficult to perform these steps yourself, contact professionals from the manufacturer’s service center.
How to change shock absorber struts and springs on a Camry 40?
- Raise the car on a lift;
- Unscrew the bolts securing the rear wheels;
- Unscrew the brake hose mounting bolts;
- Unscrew the upper stabilizer link mounting bolt;
- Unscrew the two fixing bolts of the shock absorber strut;
- Remove the shock absorber strut from the knuckle;
- Go to the car interior;
- Remove the rear passenger seat headrest;
- Pull out the decorative plugs;
- Unscrew the two fixing nuts;
- Move the seat forward;
- Unscrew the upper fastening of the shock absorber support;
- Remove the shock absorber strut;
- Compare the shock absorber struts with each other (new and removed);
- Pull the spring off the shock absorber strut;
- Unscrew the nut securing the support;
- Remove the upper support with boot + bump stop;
- Compare springs;
- Assemble the shock absorber strut and support;
- Install the new assembled shock absorber strut;
- Complete assembly in reverse order.
We lift the car on a lift. If you don't have a lift, you can use a jack on each wheel one at a time. Unscrew the rear wheel mounting bolts using a pneumatic gun and a 21 mm hex socket. We remove the wheel.
We determine the location of the shock absorber strut and check the mounting points of the strut.
Unscrew the two bolts securing the brake hose and ABS wire. We unscrew the brake hose bolts with a 13 mm hex head, and the ABS wire fastening with a 10 mm socket. We take them aside.
Check the upper mount of the stabilizer link. In case of sticking, the fastening must be cut off with a grinder.
The fastening is in order and yielded when unscrewed using a 17 mm hex socket. Move the stabilizer bar to the side.
Unscrew the two nuts of the lower suspension strut mounting with a 21 mm hex head and remove the bolts.
We remove the shock absorber strut from its mounting location.
Open the rear passenger door and remove the headrest from the rear passenger seat.
We take out the decorative plugs that hide the seat mounting bolts.
Unscrew the rear seat mounting nuts with a 12 mm socket.
Move the seat forward.
We open access to the upper support mount.
Using a large ratchet with a 13 mm socket, unscrew the upper support mount.
We are dismantling the rear shock absorber strut.
Place it on a flat surface and prepare a tie for the spring.
We compare the removed shock absorber strut with the new one.
We compress and tighten the spring with a spring tie.
Unscrew the support fastening and remove the support. We use a 19 mm socket.
The photo shows the stand disassembled.
Removed support with bump stop.
Let's compare the springs.
We compress the new spring and pull it onto the new shock absorber strut.
Install the support and secure it with a bolt
Important: if you are replacing a shock absorber strut + spring + support, then there is no need to disassemble the used strut and tighten the spring. Just collect new parts in the above order
We check the correct assembly of the shock absorber strut + spring + support before installation;
We install a new rack and secure it with bolts. We complete the assembly in reverse order. We repeat all the steps for the second rear pillar.
Among modern Toyota cars there are no models with a non-removable second row of seats. Engineering teams from major companies are designing passenger seats that can be transformed into a table or even removed with a flick of the wrist. But some motorists have no idea how to properly remove the seat on a Toyota Camry. However, there is nothing difficult about this, since you don’t need any special skills or knowledge, just a couple of tools.
Are separable improvements always the property of the tenant?
To stop disputes about separable and inseparable improvements when returning property at the end of the contract, lessors often include in the terms of the agreement a clause on the right of ownership and separable improvements. In this case, the tenant will be required to transfer such improvements. Another thing is how can the landlord prove, for example, that there was a screen or expensive curtains hanging in an empty place, if there are no traces of these objects, as well as the objects themselves? And the tenant does not need to obtain permission for separable improvements. On what basis will the landlord make demands? However, most likely, the landlord is not interested in screens and curtains, but larger “game” is. For example, office partitions or air conditioning systems. In principle, they can be taken apart, but traces will still remain. This means that these are inseparable improvements. And if the tenant claims the opposite, let him look at the relevant clause of the contract, as was the case when making a decision in the Ruling of the Supreme Court of the Russian Federation of April 10, 2017 No. 309-ES17-2544. The tenant considered that the ceiling air conditioners and office partitions were separable improvements, that is, his property, and went to court.
According to paragraph 36 of the joint Resolution No. 10/22 in accordance with Art. 301 of the Civil Code of the Russian Federation, a person who has filed a claim in court to recover his property from someone else’s illegal possession must prove his ownership of the property in the possession of another person. The right of ownership of movable property is proven with the help of any evidence provided for by procedural legislation confirming the emergence of this right by the plaintiff. The tenant provided the courts with an agreement for the free use of the installed equipment, as well as a contract for installation and assembly.
Indeed, in accordance with Art. 301 of the Civil Code of the Russian Federation, the owner has the right to reclaim his property from someone else’s illegal possession. This method of protecting a violated right is aimed at returning to the owner or other legal owner exactly that property that was illegally removed from his possession. The object of vindication can be any individually defined property that has been preserved in kind. The defendant in a vindication claim is the illegal owner who actually has the thing. An illegal owner should be considered not only a person who has taken possession of a thing without permission, but also one who has acquired a thing from a person who is not authorized to dispose of it. Illegal possession should be understood as any actual possession of a thing if it does not have a legal basis.
The subject of proof in a vindication dispute includes: the plaintiff’s ownership of the claimed property, individually defined characteristics of the claimed property, the fact that the claimed property is in the defendant’s possession, the conditions under which the property left the owner’s possession (the absence of obligatory relations between the parties regarding the disputed property ). The burden of proving these circumstances in total is placed on the plaintiff (Article 65 of the Arbitration Procedure Code of the Russian Federation).
However, the plaintiff failed to prove the existence of ownership of the claimed property in the case under consideration. By virtue of Art. 623 of the Civil Code of the Russian Federation, separable improvements made by the tenant to the leased property are recognized as his property, but only unless otherwise provided by the lease agreement. And the agreement precisely stipulated that the lessor is the owner of both inseparable and separable improvements to the leased property.
The court rejected the tenant's demands to determine whether the installation of air conditioners was part of a redevelopment or alteration, and the claim that the dismantling would not cause any damage to the premises. Since it was proven that, according to the agreement, the lessor is the owner of both inseparable and separable improvements to the property, including improvements in the form of the installation of an air conditioning system, the court concluded that the disputed property cannot be claimed by the tenant regardless of the characteristics of this property.
So, although in Art.
623 of the Civil Code of the Russian Federation states that separable improvements to leased property are the property of the tenant; attention should be paid to the end of this article, which allows for the transfer of these improvements to the lessor under the terms of the agreement
How to connect your phone via bluetooth to a Toyota Camry?
Now let's focus on the part that is most likely the most important to you. How to connect your phone to Toyota Camry via bluetooth? It's nice to know that your car has this technology, but how do you do it if you want to make a Bluetooth call using your Toyota Camry? The process is quite simple and we will present you with some tips on how to activate Bluetooth and how to connect your phone to Toyota Camry:
- Go to your phone's settings, then under the Network tab, select Bluetooth and search for devices to pair.
- Once the search is completed, establish a connection with your car, the bluetooth name will be "Toyota Camry", a code should be displayed on the screen of your car, it is up to you to decide that it is the same on your phone and to confirm the connection with the car radio of your Toyota Camry
. The second possibility is that you can simultaneously perform manipulations directly through the car radio:
- Go to the car radio settings, go to the “connection” tab.
- Select the "search for device" option.
- Select your smartphone from the list and make sure its Bluetooth connection is activated before handling it.
. - To complete the connection, you simply need to confirm that the two codes displayed on your two devices are the same.
Now you know how to connect a smartphone via bluetooth to a Toyota Camry . You just need to take advantage of all the functions that this technology allows you to do, such as having a Bluetooth phone or playing music via Bluetooth. If you wish to connect or activate Android Auto on your Toyota Camry, we have created a page with complete contents that will allow you to do so without any hassle.
How to remove the sofa and rear seat cushion on a Toyota Camry?
The next step is to unscrew the bolts with a size 12 wrench. We remove the lower part of the middle pillar, carefully pull it towards ourselves and gain access to the bolt to unscrew the upper part of the pillar. Remove the top part of the rack. We pull towards ourselves and down... We remove the plugs, squeeze the metal plates and remove the handle.
To install it back, you need to assemble the handle completely, and then simply insert it with the plates back into place until it clicks. We remove the front seat in order to pull out the removed ceiling through the rear right door.
We take out the front lamp starting from the front edge. It's quite easy to do.
Next, disconnect the wiring terminals. The photo shows the latches. Remove the sun visor.
Turn the fastener 45 degrees and pull it out. I had to suffer in this place. The plug bent and did not give way.
It was very difficult to come out. The tabs of the plug push apart the metal brackets that go into the body. I bent the entire plug and creases appeared. To do this, you will need a key to remove the armrests on both sides. After this, you can unscrew the backs.
How to remove the back seat of a Toyota Camry
Tilt them. On the back you will find fasteners. It is necessary to unscrew two bolts on the right and left sides of the backrest. In some cases, you may need to remove the seat belt from its guides.
There are also plastic plugs installed on the bolts.
They are quite fragile, so it is recommended to carefully pry them off with a slotted screwdriver.
You can always find useful information in the manual for your vehicle.
How to Remove Rear Seats on Camry 50
You need to find the corresponding item in the table of contents to familiarize yourself with the available information. The documentation contains informative pictures with symbols and procedures. The whole procedure will not take you more than 30 minutes. This way you can clean the seats or install new covers without any problems. Installation occurs in the reverse order.
https://clubmashin.ru/toycamry/repair/kak-snyat-zadnee-sidene-tojota-kamri.html https://toyota-camry-corolla.ru/camry/snimaem-zadnee-sidenie-kamri-xv40-50 / https://inomarki-remont.ru/zadnie-sidenija-toyota-camry.html https://autovizov.ru/toyota/camry/%D1%81%D0%BD%D1%8F%D1%82%D1 %8C-%D0%B7%D0%B0%D0%B4%D0%BD%D0%B5%D0%B5-%D1%81%D0%B8%D0%B4%D0%B5%D0%BD%D1 %8C%D0%B5-%D0%BD%D0%B0-toyota-camry.html https://pr-people.ru/toyota/%D1%81%D0%BD%D0%B8%D0%BC% D0%B0%D0%B5%D0%BC-%D0%B7%D0%B0%D0%B4%D0%BD%D0%B5%D0%B5-%D1%81%D0%B8%D0%B4% D0%B5%D0%BD%D0%B8%D0%B5-%D0%BA%D0%B0%D0%BC%D1%80%D0%B8-xv40-50.html
How to remove the rear seat backs
In order to successfully remove the installed rear seat, you cannot do without the second stage. Will it be easy? The main goal is to understand what it really involves to remove the seats. Only step-by-step completion of the task will increase the chances of a successful result to the maximum level.
- Initially, you should raise the headrest. At this time, the plugs for the backrest mounting points will be open.
- Now the plugs need to be removed. To do this, it is advisable to use a slotted screwdriver.
- The next step is to unscrew the bolts with a size 12 wrench.
- The seat belt should now be removed from the guide structure.
- The bolts holding the backs of the car seats are unscrewed from the bottom on both sides. To complete this task you will need a size 12 wrench.
- Now you need to unscrew the bolts, using a key with the number “12”, holding the backrest to the bracket.
- The next task is to carefully detach the seat curtains from the rear parcel shelf to which they are originally attached.
- Once everything has been successfully unscrewed, the backrest can be carefully removed .
Back row problems
The rear passenger seat is designed for two people of average configuration. It will be difficult to accommodate three people, but it is possible. The armrest is located in its normal place - in the center. The design does not provide handles for removing it from the opening. It is necessary to extend your hand and recline it, which is not very convenient and sometimes unhygienic. In addition, the armrest constantly shakes when moving, there is no strong fixation.
The hardest part comes ahead, when you need to dismantle the rear row for repairs. The lower “seat” is dismantled with a flat-tip screwdriver, which is inserted into the opening, and the bracket is removed. For such a prestigious brand, it’s not “befitting.” The top row of backrests folds from the trunk side by pressing the levers. After that, the three fasteners - the latches - are unscrewed, and the backrests are removed.
The main steps for removing rear car seats
The whole process can be divided into two steps, any of which will certainly play an important role during the event:
- removing the rear seat sofa;
- Removing the backrests.
It is recommended to do each step with extreme caution, because you can only count on excellent configurations and successful removal of the seats from their places. Despite the lack of experience, nothing difficult will be noted. The main task is to exercise the greatest caution, because this determines how successful the work process will be.
How to Remove the Rear Shelf of a Camry 40
How to remove the back seat of a Toyota Camry
The Toyota Camry V40 is a popular car that is generally well maintained.
In this case, it is worth not only paying attention to the technical equipment, but also equipping the exhibition hall. For example, it is better to keep the seats in a safe condition, because the ergonomics of the car interior and, therefore, the level of comfort depend on it in almost everything
The main stages of removing the rear seats of a car
The whole process can be divided into two stages, each of which will certainly play an important role in the event:
- Removing the rear seat sofa;
- removing the backrest
It is recommended to carry out each step with extreme caution as you can only count on excellent configurations and successful seat removal. Despite the lack of experience, nothing difficult can be noted
The main task is to be as careful as possible because it depends on how successful the workflow will be.
How to remove the back sofa
First you need to turn off the sofa. Only after the first step will it be possible to remove the back without unnecessary risks.
- Gently pull the edges of the upholstered sofa at the very beginning. In this case, the fastening must be carefully removed from each side.
- The connectors are now disconnected with a special slotted screwdriver.
As you can see, the first step is short and simple, but only if everything is done correctly, the subsequent steps will be completely harmless. Naturally, you need to know how to do this with a Toyota Camry v40.
Removing the rear shell trim
The secret is why I removed the rear shelf
.
but for now it has removed
a little noise
from the rear parcel shelf
.
How to remove the rear seats
To successfully remove the installed rear seat, you need the second step. Will it be easy? The main goal is to understand what lifting is. Only gradual completion of the task will increase the chances of a successful result to the maximum level.
- First, raise the headrest. At this time, the rosettes of the backrest points will be open.
- The plugs should now be removed. To do this, it is advisable to use a slotted screwdriver.
- The next step is to remove the bolts using a size 12 wrench.
- The seat belt should now be removed from the guide structure.
- The bolts that hold the backs of car seats are unscrewed from below on both sides. This task requires 12 keys.
- Now you need to unscrew the bolts with a number 12 wrench while holding the back of the bracket.
- The next task is to carefully remove the curtains from the rear bunk seats that they originally attach to.
- Once everything is well unscrewed, the back can take off neatly.
Use a 12-slotted key screwdriver to do it successfully and without unnecessary risks.
Only with the help of special tools for Toyota Camry seats will they be removed quickly and efficiently.
Why remove Toyota Camry car seats
When to remove car seats?
In most cases, a replacement is provided, since over time the ergonomics of any seat deteriorate, leading to an unpleasant position and rapid fatigue.
In addition, motorists are forced to remove car seats for further installation of covers and upgrades to the car interior.
Conclusion
When wondering how to remove the rear seat of a Toyota Camry, you should note the simplicity of the procedure with a 12mm wrench and a slotted screwdriver. Every Camry owner will successfully cope with the task of acting with the utmost care and understanding of the basic rules of this significant event.
Do-it-yourself replacement of upholstery and cleaning of Toyota Camry ACV40 seats & | interior of Toyota Camry ACV40
Rear
admin
Toyota Camry XV40. How to remove seats
In order to carry out the planned event successfully and without unnecessary risks and problems, you should use a slotted screwdriver, a wrench, and you won’t even need the help of a specialist.
Do-it-yourself replacement of upholstery and cleaning of Toyota Camry ACV40 seats. And we begin to remove the upholstery by snapping it off...
Therefore, if you need to remove the seats from a Toyota Camry, don’t be afraid, go for it! To remove the sofa, you will need to follow a few simple steps:
Next, remove the thresholds by simply gently pulling them up. Long pliers are a very important tool for removing the front pillars... Next, remove the rear backrest. This creates significant inconvenience for passengers.
We mount a new rear strut on its seat on the Camry 30
- New protective protectors are taken, the boot is mounted, the spring with its lower coil should face the wheel.
- A vertical prepared structure is inserted into a special glass and secured at the top, and after lowering the car slightly from the jack, the lower bolts and nuts are also attached. You shouldn’t tighten it too much, just until it locks.
Boot
It is more profitable to purchase a replacement product from a reliable manufacturer, these include:
- FENOX. The average price for a product is 2000 rubles
- SACHS. The average price for a product is 1,500 rubles.
- MONROE. The average price is 1600 rubles.
- KAYABA. The average price for a product is 2000 rubles.
1200 rub. for the photo report
We pay for photo reports on car repairs. Earnings from 10,000 rubles/month.
Write:
The shock absorber strut and spring are replaced when the parts fail. When the car undergoes maintenance, it is preferable to carry out diagnostics of the suspension.
Signs of shock absorber failure:
- Extraneous knock from behind;
- Sagging of the rear of the car;
- Unstable cornering;
The owner of a 2006 Toyota Camry V40 2.4 turned to a service station to diagnose the suspension. During the diagnostic process, it was discovered that the rear right spring had burst. At the request of the car owner, the two rear shock absorbers were replaced along with the springs. The owner refused to replace the support.