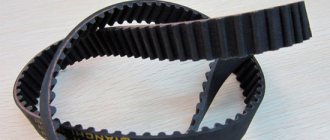
The timing belt acts as a synchronizing link between the crankshaft and camshaft. Its inner surface is covered with teeth, and the part is located under the hood behind the boot. The versatility is due to the fact that the part acts not only as a synchronizer for the operation of the camshaft and crankshaft, but also covers auxiliary parts. The service life of the unit is limited, and the versatility of the belt only increases the wear rate.
Manufacturers regulate the period for regular replacement of the timing belt, however, not all drivers treat this procedure with due attention and neglect the recommendations. Excessive wear will lead to timing belt breakage. Such a break negatively affects the functioning of the power plant and damages the valves. Therefore, you should not neglect the manufacturer’s recommendations; it is necessary to regularly diagnose and replace the part.
Toyota Carina E 7A-FE LB › Logbook › 7. Replacing the timing belt and pulley 7A-FE.
The other day I decided to change the timing belt with a roller.
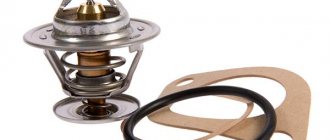
The condition of the belt and pulley was unknown. I had no idea when the previous owner changed them. Therefore, regardless of their condition, it was decided to change them. I went and ordered everything I needed. At the moment I don’t have much money for the original, so after consulting with the seller, I purchased analogues of more or less decent quality. In general, I bought: 1) Continental timing belt - 900 rubles. 2) Koyo tensioner roller - 1000 rubles. 3) Front crankshaft oil seal Toyota 90311-32020 — 360 rub.
Out of curiosity, I called the station and asked how much this procedure would cost me. Prices varied. But on average they asked for no less than 3000 rubles. There is no extra money, but a good garage with a pit and not the crooked hands, so nothing prevents you from trying it yourself. I did everything alone and for the first time, solely according to the description on the Internet. I don’t have a Murzilka, alas. The parts were supposed to arrive the next day at 16:00. Therefore, already at 11 I was in the garage in order to slowly begin to disassemble everything. I wanted to take more photos and a more detailed report, but as usual, something went wrong and at the end I realized that there would be no good report :D. Well, it’s okay, there’s plenty of information here on the drive, but still.
We start by removing the expansion tank and washer reservoir, unscrew everything unnecessary and in the way and put it aside, simultaneously removing and washing away any dirt that gets into your eyes. Then we loosen the tension bolts of the attachment and pull off the belts.
Unscrew the cylinder head cover. A little later I washed it with gasoline and a toothbrush.
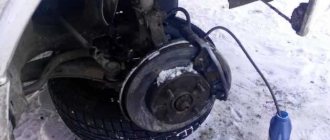
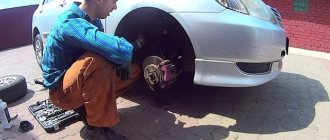
Then we jack up the car, twist the right front wheel and unscrew the plastic protection in order to get to the crankshaft pulley.
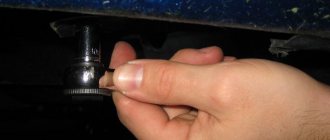
The crankshaft bolt can be easily unscrewed using the starter. We put the head on the knob (if the length is not enough, then with a tube), rest it on the drive or lever and turn it slightly with the starter (the pulley rotates clockwise). Once was enough for me. Then sex begins with the removal of the pulley. I've read more than one entry, and for some people it can be easily removed by hand, but not in my case. I spent about 40 minutes removing it without any interruptions or stops to breathe. Of course there was no puller, but it costs a lot in the store. In my case, the remover was a hammer and a mounting tool. First, I lightly tapped it in a circle with a hammer, and then from the pit, sideways and doggy style, I pry it with a pry bar and turn it. And in this way, millimeter by millimeter he moved and eventually flew off. For these procedures, do not forget to unscrew the spark plugs so as not to shit yourself when rotating the crankshaft by hand.
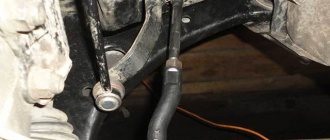
Next, manipulations begin with raising/lowering the engine. To do this, place a jack on a long thick board from the pit, rest it against the engine pan with a piece of wood and lift it up a little.
Unscrew the right engine mount completely from above.
To unscrew the 2nd timing cover, you need to unscrew the pump pulley, in my case it seemed to me that then putting it back in place was much more difficult than removing it, but it unscrewed easily for me. Raising the engine as much as possible, you can use the head and a small ratchet to get to the pulley bolts.
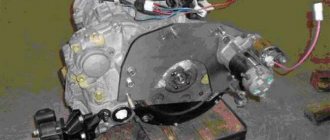
Before removing the bottom cover and timing belt, it is necessary to set the piston of the 1st cylinder to TDC, for which the crankshaft pulley is put in place without fixing it with a bolt. We bring the mark on the crankshaft pulley together with the “0” mark on the lower timing cover, while checking that the mark on the camshaft bearing is visible in the hole of the camshaft pulley (this is shown in the pictures in the primer), or, more simply, that the middle of the camshaft pulley is straight five-pointed star, not upside down. If it doesn’t match, turn the crankshaft one more revolution. You can also check that the piston is positioned correctly through the spark plug well. From this moment on, neither the crankshaft nor the camshafts can be turned. We pull off the crankshaft pulley and the lower timing cover.
Remove the timing belt guide, unscrew the tensioner pulley fixing bolt, and remove the pulley spring.
Then we pull off the timing belt. Since we are throwing it away, there is no need to put any marks on it.
Then I started having another sex, only this time with a gear. I wanted to change the crankshaft seal at the same time. In other records, people removed the gear easily, some simply by hand. I don’t know what went wrong, but I didn’t remove the gear, spending about 30 minutes on this task. Well, the oil seal still works, I thought and went to lunch :D.
Carefully tighten the new timing belt, install a new pulley, and attach the spring. There is no need to forcefully tighten the belt with a roller, it is enough that the spring presses + help a little with your finger in the direction of tension and tighten the bolt. The bolt must be pulled through properly so that it does not unwind or become loose, otherwise this could be fatal for the belt.
That's all. We put on the belt guide, screw on the lower timing cover and put on the crankshaft pulley. We make 2 revolutions of the crankshaft and check for consistency with the marks that we looked at earlier. If nothing is wrong, then everything is assembled correctly. Next, collection begins in the reverse order of removal. How to tighten the crankshaft pulley without using special tools. key remains a mystery to me. I inserted the pins into the holes and, using keys, a socket with a wrench, a piece of pipe and someone's mother, tightened them as best I could. I really hope that it won’t unwind and come loose :D.
When reassembling, I can say one thing - be careful what, where and in what order you put it. Due to my attentiveness or the desire to finish quickly, I staged something several times and filmed it again, because either I would forget it or I wouldn’t stage it. But the experience gained, saving money and the interest of the entire process in this procedure is priceless