The price of fuel equipment components, in particular injectors, varies depending on their actual condition: new or used. Obviously, in the second case the cost will be 30% lower. Each owner purchases based on the budget allocated for technical inspection. The main difference between used parts is that they have been used for a certain period of time in the past.
The Toyota Camry 40, which was produced from 2006 to 2011, was equipped by default with fuel injectors with the article number: 23209-0H050 in the amount of 4 pieces, manufactured by DENSO. The TOYOTA CAMRY V40 07-11 model was produced in three engine variations:
- 2.4 l 2AZ-FE I4 (167 l/s);
- 2.4 l 2AZ-FXE I4 (for hybrid) (167 l/s);
- 3.5 l 2GR-FE V6 (277 l/s).
A new set of original fuel injectors will cost the owner 5,500 rubles. and higher, depending on the chosen place of purchase. It is possible to buy new ones “by the piece”, but it is problematic, since at official points of sale there is only a complete version of 4 pieces. Injectors from disassembly "used" will cost 3,300 - 4,000 rubles, individually about 1,000 rubles.
If for some reason you do not find new injectors at points of sale, you can always replace them with analogues from the Toyota RAV 4 II modification (CLA2_, XA2_, ZCA2_, ACA2_). They fit all parameters 100%.
Injectors for Camry 40
The price of fuel equipment components, in particular injectors, varies depending on their actual condition: new or used.
Obviously, in the second case the cost will be 30% lower. Each owner purchases based on the budget allocated for technical inspection. The main difference between used parts is that they have been used for a certain period of time in the past. The Toyota Camry 40, which was produced from 2006 to 2011, was equipped by default with fuel injectors with the article number: 23209-0H050 in the amount of 4 pieces, manufactured by DENSO. The TOYOTA CAMRY V40 07-11 model was produced in three engine variations:
- 2.4 l 2AZ-FE I4 (167 l/s);
- 2.4 l 2AZ-FXE I4 (for hybrid) (167 l/s);
- 3.5 l 2GR-FE V6 (277 l/s).
A new set of original fuel injectors will cost the owner 5,500 rubles. and higher, depending on the chosen place of purchase. It is possible to buy new ones “by the piece”, but it is problematic, since at official points of sale there is only a complete version of 4 pieces. Injectors from disassembly "used" will cost 3,300 - 4,000 rubles, individually about 1,000 rubles.
If for some reason you do not find new injectors at points of sale, you can always replace them with analogues from the Toyota RAV 4 II modification (CLA2_, XA2_, ZCA2_, ACA2_). They fit all parameters 100%.
How to remove and replace
The decision to dismantle and replace is made by a service station mechanic based on the results of a full diagnostic. Unprofessional intervention on the part of the owner leads to undesirable consequences. Frequent cases of repeated repairs due to violations of installation technology.
Preparatory stage: a set of automotive tools, rags, additional lighting if necessary, a stationary vacuum cleaner for cleaning, new fuel nozzles.
Key points when replacing:
- placing the vehicle within the perimeter of the service station repair area;
- dismantling the valve covers;
- cleaning the surface using a stationary vacuum cleaner or other equivalent;
- on the rear part there is a fuel rail, fixed to the engine body using two bolts with ebonite bushings;
- It is not at all necessary to dismantle the ramp in the case of replacement; it is enough to simply give up the fastening and move it to the side;
- alternately removing the injectors from their seats.
This completes the process.
Next, the master installs the elements on a special high-pressure stand for ultrasonic cleaning. After completing the cleaning and testing procedure, consumables must be replaced: rubber seals. Original catalog items: 90301-07001, 23291-41010, 90480-13005. The final stage: assembly and installation at the regular location. The car is being prepared for delivery to the customer, provided there are no third-party breakdowns that require a prompt response from the service station mechanic.
Is it worth cleaning the fuel injectors on Camry 40
Decreased acceleration dynamics, increased fuel consumption, and an uninformative accelerator pedal are the primary signs of a fuel system malfunction. The above factors are harbingers of other breakdowns, for example, the ignition system. The technician must be extremely careful during the initial diagnosis, otherwise you can follow the wrong path and the breakdown will not be fixed.
You should not ignore the primary signs of a fuel circuit malfunction, as it can have disastrous consequences for the engine and the vehicle as a whole:
- premature wear of the fuel pump;
- increased fuel consumption: 6 – 7%, or 3 – 4 l/100 km;
- reduction in dynamic performance by 4%;
- difficulty starting the engine;
- unstable operation of the power unit at idle;
- an increase in the diameter of the injector nozzle due to excess pressure;
- reduction in engine performance by 25 - 30% compared to a clean nozzle.
The fuel nozzle must be cleaned during every second maintenance (after 30,000 km), provided there is no damage to the housing. Otherwise, replace with new ones.
6.10. Electronic fuel injection system EFL
| GENERAL INFORMATION |
Electronic fuel injection system EFL four-cylinder engine
| 1 – additional oxygen sensor; | 20 – fog lamp switch; 21 – ECM block; 22 – vacuum sensor; 23 – ignition unit; 24 – switching vacuum valve VSV; 25 – ignition coil; 26 – EGR valve; 27 – exhaust gas temperature sensor for the EGR system; 28 – temperature sensor of air entering the engine; 29 – ISC valve; 30 – throttle position sensor; 31 – knock sensor; 32 – coolant temperature sensor; 33 – TWC; 34 – TWC |
Electronic fuel injection system EFL six-cylinder engine
| 1 – crankshaft angle sensor; | 23 – ECM block; 24 – fuel pressure regulator; 25 – IAC valve; 26 – switching vacuum valve VSV; 27 – idle valve; 28 – EGR vacuum modulator; 29 – valve for adjusting the air entering the engine; 30 – actuator; 31 – vacuum tank; 32 – ACIS system; 33 – throttle position sensor; 34 – fuel injector; 35 – camshaft position sensor; 36 – oxygen sensor (block 1 sensor 1); 37 – temperature sensor; 38 – EGR valve; 39 – oxygen sensor (block 1 sensor 2); 40 – knock sensor 1 |
The EFL electronic fuel injection system consists of three main systems: the fuel system, the air injection system and the electronic control system (see figure: Four-cylinder EFL electronic fuel injection system).
Recommendations from the manufacturer and service station technicians
A fuel injector is a consumable item that must be replaced every 100 - 130 thousand km. Systematic use of low-quality fuel reduces the specified interval by 20%. The main “pest” is sulfur, which is contained in domestic fuel with an excess content of 40 times.
It often happens that owners, in order to save money, purchase non-original components, including sprayers. The service life of the part is reduced by another third.
Modern service centers provide cleaning services in two ways: with removal and without dismantling, which significantly reduces the time and cost of work.
Cleaning the injector and nozzles
During its operation, the fuel system is heavily polluted by impurities found in domestic fuel, which is significantly inferior in quality to foreign analogues. The fuel contains various additives that increase the octane number and water. There is also benzene and sulfur, and just ordinary dirt. Therefore, while the injection engine is running, the fuel lines, injectors, and other parts of the system gradually become covered with dirt. Accordingly, if the settled contaminants are not removed in time, then all of these listed elements will quickly fail, especially if the fuel is of less than ideal quality. Therefore, experts advise to periodically wash the injectors and nozzles. You can do this, for example, here.
Signs of injector contamination when it needs flushing
Typically, car owners decide that they need to flush the injector when the following characteristic nuances arise:
- Fuel consumption began to gradually increase, sometimes this trend is not immediately noticeable, because the injector becomes clogged over a certain period of time, not abruptly;
- stabilization of idle speed is difficult;
- the engine does not start the first time, most often on the second or third attempt;
- the car accelerates poorly, the speed gain is poor, there is a lack of power;
- speed is unstable at idle;
- the driver feels uncomfortable behind the wheel and has difficulty driving;
- the temperature of the exhaust gases increases, which negatively affects the catalytic converter; it stops working normally, as do the oxygen sensors.
If several signs appear at the same time, then this already indicates a serious deposit has formed and professional cleaning of the main elements of the fuel system is required.
Methods for washing nozzles and injectors
There are three most relevant ways to clean the injector from dirt deposits. The first is to wash the fuel system parts yourself by pouring a special additive into the gas tank. A very effective method, however, only if the car is new or has been maintained regularly. Because it will not be possible to achieve excellent results if the fuel system is heavily contaminated. This will only lead to mud masses moving from one place to another. Typically, this option is ideal as a prevention against pollution, rather than an effective solution to a global problem.
How and why to flush car engine injectors
An article about washing car engine injectors: why wash injectors, work progress, choice of fluid. At the end of the article there is a video about how the engine works after flushing the injectors.
Since the quality of the fuel used cannot be called ideal, the injectors become clogged over time, which leads to deterioration in injection quality
. This is also reflected in the operation of the engine itself, so it will not be difficult to notice a malfunction.
- Read an article on the topic: What are engine injectors, types and principle of operation
Methods for cleaning injectors
Today there are two effective methods for cleaning elements. To choose the one that will be most effective, you will have to study both options. So, washing injectors on special stands is popular.
For this purpose, special cleaning fluids are used. This method is quite effective. But if you clean old and very dirty injectors, it will not give any results. The stand effectively cleans ceramic mechanisms. Processing with liquids is also used. In this case, it is possible to wash the injectors without removing them from the engine, or with removal. But that's not all. Below we will consider another, no less popular method.
Causes and signs of injector contamination
The main reason for injector contamination is the sedimentation of heavy elements of automobile fuel, which occurs immediately after stopping the engine. The temperature at the injector body increases due to a hot engine.
Over time, the deposits become so large that the injector opening becomes smaller, and this leads to unstable operation of the injector, since much less fuel passes through it. Clogged injectors lead to interruptions in the operation of the car engine.
Signs of clogged injectors:
- engine starting is difficult;
- the engine operates intermittently at idle;
- significant losses in engine power and dynamics are noticeable;
- the car consumes more fuel;
- the toxicity of exhaust gases increases;
- There are popping noises in the exhaust pipe.
Injector contamination is especially noticeable in winter, when the fuel becomes more viscous and starting a cold engine is difficult.
When is cleaning needed?
You must clearly know when to clean the injector. There is an opinion that it is necessary to take into account the manufacturer's recommendations. On the one hand, this is true. But if we are talking about foreign cars, then the recommended figure must be divided by at least half. It's easy to explain. The quality of domestic fuel is very poor, so it is advisable to clean the injectors every 8-10 thousand kilometers.
In addition, it is necessary to monitor the behavior of the engine and clean it if a number of suspicious symptoms appear, for example, interruptions in engine operation, increased volume of smoke from the exhaust pipe, lack of normal response of the accelerator pedal, decreased traction of the car, and so on.
Injector cleaning options
Since it will not be possible to avoid contamination of the fuel injection devices, they will have to be washed as soon as the speedometer rewinds the next 30 thousand kilometers. Washing is performed on a special stand using ultrasound or using washing liquids.
Since no special skills are required when washing with special liquids, it is the second cleaning method that is most popular among motorists.
The only thing is that it is necessary to establish a high-quality supply of flushing fluid to the injectors so that it cannot get into the fuel tank. Otherwise, the deposits in the tank will also be dissolved by the active components of the fluid, which will lead to clogging of the fuel pump. As a result, it is even possible to replace a clogged fuel pump.
The active components of flushing fluids perfectly dissolve tar deposits from the surfaces of injectors, valves and cylinder walls of a car engine. The whole process will not take more than half an hour.
Video about how nozzles are cleaned in an ultrasonic bath:
Ultrasonic cleaning
A modern way to clean an injector is to use ultrasound. Here you will need to remove the injectors from the engine and place them in an ultrasonic bath. Cleaning is carried out using micro-explosions of ultrasonic waves capable of reaching thousands of atmospheres (cavitation effect). At the bottom of the bath there is an ultrasonic generator. The nozzles are lowered into it and, due to cavitation, the maximum effect of peeling off blockages in the nozzle channels and sediments in the nozzle channels is achieved.
Thanks to the use of an ultrasonic bath, the surface of the nozzle and its internal working cavities are cleaned. Varnish and carbon deposits are also possible on the inner surface, since it is located in a working area of high pressure and high temperatures. The internal surface of the device is cleaned exclusively in the active cleaning mode. This mode assumes that the nozzles open and close while being in the working solution with the part that directly sprays the fuel - the spray hole, during ultrasonic cleaning.
Ultrasonic cleaning is considered more effective, since it can also be used to clean those nozzles that cannot be cleaned with flushing liquid. Flushing the injector using this method will cost a little more.
Ultrasonic cleaning steps:
- Removal and inspection of injectors.
- Installation on a stand.
- Initial test on the stand (spray, performance).
- Washing with a special solution in a gentle mode in an ultrasonic bath.
- Intermediate testing of devices on the stand (spray, productivity).
- Additional rinsing if necessary.
- Final test on the bench (spray, performance).
- Install new filters and O-rings if necessary.
- Installation of injectors in the engine.
Bench testing is an advantage of this method. It is recommended to use an ultrasonic bath after 100 thousand km or more often if engine diagnostics have shown the need for this. The main disadvantage of the method is its high cost and the need to resort to the help of specialists. Injectors may be damaged due to improper ultrasonic cleaning. Of course, first make sure that the interruptions in engine operation are due to dirty injectors.
Washing removed engine injectors
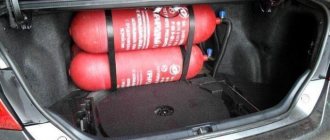
If you need to wash the injectors by removing them from the engine, you will need to reproduce the fuel supply system by adding two cylinders filled with cleaning fluid. In addition to this, you will also need:
- a small piece of hose 15-20 centimeters long and two clamps to secure it;
- knife or scissors;
- 12 W light bulb;
- regular two-pin button;
- a constant current source that could provide a voltage of 12 W. In this capacity, it can be used as a telephone charger.
What you need to do for washing:
- First of all, we disconnect the battery cable responsible for ground. Next, we take out the nozzles themselves, having previously removed the air filter, manifold and other parts that limit access to the nozzles.
Then we attach the nozzle to be washed to a can of cleaning liquid using a hose. We clamp the ends of the hose with clamps, and place an empty container at the nozzle outlet.We connect the red wire from the power source to the button, and the other end of the wire to the injector contact. The light is needed to avoid damaging the atomizer coil.
We check the functionality of the assembled structure by simultaneously pressing the button. The lamp should light up. In addition, a slight click should be heard from the sprayer.
After checking the operation of the structure, we supply the flushing liquid by pressing the button. Turn on the power supply from the current source.
- We carry out cleaning until the jet coming out of the nozzle becomes more powerful and uniform. We wash all nozzles in a similar way.
Toyota Camry 3.Stock Edition › Logbook › Self-cleaning of injectors using Lavr ML101 flushing
Hello. This weekend I decided to flush the injectors with Lavr ML101 with a decarbonizing effect. I washed it partly for prevention, and partly I felt that if I washed it it would run better and the consumption would drop (before washing everything was according to the passport).
Mileage: 121000 km
Cleaning injectors without removing them
It is not at all necessary to dismantle the nozzles for washing - there is a method that allows cleaning directly through the operation of the engine. The fuel supply is turned off:
- To rinse, you will need a plastic bottle into which we pour cleaning liquid and gasoline. For a two-liter bottle you will need 400 grams of washing liquid and 200 grams of gasoline.
We put a hose on the bottleneck, the second end of which is connected to the fuel pump.
Next, we start the engine, which will relieve pressure in the system.
Now we attach the supply hose to the fuel injectors directly to the structure we have assembled, and insert a small plug into the return hose. The most ordinary bolt with a diameter of 10 mm will do.
If there is no leak in the assembled structure, start the engine and let it run for five minutes.
Then we turn off the engine for about five minutes so that the resin deposits get wet and start the engine again, which should work according to this scheme for at least half an hour.
- After washing, we disconnect the assembled structure and attach the factory one in its place. It is recommended to change the spark plugs and reset errors on the control unit, if any. Read the article about replacing spark plugs.
Cleaning methods
Currently, there are two main cleaning methods:
- One of the simplest methods is to add a cleaning additive to the fuel through the gas tank, which dissolves deposits during operation. It is recommended to carry out such cleaning as a preventative measure approximately once every 5 thousand km. This method is only suitable if the car has low mileage. If the machine has been in use for a long time and the system is supposedly very dirty, such cleaning may only make the situation worse. When there is a lot of contaminants, it will not be possible to completely dissolve them with the help of additives, and the spray nozzles may become even more clogged. More deposits will get from the fuel tank into the fuel pump, which can cause it to break down.
- Another method requires special equipment and skills. A flushing device is connected to the injector through special adapter fittings. Instead of fuel, the device receives a special washing liquid such as: Wynn's, Liqui Moly, C arbom clean, etc., from a cylinder, which is connected by tubes. Thanks to the fitting, the system does not need: a fuel filter, a gas tank, a gas line, or an electric fuel pump. A mixture of cleaning fluid and gasoline is supplied to the engine under pressure. The supply pressure must be set according to the technical parameters of the specific engine. Under the influence of the washing liquid, contaminants become limp, pass through the nozzles and burn in the cylinders. The cleaning procedure lasts 30−50 minutes.
It should be noted that this method will not get rid of dirty injectors 100%. After this, flushing fluid remains in the oil system and injector. Therefore, experts recommend driving 10-15 km in forced engine operation, and then changing the oil filter and changing the oil. This method requires a significant investment of time and will cost a lot.
However, both methods are most suitable when the car’s mileage is low, and dismantling the injectors is quite difficult due to their location.
How to wash car engine injectors: washing liquid
How to choose the composition of the flushing fluid? This depends on the degree of contamination of the nozzles and the year of manufacture of the car.
How injectors are designed and work
YouTube channel "Mikhail Nesterov"
There is a solenoid needle valve located inside the fuel injector body. It is held closed by a return spring. When pulses are supplied from the electronic control unit (ECU) to the excitation winding, the valve opens. At this moment, the fuel is atomized and mixed with air, burned in the combustion chamber.
The correct proportions of the air-fuel mixture and its ignition depend on the quality of gasoline atomization. During normal operation of the injectors, the fuel is crushed into small particles, easily mixed with air and burned.
Why do injectors clog?
Impurities in the fuel, short trips and difficult operating conditions lead to carbon deposits forming on the needle and internal surfaces of the injector. This plaque clogs the channels. The solenoid valve opens for a long time and more gasoline enters the combustion chamber than necessary.
All this leads to an over-enrichment of the fuel mixture, poor ignition and misfires. Unburnt gasoline enters the exhaust system and burns out inside the catalyst, which becomes clogged and melts at high temperatures. At the same time, engine power decreases, detonation appears, and fuel consumption and exhaust toxicity increase.
How to understand that you need to flush the injectors
Car manufacturers recommend cleaning every 30 thousand kilometers. Problems with the injectors will be indicated by corresponding errors on the on-board computer. The same thing will be shown by diagnostics of fuel equipment in a car service center.
But with a high probability, flushing is needed regardless of mileage, if at least three symptoms from the list appear in your car:
- poor starting (especially in winter);
- unstable operation at idle speed;
- reduction in engine power;
- slow acceleration;
- dips when pressing the gas pedal;
- increased fuel consumption.
Pollution prevention
In order for the injectors to retain their original working condition longer, it is necessary to regularly refuel with normal fuel. Good gasoline will not cause black deposits to appear on the surface of the nozzle, as a result of which it will supply fuel longer in the form of mist rather than droplets.
Every 15-20 thousand kilometers, fill a full tank of gasoline and add a small amount of acetone to it, following the algorithm specified earlier. Burn the fuel completely. The engine will run better than before. But don’t get carried away, because increasing the octane number negatively affects the overall condition of the engine.
How to clean injectors yourself
Method 1: fuel additive
The simplest and relatively gentle cleaning method is using special additives. More suitable for preventing the formation of deposits inside all elements of the fuel system - from the gas tank to the injectors.
The disadvantage of such additives is that on cars with high mileage they lift all the dirt from the gas tank and pipelines. As a result, the filters and the injectors themselves become clogged, which leads to even more disastrous consequences.
You will need
- Fuel additive-injector cleaner.
How to do
- Pour the product into the tank immediately before refueling according to the proportions in the attached instructions.
- Operate the vehicle as normal.
- For the best cleaning effect, it is advisable not to stand in city traffic jams, but to drive along the highway.
Method 2: flushing the injectors on the engine
This cleaning method is more difficult, but also more effective. It not only cleans the injectors, but also additionally decarbonizes the piston rings and also increases compression. Flushing is carried out with the engine running, which runs on detergent instead of gasoline.
The main disadvantage is that the quality of washing cannot be controlled. Other disadvantages include the entry of aggressive substances into the exhaust tract and potential damage to the catalyst. After using some products, spark plugs may need to be replaced.
You will need
- Injector cleaner;
- fuel filter;
- two-liter plastic bottle;
- wire;
- 1 m of fuel hose with a diameter of 10–12 mm;
- 3 clamps with a diameter of 9–14 mm;
- 2 nipples from a tubeless tire;
- bolt M12;
- screwdriver or drill;
- drill with a diameter of 12½ mm;
- tire compressor;
- spark plugs (if their replacement is recommended in the flushing instructions).
How to do
- Drill one hole each in the cap and bottom of the bottle. Install the nipple with the valve turned out into the cover. The nipple will supply liquid to the ramp.
- Insert the second nipple assembly into the hole in the bottom. You will need it to pump in air later to create pressure.
- Place one end of the hose onto the nipple in the cover, and install the other on the fuel filter, according to the arrow on the body. Tighten the ends of the hose with clamps. Wrap the bottle with wire so you can hang it.
- Warm up the engine to operating temperature and turn it off. Disable the fuel pump by removing the corresponding fuse.
- Start the engine. Let it run to relieve pressure in the rail. Wait until the engine stops.
- Disconnect the fuel supply hose from the line and connect it to the filter of an improvised flushing receiver. Pour the wash into the bottle, close the cap and hang it on the hood.
- If the car has a return fuel line, plug it using a bolt of suitable diameter and clamp it with a clamp.
- Use a compressor to pump air into the bottle until the pressure reaches 2–2½ bar.
- Start the engine and let it idle for 15 minutes, maintaining the pressure in the bottle at the same level.
- Turn off the engine and wait about 15 minutes for all deposits to soak off.
- Start the engine again and use up any remaining flushing fluid while maintaining the RPM between 1,000 and 1,500.
- Remove the bottle, the return plug and connect everything as normal. Don't forget the fuse.
- If the flush is aggressive and affects the spark plugs, replace them.
Method 3: washing and removing the injectors
The most difficult method, which involves removing the fuel rail and injectors. At the same time, it is the most effective and targeted - there is no harm to other elements of the system. For flushing, the operation of an injector is simulated, and a carburetor cleaner is used instead of gasoline.
The only disadvantages of this method are the difficulty of dismantling the ramp and injectors, as well as the need to replace microfilters and o-rings.
You will need
- Aerosol cleaner for carburetors;
- syringe 5 mm³;
- 9-volt Krona battery;
- 1–2 m of wires;
- doorbell button or other without fixation;
- 4 alligator clips;
- screw with a diameter of 4 mm;
- pliers;
- repair kit for injectors (only rubber rings and a filter are allowed).
Recommendations
Comments 25
Why did you install the filter?
I laughed about crazy hands)) Question: if the mileage is 350+, is it worth observing the decoking stage? What's your mileage?
Then it was 121,000. I didn’t understand the question. What does stage mean? Should I buy Lavr with the decarbonization effect?
I laughed about crazy hands)) Question: if the mileage is 350+, is it worth observing the decoking stage? What's your mileage?
Did you understand...shut off the engine? Well, why not? It won’t make it worse. Well, I would also advise combining flushing with an oil change. Rinse and change the oil.
I just heard that on long runs when decarbonizing it becomes even worse than before. It seems that at least the soot there creates compression, but here if you wash everything...
Well, this is from the section that someone came up with a theory. I think that this is all nonsense. Even at low mileage, if the oil is bad, there can be such coke...
Well, I’ll probably try it, I already bought the Laurel anyway) Only I recently changed the oil, it’s a pity.
The packaging says that the oil does not require changing... but it seems to me that it’s worth changing
And the oil and candles are scrapped after such a chemical attack
+ also a fuel filter! I had previously thought about installing a fuel filter instead of an adapter. but changed my mind. for the reason – I read on another site that the filter element is glued and can corrode! It’s better to order from a turner, the dimensions are the same as a filter, and on the other hand make a “herringbone”. They made it for me from brass for 200 rubles!
+ Disabling the fuel pump on v40
Driver's side. Remove the decorative sill trim (on 3 clips), the inscription “Camry”. Lower left part of the rack. remove the cover (2 clips and 1 plastic nut). We see a black connector. Let's take it off. So they turned it off. When I washed it (with the help of a fuel pump), the vsr error came out (that’s how it’s written), then it turned off. Battery when disassembled and reassembled. The error is gone.
+ Personally: after washing, I drove on the highway for min 40, speed 110.
Just assembled the pads. I didn't take any photos. If it is not clear what I wrote. I can take photos!
P.S. Vince and Liquid have no recommendations on the revs! Only at the laurel! This question remains open?!
Thank you too. Like a safety catch. I was tortured to remove it (I suffered for about 4 hours) until I removed the air vent housing
How to clean injectors without removing them from the engine: basic tips and tricks
It is important for all drivers to ensure the smooth operation of the car engine. Injection machines require special attention. Such engines should have their injectors flushed periodically. Poor quality fuel clogs the injector. And already at idle speed problems appear. To eliminate them, drivers will need a skill such as cleaning injectors without removing the injectors from the engine.
The reasons for the deterioration of the injectors are deposits on them. The result is incorrect atomization of gasoline, since the injector no longer closes completely. The filter cannot retain the entire volume of harmful substances. Therefore, the injector becomes dirty gradually. And before the driver realizes the complexity of engine failures, cleaning is already necessary.
If the engine is difficult to start, and problems are already diagnosed in idle mode, then problems with the injectors are obvious. Additionally, the gas pedal may fail. The engine is not as powerful, and the car accelerates much worse.
The injectors are exposed to high temperatures. As a result, resins are formed that contaminate the injector. It should be borne in mind that any gasoline leads to a similar outcome, since heavy hydrocarbons are contained in all its brands. The only difference is that when using gasoline of poorer quality, flushing will have to be done much earlier.
There are the following stages in injector malfunctions:
- with low contamination of up to 10%, the injector performance deteriorates. And although several liters more fuel is consumed, the engine continues to operate normally.
- With average pollution, the deterioration of indicators increases to 20%. Fuel consumption continues to increase, and interruptions in engine operation are already noticeable. The car is difficult to accelerate, and there is an unpleasant smell coming from the exhaust pipe.
- If the contamination is severe, the injector works half as bad. Several cylinders stop functioning. Popping sounds appear due to problems with the air filter.
Most car enthusiasts prefer to wash their injectors after 100 thousand km. However, a more optimal solution would be to carry out this procedure after 20-30 thousand km. It is especially recommended to do washing on the eve of winter.
What's the result?
In all cases of cleaning injectors and removing them from the engine, car repair shops strongly recommend replacing fine filters and all rubber seals. Practice shows that in some cases the filters do not need to be changed, and it will be enough to lubricate the rubber bands with silicone grease.
As you can see, with regular car care, you can clean the injectors in your own garage. This can be done in several ways, and in all of them, except ultrasonic, you will need a product for cleaning the injectors of a gasoline or diesel engine.
The composition is usually purchased in stores selling fuels and lubricants and automotive products. Please note that cleaning agents of this type are quite aggressive and flammable, so it is recommended to work with protective gloves and also protect your eyes.
Washing methods
To flush the injector, there are two solutions for cleaning the injectors:
- ultrasound procedure on a special stand;
- use of liquid.
In the first option, ceramic, old and very dirty injectors are excluded, since there is a risk of damage. Separately, after such a procedure, it is worth replacing the microfilter and sealing rings. Such parts are not cheap.
The second option involves washing the injectors without removing them from the engine. This method helps save money.
Flushing procedure
To carry out high-quality washing, you should have a second fuel pump, a container for cleaning fluid, a hose and the actual injector cleaner.
Adding rinse directly to the tank is not effective enough. Carefully remove the hoses and prepare a temporary power supply system.
Such a system, when supplying liquid to the injectors, acts as a fuel pump, but instead of gasoline it supplies the prepared solution. To create the system, a cleaner is poured into a plastic bottle. The calculation of the required quantity is related to the engine size. The template is a 2.5 liter unit, for which a liter of liquid is used. For larger volumes, the amount of solution is increased by 100 grams for every 0.5 liter of unit.
Gasoline is poured into the wash. It is taken in half the total volume of liquid. A hose is put on the bottle and secured with a clamp. The prepared fuel pump is inserted into it. The engine starts and warms up to operating condition. Next, remove the fuse from the fuel pump.
The engine is restarted. This relieves pressure from the fuel system. Then the hose is removed, through which gasoline is supplied to the injector. It is in its place that the fuel system bottle is fixed. When the fuel pump is turned on, it pumps fluid.
After running the engine for five minutes, it is allowed to rest. This time is enough to dissolve deposits on the injectors. At the next stage, the motor runs for half an hour. After disassembling the system, the engine should run for another 10 minutes. The remaining liquid burns off.
The selection of cleaning fluid should be approached very carefully. There is a demand for various brands in the market.
The optimal fluid for many types of engines is LIQUI MOLY. It is well suited for cleaning injectors without removing the engine. A soft effect has the disadvantage of leaving carbon deposits on the valves.
Wynn's can remove any carbon deposits and resin deposits. It is quite caustic and suitable for cars made in the 2000s. But to use it, it is necessary to check the characteristics for a particular car so as not to harm the injector.
Gentle and high-quality cleaning is provided by the less popular Carbon Clean brand.
But Laurel repeats Wynn's in its characteristics, but due to the high price it is used much less often, only it costs much more, so it is used less often.
Injector cleaning equipment
The most modern equipment for servicing the injection system of injection engines is a washing stand. It is factory-made and is usually used in service stations and car repair shops. The cost of such equipment is very high and is hardly suitable for individual use.
You can use scrap materials to make your own device for washing the injector without removing the injectors.
Materials for a homemade device
- Rubber hose 2 meters long.
- Two liter plastic bottle.
- Nipples for tubeless tires 2 pcs.
- Liquid pump with pressure gauge.
- Clamps for fixing the hose 4 pcs.
- Pieces of wires, terminals, etc.
A device made from such elements will turn out to be quite simple, but sometimes it works no worse than factory equipment. You can buy a ready-made device or ask your friends. After purchasing or manufacturing a simple device, you can begin cleaning the injector.