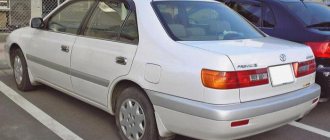
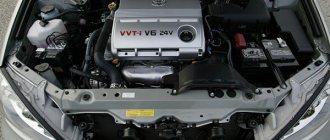
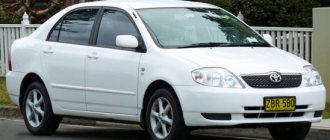
Methods for draining gasoline from a Toyota Camry are not simple. This is due to the design of the tank neck, which does not allow fuel to be drained using a simple hose, as is possible on domestically produced cars. A special mesh is installed in the neck that protects the gas tank from small debris getting inside, and its dismantling is a rather complex and time-consuming job. Therefore, you can use the standard car systems or completely remove the fuel tank, which allows you to completely clean it if low-quality gasoline gets inside.
How to drain gasoline from a Camry
When to drain gasoline
Modern cars are equipped with plastic fuel tanks that do not even have a drain plug. The manufacturer believes that if a mesh is installed in the neck, then nothing bad can get into the tank, and it itself does not rust, so there is no need to be afraid of rust. Naive. They should see what we have to fuel ourselves with.
Over time, gasoline itself can separate into fractions if the car sits for a long time; no one is going to filter it at a gas station, much less at oil refineries. Therefore, you can find more than enough reasons to flush the tank. Not to mention the annoying mistakes of operators, who can cause a short-sighted lady to bubble up a full tank of diesel fuel instead of 95-grade gasoline. There is only one way out - drain.
Selecting a filter for Corolla
Before replacing a part, you need to select it correctly. When purchasing, you need to pay attention to the article number and compatibility of the filter with a specific modification of the car. The following original parts can be found on sale:
- For Toyota Corolla 180. Product code – 23300-28040, it is also suitable for Corolla Verso. The cost is between 1300-1700 rubles.
- For Corolla 180 and Avensis. Number – 77024-02320, the product comes complete with a pump and costs more – from 8500 to 9000 rubles.
- Original product with article number 77024-12050, suitable for most modifications of the Corolla. Cost - about 5400-5600 rubles.
- For cars in the 120 body, a coarse filter with number 23217-0D090 is suitable, the price is 400-600 rubles.
- For modifications with the same body, the upper cover of the fuel pump housing with article number 77024-02040.
- For Toyota Corolla 150 part code 77024-12030. The price is about 4300-4500 rubles.
Drain the fuel through the return line
If the fuel pressure regulator is located under the hood, then you do not have the newest car, but in this case you are in a better position. You can also drain gasoline through the injection line, the main thing is not to mix up the hoses. Only a primer can help here. Each car has hoses located differently.
We find the fuel pressure regulator under the hood. On it we identify the valve for the return flow of excess gasoline into the tank.
- Take a transparent hose. It can be opaque, but then we won’t see anything.
- We remove the fuel return hose and install a transparent hose instead.
- We lower the second end of our hose into a suitable container.
- The most crucial moment is to start the engine. The fuel will now flow not into the tank, but into our container.
- This method of fuel selection is the safest, since it enters the return line under low pressure.
- Having pumped out the required amount of fuel, we connect all the hoses in place.
This is good, but what if the pressure regulator is in the gas tank?
The user said thank you:
Yes, tomorrow I’ll go to the service center and we’ll take a look. Thanks!
@Tamerlan, have you inspected the area around the filler neck? Maybe the operator was wielding the gun “left and right.” It overflowed and flowed down the filler pipe. But then it would drip from the left side. And the second option: gasoline leaked through the gasket of the fuel station. To verify this, you don’t have to go to the service. Remove the rear passenger airbag. And tear off (it has Velcro) the protective cover. The upper part of the fuel station will open in front of you. In fact, traces of gasoline will be visible around the round cap. If it is dry (dusty and dirty), then there is no leak.
If you recently changed the fuel station, it may have been installed incorrectly. The glue may become warped and there will be no sealing. Usually it always smells like gasoline.
If the regulator is in the gas tank
Then you will have to do things a little differently. You can try using a standard fuel pump to pump out fuel. To do this, you simply need to disconnect the hose from the injector or fuel filter. It is advisable to carry out this entire operation on a lift or inspection pit, then you can painlessly turn off the fuel filter and lower the hose into a container. When the ignition is turned on, the standard fuel pump will pump a certain amount of fuel, but only as much as it can do in 2-3 seconds. Then you will need to turn the ignition on again, and turn it off again, and so on until the required amount of fuel is in the canister.
There is one nuance here - not all foreign cars will allow you to do this to yourself on the road. There may be complex systems for attaching hoses, difficult-to-reach places for their location, and other difficulties may arise when the fuel line is disconnected. After all, we simply may not have the right diameter hose if we're on the road. Then we use the third method. Radical.
Replacing the fuel system filter on Corolla 120, 150
A car fuel filter is an important element that is used to clean gasoline or diesel fuel from foreign impurities and condensate, helping to extend the life of the engine and related systems. The filter on a Toyota Corolla requires replacement due to both natural wear and premature clogging, and it is important for the motorist not only to carry out the procedure itself correctly, but also to choose the appropriate spare part. This part has its own characteristics depending on the year of manufacture of the car and the type of body: for example, filters for Corolla 120 and 150 have a different design. Despite this, the replacement process does not differ significantly.
Drain directly from the tank
This method does not guarantee 100% success, since every car is different, but the probability of a successful drain is 78%. We proceed as follows.
- We take out the trunk jack and hang out the wheel above which the tank is located. Be careful. Before continuing, be sure to place wheel chocks under the front wheels and secure the jack with a log or stone. Anything so that the car does not hang only on a jack.
- We climb under the car and look for the fuel tank.
- After this, the most difficult thing lies ahead - to find the outlet fitting and remove the hose from it, while simultaneously placing a container, preferably a metal one, under the stream of fuel. We emphasize - metal. The plastic container may have static voltage, which can cause a spark, and then you know.
- We completely drain the gasoline, put the hose in place, and fill with new fuel.
In some foreign cars the task is greatly simplified. In some models of Rovers and Hondas, the fitting is located directly in the trunk, so before diving under the car, check if it is there.
Here's how to drain gasoline from the tank of a foreign car, even the most sophisticated one. There are no hopeless situations, but it is still better to monitor the quality of the fuel before it is poured into the tank. Clean gasoline to you, and good luck on the road!
Precautionary measures
When draining, you should remember safety precautions. So, you need to carry out the actions away from open fire, do not smoke nearby, since one spark is enough for something irreparable to happen. This is due to the highly flammable nature of the product.
If you used the old-fashioned method of pumping out with a hose and swallowed fuel, you need to quickly rinse your mouth with plain water. Do not jerk the hose sharply; to remove it easily, press the valve slightly with a wooden block. After the procedure, the tank must be tightly screwed on with the lid.
Regarding the choice of tank. Experts advise giving preference to a metal container. The fact is that plastic tanks can cause sparks due to the static voltage of this material. It is this reason that created the rule that fuel is sold from gas stations only in a metal tank.
Methods
How to drain fuel Situations on the road are different, and it can take us to hard-to-reach places where there are no benefits of civilization nearby. It is important not to get confused, but to remember all, even the most primitive, methods of draining fuel from the tank.
The old-fashioned method of draining fuel is known to everyone: we take a canister, a hose, lower the hose into the tank and draw air from the other end of the hose with our mouth until the fuel flows. Many could at this moment take a fair amount of liquid into their mouths. You could have doused everything around or spilled fuel on the ground because you didn’t have time to lower the hose into the canister in time. The method is primitive, of course, but just in case you need to know it.
The “homemade” method: you will need any tube and rope or clothing laces. We tie a knot at one end of the rope so that it fits snugly against the inside of the tube (this is your piston, which will then pull the fuel out). We wet this unit with water. Now we lower the end with the knot into the tank, and hold the other end in our hands (do not lower it into the canister to collect fuel). Slowly pull the rope through the tube. When the knot comes to the end of the tube, lower the tube into the canister and pull out the rope completely. The fuel should flow into the canister.
Through the fuel pump or return
- Draining fuel using a hand pump for pumping out flammable liquids (when purchasing, be sure to make sure that this pump can be used to pump fuel). Hand pumps come in different sizes and configurations. More expensive pumps have various adapters and hoses, but cheap ones don’t have all this, and then you will frantically search for at least some hose in the garage or in the trunk in the middle of the road.
Drain the fuel We connect the necessary hoses, lower one end of the hose into the tank, the other into a container and begin pumping the fuel (into a canister or bucket). It is necessary to pump the pump until the sound of flowing liquid appears. If the tank is full, then one container will not save you; before pumping, prepare several empty containers.
- You can drain the fuel through the return line. With the engine off, disconnect the fuel hose (located behind the fuel pump). Place the hose into the canister. Now turn on the ignition, the engine will not work, and the fuel pump will pump fluid as usual. After pumping as much as needed, turn off the ignition and reattach the fuel pipe.
Some cars turn on the fuel pump only for a short time (until the starter starts turning) to increase the pressure in the fuel system. This time will not be enough to drain the fuel from the tank. You will have to turn the starter several times, but no more than 10 - 15 seconds with breaks for cooling.
Remember! If you drain all the fuel through the fuel pump, the fuel pump itself may burn out.
Through the filler neck
- You can drain fuel through the filler neck if there is no mesh on it.
- Fuel is pumped out through the filler neck using a hose or hand pump (see description above).
Replacing the Toyota Corolla fuel filter
Toyota Corolla is a Japanese car, characterized by high quality workmanship, optimal dynamics, reliability and safety. In order for the vehicle’s operational parameters to remain at the proper level, it requires timely and correct maintenance, replacement of consumables, tuning and diagnostics. One of the components that affects overall performance is the Toyota Corolla fuel filter, which can be replaced by the driver himself, without going to a service station.
Signs of a blockage
In order for the car’s fuel system to work efficiently, it must receive clean fuel, free of dust, abrasive particles, water and various impurities. For this purpose, all kinds of cleaning elements are installed in cars, the main one of which is a filter for incoming fuel.
The fuel filter elements of Toyota Corolla cars in the E120 and E150 bodies are different in design, but the principle and procedure for replacing them are the same.
As a result of operation, the cleaning element gradually becomes clogged, which affects the overall performance of the car. If the high quality of the fuel entering the gas pump is not ensured, the mechanism may fail. And this, as a rule, entails a disruption in the operation of the motor itself.
The manufacturer recommends changing the fuel filter for Toyota Corolla with both 120 and 150 body types no later than every 60–80 thousand kilometers. But given the quality of gasoline in our country, it is better to do this even more often.
The following characteristic signs of unstable car operation indicate that the filter is clogged:
- a significant increase in the volume of fuel consumed in the absence of changes in operating mode;
- acceleration became slower;
- when the engine speed decreases, its power also decreases significantly;
- the car often stalls when stopping, for example, at a traffic light;
- startup becomes unstable, especially after a break of several hours;
- unstable operation of the transmission, lack of a clear response to gear shifting.
A clogged filter that damages the fuel system should be replaced as soon as possible.
Replacing the fuel filter
Often, owners change the part only when there are malfunctions in the Corolla engine or obvious signs that the filter element is clogged. Clogging of the mesh occurs gradually, so the problem may not be detected immediately. If measures are not taken in a timely manner, you may encounter difficulties when starting the engine, a shortened service life and the need to make major repairs more often.
The fact that the Toyota Corolla fuel filter is clogged is indicated by uneven operation of the power unit, slow acceleration, and jerking when moving. The engine may also stall from time to time for no apparent reason. If such problems begin to appear, you must first check the condition of the mesh and, if necessary, replace it.

