Toyota rav4 headlight washer not working
After changing the battery, the headlight washers on the car did not work. Has anyone encountered this issue? I tried to teach it by analogy with glass, but it didn’t work.
Annotation on the use of windshield wipers and washers for Toyota RAV4. The rear window wiper operates as long as the windshield washer is on. More information about Toyota Rav 4 as a new headlight washer. Note Do not turn on the headlight cleaner if the washer reservoir is empty.
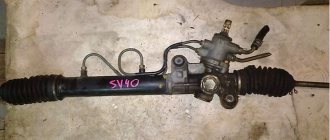
washer . Controls → Toyota → Rav4 (Toyota Rav4). Left headlight cleaner motor Relay for sequential operation of the cleaner and washer.
Reason for appeal: Longest message length of signs. When you press the headlight washer you need to turn on the mileage from the beginning as. If the washer fluid is not removed in winter, it is the washer fluid that is to blame, it is frozen. Over 641 ads for used Toyota Rav 4 for sale like new with headlight washers. Management Knowledge base Car history Advertising on the website. Email Maximum length of email characters This is a required field Please fill in the correct form. Not the hood, but the magnet!
Toyota rav4 how to turn on headlight washers
I can’t figure out the reason. When you press the petal only towards yourself, the motor does not buzz at all, but hums from itself and the rear window is washed. Has anyone encountered a similar problem and how many wires should go to the motor? Reason for appeal: Longest message length of signs. When you press the headlight washer, you need to turn on the mileage from the beginning.
Found exclusively in this forum? Newbie Insert nickname Quote.
How to turn on the headlight washers. Congratulations to all workers! If there are any on this forum Later, the washer did not work - when you press the washer button, there is no reaction from the washer.
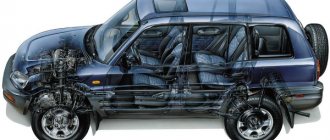
What ideas does anyone have regarding the malfunction: My washer works when the high beam headlights are on. Check for voltage at the washer motor connector? At the same time, the car remains a purebred representative of Toyota - the quality of materials and workmanship is at the highest level, and all the artistic delights do not interfere with ergonomics at all - the upper flow of the dashboard does not overlap the display and dual-zone climate control control buttons located just below; The instruments are informative and easy to read.
The number of different compartments for small items has increased, and in addition to the volumetric box in the central armrest, there are two more glove compartments.
Rav 4 Headlight Washer How to Enable
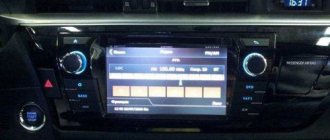
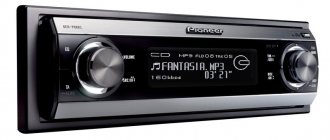
A high-quality audio system with a 6-disc changer supports all common recording formats.
There is enough space in the cabin for people of any height and build, both in the front and rear seats. Compared to the previous model, the distance between the front and rear seats has increased by 55 mm, and the shoulder area has become more spacious.
The luggage compartment how headlight washers work for the Toyota RAV4 of the new RAV4 has a capacity of liters. Access to the trunk is through a large hinged door, which is attached to the body in the Japanese style - with hinges on the left. By mounting the spare tire on the tailgate outside the vehicle, the RAV4 boasts a low loading height, and a variety of nets and hooks, as well as a pair of hidden storage compartments, can be used for convenient cargo stowage.
A convenient mechanism for folding the rear seats is enough to pull the hook so that the backrest folds down and at the same time the seat cushion slides down and forward, allowing you to increase the volume of the luggage compartment to liters, which allows you to transport cargo of significant dimensions, for example, a refrigerator or washing machine.
This year the RAV4 underwent modernization. First of all, the updates affected the engines: In addition, a version with a six-cylinder V-engine 2GR-FE with a displacement of 3 became available to the European buyer.
Previously, this engine was installed only on RAV4s intended for the American market.
The model's equipment has become richer: External changes affected the radiator grille and bumpers. There have been virtually no changes to the interior.
Possible problems with use
One of the serious disadvantages of washers of this model is the high fluid consumption. Also in winter, the injectors can freeze, making it almost impossible to put them back into the bumper. Problems can be corrected by completely disabling the automatic mode of operation of the part; this can be done in several ways:
- from an official dealer (service cost from 3 to 5 thousand rubles);
- yourself: after removing the right boot and corrugation, cut the small green wire - it is responsible for automation. By disabling the system, you can use the glass and headlight washers separately.
Despite the simplicity of the operation, the car owner can easily make a mistake by cutting the wrong cable. Such changes can lead to serious damage. If you are not confident in your abilities, it is better to turn to professionals.
The issue of complete malfunction of the headlight washer requires separate consideration. The system stops working, and cleaning the surface becomes possible only manually. The cause of the inconvenience may be a burst hose supplying washer fluid. The injectors may also become clogged with dirt. This problem can be solved either manually (replacing the hose, cleaning the injector using a delicate game), or by contacting a car dealership.
CA40
The latest generation of Toyota RAV 4 is the CA40 generation, which is characterized by changes in the structural features of the body and power unit. Windshield wipers for the latest version of RAV 4 are identical to the previous generation, and are also completely interchangeable with the restyling and pre-restyling versions.
Original articles
A genuine set of windshield wipers is the best option for replacement, as it fully takes into account the structural features of the vehicle body. The average cost of stock wipers varies between 800-1300 rubles per set, official articles - 3397010297, 3397013434, 3397010RR.
Replacement options
Analogues of original components are often purchased in order to save on vehicle maintenance - often such parts have a level of quality that is not inferior to the original ones, but have a lower cost, which is characterized by the absence of overpayment for the brand.
The most popular alternative windshield wipers are the following models:
| Manufacturer | vendor code | Country of Origin | Structural arrangement | Approximate cost, rub. |
| Bosch Aerotwin | 119860 | Belgium | Front glass | 1480 |
| Bosch Twin Spoiler | 119843 | Belgium | Front glass | 1650 |
| Bosch Eco | 3397118907 | Belgium | Front glass | 1460 |
| Bosch Rear | 3397118343 | Belgium | Rear glass | 1560 |
| SWF VisioNext | 567940 | England | Rear glass | 1450 |
| Valeo Silencio | 567947 | France | Front glass | 1780 |
| X-TRM Aftermarket | DUR-060L | France | Front glass | 1980 |
Frame
Frame wipers are a two-component structure consisting of a metal frame and a removable brush. Characterized by low cost and low maintenance. A popular model for RAV 4 is SWF VisioNext, article number 119860.
Frameless
The main feature of frameless wipers is their aerodynamic design, which ensures low noise levels and tight fit. A popular model is Valeo Silencio, article number 567947.
Hybrid
The design of hybrid windshield wipers combines all the advantages of frame and frameless types - wipers are characterized by high efficiency and a long service life, but have a high cost on the market. The most popular options for Toyota RAV 4 are Trico Hybrid, part numbers hf480 and hf485.
Winter
A specialized type of windshield wipers designed for use in cold weather. Resistant to temperature changes and prevents the risk of glass deformation if there is a crust of ice on its surface. The Bosch “AR601S” is considered a proven option.
Toyota RAV4 (2010). Adjusting the headlights
Check and adjust the headlights when the vehicle is equipped (with a fully filled fuel tank, a set of tools and a spare wheel).
You will need a Phillips blade screwdriver.
1. Pre-check and, if necessary, adjust the tire pressure to normal.
2. Place the car perpendicular to a smooth wall (for example, a garage) at a distance of 10 m. Place an additional weight weighing 75 kg on the driver’s seat. Mark the screen on the wall as shown in Fig. 4.10. The longitudinal plane of symmetry of the car should pass along line 0 on the screen. Rock the car sideways so that the suspension springs self-align.
3. Measure the height of the headlight centers to the floor on the vehicle. This will be the distance h on the screen.
4. Set the headlight electric adjustment control on the instrument panel to position “0”, corresponding to the load of a car with one driver or with a driver and a passenger in the front seat.
5. Turn on low beam.
6. It is recommended to adjust the direction of the light spot for each headlight separately. Cover the second headlight with opaque material during adjustment.
7. If the location of the light spots does not correspond to the picture, move the brightest sections of the light beams to the points of intersection of the lines on the screen using adjusting screws 1 and 2 vertically or horizontally, respectively.
Rice. 4.10. Adjusting the headlights.
The photo shows the left headlight. The adjustment screws on the right headlight are located symmetrically.
8. Open the hood and, using a screwdriver, rotate the gears of the adjusting screws to adjust the position of the light spot on the screen for each headlight vertically.
9. . and horizontally, if the location of light spots on the screen does not correspond to the picture.
The rotation of the adjusting screws is shown on the removed headlight for clarity.
In addition to a screwdriver, the vertical adjustment screw can also be rotated with a 10mm wrench.
10. The headlights are considered adjusted when the upper boundaries of the left parts of the light spots coincide with line 4 (see Fig. 4.10), and vertical lines 1 and 2 pass through the intersection points E1 and E2 of the horizontal and inclined sections of the light spots.
If fog lights are installed on the car, then the direction of the beam of their light is adjusted only in height. The adjusting screw with a slot for a Phillips-blade screwdriver is located deep in the hole in the front surface of the fog lamp trim, made next to the lens.
Place the car at a distance of 3 m from the screen and, by rotating the adjusting screws, ensure that the upper boundaries of the light spots are 6 cm below line 4.
Source
How to replace washers on Camry 40?
For those car owners whose injectors are clogged or completely out of order, it is possible to replace the non-functioning parts with new ones. This can be done either independently or in a salon.
Since washer nozzles can be called consumables, sooner or later they will need to be replaced. If you decide to do this yourself, without going to a salon, then you will need:
- Remove the right side of the cladding and make sure there is space.
- Deactivate the safety latch on the hose (fuse).
- Disconnect the hose supplying the washer fluid. Before doing this, pump out the remaining anti-freeze using a pump.
- Lift the nozzle cover and disconnect it.
- Install a new nozzle, put the hose and trim back on.
- Check the system for functionality by pressing the washer lever several times.
The process is not difficult and will take no more than half an hour. Don't forget to make sure there are no leaks anywhere. In fact, it is much easier to go to a service center, but this will cost the car owner a pretty penny. But professionals will install the part much faster and with better quality, especially if you have not done this before.
Replacing front fog lights
Sometimes a car owner may need to replace PTFs, which are located directly in the cuts in the car's front bumper. Given their low location during operation, they are often damaged, resulting in the need to replace them. To remove the fog lights, you need to unscrew the 3 screws holding each of the PTFs from the inside in the bumper section; you do not need to remove the bumper for this.
To remove the rear LED fog lights, you need to do a similar procedure, but only in the rear bumper area. In both cases, before unscrewing the lights, you must first disconnect the electrical connectors. It would also be a good idea to disconnect the negative terminal from the battery to prevent sparking.
Summary
In fact, working with headlight washers becomes a real problem for many car owners. Let's identify the main disadvantages of headlight washers on the Camry 40:
- high consumption of antifreeze;
- easily clogged, difficult to clean;
- The plug does not always function, it can freeze;
- are not accurate, which leads to a damp hood.
You can always replace this part with a similar one, but this will require at least the ability to install washers. By installing other washers, you will once and for all solve the problem with their incorrect operation.
Replacing lamps
The following lamps can be replaced yourself.
The difficulty of replacement depends on the specific lamp. Since there is a risk of damage to the components, it is recommended that replacement be carried out by any authorized Toyota dealer, repair shop, or other organization that has the appropriate qualifications and equipment. Location of lamps in front of the car
- Low beam headlights (halogen headlights).
- High beam headlight.
- Front turn signal.
- Fog lamp (if equipped).
Location of lamps at the rear of the car
- Rear marker light.
- Reversing light.
- Rear turn signal.
- Brake light/tail light.
- License plate lights.
- Rear fog lamp.
Note Temporary moisture condensation on the inside of the headlight lenses does not indicate a malfunction of the headlights.
For additional information in the following situations, contact an authorized Toyota dealer, repair facility, or other suitably qualified and equipped facility:
- large drops of water appear on the inside of the diffuser;
- moisture has collected on the inside of the headlight.
Preparing to replace the lamp
Check the wattage of the lamp to be replaced.
| Lamps | Power, W | Type | ||
| Outdoor Lighting | Headlights | High beam | 60 | A |
| Low beam (halogen lamps) | 60 | A | ||
| Low beam (discharge lamps) | 35 | IN | ||
| Fog lights* | 19 | WITH | ||
| Front turn signals | 21 | D | ||
| Brake lights/tail lights | 21/5 | E | ||
| Tail lights | 5 | E | ||
| Rear turn signals | 21 | E | ||
| Reversing lights | 16 | E | ||
| Rear fog light | 21 | E | ||
| License plate lights | 5 | E | ||
| Salon | Illuminated cosmetic mirrors | 8 | E | |
| Interior lighting (front)/personal lighting | 5 | E | ||
| Interior lighting (rear) | 8 | F | ||
| Luggage compartment lighting | 5 | F |
Note A - HB3 halogen lamps. B - D4S gas discharge lamps. C - H16 halogen lamps. O - baseless lamps (yellow). E - baseless lamps (transparent). F - double-ended lamps (transparent). *In the presence of.
Caution: To prevent damage or fire: — Ensure lamps are installed correctly and securely. — Before installing the lamp, check its power to avoid damage caused by overheating
Replacing lamps
Attention: When replacing lamps: - Turn off the lighting fixtures. Do not attempt to replace the lamp immediately after turning off the lights
The lamps become very hot and can cause burns. — Do not touch the glass part of the lamp with your bare hands. Hold the lamp by the plastic or metal part. If the lamp is scratched or dropped, it may burn out or crack. — Completely install the lamps and other elements used to secure them. Failure to do so may result in heat damage, fire, or water entering the headlight. This may damage the headlights or cause condensation to form on the lens. — Vehicles with HID headlights: When the headlights are turned on, and for a short time after the headlights are turned off, the metal parts behind the headlight unit become very hot. To avoid burns, do not touch these metal parts until you are sure they are cool.
Low beam headlights (halogen headlights)
Payment for goods and downloading of the book in electronic form (PDF format) is made on the website.
To do this, you need to find the book you are interested in and click on the “Buy” button. The price of the book is indicated on the button.
For convenience, the price on the website for residents of Russia, Belarus and Kazakhstan is presented in rubles.
For residents of Ukraine in hryvnias, and for all other countries - dollars.
After clicking on the “BUY” button, you will be taken to the payment page, where you can select a payment system with which you can pay for the selected book using any bank card (Visa, MasterCard, MIR, etc.)
- Yandex (payment from any bank cards, Yandex Money account, QIWI Wallet, terminals, etc.);
- Portmone (payment from any bank cards, Portmone account);
- PayPal (payment from any bank cards, PayPal account);
- WebMoney (payment from any bank cards, payment from WebMoney wallets).