The ninth generation sedan Toyota Corolla E120 series in a short period of time from 2000 to 2007 was able to become one of the most popular models ever produced by the Japanese company. Affordable price, excellent driving performance and, most importantly, safety - all this was also appreciated by domestic motorists. You can already buy the eleventh generation of Corolla in showrooms, but not everyone wants to part with the proven ninth generation cars.
During the entire period of operation of the 120 series, many car enthusiasts were able to master techniques for eliminating simple breakdowns, which do not happen very often, but, unfortunately, do occur.
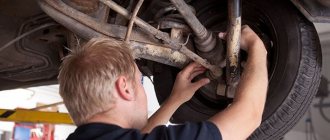
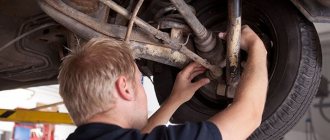
An operation such as replacing a Toyota Corolla brake disc does not pose any particular problems for a driver who knows how to use keys and is interested in the structure of the car.
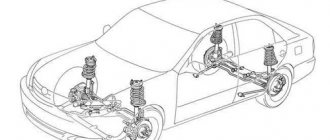
General information about the Toyota Corolla brake system
The machine is equipped with a hydraulic dual-circuit system, which is divided into front and rear wheels. The main cylinder has two tanks that supply both circuits with liquid; if one of them fails, the second will work. Installed brakes vary and are divided into:
- front – disc;
- rear - drum-disc.
Both types automatically adjust based on pad wear. The rear brakes perform the additional role of a handbrake and have an adjustment mechanism that is activated when setting.
When should brake discs be replaced?
The timing of replacement can be determined while driving; they are expressed in the following signs:
- wheel runout;
- car leaving a straight path when braking;
- extraneous knocking or grinding noise.
The manufacturer recommends installing a new part after replacing the second set of pads. Despite this, you should still carry out a preventive inspection and measure the thickness of the unit so as not to miss replacing faulty Toyota Corolla brake discs and not get into a difficult situation on the road. The company determined the following indicators for these nodes :
- for rear TDs, the minimum thickness is 8 mm;
- for front TDs the minimum thickness is 23 mm.
As practice shows, on average, front discs are replaced at a mileage of about 100-130 thousand km, while the rear ones have a significantly longer service life due to the characteristics of their operation. In some cases, burrs and deep scratches can be eliminated by turning and grinding, but you should not expect long-term results from such attempts.
What is the minimum thickness of a brake disc?
The minimum thickness of a disc brake is the minimum safe operating thickness of the brake rotor before it must be replaced. Continued operation at or below minimum rotor thickness may result in brake system failure. When the rotor reaches its minimum thickness, the braking distance increases, sometimes up to 4 meters.
With the minimum permissible thickness of the brake disc, driving becomes dangerous
As the thickness of the rotor decreases, its ability to absorb and dissipate the heat generated during braking decreases. Once the rotor reaches its minimum thickness, its ability to absorb and dissipate heat is reduced to such an extent that it can lead to a significant reduction in braking performance. This can be noticeable by a premature increase in braking distance.
Algorithm for replacing front brake discs of Toyota Corolla E120
To carry out the work you need to prepare the appropriate tool :
- a set of keys;
- jack and wheel wrench;
- stand;
- thrust shoes;
- special lubricant;
- wire.
Now you can proceed directly to the operation.
Actually, the principle of operation is the same for any car, with the exception of some design features.
So, point by point:
- Pump out the fluid from the brake master cylinder reservoir.
- Secure the vehicle with shoes, jack up the desired side, install a stand and remove the wheel.
- Unscrew the lower caliper bolt, lift it up and tie it with wire.
- Remove the pads and unscrew the second caliper bolt and disconnect it from the bracket.
- Turn the steering wheel in the direction of work and unscrew the two bolts of the caliper bracket and remove it.
- Screw two M8 bolts into the special holes for dismantling until the disk is removed.
- Install a new disc and caliper bracket.
- Lubricate the guide bolt.
- Press in the piston of the brake cylinder and install the caliper.
When replacing brake discs on a Toyota Corolla, some drivers try to save money and not change the pads. This is an extremely frivolous act, because old pads have an uneven surface that matches the profile of the removed disc. Next, it’s easy to guess what will happen to the new part - it will also have uneven production.
How to measure the thickness of a brake disc
When it comes to measuring rim thickness, you simply need to follow the detailed testing procedure per any factory service manuals. Most procedures say that you can simply use a micrometer to measure the thickness of the rotor in 8-10 different places. When measuring, keep a distance of about 10-20 mm from the edge of the disc. It is important to note that all readings must be above the minimum thickness requirement. Moreover, it must in no case exceed the minimum braking parallelism values specified in the vehicle's manual. This is essential to ensure stable and smooth braking.
The instructions for measuring the thickness of the brake disc are as follows:
- Raise the car on a jack.
- Remove the wheel and rim from the desired disc.
- It is advisable to remove the block.
- Wipe the upper part of the brake disc from dirt and dust - these deposits can “add” the missing millimeters to the rotor, which will have a bad effect on the measurement.
If rust has accumulated on the sides of the discs, increasing the thickness of the disc, then you can try to clean it off with a soft sandpaper. - Take a caliper or micrometer and measure the rotor in several (8-10) different places. Deepen the caliper a couple of centimeters from the edge of the rotor.
If you couldn’t clean off the “sides” and you don’t have a micrometer, then you can do this: place a coin on each side of the disk in the center of the surface and measure it in this state, then simply subtract the thickness of the coins - this will give you the required thickness of the rotor.
- All measurements must be above the minimum disc thickness. If at least one of the indicators is lower, you need to replace the disk as quickly as possible.
There is no universal minimum wheel thickness; it depends on the make and model of the wheel, the vehicle and its engine. For example, for the Lada Kalina the maximum thickness is 17.8 mm, for the TRW front discs - 21.8 mm, for the Skoda Octavia 1.8 and 2.0 TSI - 22 mm, and so on. All this data must be taken from the technical manual for the car or the disc itself.
Useful video instructions:
Features of changing the rear discs of the Toyota Corolla brake system
This procedure is similar to that described above, with the exception of some points. Here they are:
- Release the handbrake.
- Before dismantling the disc, bring the handbrake pads together with a screwdriver.
- After replacing the pads, first spread them until there is no rotation, and then close them a little until they rotate freely.
After carrying out the work, it is necessary to fill in new fluid and bleed the hydraulic system. And remember, brakes need to be given special attention and kept in working order throughout their entire service life.
Source autoclub.su
Toyota cars have long been considered the undisputed leaders in sales in the markets. Directly, the Toyota Corolla is even listed in the Guinness Book of Records as the best-selling car in the world. Toyota Corolla, despite the huge competition, has practically no analogues. Few cars can boast the same excellent ratio of price, quality, wear resistance of parts and, most importantly, safety.
But, unfortunately, even such cars require maintenance and repair, especially if your car has already crossed the line of 10 years of operation. What you should especially pay attention to are the brakes. And we're not just talking about Toyota cars. Good brakes mean excellent safety, or a saved pedestrian. This article will focus on a more in-depth inspection of brake discs and pads.
Important information about brake disc thickness
In the past, most brake rotors were designed to be thick enough that there was little need for replacement. Nowadays, in order to reduce weight and save some costs, many automakers often produce wheels with a thinner thickness. Thus, the rotors easily wear down to the minimum thickness (the appropriate tolerances are usually specified in the factory instruction manual or on the rotor casting), sometimes even by the time the first set of brake pads are replaced.
Example: minimum thickness of JCW rear brake disc is 8.4 mm
Knowing the minimum thickness of your car's rim is very important because if the thickness of the car's rotor is less than the minimum level, your safety will be compromised. A worn or thinner rotor has less mass than a normal rotor, which reduces its ability to absorb and dissipate heat. In addition, the strength of the rotor is also reduced, leading to a greater risk of cracking and braking. For this reason, it is very important to check the rotor thickness every time you service your brake pads. If the rotor thickness is below the minimum specification or cannot be repaired, you must replace it immediately.
Cracked brake disc
The front discs on a car are subject to more wear than the rear ones. But at the same time, both front discs usually wear out equally (as do the rear ones). Therefore, when it comes to replacing one worn rotor, this means that you must replace both rotors on the vehicle.
Auto experts advise replacing both rotors (even if one is still functional) at the same time to maintain even braking. A noticeable difference in rotor thickness can cause the brakes to be biased to one side.
When to change brake discs and pads
Without special knowledge, you can determine that the brake system is living its last days. The main signs of unstable brake operation:
- Periodic wheel runout when turning and driving on uneven surfaces
- Changing the vehicle's trajectory when braking
- Extraneous knocking or grinding noise when pressing the brake pedal
It is recommended to change both the disc and pads at once in order to increase their service life and improve the safety of the car. Despite this, it is still necessary to periodically inspect the brake system for preventive purposes. Based on statistics from Toyota service centers, on average, front brake discs are replaced at a mileage of 100-130 thousand km. The rear ones are more resistant to stress. In general, the principle of replacing brakes is almost the same for all cars, only the design feature of the brakes differs. Let's move on directly to the process of replacing the brake system:
- Remove fluid from the brake master cylinder reservoir.
- Jack up the car on the desired side and remove the wheel. Turn the steering wheel to the side as far as it will go.
- Unscrew the lower caliper bolt, disconnect it and hook it with a wire so that it is raised.
- Remove the pads, after which you can unscrew the upper caliper bolt and disconnect it from the bracket.
- Turn the steering wheel to the side where the replacement process is taking place, and unscrew the two bolts of the caliper bracket, then remove it.
- Screw two M8 bolts into the special holes for dismantling until the disk is removed.
- Install the new disc and caliper bracket.
- Lubricate the guide bolt.
- Press in the piston of the brake cylinder and install the caliper.
Many drivers, in order to save a little money, do not replace their brake pads with new ones. This is an extremely unreasonable act, because old worn-out pads have a surface that does not correspond to the new disc. It is not difficult to imagine what will happen to the brake disc itself. It will also have uneven output and after a certain time you will experience a creaking or whistling noise when braking due to a small amount of play.
