The Toyota Camry has been in production for four decades now, enjoying stable popularity in Russia - while the car is little known in Europe (where the Avensis occupied its niche), it has been produced for the Russian market near St. Petersburg since 2005. This, in turn, has significantly increased the number of V40 and V50 cars on the roads.
By replacing the cabin filter yourself on a Toyota Camry of these generations, you can use the same algorithm, so this article is relevant for all cars from 2005 to the present day.
The need for a cabin filter
Driving in large cities involves constant traffic jams and the presence of hundreds of other vehicles. At the same time, colossal amounts of harmful substances enter the air, including:
- oxides of carbon and nitrogen;
- aldehydes, sulfur oxides;
- hydrogen fluoride;
- soot and small particles from tires;
- soot and heavy metal compounds.
All this poses a huge danger to the lungs of the driver and passengers. Constant exposure to these substances on the body and respiratory system can cause allergies or other lung problems. Feeling unwell while driving a car can also lead to an emergency situation on the road and, accordingly, getting into a traffic accident.
For this reason, it is recommended to promptly replace the Toyota Camry cabin filter. Every car owner can do this on their own, since the whole procedure does not present any particular difficulties.
Universal filters for Toyota Camry
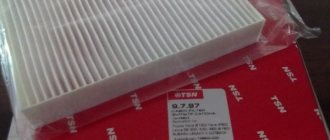
Carbon and paper universal filter FILTRON
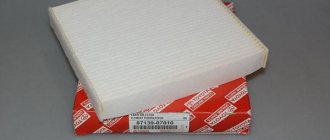
Toyota cabin filter (paper/carbon) – recommended by the manufacturer. To purchase, you will need to know the year of manufacture of the car, body number and engine size. Can be found in specialized Toyota stores or service centers. The average price of such a cleaner is 3,000 rubles. Manufacturer: Japan or USA. It has a high degree of air purification and disinfection, blocking unpleasant odors and the ingress of small dust particles. Every 10 thousand mileage it is advisable to do an update. Preventive cleaning with high-pressure air is also possible, every 2-3 thousand kilometers.
FILTRON K1210 – material – paper. Suitable in all respects for Toyota Camry V40. Not an expensive option (price 350-400 rubles) made in Poland. Parameters: height 29 mm, length 194 mm, width 214 mm. The coefficient of blocking negative substances is 60-70%.
More on the topic:
- How to choose the right auto parts
CHAMPION CCF 0051 – fine filter. Its effectiveness is 80-90%. It is recommended to install it when the vehicle is constantly used within the city. Parameters: height 27 mm, length 213 mm, width 194 mm. Price 380-450 rubles. Manufacturer – USA.
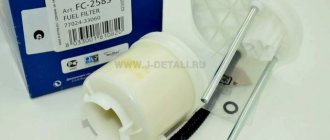
DELPHI TSP 0325175 C – carbon cleaner (spray material – activated carbon). Absorbs CO emissions well. It is also an analogue of original Toyota filters. Parameters: height 17 mm, length 213 mm, width 210 mm. Manufacturer – Italy. The average price on the market is 600 rubles.
FIAAM PC 8186 – fine cabin filter. Manufacturer – Slovenia. The absorption efficiency of harmful substances is 80%. In all respects it is perfect for the Toyota Camry. Price 380-400 rubles.
JAKOPARTS J 1342024 – fresh air purifier made in China. Also performs fine cleaning functions. Parameters: height 29 mm, length 215 mm, width 193 mm. Price 387 rubles.
All of the above manufacturing companies produce universal filters. They are perfect for your Toyota Camry. But do not forget that in the production of original Toyota cleaners, modern equipment and materials are used. In addition, you receive a quality guarantee. By installing an original filter, you ensure freshness and comfort while driving. You need to take care of your health while driving!
A little about filters
The modern market offers a wide selection of cabin filters. If you were satisfied with everything before, then we recommend purchasing a similar model. For drivers with allergies, it is worth taking a closer look at higher quality models. The most effective are adsorption types. The high functionality of such products is based on the ability of activated carbon to absorb various harmful substances, as well as unpleasant odors.
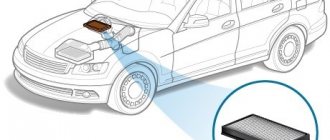
Compatible models may be purchased. As a rule, they have the same service life as the original parts, but at the same time they are characterized by a more modest price tag. Many drivers ask the question where the Toyota Camry cabin filter is located. This part is located in the dashboard area behind the glove compartment.
Which filter to choose for Camry V50
There are two types of filters - regular and carbon. Many motorists believe that a carbon filter filters incoming air better and give preference to it. However, there are those who do not notice the difference, except in price.
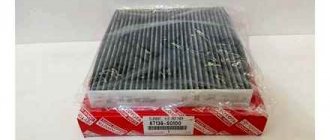
Toyota cabin filter . Its cost is about 2 thousand rubles, which is not very cheap. However, in addition to the original, you can choose analogue filters from cheap Chinese ones to quite good filters from European manufacturers.
Analogs
- Agama AC1108C from 280 RUR coal
- Amiwa 2001037 from 170 RUR
- Avantech CF0107 from 260 RUR
- Corteco 2165 2551 from 500 rub.
- Denso DCF35-6P from 580 RUR
- Filtron K 1210 A from 220 RUR
- FRAM CFA10322 from 570 RUR
- Goodwill AG151CFC from 500 rub.
- Mann CUK1919 from 750 RUR
- Sakura CA1114 from 320 RUR
- Valeo 715 730 from 1100 rub.
When to replace
You can find information about the frequency of filter replacement in your car's manual. As a rule, this figure ranges from 25 to 30 thousand kilometers. It should be borne in mind that for people living within the city, replacement must be done much more often (every 10 thousand kilometers).
There are also a number of signs that indicate the need for urgent replacement. This may include:
- the appearance of unpleasant odors in the air that enters the cabin;
- dust appears when the fan is turned on;
- increased glass fogging.
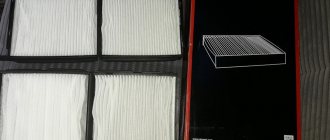
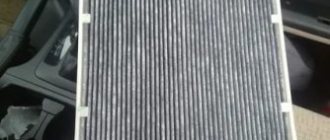
Replacing the Toyota Camry v40 and v50 cabin filter will help eliminate these problems. You can also determine the level of wear visually. A new filter is white, while a worn one is usually blackened. Remember that this element is capable of stopping up to 99 percent of harmful substances, dust and soot.
How does the filter work and what are its features?
The filter operates according to a simple algorithm.
- The ventilation and heating system receives air flow from the street.
- The filter cleans it by absorbing all contaminants.
Through its use, the concentration of substances harmful to health is significantly reduced in the air. The filter does not allow dust, pollen and any other allergens to pass through. It also protects the air from exhaust gases and bacteria.
Replacing the Toyota Camry cabin filter is primarily necessary to preserve your health. In the photo below you will see how much dirt has accumulated on the old filter.
Before you make a purchase, figure out what kind of filter you want to purchase. There are different types of air filters for car interiors:
- simple: the filter element consists of fibrous polypropylene. With the help of this material, he manages to trap odors and dust;
- carbon: have additional particles of activated carbon, which has better characteristics for retaining chemicals and odors.
Simplify your search by noting that the filter catalog number is 87139-52020.
By the way, you can check the need to replace the filter yourself. After removing it from the cell (we will describe the process below), inspect the product. If there is a lot of dust, dirt and debris on it, then it has already lost its original characteristics. The product, without the presence of foreign particles, has all the necessary properties. In this case, replacing the cabin filter on Camry V50 and V40 can be postponed for some time.
How to change the cabin filter on a Toyota Camry
Every car owner can replace the filter in a garage. The procedure does not require any tools and is completed in a few minutes. To replace the cabin air filter, follow the steps below:
- Open the car's glove compartment. There is a limiter on the right side. Unplug it.
- There are stops on the sides of the back of the glove compartment. Remove the entire structure from them, and the glove compartment will fall out on its own.
- You will see where the cabin filter is installed. Remove the protective plastic cover.
- Take out the filter. Pay attention to the direction of the arrows that are drawn on the filter wall.
- Install a new filter into the slot. The arrow should point up.
- Replace the plastic cover.
- Install the glove compartment, and then return the limiter to its place.
As you can see, there is nothing complicated about the replacement, and it is not at all necessary to contact a specialized service center to perform such a trivial task.
Replacing the cabin filter Toyota Camry Leave a comment
The Toyota brand is deservedly considered one of the most reliable car brands in the world. But this does not mean that the car does not need to be serviced. Like any other car, the Toyota Camry needs constant maintenance. One of the most common items on the work list is replacing the Toyota Camry cabin filter. Looking ahead, I will say that this work is very simple and can be completed in 5-10 minutes without any tools. So let's get started.
Cabin filter replacement interval or when should you change the cabin filter on a Toyota Camry?
If you look at the work regulations for the Toyota Camry, you will notice that the interior filter is changed after 10,000 km. As a rule, in practice this works out as follows. The Toyota Camry cabin filter is replaced 2 times a year - once before the summer season and once before the winter. The average mileage of an ordinary car is approximately 20,000 km per year. So it turns out that replacement has to be done 2 times a year and after 10,000 km.
But if you suddenly notice that the cabin heater has begun to work significantly worse, and the air flow from the air ducts has become too weak, then the first step is to check the cabin filter. If the filter is heavily clogged, it is better not to wait until the due date and replace it immediately. A similar situation can arise with the air conditioning system. If in the summer the efficiency of the air conditioner or climate control system has become significantly lower, then it is better to start troubleshooting with the cabin filter. Another characteristic feature of a clogged Toyota Camry cabin filter is severe fogging of the windows in damp and rainy weather. In addition, if you notice that an unpleasant odor has begun to appear from the air ducts, you should replace the cabin filter with a new one.
Which cabin filter to replace in a Toyota Camry?
To select an interior filter element for a Toyota Camry, you should use original auto catalogs. If for some reason this does not work out for you, then you can always contact us by phone 8 (3843) 4640042. We will quickly select a filter for your car using both original catalogs and analogue catalogs.
Standard cabin filters are designed to clean the air entering the vehicle interior from dust and other large particles. For better air filtration, it is recommended to use cabin filters with activated carbon particles, which clean the air from unpleasant odors.
Instructions for replacing the cabin filter Toyota Camry V40, V50
To replace the cabin filter on a Toyota Camry, you need to remove the glove compartment to provide access to the heater housing. This is done as follows.
1. Open the glove compartment and remove everything from it.
2. We move aside the gas lift, which serves to smoothly open the glove compartment, and disconnect it.
3. Move the entire drawer to the left to release the right latch.
4. Pull the box towards you a little and remove the second latch from the groove.
5. Remove the plug from the cabin filter housing. This is done very simply. You just need to press the latch located on the left side and pull the filter plug towards you.
6. Now we simply pull out the cabin filter towards ourselves and install a new filter element in its place. Please note that the cabin filter must be installed strictly in the direction of air flow. Most filter manufacturers indicate the direction of air flow with arrows and write AIR FLOW next to them. The air flow comes from the street into the interior. Those. in this case, the filter should be positioned with arrows down. However, there are filters that do not indicate the direction of air flow, but the top of the filter. In this case, it is written not AIR FLOW, but UP. Take these points into account so as not to make mistakes with the installation.
7. Install the cabin filter in place and snap the plug.
8. Assemble the glove compartment in the reverse order.
All! Replacing the Toyota Camry cabin filter is now complete. Agree that this is a very simple procedure to go to a car service to have it done. In addition, I called five random services in our city and was very surprised at the cost of replacing the cabin filter on a Toyota Camry. On average in the city they asked from 300 to 500 rubles for such work. This cost is equivalent to the cost of a good “double” cabin filter. So, by doing this work yourself, you can also save a lot of money.
We have also prepared for you a video of replacing the Toyota Camry cabin filter, which clearly shows all the stages of the work. We recommend watching the video if you have any questions.
We also recommend reading the articles:
How to distinguish counterfeit Castrol oil - using the example of Castrol Magnatec 10W40 Oil in a Toyota Corolla robot: selection and replacement Why does the engine eat oil?
Step-by-step instructions: how to replace the air filter in a Toyota Camry
Toyota Camry
Open the hood
Camry hood latch
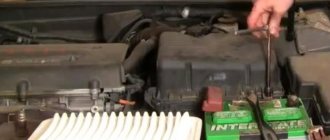
The Toyota Camry air filter housing is located in the engine compartment under the hood. To access it, you first need to open the hood from inside the car by pulling a special handle located between the driver's door and the steering wheel. At the same time, you will hear the hood latch click and notice how it rises slightly. Now you need to lift the hood over the engine - to do this, insert your hand into the gap above the Toyota emblem, feel the hood latch handle there and pull it up. With your other hand, first lift the hood, then use both hands to open it completely.
Hood latch
Air filter housing
Filter cover clamp
When the hood is raised, the plastic air filter housing can be found on the front right side (driver's side) of the engine compartment. On the right side of the filter housing there are two metal fixing clips (or 10 mm bolts depending on the year of manufacture of the car). They hold the top of the air filter housing in place. You will need to press down on the clamp tabs, pulling them away from the filter until they spring back into the free position. Likewise, release the clips at the front and rear of the air filter housing.
Open clamp
Back clamp
Filter cover hinges
There are two hinges on the left side of the filter cover that secure the cover. Release the cover from under them.
Lift the filter cover
Get the filter itself
Camry air filter
After you remove the cover, the filter itself will be in front of you, you can freely take it out.
Inspect both sides of the filter and evaluate its external condition. If it turns out to be clean, it does not need to be replaced. If the filter is dirty, it must be replaced with a new one (original Toyota part number: 17801-0H010).
If you decide not to change the filter, but to clean the existing one, you may need a vacuum cleaner. Using it, you need to remove all debris located in the filter housing (leaves, insects, etc.).
Dirty filter
Insert the housing cover into the hinges
Lock the clamps
After installing the filter in its original place in the housing, you will need to reassemble the housing in the reverse order. To do this, first insert the housing cover into the two hinges on the left side, then install all the clamps in the working position (or tighten the screws depending on the year of manufacture of the car).
Back clamp
Instructions for replacing the filter
The replacement procedure is simple enough to do it yourself and without additional tools.
First, we traditionally empty the glove compartment of its contents - it will have to be removed from the restraints by folding it down.
Next, we unhook the damper rod on the right, which limits the speed of opening the door - just squeeze the split lock with your fingers to move it to the right.
Then, by pressing on the sides of the glove compartment in the rear, we remove the limiters from the slots in the plastic. It is better not to let them come into contact with the cladding - noticeable scratches will remain. In cold weather, the interior needs to be heated well - the plastic will become softer and more pliable.
The cabin filter cover is clearly visible behind the folded-down glove compartment.
To remove the cover, simply press the side latches with your fingers.
Next, after removing the cover, we pull the cabin filter out, making sure not to spill excess debris into the air ducts below.
Insert the new filter with the arrow on the side down, then close the lid and return the glove compartment to its place.
Once a year, it makes sense to combine replacing the cabin filter with antibacterial treatment of the air conditioner evaporator.
DETAILS: Replacing the VAZ 2107 pump, step-by-step instructions
Lifting the trim at the front passenger's feet, we find the air conditioning drain pipe.
Having pulled it out with the seal from the hole in the body, we insert the extension tube of the aerosol can with the cleaning agent into the drainage.
Having filled the volume of the box with the product, we quickly remove the cylinder tube from the drainage and return the drainage to its place so that the product, carrying with it the dirt, flows out of the body. At the same time, we switch the air conditioner to recirculation, directing the air flow at low fan speeds to the feet.
To replace the filter, we do not need to dismantle the glove box (glove box), since there is a special removable strip on its back cover, behind which the filter housing is located.
Open the glove compartment and take out all the contents. We see the same bar on the back wall.
Carefully press the latch and pull the bar out of its seat.
Behind it is the cabin filter housing cover, which will also need to be removed by unfastening the latches.
Removing the cover we see the cabin filter. We carefully take it out, clean the case from dust if necessary, and clean the sheets if there are any.
Now we install the filter in exactly the same way as the old one and reassemble it in the reverse order.
Next, we just have to check the flow of air entering the cabin. After replacing a clogged filter, it should be much better.