The filter element in the fuel system of a Toyota Corolla car plays a very large and important role. It removes various mechanical particles and condensate from the fuel, which ensures normal engine operation for a long time. The design of the fuel filter on the Toyota Corolla differs from similar samples on many branded models. In addition, the structural features of the filter module largely depend on the modification of the car body. So, for example, Corolla cars in the 150th and 120th bodies produced in 2007 and 2008 have a fuel pump and filter of different types, which does not in any way affect the principle of their replacement, which is identical.
In this article we will share with you information about the original filter and the frequency of its replacement. You will learn about all types of fuel filters for Corolla on the Russian market and get acquainted with step-by-step instructions for replacing them.
Frequency of replacing the fuel filter on a Toyota Corolla
According to the operating instructions, the fuel filter must be replaced every 80 thousand kilometers. Many car owners drive without changing the filter, thereby almost doubling the recommended mileage. You can’t treat the fuel system and engine this way, because it’s no secret that the quality of domestic gasoline is much inferior to the Japanese standard. Therefore, keep in mind that the fuel filter, like any other cleaning element, cannot last forever and its resource is limited by the mileage of the car or a certain time interval. Maintenance specialists strongly recommend replacing every 50 thousand km. However, replacing the fuel filter may be required earlier. Certain signs will indicate this to you.
How often should I replace it?
Replacing the Toyota Corolla fuel filter in 120 (2000-2007) and 150 (2008-2012) bodies is not provided by the manufacturer as a routine operation. Such work is performed only at the beginning of diagnostic procedures, if a drop in pressure is detected when the load on the engine increases (that is, at times when the engine’s fuel consumption is highest).
Considering that the fuel filter is built into the body of the fuel module and is not cheap even in its non-original form, few people will decide to perform such a procedure as a preventive measure, especially since it is quite labor-intensive. We also recommend performing this procedure first when purchasing a car with more than 70-80 thousand kilometers or when there are specific signs of excessive filter contamination.
Signs of a clogged fuel filter
Many Toyota Corolla car owners start replacing the filter only when there are clear signs of a decrease in the throughput of the cleaning element or when the engine fails completely. Since filter clogging occurs at a slow pace, it is not immediately possible to notice the obvious symptoms of its poor performance. And further operation with a clogged filter has a negative impact on the engine’s turnaround time, which is reduced.
Here are the main signs of a clogged filter:
- Uneven engine operation both at idle and under load
- Slow acceleration
- Unstable engine starting
- Unexpected engine stalls
Types of fuel filters for Toyota Corolla on the Russian automotive market
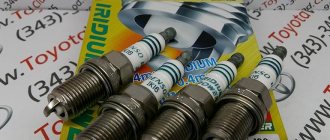
Many auto stores offer a choice of at least three types of products of this type for Toyota Corolla. First of all, these are products from Chinese and Korean manufacturers, as well as the original version. Many motorists do not consider that the quality of filters of different types varies greatly. The main thing is that when replacing the filter, correctly install the sealing gaskets that come with them.
Depending on the modification of the Toyota Corolla car body and the year of manufacture (before 2007 or after), you should individually select a fuel filter that is suitable for the design. There are designs for fuel supply units from the gas tank, where the filter is located in the pump itself, so replacement has to be carried out as a whole module. The procedure is expensive, but the car owner still has no choice. Unlike these Toyota models, Corolla cars produced in 2008 were equipped with different designs of fuel filters, which can be replaced and installed separately from the fuel pump.
A rich assortment of foreign spare parts allows the car enthusiast to make his choice on a line, on one side of which is the cost of the product, on the other - the high quality standard of replacement parts. For example, the price for individual copies exceeds about 10,000 rubles. This is especially true for original products made from non-separable filter and pump units.
So, before replacing the fuel filter, be sure to familiarize yourself with fire safety precautions, and also stock up on the necessary tools and spare parts.
Brake caliper guides for Toyota Corolla E120
Brake caliper guides for Toyota Corolla E120 (1.8, 2.0, 2.2) are always available in our catalog. We have parts for models with any body modification: sedan, hatchback, station wagon. From our wide product range, anyone can choose an original or analog auto spare part for cars with automatic and manual transmissions.
For all customers, we provide a warranty on parts and provide the opportunity to quickly receive an order thanks to timely delivery. For convenience, the online store catalog has a search by item.
Non-original analogues:
| Manufacturer | vendor code | Name | Availability | Price, rub.) | ||
| ABS Netherlands | 55020 | Guide sleeve kit Toyota Corolla E120 compatibility | 130 rub. | Buy buy in 1 click | ||
| ABS Netherlands | 55106 | Guide sleeve kit Toyota Corolla E120 compatibility | 840 rub. | Buy buy in 1 click | ||
| AUTOFREN SEINSA Spain | D7044C | Guide sleeve kit Toyota Corolla E120 compatibility | 540 rub. | Buy buy in 1 click | ||
| AUTOFREN SEINSA Spain | D7037C | Guide sleeve kit Toyota Corolla E120 compatibility | 510 rub. | Buy buy in 1 click | ||
| ERT Spain | 410035 | Guide sleeve kit Toyota Corolla E120 compatibility | 535 rub. | Buy buy in 1 click | ||
| ERT Spain | 410028 | Guide sleeve kit Toyota Corolla E120 compatibility | 505 rub. | Buy buy in 1 click | ||
| FRENKIT Spain | 810002 | Guide sleeve kit Toyota Corolla E120 compatibility | 480 rub. | Buy buy in 1 click | ||
| KAWE Netherlands | 113-1317X | Guide sleeve kit Toyota Corolla E120 compatibility | 625 rub. | Buy buy in 1 click | ||
| KAWE Netherlands | 113-1376X | Guide sleeve kit Toyota Corolla E120 compatibility | 520 rub. | Buy buy in 1 click | ||
| KAWE Netherlands | 113-1377X | Guide sleeve kit Toyota Corolla E120 compatibility | 630 rub. | Buy buy in 1 click | ||
| Metzger Germany | 113-1317X | Guide sleeve kit compatibility | 2145 rub. | Buy buy in 1 click | ||
| NK Germany | 8932015 | Guide sleeve, brake caliper housing compatibility | 820 rub. | Buy buy in 1 click | ||
| ABS Netherlands | 55018 | Guide sleeve kit compatibility | check by phone | make a request | ||
| ABS Netherlands | 55019 | Guide sleeve kit compatibility | check by phone | make a request | ||
| ABS Netherlands | 55105 | Guide sleeve kit compatibility | check by phone | make a request | ||
| ABS Netherlands | 55107 | Guide sleeve kit compatibility | check by phone | make a request | ||
| Jakoparts Germany | J3272002 | Guide sleeve kit compatibility | check by phone | make a request | ||
| Jakoparts Germany | J3272001 | Guide sleeve kit compatibility | check by phone | make a request | ||
| Jakoparts Germany | J3272008 | Guide sleeve kit compatibility | check by phone | make a request | ||
| Metzger Germany | 113-1376X | Guide sleeve kit compatibility | check by phone | make a request | ||
| Metzger Germany | 113-1377X | Guide sleeve kit compatibility | check by phone | make a request | ||
| NK Germany | 8945025 | Guide sleeve, brake caliper housing compatibility | check by phone | make a request | ||
| NK Germany | 8936011 | Guide sleeve, brake caliper housing compatibility | check by phone | make a request | ||
| NK Germany | 8945032 | Guide sleeve, brake caliper housing compatibility | check by phone | make a request | ||
See also:
- — Toyota Corolla E 120 brake caliper repair kit
- — Brake caliper bracket Toyota Corolla E 120
- — Brake caliper piston Toyota Corolla E 120
We have a huge range of auto parts. If you do not find suitable spare parts models in our catalog, be sure to check their availability by calling 8 (495) 320-19-19.
Fire safety during work
When working with the fuel system, compliance with fire safety regulations is a necessary requirement. The penetration of gasoline vapors begins within a few seconds after removing the gas tank cap. The mixture of air and fuel is very explosive, so there should be no open sources of fire nearby!
After removing the pump unit, when work is being done somewhere on the table, the neck opening of the gas tank must be temporarily covered with a dense layer of material: clean film or cloth. In this case, you should not close the car doors, since the interior will be ventilated through them. By the way, it is much better if the work of replacing the fuel filter is carried out outdoors.
Step-by-step instructions for replacing the fuel filter on a Toyota Corolla body 120
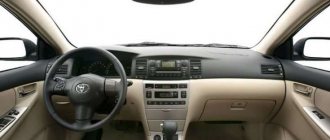
- The Toyota Corolla 120 fuel filter is accessed by removing the rear passenger seat on the left side of the cabin.
- Next, remove the underbody upholstery located under the seat. To do this, use a “10” key to unscrew the two fasteners (red arrows). Use a screwdriver to remove the piston (yellow arrow).
- We lift the carpet onto the seats. We secure it with the driver's and passenger's seat belts using the red protrusions. Under the mat we see a layer of foam that needs to be removed.
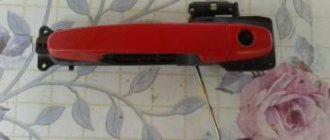
- Now you will see the fuel pump cover, which you can carefully pry up and remove using a knife or flat screwdriver (it sits on the black sealant).
- Before proceeding directly with the replacement, you should thoroughly vacuum the opened cavity, first under the rug, and then above the gas tank.
- Before disconnecting the pipes, we substitute a previously stored canister to drain the remaining gasoline. Next, remove the fuel hoses. The small pipe or return hose can be removed very easily; just pull the yellow bracket to the side with a thin screwdriver. Disconnecting the second hose will also not take much effort, however, if something happens, you can also help yourself with a screwdriver.
- Before directly dismantling the fuel filter, when the pipes are pulled out, you need to start the car and wait two to three minutes until it stalls. As soon as the engine turns off, you can crank the starter a few more times. This process will remove all fuel from the system and also relieve pressure.
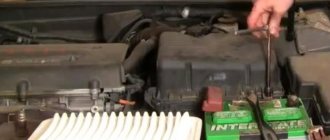
- Next, you need to disconnect the battery terminals.
- Next, you should unscrew the eight screws with a Phillips screwdriver or an “8” key and remove the pump unit. Rags will come in handy here, as gasoline will leak out from all the cracks.
- To get to the fine filter and replace consumable components, we begin to disassemble the fuel pump.
- Remove the latch to disconnect the float.
- Next, press the plastic clips in a circle to disconnect the block body at the top.
- Apply slight force to pull the fuel pump out of the rubber seal.
- We insert the fuel pump into the new fine filter housing.
- Then you should rinse and blow out the intake mesh with compressed air and reassemble everything in the reverse order.
If you make the replacement according to all the rules and do not forget the rubber sealing rings, then the engine will start without problems and will work better than before.
Another modification of the Toyota Corolla model with a 150 body produced in 2008 has a large plastic ring with a rubber seal instead of a metal gas tank cap. To remove the block, the ring must be turned counterclockwise to loosen the seal. You can unscrew the ring lid using wooden choppers, which should be placed on the ribs of the lid and carefully hit them with a hammer. During further disassembly, some parts may differ from the design of a Toyota Corolla with a 120 body until 2008. For example, the intake mesh and fine filter look a little different, otherwise everything is almost the same. In general, the replacement process is identical, so you can use the above instructions for a Toyota Corolla with a 120 body.
Replacing the main filter - follow the instructions
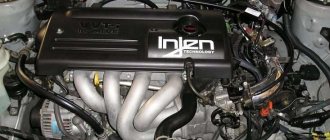
Replacing the fuel filter in a Toyota Corolla is a completely feasible task for every driver. Automotive stores generally only have an additional filter, which is located under the hood, so worry about ordering the main device in advance. There is no need to save money on your purchase and it is better to purchase only the original. It will serve you much longer than the Chinese fakes that are now saturated in the auto parts market.
Before replacing, you will need not only the part itself, but also additional tools: a pair of screwdrivers and sealant, as well as open-end wrenches to replace the second filter. The main fuel filter in a Toyota Corolla is located under the rear seat in the fuel tank. This type of filter is commonly called submersible. To replace it, you need to lift the rear seat, or even unscrew it for a while. Under the seat you will see a metal cover, the so-called hatch. Using a screwdriver, carefully pry it out, as it is attached to the sealant. When doing this, be careful not to damage the electrical wires.
Opening the lid, you will see a fuel pipe and a chip with wires. First of all, turn off the power supply. The next step is to disconnect the fuel pipe. There is an arrow on its plastic lock that indicates the direction in which you need to turn it - do this carefully so as not to break it. After disconnecting, gasoline may spill out, so use a cloth or bottle. To prevent gasoline from spilling, before starting all work, you must remove the pump fuse from the mounting block.
The engine must be turned on. You need to wait until it stalls. These actions will cause all the fuel in the tube to burn. Before removing the pump and filter, pay attention to its correct location in the tank - you will also need to put the new part back in the same way. Unscrew and remove the clamping ring, then carefully remove the pump with the filter - it is important not to damage or move the level float with the fuel grid.
The next step is to remove the part itself. To do this, turn the entire body over and carefully move a few rivets, then remove the cover. There will be a rubber gasket under the cover, which also needs to be removed. Then remove the metal corkscrew ring that holds the fuel grid in place. If possible, replace it with a new one or, at a minimum, rinse it well in water and let it dry.
Then disconnect the pressure regulator - this will be quite difficult, since it is located in the sealing rubber. After this, disconnect the fuel pump and o-rings. Now take a new filter and assemble everything in reverse order. Before assembly, you can lubricate all rubber sealing joints with oil, this will greatly simplify the assembly process. Clean the hatch cover from the old sealant and apply a new one. You will need to hold it under a load for 10-15 minutes for the sealant to harden.