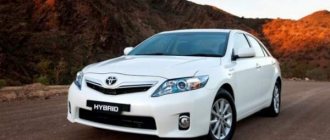
All Camry 40 lamps differ from each other and their analogues in basic parameters, including power, energy consumption, and brightness. For low beam, halogen or xenon elements are installed at the factory. Some craftsmen install LEDs themselves. Each type of light bulb has its own advantages and disadvantages.
Basic designations
The light elements of the Toyota Camry car are conventionally divided into external and internal sources. For ease of perception, information about them is presented in table form.
| Outdoor Lighting | Interior lighting | ||
| HB3 | Driving lights | C5W | Central and general lighting |
| H11 (D4S) | Low beam, fog lights (xenon) | W5W | Light for the driver and passengers, illumination of the sun visor, trunk lamps, door openings |
| W16W | Reversing lights | T5 | Glove compartment lighting |
| W21W (5W) W5W | Rear - fog lights, stops, dimensions | T5 with green and simple filter | Illumination of the cigarette lighter and automatic transmission selector travel |
| WY21W | Turn signals | ||
| WY5W | Body direction indicators | ||
The side direction indicators are replaced only as an assembly; the letter Y means a yellow glow.
Low beam lamps used on Camry V40
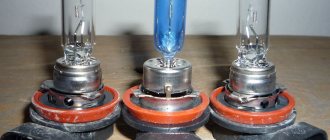
The Camry V40 comes standard with halogens. They are cheaper than analogues and do not require an ignition unit. This type of lamp has been produced for several decades; there is no shortage of them on the market, since all leading manufacturers are engaged in production. The elements provide a soft luminous flux, providing normal illumination of the road.
In luxury trim levels, xenon low beam lamps are installed on the car. They provide a brighter beam compared to halogen optics (up to 3200 lm versus 1550). Xenon provides a glow that does not irritate human eyes, lasts several times longer, and consumes less energy.
Many Camry 40 owners install LEDs.
Properly installed elements withstand vibration and shaking better, consume energy economically, respond faster when turned on, and do not heat up.
Original spare parts
Low beam lamps for Camry V30 and 40 were produced from 2003 to 2006 with an H7 socket. Until 2011, the car was equipped with V40 models with an H11 or D4S base (for halogen and xenon bulbs). Similar elements are now being produced that have the same basis and an extended service life.
Original xenon lamps are distinguished from low-quality fakes by several criteria:
- the base tip is not sawed off, but chipped;
- glass without defects, with a mark in the form of extruded squares;
- there are only 2 slots in the plastic part;
- The packaging contains a laser-engraved corporate logo;
- strictly perpendicular position of the flask in relation to the base;
- no traces of soldering on the electrodes;
- inside there is a ball with yellowish spots;
- product parameters are applied to the base;
- the presence of a stepped indentation on the ring.
Analogues from the market
After the advent of LEDs, many motorists began to install them on their head optics themselves. These bulbs increase the brightness of the light compared to xenon and halogen bulbs.
Among market analogues, baseless lighting elements are noted. Their popularity is due to their long service life, structural reliability, and color.
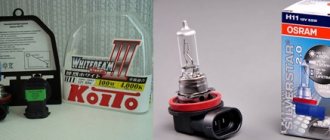
To choose high-quality halogen bulbs for Camry 40, pay attention to a number of points:
- Reputation of manufacturers and provision of guarantees.
- Brightness setting (at least 30%).
- Service life specified by the manufacturer.
- Power (more than 55 W is not recommended).
- The presence of visible defects and damage.
What type of lamp to choose
Each Toyota Camry car owner chooses the types of light elements at his own discretion. The main thing is to know the correct labeling, since even the most similar analogues will not work.
In addition to the advantages of all types of lamps, their disadvantages should be taken into account:
- Compared to xenon and LEDs, halogen lamps are not as bright and have low efficiency. The optics are not reliable and have a long service life. The filament may break during vibration and shaking.
- Among the disadvantages of xenon is its high price compared to halogens. Over time, the brightness of the stream dims, and incorrect adjustment of the gas-discharge beam can cause “blinding” of oncoming vehicles.
- LEDs are the most expensive optics. Creating a directed workflow is a common problem.
The best companies
The market offers light bulbs of all types from popular manufacturers and budget analogues made in China. They differ from each other in design, price, and characteristics. Information about the best products is presented in the table.
| Category | Brand and brand | Description |
| Halogens | MTF Light Vanadium 5000K (H11) | The milky white glow emphasizes the overall style of the car, temperature - 5000 K |
| Osram Breaker Night | A modern coating of the flask is used, which provides additional protection from vibration and mechanical stress. Includes 2 pcs. Temperature - 3312 K | |
| Philips Vision White | The effect of a bright white light beam at 3700 K | |
| Xenon | Osram Xenarc D4S | White-yellow glow, European quality. Service period - 3.5-4.0 thousand hours, brightness - 3200 lm |
| Philips Extreme Gen2 | Increased flux (4800 K), no yellow tint. Power - 35 W, voltage - 42 V | |
| Neolux Standard | The optimal combination of quality and price. Marking - D4S (85V, 35 W) | |
| LEDs | Philips Luxeon Z ES | Branded optics of 6 diodes in 1 part. At a power of 20 W, the working beam produces 2200 lm. A flexible radiator acts as a cooling system |
| Honglitronic | One element of the 6HL series produces a beam of 2000 lumens, forming a cut-off line without the need for adjustment. At the same time, the power is only 18 W (a halogen analogue with the same parameters consumes 55 W) | |
| Neyuning A1 | Universal size, no massive radiator, flow - 1800 lm. Service life - up to 30,000 hours |
Headlights Toyota Camry
5 out of 5 (5 ratings)
* Calculated based on Yandex Directory reviews
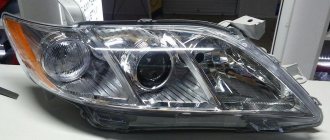
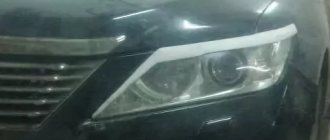
The headlights on Toyota Camry differ depending on the year of manufacture. The front left and right headlights are different for all models. Toyota Camry headlights are distinguished by the installed lamps. If there is one lamp for high and low beam, it is bi-halogen. If in different lamps, then the high and low ones go separately. If xenon is installed in the headlights, then by analogy, it is either bi-xenon or just xenon. You can buy any headlights, but install only those that are suitable.
You can buy and replace regular Toyota Camry headlights with xenon ones. These headlights are distinguished by the presence of a lens. You can install lenses in regular headlights at our stations. Adaptive headlights are not available on all models. If the adaptive headlight is broken, you can try replacing the gyroscope that controls the rotation of the headlight. If it is installed in the headlight unit, then only purchase and replace the headlight assembly. LED headlights are usually distinguished by the presence of built-in running lights and installed diodes, instead of conventional lamps or xenon.
Cost of headlights:
| Options | Price |
| Front left headlight | from 2800 rub. |
| Front right headlight | from 2800 rub. |
| Headlights, xenon with lens | from 7000 rub. |
| Headlights, tuning | from 9000 rub. |
Check the cost and availability of headlights:
Phone: 8 (812) 409-46-75
Write to us on Whatsapp
The cost of the headlight depends on its condition (used, degree of wear, glass cracks, etc.), the manufacturer, as well as availability in our warehouse or delivery time to our store.
We do not sell headlight glass separately. We do local headlight repairs if they can be restored. Before purchasing headlights, check whether the headlights come complete with a corrector or whether the headlight adjuster comes separately. Some headlights are sold without lamps. This can also be clarified with the manager before purchasing headlights.
Which headlights are best to buy:
1. Original headlights 2. Valeo (France) 3. Depo (Taiwan) 3. TYC (Taiwan) 4. Polcar (Poland)
For engine
- 2.0 AT (148 hp)
- 2.5 AT (181 hp)
- 3.5 AT (249 hp)
- 3.5 AT (277 hp)
- 2.5 AT Overdrive (179 hp)
- 2.5 MT Overdrive (179 hp)
- 3.5 Dual VVT-i AT (277 hp)
- 2.4 VVT-i AT (169 hp)
- 2.4 VVT-i MT (169 hp)
- 2.4 MT (Japan) (157 hp)
- 2.4 VVT-i AT (152 hp)
- 2.4 VVT-i MT (152 hp)
- 2.4 AT 4WD (Japan) (157 hp)
- 2.4 AT (Japan) (157 hp)
- 3.0 AT (Japan) (210 hp)
- 3.0 AT (Japan) (192 hp)
- 3.3 AT Overdrive (US) (225 hp)
- 3.0 V6 AT (186 hp)
- 2.2 AT Overdrive (125 hp)
- 3.0 AT Overdrive (188 hp)
- 2.4 AT Overdrive 4WD (158 hp)
- 2.4 VVT-i AT (167 hp)
- 2.4 VVT-i MT (167 hp)
- 2.4 Hybrid CVT (147 hp)
- 2.4 AT 4WD (167 hp)
- 2.2 MT Overdrive (125 hp)
- 3.0 AT Overdrive (185 hp)
- 2.2 AT Overdrive (130 hp)
- 2.2 MT Overdrive (130 hp)
- 1.8 AT (105 hp)
- 1.8 MT (105 hp)
- 2.0 AT (140 hp)
- 2.0 MT (140 hp)
- 2.0 MT Overdrive 4WD (115 hp)
- 2.0 AT Overdrive (115 hp)
- 2.0 MT (120 hp)
- 2.0 AT Overdrive 4WD (115 hp)
- 2.5 AT Overdrive (153 hp)
- 2.5 MT Overdrive (153 hp)
- 2.0 TD MT (82 hp)
- 2.0 MT 4WD (120 hp)
- 2.0 TD AT (82 hp)
- 1.8 AT (85 hp)
- 1.8 MT (85 hp)
- 2.0 AT (120 hp)
- 2.0 AT 4WD (120 hp)
- 2.0 MT Overdrive (115 hp)
- 2.5 AT Overdrive (156 hp)
- 2.5 MT Overdrive (156 hp)
- 2.0 AT (95 hp)
- 2.0 AT (92 hp)
- 2.0 AT (150 hp)
- 1.8 TD AT (73 hp)
- 2.0 MT (95 hp)
- 2.0 DT AT (79 hp)
- 2.0 MT (92 hp)
- 2.4 MT Overdrive (154 hp)
- 3.0 AT Overdrive (190 hp)
- 3.3 AT Overdrive (210 hp)
- 2.2 AT Overdrive (136 hp)
- 2.2 MT Overdrive (136 hp)
- 3.0 AT Overdrive (194 hp)
- 3.0 MT Overdrive (194 hp)
- 2.2 AT Overdrive (133 hp)
- 2.2 MT Overdrive (133 hp)
- 1.8 AT (125 hp)
- 1.8 MT (125 hp)
- 2.0 AT 4WD (135 hp)
- 2.0 MT 4WD (135 hp)
- 2.2 AT 4WD (88 hp)
- 2.2 TD AT (91 hp)
- 2.2 TD MT (91 hp)
- 2.2 TD AT 4WD (88 hp)
- 1.8 AT (115 hp)
- 1.8 MT (115 hp)
- 2.0 AT (165 hp)
- 2.0 TD AT (91 hp)
- 2.0 V6 AT (140 hp)
- 2.0 MT (165 hp)
- 2.0 TD MT (91 hp)
- 2.0 V6 MT (140 hp)
- 2.5 AT (175 hp)
- 2.0 AT 4WS (140 hp)
- 2.0 MT 4WS (140 hp)
- 2.0 MT (121 hp)
- 1.8 TD MT (73 hp)
- 1.8 MT (100 hp)
- 2.5 AT (178 hp)
- 2.5 Hybrid CVT (178 hp)
- 3.5 AT (268 hp)
Modifications
- Toyota Camry V30 restyling
- Toyota Camry XV70
- Toyota Camry V10
- Toyota Camry V30
- Toyota Camry XV10 restyling
- Toyota Camry V40
- Toyota Camry V40 restyling
- Toyota Camry XV20 restyling
- Toyota Camry XV30 restyling
- Toyota Camry V10 restyling
- Toyota Camry XV10
- Toyota Camry XV40 restyling
- Toyota Camry XV50 restyling
- Toyota Camry V20
- Toyota Camry XV20
- Toyota Camry XV30
- Toyota Camry XV40
- Toyota Camry XV50
Toyota Camry V40 lamp replacement procedure
You can change low beam lamps yourself, even without the relevant experience.
To reduce the likelihood of failure of xenon elements, experts recommend the following:
- regularly check the electrical contacts of the vehicle network, avoiding loosening at the fixation points;
- monitor the state of the moisture protection of the ignition unit;
- To avoid burnout of the gas mixture, do not turn on or turn on the headlights too often;
- do not “wink” with flashlights;
- turn on xenon optics no earlier than a few minutes after starting the engine.
Tools and consumables
To replace low beam elements on a Camry B40, you do not need a tool. If you plan to install lamps on side lights at the same time, you will need a small screwdriver. New lamps and gloves are prepared as consumables. It is not recommended to touch the glass with bare hands, as sweat secretions will shorten the life of the part.
First wipe the light bulb with a clean rag soaked in alcohol (do not use solvent). If elements of different types are removed and installed, it is better to carry out the operation in pairs. Otherwise, there will be a noticeable difference in the light beam and brightness between the right and left headlights.
Replacement instructions
The process consists of several simple steps:
- Make sure that the markings on the lamp correspond to the desired indicator.
- Raise the hood of the car and disconnect the negative terminal of the battery.
- Disconnect the electrical connector.
- Dismantle the old element by turning it counterclockwise by 45°.
- Insert the new electrical device into the socket, turn it a quarter turn to the right until a characteristic click is heard.
- Check the reliability of fixation.
- The electrical connector is put in place, the battery is connected, and the functionality of the optics is checked.
After replacing lamps, they may need to be adjusted. If the automatic corrector does not work or does not cope with its duties, the adjustment is carried out manually. The car is placed on a flat area in front of a wall or other flat obstacle.
Equalize the tire pressure (2.0-2.3 bar), fill a full tank of fuel, set the corrector to position 0.
The adjustment procedure is as follows:
- Measure the operating range of the autocorrector.
- Determine a setting level that is 2 times the maximum.
- Under the plugs on the back side of the light elements there are adjusting screws.
- Apply markings to a wall or other suitable vertical surface.
- The car is installed at a distance of 5 m, the light flux is directed strictly to the center.
- Turn on the low beam, draw a vertical line from each beam.
- Apply 2 horizontal lines (along the height of the optics and 5 cm below).
Each headlight is adjusted separately, covering the element one by one with an opaque material. Both lights should shine identically. The result is considered good if the beam of light from each element is within the lower horizontal line, without going beyond the boundaries of the central strip from the adjacent headlight. To raise and lower the lamp, turn the screws to the right or left, respectively.
Replacing standard xenon lamps and Keramik Pro test
Hello everyone!
Happy Traders' Day! I'm one of them)
It’s been almost a year since my standard xenon lamps began to die, blinked and even turned off, turning them on/off again was the cure. But it was really annoying. Even once the police stopped with the comments “why are you blinking?” On the highway several times they let us through very compliantly))).
I didn’t really bother with the question of choice; MTF was previously recommended in the auto store. And on the way from the EKB near Tyumen, I got into a conversation with another owner of the Kamryuha; he was pleased with the replacement of the standard lamps with MTF ones. The replacement process is not complicated, but you still need the Internet to get started). Everything is visible in the photo; to dismantle the lamp, you need to turn the outer cover about 1/6 part counterclockwise, then also counterclockwise the ignition block and remove the clamps of the lamp itself, while moving the clamp ears (one at a time) to the center and down. Next, remove the lamp from the grooves and carefully (without touching the glass of the lamp itself) insert a new one in its place, then do everything in reverse order.
Compared to the old lamps, the luminous flux has slightly changed to white and is very close to the original one. And in a direct comparison of the old and new lamp, the light of the new one became much whiter; this was visible in daylight, when there was an old one on one side and a new one on the other. So, the luminous flux of the old lamp went slightly pink, but on the new one it was perfectly white and significantly different from the DRL with a blue tint.
Yesterday evening I tested the new lamps at night, while it was raining heavily with almost hurricane-force winds, I am very pleased with the light, let's see how long it lasts. By the way, the body remained clean, more on that later...
Once again, at the car wash, they persuaded me to try a new product from “Keramik Pro”, they say that when processing the body in the future, there will be no need to wash it especially, this will save a lot of money, etc. and so on. In the rain, the car will remain clean, the dirt will be washed off by the rain, and if the dirt is just superficial or the birds do something nasty, then after an express wash with a sponge wipe (without wiping dry) at a speed of 70 km/h, all the water and dirt will come off. Yes, it will look as if the body has been wiped dry and doused with wax...
I did it, first they staged a demonstration on the hood), and then the entire body was processed.
The check showed that everything is so! The reason for visiting an unplanned express wash (2 weeks after treatment) was the birds. After the process described above, there were two small dirty spots on the whole car (where the washer missed it with a sponge) and several dried, cloudy drops on the rear bumper, the whole body was absolutely clean. The last photo shows the car after the last express wash; in short, I definitely recommend it if you don’t mind spending money on experiments). By the way, after this there were two decent rains (the car was in use) and at the moment there is no need to wash the body.
Thanks to all!
Continue to operate, mileage 105t, normal flight
