Which lamp to choose
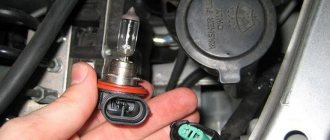
So, as I wrote above, we need an H11 12v/55w . Today, a huge number of them are offered, from the cheapest Chinese analogues to expensive Japanese ones, the price of which reaches 4 thousand rubles per pair.
- PHILIPS H11-12-55 LLECO 12362LLECOC1 from 500 RUR extended service life
- BOSCH H11-12-55 Pure Light 1987302084 from 450 RUR
- OSRAM H11-12-55 64211 from 500 RUR
- NARVA H11-12-55 LONG LIFE 48078LL from 500 rubles (Philips subsidiary, extended lamp life)
- KOITO H11-12-55 0110K from 500 RUR
- General Electric H11-12-55 53110
- AYWIparts H11-12-55 AW1910006 from 300 RUR
- MTF H11-12-55 HS1211 from 300 RUR
These are standard lamps or lamps with an extended service life. You can also install brighter bulbs in the PTF, which, with the same power, will illuminate the road much better.
- OSRAM H11-12-55 +110% NIGHT BREAKER UNLIMITED from 1500 RUR set.
- DiaLUCH H11-12-55 +90% PGJ19-2 Megalight Ultra PR from 700 RUR set.
- AVS H11-12-55 +110% 3700K Sirius Night Way A78945S from 650 RUR set.
The advantage of such lamps is increased brightness compared to standard lamps, but the minus is the price and service life, which is shorter than that of standard lamps.
In addition to halogen lamps in the PTF, the Camry V50 can also be equipped with bright LED lamps. H11 LED bulbs on a Toyota Camry will illuminate the road much better, but can blind oncoming drivers. Correct PTF adjustment is required.
- Optima LED i-ZOOM H11 5100K from 2800 RUR set.
- Philips X-treme Ultinon H11 (H8, H16) - 12794UNIX2 from 6800 rub.
- OSRAM LEDriving FOG LAMP H11 (H8, H16) from RUB 4,600.
These are not all LED lamps offered on the market, but only the most popular ones. Their price is noticeably higher than that of halogen lamps, but their service life is longer. Famous manufacturers provide a one-year warranty on such lamps.
Instructions for replacing PTF lamps on a Camry v50
You can replace the lamp in two ways: by removing the lower bumper protection, or through the fender liner. Both methods are not particularly labor-intensive, but require the removal of some plastic parts; otherwise the lamp cannot be replaced.
If you change through the fender liner, you will need to pull out several clips securing the bumper, then bend the fender liner and reach the lamp with your hand. Disconnect the block, turn the lamp counterclockwise half a turn and remove it from the PTF. The installation procedure occurs in reverse order.
Another method is to remove part of the lower bumper protection. This method seems easier to me - unscrew the 3 bolts securing the protection, it is carefully removed.
Next, we reach the lamp with our hand, just as in the first case, we remove the block from the lamp.
Turn the lamp half a turn and remove it from the PTF. We carry out the installation in a similar way.
When installing a new lamp, you need to be careful and not touch the bulb with your hands. If you touch the bulb with your hands, it must be wiped with an alcohol-containing cloth, otherwise the lamp will not last long.
After replacing the lamps in the PTF, no adjustment is required, since only the lamps were replaced, and the adjustment remained untouched. When installing LED lamps, I advise you to make adjustments.
Similar articles:
Share “Replacing PTF lamps Toyota Camry V50”
Sequencing
To directly replace a Toyota Camry fog lamp, you need to perform several steps:
- Open the luggage compartment of the Toyota Camry 50. It is best to securely fix the trunk flap in the upper position so that in the future it does not interfere with manipulations with the fog lights.
- Remove the clamps to make further actions easier. Each of them must be dismantled. If you forget even one, the replacement procedure will be greatly complicated in the future.
- Remove the panel cover where the fog lights are located. Partial or complete dismantling is allowed.
- Turn the lamp included in the fog lamp and then remove it.
After completing the steps necessary for replacement, installation of a working Toyota Camry 50 lamp is carried out in the reverse order. The lamp is mounted into the housing by turning it. This way it is secured. You need to connect the connector. The protection must be reinstalled after checking the mounted part.
Types of lamps
The standard is halogen designs, but many drivers may not be satisfied with them, so they have to spend time and effort searching for more progressive options - LED and xenon designs.
Halogen lamps: features
They are traditionally used in the Camry V50 and other cars, creating increased lighting efficiency in fog without dazzling oncoming drivers. A significant disadvantage of this type of design is the short service life, and replacing a product of this type is difficult. Users have observed the headlight overheating, resulting in noticeable cracking.
LED elements and their choice
This type of fog light is an acceptable option for most car enthusiasts due to its wide color range, brightness and low energy consumption.
The element heats up quickly, making it possible to eliminate melting in the headlights. If we consider the weaknesses, we can note the high price and the importance of detailed selection.
Gas discharge products
Such a lamp for a fog light for Toyota Camry 40 is an effective option because it allows you to get a high-quality and interesting result.
The lifespan of this product can be up to three years, but this is slightly overshadowed by the need to use strict rules that cannot be violated.
The complexity of installation and considerable cost are significant disadvantages of these designs.
Replacing the headlight: features
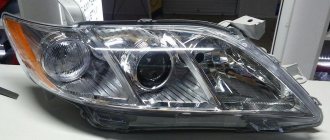
The need to change a light bulb in a car can be caused by several factors: wear and tear of the old element, the need to purchase and replace it with a new product. However, an experienced driver should know how to install a new lamp yourself:
- We look under the bumper, located inside, slightly lower than the body of the element in question. In this area you need to find fasteners for the mudguard.
- Unscrew the 10mm screw using a Phillips-type screwdriver or socket. There are cars that no longer have retaining elements, but there are cars with plastic rivets.
- We approach the body of the device - to the connectors of its lamps. It is necessary to press the latch and disconnect the power. Then the lamp is turned against the emergency direction and removed from the headlight.
- The glass of a new product should not be touched, as this can damage the lamp, as there is a possibility of rapid burnout. Cleaning can be done with an alcohol wipe.
- Next comes direct replacement, when a new lamp is installed in the headlight structure and fixed by turning.
- Then a full check of the operation is carried out, after which it is necessary to urgently replace the splash guard and ensure that the screw is tightened. This will allow a complex of work to be carried out within a short time interval.
Replacing the Fog Light Lamp Toyota Camry V50
Replacing fog lights for Toyota Camry
Fog lights are an additional element as part of a modern car type. If this is the case, this fact provides the driver with a lot of comfort and convenience, correcting problems with basic type optics and illuminating the curb in the dark. The effectiveness of PTF depends on several factors, initially determined by the type of element.
Types of lamps
Halogen designs are standard, but many drivers won't satisfy them, so you'll have to spend time and effort looking for more advanced options - LED and Xenon.
Halogen lamps: features
They are commonly used in the Camry V50 and other vehicles, creating increased illumination efficiency in fog that prevents even blind drivers from swerving. The main disadvantage of this type of design is that there are few resources and it is difficult to change a product of this type. Users overheat the headlights, causing noticeable cracks.
LED elements and their choice
Myth Mist Against Mist is a viable option for most car owners due to its wide color gamut, brightness and low power consumption.
The element heats up quickly, making it possible to prevent the headlights from melting. Considering the disadvantages, it is worth mentioning the higher cost and the importance of detailed selection.
Gas Leak Products
Replacing xenon subtitles Toyota Camry V50 / Toyota Camry V50 / English / Rus'
My goal is 100,000 subscribers, which will be easy, translate, if not difficult, Subscribe.
Replacement Camry fog lights.
Replace fog
LED lamps,
Toyota Camry
50 body.
It will be useful: Changing the oil in a Renault Duster engine video
This fog light
for Toyota Camry 40 is an effective option as it delivers quality and impressive results.
The lifespan of this product is 3 years, but it is a little marred by the need for serious non-violent rules.
The complexity of installation and high cost are the main disadvantages of these designs.
Replacing headlights: Features
The need to replace the light bulb in your car that you like the most is due to several factors: the demolition of the old item, the need to purchase and replace it with a new product. However, the most experienced driver should know how to install the last lamp without assistance:
- Enter under the bumper, located slightly lower than the body of the corresponding element. Here you need to find a mount for the mudguard.
- Unscrew the 10mm screw using a screwdriver or Phillips head. There are machines that not only do not have fasteners, but also machines with plastic rivets.
- We approach the device - the connectors of its lamps. You need to press the latch and turn off the power. The lamp then turns on in an emergency and comes out of the headlight.
- The glass of the new product should not be touched as it may damage the lamp and may burn quickly. Cleaning can be done with an alcohol wipe.
- After this, a specific change occurs when the last lamp is installed in the headlight structure and is fixed by rotation.
- Then a full check of the operation is carried out, after which it is necessary to urgently install the syringe and make sure that the screw is tightened. This allows you to complete a set of tasks while maintaining a small amount of time.
Conclusion
Thus, the change is made quite quickly, but requires some effort unfamiliar to the motorist. If you know that self-fulfilling work is very difficult and is not suitable for your business, you should contact a specialist.
Necessary tools and preliminary preparation
First, you should check the functionality and settings of the above-described electrical corrector. On new cars, as a rule, there are no problems with it, but in cars manufactured before 2008, such a breakdown is not uncommon. If you find that the corrector still does not work, all further actions are meaningless until you replace it.
If you are convinced that the corrector is in good condition, you can proceed to the next step - searching for a suitable site to set up. It must meet several conditions.
- The area must be level - all four wheels of the car must be at the same level.
- The length of the area from the location of the headlights to the wall must be at least 10 meters.
- The wall on which the headlights will shine must also be perfectly flat.
By adjusting the headlights we also mean checking the tail lights and fog lights. As a rule, their correct operation depends on correct placement. Their level above the ground should be within 25 centimeters. Moreover, they should not act as the main optics of the car. To do this, they are fixed with a slight indentation from the headlights. If standard headlights are installed, then all these conditions must already be met.
The car is placed with its headlights against the wall at a distance of seven meters. Turn on the light and mark the centers of the light spot on the wall. You need to step back 10 cm from them and draw a horizontal line. After this, you need to drive the Toyota another 7 meters and turn on the headlights again. If the setting is correct, then the upper boundary of the light beam should pass exactly along the previously drawn strip.
Installation of LED lamps and PTF modules on Toyota Camry / Toyota Camry V55
a Toyota
Camry
contacted our car service center at Melnikova 5 in order to carry out a comprehensive tuning of car lights.
It was necessary to replace the standard xenon lamps with some bright and white ones, and we will also replace the standard halogen PTF modules with new LED ones with a similar white glow. Additionally, we will install LED lamps in the high beams and rear turn signals.
The initial cut-off line between PTF, low beam and high beam.
The light of the headlights and the appearance of the car at the time of contact.
After such a large-scale replacement of standard lamps on Toyota Camry, we will not only strengthen the head and fog lighting
, but we will also create a certain style for the car, where all the lamps glow white, which, of course, looks much more beautiful than the typical yellow glow of standard lamps.
The materials used in the work, new and old PTF modules and the car in work.
For the low beam we will install the brightest (we conducted tests)
Osram Cool Blue Boost D4 S
xenon lamps , and for the high beam we will install our branded
XS- Light LED H7 5000 K
LEDs .
As for the foglights, we will replace the standard modules with MTF- Light LED 5000 K LED modules (for Toyota/ Lexus)
, and in the rear turn lights we will install
Philips LED CANbus WY21 W
LED lamps with built-in blende.
Turn signal lights before replacing bulbs and after installing LEDs.
Replacing Toyota Camry lamps, in principle, does not take much time, but given that we need to change several types of lamps, it took about an hour to work specifically on the lamps. There is no need to dismantle the headlights or bumper to replace the lamps
, the bulbs in the headlights are changed through the hood, but when installing Philips LED CANbus WY21W LEDs in the rear turn signals, we removed the tail lights, otherwise there is no way.
The final cut-off line for PTF, low beam and high beam.
Regarding the replacement of standard PTF modules on a Toyota Camry, similarly, there is no need to completely remove the bumper
– the work is carried out through the fender liners, in terms of time it took us another hour, in total the entire work in general took two hours, and the result turned out to be very worthy, however, we had no doubt about it.
The final light of the headlights and the appearance of the car after replacing the lamps and PTF modules.
We look at the cut-off line of the new MTF-Light LED 5000K OEM foglights (for Toyota/Lexus) - of course, there is no point in comparing with the standard halogen version, the luminous flux has become denser and brighter. The same can be said about the low/high beam, which with the new lamps has gained in brightness and lost the yellow halo of glow
in the distant light. The rear turn signals also began to shine brighter, and the LEDs themselves last for several years, so there is a double meaning here: brightness and convenience, since they do not need to be changed often.
It will be useful: Replacing the chain of Peugeot 308 1.6 ep6
Professional vehicle retrofitting
In our car service center, we offer a wide range of services for the installation of additional equipment for cars: car lighting, car alarms, car audio, tinting, as well as workshop and maintenance.
We employ only professionals - our technicians are able to quickly and efficiently implement any client’s idea in terms of car detailing.
Call to make an appointment
+7(495) 432-33-73
Necessary tools and preliminary preparation
First, you should check the functionality and settings of the above-described electrical corrector. On new cars, as a rule, there are no problems with it, but in cars manufactured before 2008, such a breakdown is not uncommon. If you find that the corrector still does not work, all further actions are meaningless until you replace it.
If you are convinced that the corrector is in good condition, you can proceed to the next step - searching for a suitable site to set up. It must meet several conditions.
- The area must be level - all four wheels of the car must be at the same level.
- The length of the area from the location of the headlights to the wall must be at least 10 meters.
- The wall on which the headlights will shine must also be perfectly flat.
By adjusting the headlights we also mean checking the tail lights and fog lights. As a rule, their correct operation depends on correct placement. Their level above the ground should be within 25 centimeters. Moreover, they should not act as the main optics of the car.
The car is placed with its headlights against the wall at a distance of seven meters. Turn on the light and mark the centers of the light spot on the wall. You need to step back 10 cm from them and draw a horizontal line. After this, you need to drive the Toyota another 7 meters and turn on the headlights again. If the setting is correct, then the upper boundary of the light beam should pass exactly along the previously drawn strip.
Replacing the Fog Light Lamp Toyota Camry V50
Osram h11 lamps are installed at the Toyota Camry V50 factory in PTF. Their service life primarily depends on their use. If the owner drives a car with PTFs turned on frequently, its service life is a maximum of one or two years. When the PTF is turned on for its intended purpose, the lamp service life is 4-5 years. What to choose for Camry V50 fog lights and how to replace them, read below.
What we need, as I wrote above, we need a H11 12V / 55W . Today they are offered in unlimited quantities, from the cheapest Chinese analogues to expensive Japanese ones, the cost of which reaches up to 4 thousand rubles per pair.
These are standard lamps or longer life. In PTF it is possible to install more multi-colored light bulbs, which, with the same power, illuminate the road much better.
- OSRAM H11-12-55 110% NIGHT SWITCH SAFE from 1500 rub.
- DiaLUCH H11-12-55 90% PGJ19-2 Megalight Ultra PR from 700 RUR
- AVS H11-12-55 110% 3700K Sirius Night Way A78945S from 650 rub.
The advantage of such lamps is increased brightness compared to standard lamps, but the disadvantage is the cost and service life, which are shorter than that of standard lamps.
In addition to PTF halogen lamps, the Camry V50 also offers colorful LED lamps. The h11 LED bulbs on a Toyota Camry will illuminate the road much better, but there are options for dazzling oncoming drivers. Correct PTF configuration is required.
Safety instructions for Camry 50
When replacing any lamp on the Camry V50, it is unacceptable to touch the glass with bare hands. The traces of sweat left behind provoke rapid burnout of the part, especially halogen ones. If necessary, clean the lamp with a clean cloth soaked in alcohol (acetone cannot be used).
The difficulty of replacement depends on the type of light element. Since there is a possibility of parts being deformed from mechanical impact, it is better to entrust the work to an authorized dealer if you are not confident in your own abilities. Before starting the procedure, it is necessary to compare the power of the lamp being replaced, disconnect the engine and battery.
