Types of bumpers
The process of development and transformation of the bumper has always kept pace with the improvement of the Toyota body. The recognizable Camry V40 was born in 2006. Along with the voluminous, heavy body, it received a rounded, streamlined front bumper with a prominent false grille for the radiator. The top of the part began to emphasize the predatory slanted look of the headlights. At the bottom of the Toyota Camry V40 bumper there are niches for fog lights. According to many buyers, this type of car did not match the daring sports engine and expressive interior design.
In 2011, the Camry V50 was released. The exaggerated forms disappeared from her appearance. The car received a fast, sporty design. The front bumper of the Toyota Camry V50 model has increased in size, acquired style, and serves as a spoiler. The angular ribbed shapes of the front end serve more of a decorative function than a protective one.
The Toyota Camry V55 stands out. Her image began to resemble another popular Japanese - Lexus. The Toyota Camry V55 has a Lexus Style front bumper. This model has been produced since 2015. The optics remained from the Camry. The protection gives the appearance of a space alien, visually identifying the model among its competitors, emphasizing the rich equipment of the Lexus Style.
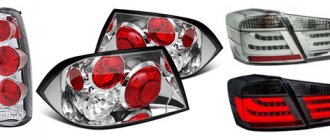
Manufacturers offer several design options for the front of this car. You can purchase chrome bumper grilles in a variety of shapes. The squeak of the Style design season – steel radiator grilles with a fine mesh. The perimeter of the mesh is decorated with a chrome plate. The car takes on a powerful, serious look.
The rear body kit has also undergone appropriate tuning. Now this is not a solid part for attaching a license plate. The rear bumper trim highlights the design of the car. The appearance of the parts completely matches the style of the car.
Restyling Camry: highlight the style of the car!
Also, most car enthusiasts upgrade the front bumper of their vehicle to give an expression of aggressiveness and elitism to the car. Restyling of the Toyota Camry bumper is the replacement of original components with analogues from other brands of the appropriate sizes and fastening systems. Most often, Camrys are tuned in the style of Lexus or Mercedes, installing a wide bumper with a low bottom on the car.
The cost of such an upgrade exceeds the price of replacing original components, but it allows you to make your car stand out, adding a touch of uniqueness. You can purchase tuned bumpers at the car market or workshop showrooms - official Toyota dealers do not do restyling.
Note! Installation of an analogue of the original, home-made bumper or from a studio with a modified design requires approval from the traffic police and adjustments to the vehicle’s registration certificate.
Features of the Camry bumper
The main function of these body parts is decoration. The Toyota Camry manufacturer positions the bumper as an independent expressive detail. They began to be produced from different types of plastics. To achieve the desired plastic effect, the manufacturer uses various additives. You can find a front bumper made of thermoplastic, duroplast, and polypropylene components. Polypropylene is very often used for the manufacture of external body parts. It is lightweight, allows you to make very bold shapes, can be restored with slight deformation, and holds the paintwork well.
What material the car bumper is made of can be recognized by the markings located on its inner surface.
The protective role of the front bumper fades into the background. Many car owners are forced to protect this work of art themselves. Toyota Camry V40 and 50 are equipped with additional removable rubber skirts. They protect the bottom from chipping. Rubber strips glued to the bottom of the bumper extend the life of the paintwork.
Starting from the sixth generation of Camry, the style of the products enhances the aerodynamic properties. Curved edges and stiffening ribs play the role of a spoiler, increasing the downforce of the car at speed.
Prices
| Service | Price | Promotion price* |
| Car diagnostics on a lift | for free | for free |
| Installing a standard muffler | from 800 rub. | from 500 rub. |
| Resonator installation | from 900 rub. | from 600 rub. |
| Installing a flame arrester | from 1,500 rub. | from 1,200 rub. |
| Replacing corrugations | from 1,800 rub. | from 1,500 rub. |
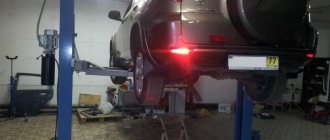
Algorithm for removing the front bumper
To remove the front bumper on Camry V40 and V50, carefully examine the design from the front from the outside. The instruction books show how to remove the bumper:
- The license plate must be removed first.
- Then decorative overlays. They are attached with clamps.
- Next comes the turn of the decorative trim for the fog lights.
- To remove the bumper, you need to unscrew the two bolts securing its upper part to the body, under the hood, then carefully remove the piston between them. This is how the top of the bumper comes unfastened.
- Next you need to remove the piston on the sides. They are located outside, on top of the sides, almost in the center of the wheel arch. Lightly press the surface of the bumper in these places and pry off the head of the piston with a screwdriver. To unfasten it, you need to turn its cap 90 degrees. Its legs will easily come out through the holes in the body and bumper.
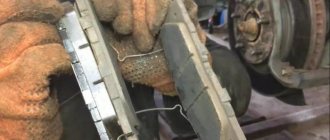
- Having removed the pistons, we move on to the lower mount. There are nine bolts. Two are located on the sides of the headlights on the edge. The rest go down. When unscrewing the bolts, use a universal ratchet wrench to avoid scratching the paintwork. You can spray VAD or Cayckle for better bolt removal.
- After unscrewing the bolts, there is no need to tear and pull the bumper. There are six more clamps to remove. They are located in the recesses near the headlights. Disconnect the fog lights, if equipped. The process is over.
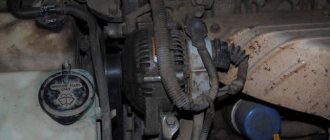
There is a lower shock absorber under the bumper. It is attached to the body with pistons. Below it is a bumper reinforcement. To remove it, you need to:
- Unscrew the six bolts and remove the five pistons.
- The upper shock absorber is located under the headlights and is secured with two bolts. This is the entire design of the Toyota Camry front bumper.
When making complex repairs with many parts yourself, use several auxiliary containers for each element. Don't rely on your memory.
Everything must be reassembled in the exact reverse order.
Which bumpers are similar to the front of a Toyota Camry - the original at the best prices!
Installing original components on a vehicle eliminates the need to make adjustments to the vehicle’s registration certificate and allows you to maintain a stable price on the market - if you need to sell the car, the price of a Camry with spare parts from a dealer will be higher than that of restyling models.
The front bumpers for different Camry models differ in size, which makes it necessary to select a model with the location of the mounts that matches your vehicle. In order to prevent a lot of troubles and speed up the delivery of the bumper when ordering remotely, it is recommended to select models by the article number or VIN code of the car.
| Brand/equipment | vendor code | price, rub. |
| CAMRY V55, CAMRY | 52119-33968 | 18 000 |
| CAMRY V40, CAMRY (R1, R2, R3, R4) | 52119-33968 | 17000 |
| CAMRY V55, CAMRY | 52119-0X911 | 14 000 |
| CAMRY, CAMRY V50, CAMRY (2.5L, 3.5L) | 52119-33987 | 13000 |
Removing the rear bumper
The rear bumper on a Toyota Camry also consists of several parts. It all starts in the trunk. It needs to be cleared of its contents. We remove the carpet and take out the spare wheel along with the mount. Then we remove the trunk lining and trim, disconnect the clamps and four pistons. We remove the bumper itself: there are two bolts under the wheel arches, there are eight nuts in the trunk. There are two bolts and pistons on the outside of the lower part. There are clamps inside.
Before repair work, stock up on additional caps. Many may become unusable due to wear and tear or break during removal.
Under the rear bumper there is a shock absorber on pistons and an amplifier. It is attached to the body with six bolts. You need to reassemble the part in the reverse order of disassembly.
Secrets of quality repairs
During disassembly work, it is recommended to sort all fasteners and place them in different containers so as not to get lost during the assembly of spare parts. Also, if you are changing bumpers for the first time, you need to make a photo report of the work to facilitate further assembly - when working with a complex design and many parts, it is reckless to rely on your memory.
Before repair work, it is advisable to purchase several additional pistons - this structural tool is very fragile and is easily lost.
It is important to know! To cover a small crack or scratch on the bumper, sometimes it is enough to install new trims or a wider grille. Small scratches can be made up with a special pencil or covered with paint after sanding yourself. Painting a used bumper will cost less than buying new parts.
Installing a new front bumper will significantly improve the appearance of your car, giving it a touch of your own style and individuality.
To remove the bumper on a Toyota Camry we need the following tool:
- small slotted screwdriver;
- screwdriver with a set of heads.
Do we dismantle and install the bumper correctly or how not to increase the cost of repairs?
The Toyota front bumper is held on special fasteners, so it can be easily disassembled with a pair of slotted screwdrivers. However, when dismantling the front end of a Toyota, it is important to be careful in your movements - the fastening system does not like sudden movements and can break off the fixing grooves.
To remove the bumper from a Camry you need to:
- Remove 7 pistons from the engine compartment and dismantle the plastic panel;
- Then, under the panel, we unscrew the fixing bolts and remove two more pistons holding the top of the bumper and 6 screws securing the bottom of the plastic;
- After removing the front mounts, you need to turn the car's wheels in each direction and remove the front screws, moving the wheel arch liners to the side;
- When the procedure is completed, the bumper remains in place only on the side latches. It is necessary to remove the spare part from both sides at the same time, so as not to break off the fixing latches - to do this, ask someone for help.
- Having separated the bumper from the car, the parking sensor connectors and wires should be disconnected, and the leading hoses should be carefully bent.
- After trying on the new bumper, it is installed. For installation, all of the above steps must be repeated strictly in reverse order.
Note! Some Camry models have a bumper reinforcement located under the lower shock absorber. To dismantle it, you need to remove 5 pistons and unscrew the fixing screws.
Do we dismantle and install the bumper correctly or how not to increase the cost of repairs?
The Toyota bumper is held on special fasteners, so it can be easily disassembled with a pair of slotted screwdrivers. But when dismantling the front end of a Toyota, it is important to be careful in your movements - the fastening system does not like sudden movements and can break off the fixing grooves.
To remove the bumper from a Camry you need:
- Remove 7 pistons from the engine compartment and dismantle the plastic panel;
- Then, under the panel, we unscrew the fixing bolts and remove two more pistons holding the top of the bumper and 6 screws securing the bottom of the plastic;
- After removing the front mounts, you need to unscrew the car wheels in each direction and remove the front screws, moving the wheel arch liners to the side;
- At the end of the procedure, the bumper remains attached only to the side latches. You need to remove the spare part from both sides at once, so as not to break off the fixing latches - for this purpose, ask someone for help.
- Having separated the bumper from the car, the parking sensor connectors and wires should be disconnected, and the leading hoses should be carefully bent.
- After trying on the new bumper, its installation is done. To install what remains for our client to do, the listed steps must be repeated strictly in reverse order.
Be careful! On some Camry models, a bumper reinforcement is installed, which is located under the lower shock absorber. To dismantle it you need to remove
5 pistons and unscrew the fixing screws.