Compatibility of other manufacturers' products is not guaranteed. To avoid emergency situations, auto center technicians recommend purchasing only original products.
So that catalog items completely match the actual names. Carry out preventive maintenance strictly at designated time intervals in authorized workshops, where they provide a quality guarantee.
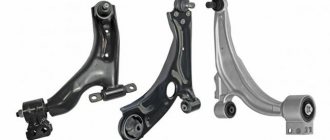
| Name | Article/OEM | Price, rub.) |
| Toyota Corolla rear suspension arm | Febest 0125-AE114R | from 980 |
| suspension arm | Japanparts BS291 | from 1300 |
| -/- rear | Japko 72291 | from 1300 |
| —/— front | Febest 0125-MCV20RH | from 1300 |
| -/- rear | Febest 0125-AE100R | from 1200 |
| —/— front | Febest 0125-141 | from 1200 |
| —/— rear Toyota Corolla | Toyota/Lexus/Daihatsu 4871012200 | from 1500 |
| —/— front | Herth+Buss J4912055 | from 1700 |
| —/— | Mapco 49570 | from 1800 |
| —/— front | Mapco 49571 | from 2000 |
| —/— front | Nipparts J4902004 | from 2100 |
| —/— front | Patron PS5135R | from 2100 |
| —/— Toyota Corolla | Blue Print ADT38652 | from 2100 |
| —/— Toyota Corolla | Blue Print ADT38651 | from 2400 |
| —/— front | Fenox CA11288 | from 2400 |
| -/- rear | Fenox CA11188 | from 2400 |
| -/- rear | Patron PS5135L | from 2400 |
| —/— Toyota Corolla | Monroe L13508 | from 2400 |
| —/— front | Monroe L13507 | from 2400 |
| —/— | NK 5014513 | from 2400 |
| —/— | NK 5014514 | from 2400 |
| Suspension arm left | Aywiparts AW1360467L | from 2500 |
| —/— right | Aywiparts AW1360468R | from 2500 |
| —/— Toyota Corolla | Japanparts BS-218L | from 2500 |
| —/— front | Febi 12932 | from 2500 |
| —/— Toyota Corolla | RTS 76-02530-2 | from 2500 |
| —/— front | Fenox CA11282 | from 2500 |
| -/- rear | RTS 76-02533-2 | from 2500 |
| —/— | RTS 76-02533-1 | from 2500 |
| —/— front | Febi 22949 | from 2500 |
Self-diagnosis of the front suspension using the example of TOYOTA Corolla
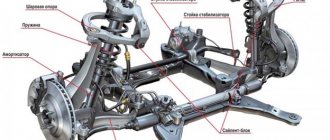
The front suspension, or rather the combination of suspension, transmission and steering parts, consists of the following components that are most often subject to failure:
- 1. Shock absorbers;
- 2. Springs;
- 3. Ball joints;
- 4. Lower arms with silent blocks;
- 5. Upper suspension mounts with bearings;
- 6. Stabilizer links;
- 7. Stabilizer supports;
- 8. Steering rack;
- 9. Steering rods;
- 10. Steering tips;
- 11. Steering cardan;
- 12. Wheel bearing;
- 13. CV joint (external joint).
Before checking the suspension parts, you should inspect all the rubber boots and boots of the listed parts. As a rule, a part with a damaged cover requires replacement.
A working shock absorber should not have any oil leaks, its rod should have a smooth mirror surface without holes or scratches, it should not make any sounds when the car rocks, and it should almost immediately dampen the vibrations of the car. When driving with a faulty shock absorber, the car sways, and from the outside it seems that the wheel is not rolling along the road, but is bouncing like a ball. Oil leaks occur earlier than other symptoms and with them the shock absorber can still work normally for some time.
Worn (sagging) springs are determined by the car's low seating position and the inability to correctly adjust the wheel camber.
Ball joints are checked by rocking the lower arms up and down using a pry bar on a pit or lift. There should be no noticeable play.
The silent blocks of the lower arms should not have any play when pressed on them with a mount, should not have bulging or cracked pieces of rubber, and the rubber should not peel off from the inner or outer bushings.
To check ball joints and silent blocks, it is useful to unscrew the fastening of the ball joint to the lower arm with the car raised. After this, when turning the ball joint body with your hands, it should move smoothly, with effort and without play. The lower lever in a free position should tend to take a horizontal position, under the influence of the elasticity of the rubber silent blocks.
Faulty bearings in the upper suspension mounts may have play when the vehicle is rocked up and down. In addition, the rubber part of the support may be torn, but it is not always possible to identify this without removing the support.
The stabilizer links and supports are checked by inspection and by swinging them with force by hand. All joints should not have any play.
The steering rack very rarely fails, except in cases where the guide bushing on the side opposite the driver wears out. This can be determined by swinging the rack itself with your hands, turning the wheels towards the location of the steering wheel, and grasping the rack through the tie rod cover.
Tie rods and tie rod ends are checked either by turning the wheel with your hands, or by turning the steering wheel left and right, while simultaneously holding the part being tested with your hand. Neither the rods nor the tips should have any play.
A faulty steering cardan can either have play, sometimes quite large, or, on the contrary, turn with force. If the steering cardan on your car does not have any cover or cover, it is recommended to select and put some kind of cover on it. Steering rod covers work well; you can also choose a cover from a domestic car.
A faulty wheel bearing may produce a hum when driving, which can be checked by spinning the wheels on a well-secured vehicle. It may also have play, which can be checked by rocking the wheel with your hands at its top point away from you and towards you.
A faulty outer CV joint produces a characteristic loud cracking sound when the car is moving with slight acceleration in a sharp turn.
The front suspension may have other faults; only the most typical ones are described here.
Removing and replacing levers on a Toyota Corolla
The front arms are equipped with rubber-metal joints that look like metal bushings. As a rule, polyurethane or rubber inserts are located inside them. Many car owners note that bushings need to be replaced as they wear out, that is, quite often. While silent blocks remain operational even after a hundred thousand kilometers.
Usually. The metal and rubber parts wear out when you drive frequently on rough roads. An unpleasant noise may be heard when parts come into contact. Accordingly, you will have to replace them.
If you hear a slight knocking sound from where the front suspension is located, you need to inspect the chassis by placing the car on a lift. Take a mounting spatula and carefully check all the connections of the parts, as well as the integrity of the rubber elements.
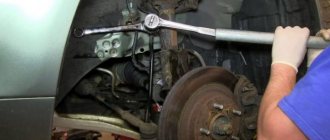
To successfully replace the levers, you will need to place the car on a pit or a lift, taking into account that the front axle is suspended and the wheels are completely removed. Now get rid of the arm on the ball joint. To do this, remove one bolt and two nuts.
Then we get rid of the two bolts that hold the brackets. To remove the lever, we also unscrew the fastening of the front silent block (one bolt). Since the lever is screwed into the subframe and can break off when removed, it is better to heat it in any available way and only then remove it.
We install new levers in place of the old ones. This is quite simple, since the fasteners fit into the holes intended for them without the use of much force. Once you are sure that the parts are installed correctly, you can reassemble the mechanism in the reverse order. That is, we screw the bolts and nuts into place. Don’t forget to check that the parts are connected tightly and not loose.
Replacement of silent blocks of front levers of Toyota Corolla in the back of E120
The silent blocks of the suspension arms serve as a kind of shock-absorbing device between the mount of the arm and the suspension beam. Changing these parts on a Toyota Corolla is quite simple.
Video about the principles of replacing silent blocks on a car
The video will tell you how easy it is to change silent blocks on the front arms of a car, and also tell you about the nuances and subtleties of the work being carried out
Catalog articles for silent blocks
| Name | Article/OEM | Price, rub.) |
| Rear axle silent block | FEBEST TAB166RUB | from 250 |
| Front arm silent block, front | FEBI 19009 | from 350 |
| Rear tie rod bushing | FEBEST TSB803 | from 350 |
| Suspension arm silent block | GSP 516723 | from 350 |
| C. rear link | FEBEST TABAE100CL | from 350 |
| —/— | GSP 510689 | from 350 |
| Bracket, lever cushions | Ashika GOM236 | from 450 |
| Silent block | RUVILLE 986901 | from 450 |
| —/— | FENOX CAB10023 | from 450 |
| —/— | KAVO PARTS SCR9007 | from 450 |
| —/— | FEBEST TAB010 | from 450 |
| —/— Toyota Corolla | YAMATO J42016AYMT | from 450 |
| —/— | FENOX CAB10055 | from 450 |
| -/- rear | FENOX CAB03018 | from 550 |
| —/— | Blue Print ADT38015 | from 550 |
| —/— | FENOX CAB02027 | from 550 |
| -/- rear | YAMATO J42014BYMT | from 550 |
| —/— | FEBEST TAB198 | from 550 |
| —/— | JAPANPARTS RU236 | from 550 |
| -/- rear | DELPHI TD372W | from 550 |
| —/— | JAPANPARTS RU2553 | from 550 |
| -/- rear | FENOX CAB20049 | from 550 |
| —/— | JAPANPARTS RU2454 | from 550 |
| —/— Toyota Corolla | FENOX FSB00040 | from 550 |
| —/— | Blue Print ADT38085 | from 550 |
| —/— | Ashika GOM2553 | from 550 |
| -/- rear | KAVO PARTS SCR9032 | from 550 |
| —/— | Nipparts J4232009 | from 550 |
| -/- rear | JAPANPARTS RU237 | from 550 |
| —/— | FEBEST TAB080 | from 550 |
| -/- rear | MAPCO 33561 | from 550 |
| —/— Toyota Corolla | JAPANPARTS RU267 | from 550 |
| —/— | Optimal F85286 | from 550 |
| —/— | SWAG 81929185 | from 550 |
| -/- rear | SIDEM 845647 | from 550 |
| —/— Toyota Corolla | MOOG TOSB7368 | from 550 |
| —/— Toyota Corolla | RUVILLE 986902 | from 550 |
When to change silent blocks on a Corolla?
The first sign of failure of the silent blocks of the levers is a characteristic metallic knock in the suspension. Typically, rubber parts are exposed to the environment, namely heat and cold, which wears out the rubber components.
Also, it is worth noting that increased wear of the silent blocks of the front levers affects the stability of the vehicle on the road surface and disrupts the alignment, which in turn will affect tire wear.
Replacement algorithm
Let's consider the sequence of actions aimed at replacing the silent blocks of the front control arms of a Toyota Corolla:
- To carry out a full shift, you will need a pit or a lift. We install the car on one of the options.
- To change the silent blocks of the levers, it is often necessary to dismantle the lever itself. So, when unscrewing a fastening bolt, this same bolt often breaks, so you need to have a couple in stock.
Part selection
Not original silent blocks.
The choice of silent blocks should be taken seriously, since the quality of the spare parts will determine how stable the suspension will be, as well as the softness of the levers. Many car enthusiasts replace original products with polyurethane analogues, which have a longer service life, but are much more expensive.
Original
48068-12300 – original catalog number of the rear silent block of the front suspension arm. The cost of the product is 3000 rubles.
Analogs
Due to the high cost of silent blocks of levers, many motorists are often looking for a lower quality and cheaper substitute. The automotive market offers a lot of different options.
| Manufacturer's name | Catalog number | Price |
| ABS | 270969 | 1000 |
| Akitaka | 0101-150B | 1000 |
| Amiwa | 02-35-1177 | 600 |
| Caster | FFD9321 | 700 |
| Febest | TAB-ACA30S | 600 |
| Fenox | CAB10013 | 600 |
| Gufu Parts | SRM-21105 | 600 |
| JD | JDT24ZE150B | 1000 |
| Jikiu | BH21118 | 700 |
| LYNXauto | C8572 | 800 |
| Nipparts | N4232056 | 1000 |
| Patron | PSE1428 | 700 |
| Sidem | 845638 | 600 |
| Stellox | 77-00438-SX | 800 |
| VAG | 357 407 182 | 400 |
| VAG | 1J0 407 181 | 1200 |
Replacing levers and silent blocks on a Toyota Corolla 120
Signs of malfunction of car suspension components:
- car roll to one side;
- difficulty in controlling equipment at medium and high speeds;
- systematic knocking, beating, vibration in the steering wheel;
- tossing a car when overcoming road obstacles;
- metallic creak accompanying the control process.
The average service life of suspension elements is 60 – 85 thousand km. mileage Intervals exceeding the 100,000 mark are exceptions rather than practice. The manufacturing quality of spare parts and the driving style of the car are fundamental factors affecting the service life.
Before starting replacement work, we carry out comprehensive diagnostics, assess the general condition of the suspension elements, identify parts that require updating, and prepare consumables in the required quantity.
Replacement sequence:
- We install the car on the inspection channel, an electric lifting mechanism is possible;
- We place a hydraulic stand under the engine, since we will unscrew the support fastening to access the lever bolts on the right side;
- The service life of the suspension elements on the right and left sides is approximately equal. Experts recommend replacing two at the same time. Initially, unscrew the fastening of the ball joint of the left wheel, then two bolts and silent block fasteners;
- remove the lever from under the car;
- using a hydraulic press we press out one (two) silent blocks. As an analogue, use a stationary vice;
- If there are defects on the surface of the lever, there is damage to the metal or welds, the suspension element must be replaced with a new one. In all other cases, new silent blocks are pressed into the standard places;
- install the lever with new rubber bands in its original place;
- We begin dismantling the right element, having first lowered the engine support by 2 - 3 cm to provide access to the mounting bolt.
- We carry out a similar procedure for prevention, pressing in new rubber bands, and installing them in their original place.
During the work, we inspect the ball joint, brake cylinder, pads, and brake fluid supply lines. If there are signs of wear or deformation, the components must be replaced with new ones from stock. Eliminating small, sometimes insignificant faults will prevent large-scale breakdowns in the future. Thus, you can save money, time, effort, resources.
Subject to following the recommendations of the specialists, purchasing original spare parts, subsequent maintenance after 80,000 km. A moderate driving style will only increase the replacement interval for parts.
Report: On replacing the silent block on the front arm of Toyota Funcargo (Alexli)
Before starting work, you just need to compare your desire and state of health with the price of work on the service. It often turns out that the service ends up being cheaper than the cost of a back or a sore leg, for example. From the experience of installing a silent block for the front lever of a Toyota, I installed Febest silent blocks, complete nonsense. We drove 3 thousand km.
The silent blocks that I supplied are original, original packaging, catalog number. In my opinion, no one should have any doubts about the Daihatsu company. By the way, about the original. They tell me which one you will install, original or non-original. I'm certainly original. I installed it, did the wheel alignment, drove off. Installing the silent block of the Toyota front arm is walking along the road. I came back and asked why the car was running, and they said it was because of the original, these are the ones they supply now.
They changed it to a Swedish non-original one. The car drove as expected and I drove 80 thousand on them until I sold the car. On the forum I only shared my installation experience and never forced anyone to do anything.
Replacing front control arms Yaris 2004
I did everything myself, it worked out, as I already wrote in rubles, both sides took 4 hours of work. I also changed the struts and steering rack, so I had to do a wheel alignment. By the way, no one needs KAYABA struts, I don’t even know how long they have been used, but they are in good condition, maybe I should have changed them in vain. I’m not a car mechanic, I can afford a service, but I did the change myself and it took about an hour.
On all my BMWs I always changed only the silent blocks. I agree that it’s all a matter of taste, installing the silent block of the Toyota front arm is still trustworthy. The lever is an important part, that’s why I do it myself, since I don’t trust services a little. And the front silent bone in the photo is very similar to. You need to know the length, diameter of the polyurethane rubber and holes. I’ll stop by the guys’ store and take a photo of the Daihatsu silent blocks.
They are exactly the same in size and holes. The shape of the rubber is slightly different and there are no notches in the places where it is attached to the body. By the way, mine too, only the right one was torn, and the left one was good. It’s not in vain that the stiffness of the ammo is not an indicator, but the speed of working out compressions - oh, how different it is for old and new ones. I have original silent blocks. The mileage is already over. He is installing the silent block of the front lever of Toyota rubber. And my original silent blocks have gone through more than a thousand kilometers.
Moreover, after 12 years of driving Subaru cars, with their “indestructible” suspension, I also drive a Sienna according to the principle “higher speed, fewer potholes.” Yes, and it seems that I blew up the left silent block in a critical situation a month ago when overtaking a caravan of trucks, one of them in front of me also jumped out to overtake, and I had to fly into the oncoming side of the road at mph into a large hard hole.
Thank God, Sienna coped with this extreme. I bow to those who can repair a car on their own, this is not given to me, so only car service money. In my case, replacing one lever with a wheel alignment is still cheaper than sequentially replacing 4 non-original bushings. And yet, let's stick to the correct terminology: And if you once come across an unsuccessful original part in your practice, you should not conclude that you need to switch to non-original spare parts.
It would be nice to see a photo and part number, I think many will thank you. And here’s what the Polyurethane company produces by substituting the catalog numbers into their Daihatsu and Toyota search engine for the margin indicated in the post: Are they stiffer than rubber ones? Polyurethane is a good thing, especially in our frosty climate and where high abrasion resistance is needed for industrial floors. Rigidity and elasticity can be adjusted when drawing up the formulation, but the adhesion to metal of polyurethane is rather low.
Installing a Toyota front arm silent block At least 7 years ago we tried to make samples of polyurethane silent blocks. During testing, the separation along the border with the metal occurred quite quickly and we installed a silent block for the Toyota front arm to do them. I don’t understand about the equation between replacing silent parts and changing the oil?
When replacing the entire lever, is it not necessary to do the camber?
Does the lever assembly have different rubber in the silent block? According to the author’s terminology above, “whoever wants it as he wants” and “please forgive my French! Therefore, he is in favor of putting on the original Dmitry, but what is the difference between an original not in a pair and a non-original in a pair?
We make risks on the silent block and the lever so that when installing a new silent block, place it in exactly the same position. It is very important that it stands exactly the same as it does. And one more thing: This is what the entire assembled mandrel looks like.
There is no point in describing the entire 15-minute process of pressing 4 silent blocks, I will only show a couple of glides of the process and the end result. Two clicks on the hydraulic pump and the silent block is in place.
Horizontal only double, took RBI. The first stage before the replacement went perfectly, let's move on to the second!
how to properly install the lever sales block
In order to remove the left lever, it was necessary to untie the left and front engine cushions, which made it possible to raise the automatic transmission, which would not allow pulling out the fatal bolt securing the horizontal silent block.
The first sign of failure of the silent blocks of the levers is a characteristic metallic knock in the suspension. Typically, rubber parts are exposed to the environment, namely heat and cold, which wears out the rubber components. Also, it is worth noting that the reinforced installation of the silent block of the front lever of the Toyota front lever silent blocks affects the stability of the vehicle on the road surface and disrupts the alignment position, which in turn will affect tire wear.
Replacement algorithm Let's consider the sequence of actions aimed at replacing the silent blocks of the front control arms of a Toyota Corolla: The stabilizer struts seem to be from Lexus, I don’t know for sure, but they fit me the first time. In short, I repeat, I took the installation of the silent block of the front lever of a Toyota rubber band from them and I’m sure that next time I won’t go there. Published by amasa2 - April 3, - Hello, I have a problem replacing the front silent block in the front suspension arm.
For Exist only assembled with a lever, there is still a replacement for Febest TAB, but the reviews for this brand are not entirely good. Who will advise what?? Published Diagnosis - April 3, - Read above. Suitable vtr Published by amasa2 - April 4, - The diagnosis is the rear silent block, and I'm talking about the front, sweetie, eared Published by andy - April 4, - I changed it myself, installed the installation of the silent block of the front Toyota arm, I'm happy.
Published by amasa2 - April 5, - Published by andy - April 17, - On their website http: You enter the original part number there and it gives out their fulcrum number.
As if I talked to a person and installed the silent block of the Toyota front arm, he gave me this installation of the silent block of the Toyota front arm. He said that their centers would pick up the part without any problems. Published by wolk - April 17, - We would like a direct link to the part installed for you. Published by Okella - April 17, - Published by leon - April 17, - I installed this http: In general, we praise this company, but in terms of the fulcrum the reviews are so-so, supposedly polyurethane lags behind metal quickly, like on Chinese silent compounds.
Published by Colonel - April 18, - In general, installing a Toyota front arm silent block polyurethane is a good alternative to rubber, provided the correct manufacturing technology is used. But, since in our country everyone who is not too lazy is engaged in polyurethane, without having basic knowledge and conditions for the correct manufacture of products from it, the results are accordingly.
Therefore, it is better not to worry and buy original spare parts or decent analogues. Published by wolk - April 18, - Yours is also polyurethane. What worries me is that the shape of the silencers is fundamentally different on the link and our original. Well, since 40 tkm works, then we should consider it as an option.
Published by leon - April 18, - I can’t vouch for it, I convey people’s opinions in reviews. The most difficult thing in their production is just “blinding” the metal with polyurethane; there is some kind of special processing there. Maybe the chemical composition is different, I don’t know all the details.
Published by De-mui - April 21, - Good day everyone. Anyone who has installed silent blocks for their own “fulcrum points”, please tell me the exact number or link for installing a silent block for the Toyota front arm. Sienna 04. There is definitely no Sienna on their website http: I want to know the exact part number so that I can ask my friends to buy it and send it to Minsk. A cut in the front beam Removing the front suspension arm With the help of welding and a pneumatic chisel, the cracker gave in, and the rest of the bolt was safely removed from the beam; they spent half an hour poking around to get it out.
The levers were removed and taken to re-pressing the silent blocks. The front horizontal silent blocks are in good condition, I only replaced the rear vertical ones.
In general, the other day I changed the steering tips and rods, a photo report will be later, I removed the levers to see the condition of the silent blocks and lubricate them with graphite lubricant for the future, and so you can see that the silent block is already starting to crack due to uneven load, it is clear that the crack is due to the tilt of the silent block, so The silent blocks must be pressed evenly.
Suspension device for Toyota Corolla 120
Most often, rubber bushings and seals wear out in the chassis. This is typical not only for Toyota Corolla cars, but for all other vehicles. The first sign of wear is a knocking sound in the suspension area.
Instances supplied to the territory of the CIS, including the Russian Federation, have increased ground clearance and adaptation to poor road surfaces. The suspension is somewhat harsh, but ergonomic, which compensates for the first factor. The manufacturer took care in advance of the simplicity of the design so that it could be changed independently. Only in rare cases do owners resort to the help of professionals - service station masters.
The ball joint is capable of reaching more than 140,000 km. Systematic technical inspection will significantly extend the service life of the machine. The risk group consists of silent blocks and stabilizer bushings. Their resource does not exceed 80,000 km. Consumables quickly wear out when driving at speeds over 150 km/h on poor road surfaces.
Toyota Corolla 120 suspension structure
- spherical bearing;
- spring;
- shock absorber;
- lever arm;
- silent block;
- bushing and stabilizer link, which are fixed to the car body.
There is a similar design on the opposite side of the suspension mechanism.
Note to the driver. Most often, the left side of the suspension is subject to wear. While driving, it is not always possible to react in time to a bump, hole, or other irregularities on the road. Despite the fact that the right side is less susceptible to negative effects, both suspension arms must be replaced at the same time.
Typical suspension problems. Solutions
Minor vibration, knocking, metallic creaking while driving. These are the first signs indicating a malfunction. A timely visit to a service station for comprehensive diagnostics will prevent many sudden breakdowns in the future.
A car tilting to one side or a wheel tilting are already signals of a large-scale breakdown that requires prompt intervention by a service center mechanic. Delays in repairs and ignoring are unacceptable. We are talking about the safety of the driver and passengers.
It is also possible to conduct an inspection on your own. To begin, install the Toyota Corolla 120 on the inspection hole and try to loosen it using mechanical force on the lever. Play, grinding, beating are defects. Replace the parts with new ones. Carry out a similar procedure with the second suspension arm.
Features of the Toyota Corolla front suspension
So, the front suspension is a fairly necessary part of the car; the handling of the car and its behavior on the road depend on it.
The front suspension consists of the following components:
- shock absorber struts;
- coil springs in the form of a cylinder;
- anti-roll bar;
- transverse lower arms.
The design of the front suspension is thought out in such a way that, coupled with the diagonal separate hydraulic brake drive circuit, the car becomes quite stable when braking on slippery road surfaces.
Front suspension maintenance
The Toyota Corolla has a MacPherson type front suspension. The high reliability of this design makes the machine quite popular all over the world, including in Russia.
In order to determine the technical condition of the front suspension on a Toyota Corolla, you should perform the following procedure:
- During maintenance, it is necessary to visually check protective covers, shock absorber struts, ball and rubber-to-metal joints, as well as bushings and rubber cushions for damage.
- The backlash of the joint (ball joint) should be determined. This can be done by manually swinging the lower lever vertically, then you should “hang” the vehicle wheel by the upper and lower parts around the longitudinal axis located horizontally.
- During a technical inspection, a leak in the shock absorber strut is usually detected, as well as scoring on the working rod surface, deformation and damage to other suspension parts.
- If signs of deformation are detected on them, the stabilizer bar and lower arms must be replaced.
- If the frame cross member, stabilizer bar and body front end are deformed, then the wheel angles change their parameters, making it impossible to adjust these parts. In order to avoid deformation of these parts, you should check the tightness of the bolts.
Removing and installing suspension
On a Toyota Corolla, it’s quite easy to install or remove the front suspension; to do this you need to:
- Using the parking brake, brake the vehicle.
- The front of the car must be mounted on a strong and reliable support, then you need to remove the front wheels in order to gain access to the front suspension parts.
- After carrying out the above actions, all that remains is to unscrew and unscrew the “finger” nut of the steering rod ball joint.
- Using a puller, you need to press out the “finger” of the steering rod ball joint. Pressing out is done from the rotary lever.
- After this, you need to unscrew and unscrew the nuts of the hinge pins on both sides.
- Again, using a puller, we press out the “fingers” of the hinges, but from the lower arms.
- Next, you should disconnect the stabilizer bar and the lower arms from the frame cross member, after which the stabilizer bar and the lower arms are removed together.
- The caliper is removed from the directional pads along with the wheel cylinder. Next, the caliper is suspended from the car body and secured with a wire, however, you should make sure that the brake hose is not stretched or twisted.
- To complete the procedure, unscrew the “top support” mounting nuts and remove the rack.
- In order to install the suspension, you need to carry out the above steps “in reverse”.
Despite its reliability and ease of care and maintenance, the suspension of the Toyota Corolla car also has a number of faults. Levers, hinges, shock absorbers, springs, all these parts require such an important operation as timely repair.
One of the signs of a malfunction may be a knocking sound that occurs in the vehicle’s suspension. Most often, knocking occurs due to the fact that ball joints, silent blocks and shock absorber struts are worn out and out of order. Repair of these parts consists of carrying out a full diagnosis and replacing worn parts with new ones.
The developers of the Toyota Corolla recommend performing routine diagnostics and repairs every six months. If you follow this recommendation, the knocking noise produced by parts and components of the front suspension will not become a problem for you. However, it is not only the front suspension components that can make knocking noises. Timely repairs will not interfere with such components as: steering system, brake system.
Thanks to the fact that Toyota Corolla will regularly undergo timely diagnostics and repairs, the knocking of worn parts will not become a problem for you.
Summarizing the above, it is worth noting that the front suspension of the Toyota Corolla is a set of fairly reliable parts. However, over time, breakdowns may also occur there, which will be indicated by the “annoying” knock of worn parts.
The knock can be eliminated only by repairing such parts as shock absorber struts, silent blocks, ball and rubber-metal joints. However, the knock is produced not only by the front suspension parts, but also by the brake and steering systems. Qualified repairs will get rid of this “scourge”.
Replacement 120-150 body
When everything necessary for the work is prepared, you can start replacing;
- First of all, the car is driven into a pit, this will allow you to gain access to the necessary components;
- The car is lifted with a jack;
- The lever is dismantled; to do this, the ball is disconnected from it and the through bolt of the front silent block and the rear bracket are removed; if you can’t unscrew the bolt, you can cut it off with a grinder;
- Using a puller, a silent block appears from the lever to make removing the part easier; it is advisable to tap it with a hammer and cut it off as much as possible;
- A new silent block is installed, pressing is carried out, this can be done using a vice or any other press. Before installation, it is advisable to clean the surface and apply lubricant;
- The assembled part is mounted back on the car.
