Planned car repairs are thought out in advance, and at least 30% of reserve money is added to a certain amount. And they will most likely be spent too, due to the fact that an unforeseen expense item will appear. And you will only have to think about how to remove the rear struts on the Camry 40, but also replace some of the worn-out components and fasteners with new products.
Camry 40
It is recommended to completely replace the rear suspension system so that the parts are of the same age, from a trusted manufacturer, but it is not necessary; you can leave durable and slightly worn parts in service, and remember that their wear may occur in the near future. If you carry out preventive inspections regularly, you will not miss the time of malfunctions, evaluate the time and quality, and repair or replace the part again.
Replacing a strut on a Toyota Camry
Driving in a car with faulty struts can hardly be called comfortable, and handling suffers a lot from this. Therefore, they should be replaced immediately after the first symptoms of a malfunction appear. Replacing struts on a Toyota Camry in 40 and 50 body types is carried out in a similar way, and can easily be done by the car owner himself. This does not require specialized tools or complex equipment.
Replacing a strut on a Toyota Camry
How to determine if racks are faulty
In addition to checking the performance of the racks at a specialized stand, which not every car repair shop has, you can check them yourself. There are several ways to do this:
- Conduct a visual inspection of the rack for deformation, oil leaks, etc.
- Rock the car and check how quickly its position stabilizes - if the racks are in working order, it is impossible to rock the car on your own.
- If the car feels insecure on the road, the suspension does not respond to unevenness and the body tilts strongly when entering a turn, then this also indicates a malfunction of the struts.
Since the main load falls on the front part of the car, the front struts most often need to be replaced on a Toyota Camry 40 . Driving with faulty racks is fraught with negative consequences:
- loss of control over the car at both high and medium speeds;
- a significant decrease in exchange rate stability;
- reducing the vehicle's carrying capacity;
- due to low depreciation, other suspension elements fail;
- decreased comfort for the driver and passengers while driving, especially on rough roads;
- loss of control during sudden acceleration or braking.
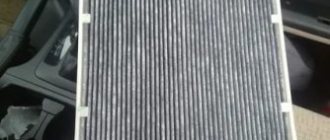
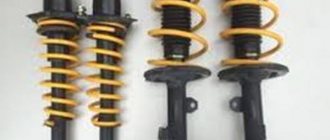
The suspension strut consists of several parts:
- Springs. The original springs can last about 100–150 thousand kilometers without any complaints. It is worth noting that at the end of their service life they begin to sag, and their untimely replacement will lead to the breakage of the turns, and this makes their further operation impossible.
- Shock absorbers. They are distinguished by gas, oil and gas-oil models, designed to work out suspension shocks that occur when driving over uneven surfaces. Depending on the manufacturer and driving mode, they can last about 30–50 thousand kilometers.
- Shock absorber supports. Installed in the upper part of the rack, they are necessary to attach it to the body and hold the spring in the socket.
- Shock absorber boot. Designed to protect the shock absorber rod from dirt and dust.
Structure of Camry struts
If the springs are in good condition, then replacing the front strut on a Toyota Camry is somewhat more complicated, since first you will have to replace the faulty shock absorber and supports. But this allows you to significantly save on repairs due to the use of old springs and anthers.
Toyota Camry 1994 l. With. — self-repair
Since the main load falls on the front part of the car, replacement of the front struts on a Toyota Camry is most often required. Driving with faulty struts is fraught with negative consequences: The suspension strut consists of several parts: The original springs are able to withstand about thousands of kilometers without complaints. It is worth noting that at the end of their service life they begin to sag, and their untimely replacement will lead to the breakage of the turns, and this makes their further operation impossible.
They are distinguished by gas, oil and gas-oil models, designed to work out suspension shocks that occur when driving over uneven surfaces.
This is interesting: Removing the steering knuckle of the rear wheel hub of Toyota Camry
Procedure for replacing racks
To carry out the work you will need the following set of tools:
- jack;
- balloon;
- set of keys and sockets;
- special ties for springs;
- gas key.
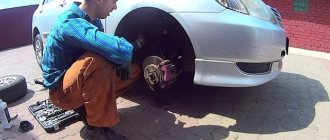
Replacing the front struts on Toyota Camry 50 and 40 is performed as follows:
- The car is jacked up, then the front wheel is removed.
- Unscrew the 2 bolts securing the hub to the bottom of the strut.
- The fastenings of the brake hose and ABS wires are unscrewed from the rack.
- The hood is opened, then the 3 bolts securing the strut support to the body are unscrewed.
- The stand is removed.
- Installation of the rack is carried out in the reverse order.
Procedure for replacing struts
Along with replacing the strut, it is recommended to replace the stabilizer strut on a Toyota Camry - it also affects the directional stability of the car. The links are attached on both sides of the car to the lever and rod with just two nuts, and replacing them is not difficult.
If the strut is not replaced entirely, but only the failed shock absorber needs to be replaced, then proceed as follows:
- On the rack removed from the car, a spring is tightened and fixed using special ties.
- Then the central nut in the strut support that secures the shock absorber is unscrewed. Often the strut rod rotates, making it impossible to unscrew the nut. In this case, you need to grab the rod with a gas wrench, after which the nut can be unscrewed.
- After this, the strut support is removed and the spring is pulled out.
- A rubber gasket is placed on the lower support of the new shock absorber, then the spring is installed.
- A rubber boot is installed on the shock absorber rod.
- The rack support is installed and tightened with a nut.
- The ties are removed from the spring, then the finished rack is installed in place.
Replacing struts
Replacing the rear struts on a Toyota Camry with replacing the shock absorber is carried out in the same way.
The procedure for replacing the rear struts is almost the same as the front struts, with some exceptions:
- The car is jacked up, then the wheel is removed.
- The bolts securing the strut to the wheel hub are unscrewed, the ABS wire and brake hose are removed.
- Then the back of the rear sofa in the car is removed, after which access to the nuts is opened, with the help of which the upper support is attached to the body.
- The nuts of the upper support are unscrewed, then the stand is pulled out.
- Installation is carried out in reverse order.
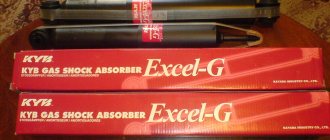
When choosing spare parts, it is recommended to pay attention to originals or OEM manufacturers who manufacture spare parts under Toyota license. As a rule, their factories are located directly in Japan, but not in China. It is worth noting that replacing rear struts on Toyota Camry 40 and 50 is performed 2–3 times less often than replacing front struts. But at the same time their cost is 15–20% higher.
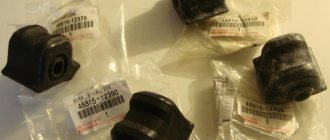
Toyota Camry XV40 (Toyota Camry) replacement of bushings and struts of the front stabilizer
We have a Toyota Camry XV40, produced in 2007, for repairs on which we need to replace the front stabilizer struts and bushings. We'll show you how to do it yourself.
Raise the car and remove the front wheels. Using a metal brush, we first clean all threaded connections, then fill them with WD-40 penetrating lubricant. Unscrew it, put the key at the back at 19, at the front at the head at 17:
We have a new stabilizer strut from GMB, its number in the spare parts catalog is 10010700. There is no difference between the left and right. Lubricate the threads with copper grease. The new racks have hexagon mounts, although you can use the old nuts. The replacement of the stabilizer struts is completed, now we raise the car and proceed to the bushings.
Due to the design features, in order to unscrew the bushings, we will have to lower the subframe, since the fastening bolts rest against the body when unscrewing, even a broken key does not help, a few mm are still needed.
Using a 19 wrench, loosen the central fastening bolt on both sides, small nuts and bolts 14, unscrew them completely:
After loosening the second side, it became immediately noticeable how the subframe dropped a little, this was enough to pull out the bushing bolt:
We have new stabilizer bushings from LYNX, their catalog number is C-8869. Diameter 24 mm. We remove the bracket, take out the old one and install the new one. We reassemble in reverse order, the replacement is complete.
Source: https://remontautohelp.ru/toyota-camry-xv40-tojjota-kamri-zamena-vtulok-i-stoek-perednego-stabilizatora-video-instrukciya/
Replacing rear springs and shock absorbers Camry 40 — logbook Toyota Camry on DRIVE2
We go into the salon and unscrew the three nuts that secure the strut support to the body, which we previously loosened! We remove the jack and the stand together with the hub falls and hangs in the air, hold it on the longitudinal and transverse rods, take out the stand and drag it to the garage on a workbench as it is more convenient there... Now the task is to unscrew the rod nut of the rear strut of the Toyota Camry which the support is wearing, for this I used a drill with a diameter of 12, 1 meter long, resting it on the garage: The lower part of the seats of the sofa.
The lower part of the rear seats of the car is dismantled and pulled out. The seat backs fold down.
Removing the shock absorber strut from the rear suspension of Toyota Camry
The sides of the rear seats will also need to be removed. The sides of the rear seats are removed. Attaching the rear struts. Behind the dismantled sidewalls of the rear seats is the upper mounting of the shock absorber struts. Removing rear shock absorbers. Unscrew the three fastening nuts from the upper cup of the body and the shock absorber rear strut of the Toyota Camry. Old shock absorber strut. Failed shock absorber strut.
General form. The hanging part of the rear suspension is on the lower arms. Decide where to carry out repairs, in whose hands to entrust your own car. Armed with knowledge, make a decision. When repairing yourself, all responsibility rests with you, and any ill-considered actions are undesirable, and they can also be disastrous in terms of the technical condition of the vehicle. You should purchase parts according to the proposed catalog for Toyota Camry rear pillar, select products that are suitable in terms of cost and quality.
The choice is enormous, and you should be guided not only by the advice of friends, but also by the technical data sheet of the car, and personal experience in the matter of repairs.
After preparatory research of the assortment, choose. No matter what mistake will result in additional waste.
Repair process
1. Installing the car on a lift. The car is installed on a two-post lift.
2. The rear wheels are removed.
3. General view of old shock absorbers. The “face” shows leaks from the old shock absorbers.
4. The result of long-term operation of leaking shock absorbers is threaded connections stuck with dirt.
5. Cleaning of parts and assemblies for subsequent repairs. Everything is cleaned and filled with penetrating lubricant.
6. After this, unscrew the brake hose mounting bracket from the shock absorber strut and the two bolts securing the strut itself from the knuckle.
7. Access to the vehicle interior to replace shock absorber struts will be through the rear door.
8. The lower part of the seats (sofa). The lower part of the rear seats of the car is dismantled and pulled out.
9. The seat backs fold down.
10. The side parts of the rear seats will also need to be removed.
11. The sides of the rear seats are dismantled.
12. Attaching the rear pillars. Behind the dismantled sidewalls of the rear seats is the upper mounting of the shock absorber struts.
13. Dismantling the rear shock absorbers. The three fastening nuts are unscrewed from the upper cup of the body, and the shock absorber is pulled down.
14. Old shock absorber strut. Failed shock absorber strut.
15. General view. The hanging part of the rear suspension is on the lower arms.
16. Disassembly of the shock absorber. The spring is clamped with a tie and the shock-absorbing unit is disassembled.
17. Old and new shock absorbers.
18. New shock absorber strut. Assembled shock absorber strut.
19. Installing a new shock absorber on a car. The new shock absorber is installed in place, then secured on top with three fastening nuts.
20. Assembling car suspension components. The strut is attached to the knuckle, the stabilizer link and the brake hose bracket are connected.
21. Broaching suspension units. Connecting nuts and bolts are tightened to the tightening torque specified by the manufacturer
22. Final operations. The wheel is installed in place. All operations are repeated with the second shock absorber. After this procedure, the car is removed from the lift on all four wheels, the upper shock absorber nuts are tightened, then the
Replacing rear struts Camry 40
Toyota Camry rear strut Provide access to the suspension fasteners without removing the tires, then you can prove yourself and do it without this step. We place the vehicle on special supports and begin to work in the interior, paying attention to the upper mounts of the rear pillar. In the cabin, we remove part of the seat back and get to the bolts that firmly fix the pillar to the body.
We remove the plugs and prepare access paths, deciding how to remove the rear pillars on a Camry. If the rear pillar of a Toyota Camry requires dismantling, then use a slotted screwdriver. At the bottom, three nuts are loosened in order to get to the brake hose and move it away from the body. It is recommended to thoroughly clean the work area using a brush, rags, or any means at hand that can remove dirt pellets and areas of rust, dirty oil and water.
We take a 19 mm wrench and unscrew the nuts of the bolts that secure the strut housing to the wheel part. We knock out the bolts from their landing place, just do everything carefully and leisurely.
Assess the condition of each part and decide whether it is worth it and how to remove the rear strut of a Toyota Camry Camry strut. We pay attention to the general condition of the shock absorption system, whether there was a leak in it, carefully inspect everything for cracks and breaks.
Look at the damage, wait for a quick repair and the rear pillar of the Toyota Camry will inject cash into the vehicle. We mount a new rear strut on its seat on the Camry 30. New protective protectors are taken, the boot is installed, the spring with its lower coil should look at the wheel.
The prepared vertical structure is inserted into a special glass and secured at the top, and after lowering the car slightly from the jack, the lower bolts and nuts are also attached. There is no need to tighten it too much, only the rear strut of the Toyota Camry is fixed. Boot It is more profitable to get a replacement product from a reliable manufacturer, these include: The average cost of the product is rubles.
We mount a new rear strut on its seat on the Camry 30
- New protective protectors are taken, the boot is mounted, the spring with its lower coil should face the wheel.
- A vertical prepared structure is inserted into a special glass and secured at the top, and after lowering the car slightly from the jack, the lower bolts and nuts are also attached. You shouldn’t tighten it too much, just until it locks.
Anther
It is more profitable to purchase replacement products from a reliable manufacturer, these include:
- FENOX. The average price for a product is 2000 rubles
- SACHS. The average price for a product is 1,500 rubles.
- MONROE. The average price is 1600 rubles.
- KAYABA. The average price for a product is 2000 rubles.
Thus, there are many analogue spare parts, but it is better to purchase those that are closer to the factory configuration. Use common sense while working. And if you have any suggestions and tips on how to change the rear struts on a Camry 40, then share them in the comments, forming useful thoughts for car enthusiasts. But some, for example, don’t even know how to dismantle the back seat of a car in two steps and begin repairs. You know? We are waiting for instructions from you! Good luck and successful repair.
Replacing front and rear struts on Camry 40
The main component of the car's chassis is the shock absorber strut.
It consists of a shock absorber body, a spring, an upper support and a rod boot. This mechanism is responsible for good controllability and ensures smooth running. The high comfort of the Toyota Camry 40 is ensured by the correctly selected characteristics of the individual elements of the rack.
If one of the elements fails, movement ceases to be comfortable and safe. It is necessary to check the condition of the struts at least once a year or after a run of 20,000 kilometers.
If the car is operated in difficult conditions: uneven dirt roads or roads with increased pollution, it is recommended to carry out chassis diagnostics twice a year or every 10,000 kilometers.
Most often, when diagnosing a strut, the shock absorber, boot and upper support are rejected. It is recommended to replace a defective element as soon as possible. Replacement of such elements occurs in pairs along the axis. An unpaired shift entails uneven distribution of the load and will quickly render the new part unusable.
Which shock absorber to choose
To maintain a smooth ride and high comfort, it is recommended to replace the shock absorber with a part from the manufacturer.
You can purchase a high-quality analogue:
- Kayaba;
- Tokiko;
- BOGE;
- Sachs;
- Lynx.
The performance characteristics of analogues may differ. After replacement, the car may become more rigid or, conversely, the roll will increase, and a rocking effect will appear on uneven surfaces. To select the correct strut parameters, it is recommended to contact Toyota repair specialists.
Rack diagnostics
The most accurate way to diagnose the performance of a rack is a special test stand. Such equipment is expensive and not every service station has it.
You can check the racks yourself by following a few simple steps:
- carry out a visual inspection for mechanical damage to elements, presence of oil leaks,
- estimate the speed of stabilization of the car when it swings in a vertical plane - serviceable struts do not allow the car to oscillate up and down,
- make several turns while driving, a strong roll indicates problems with the strut elements,
- turn the steering wheel in place, a characteristic crunch in the front of the car may indicate failure of the upper shock absorber mounts.
If malfunctions are detected, it is recommended to eliminate them as quickly as possible. Moving with racks that do not perform their functions is fraught with consequences:
- decreased vehicle controllability at medium and high speeds,
- loss of directional stability in all travel modes,
- reduced load capacity and ground clearance,
- increased load on other elements of the chassis,
- lack of comfort when driving over uneven surfaces,
- increase in braking distance.
The load on the front axle is much greater than on the rear. This is especially noticeable in the Camry with a 3.5 liter engine. For this reason, the front struts will require more frequent replacement.
Components of the rack
The suspension strut includes several elements:
- Spring. Untimely replacement leads to subsidence, which means a decrease in load capacity and ground clearance. In rare cases, the spring coils break off and further operation of such a vehicle is impossible. The average replacement interval is about 150 thousand kilometers.
- Shock absorber. There are oil and gas-oil types. Designed to stabilize roll and prevent swaying, as well as absorb impacts from uneven surfaces. The average replacement interval for shock absorbers is 60 thousand kilometers.
- Upper support. Fastening element. Absorbs shocks from the shock absorber without transferring them to the body. The front supports are equipped with a bearing.
- Shock absorber rod boot. Protects against dirt or dust. A torn boot reduces the life of the shock absorber.
Removing the racks and replacing its elements
You can replace struts or any of their elements on a Toyota Camry yourself. This procedure does not require special expensive equipment or special skills.
Removing and installing parts may require a certain set of tools:
- open-end wrenches and socket set,
- device for compressing springs,
- adjustable and wheel wrenches.
It is more convenient to dismantle on a lift or inspection pit.
To change the front struts or their elements on a Camry, you must perform the following steps:
- remove the wheel nuts,
- lift or jack up the required wheel,
- remove the wheel
- unscrew the brake hose and ABS sensor wire from the strut,
- unscrew the 2 bolts that secure the strut to the wheel hub,
- under the hood, remove the protective boot and unscrew the 3 nuts securing the upper shock absorber support to the body,
- pull out the stand
- install a new one, observing the reverse sequence.
Important! After installing new elements, it is recommended to adjust the wheel alignment angles.
Most often, not the entire strut is replaced, but only its individual elements: support, shock absorber or rod boot. The dismantling algorithm is as follows:
- after removing the rack, using special spring ties it is necessary to compress and fix the spring,
- Unscrew the nut in the center of the upper support, screwed onto the shock absorber rod. If the rod begins to rotate, it must be held with an adjustable wrench and the nut unscrewed.
- remove the upper support from the rod and dismantle the spring,
- if necessary, change the rubber linings on the shock absorber bowl,
- If there is damage, the shock absorber boot is replaced,
- the spring is mounted,
- the upper support is screwed on,
- spring ties are released,
- the stand is mounted and secured in place.
Installation and dismantling of the left and right racks occurs in the same way.
The algorithm for dismantling the rear struts is very similar to dismantling the front axle:
- jack up the car or lift it on a lift,
- remove the wheel and move the wire from the ABS sensor and the brake line to the side,
- unscrew the two bolts that secure the strut to the wheel hub,
- remove the upper half of the rear sofa and unscrew the nuts securing the upper shock absorber support,
- pull out the rack and disassemble it in the same way as the front one,
- assemble and install in place, observing the reverse order of actions.
Rear axle shock absorbers are replaced much less frequently than front axle shock absorbers. Their cost is slightly higher.
The supports of the racks on different axes are fundamentally different. There is a bearing at the front that allows the rack to rotate.
How to change shock absorber struts and springs on a Camry 40?
- Raise the car on a lift;
- Unscrew the bolts securing the rear wheels;
- Unscrew the brake hose mounting bolts;
- Unscrew the upper stabilizer link mounting bolt;
- Unscrew the two fixing bolts of the shock absorber strut;
- Remove the shock absorber strut from the knuckle;
- Go to the car interior;
- Remove the rear passenger seat headrest;
- Pull out the decorative plugs;
- Unscrew the two fixing nuts;
- Move the seat forward;
- Unscrew the upper fastening of the shock absorber support;
- Remove the shock absorber strut;
- Compare the shock absorber struts with each other (new and removed);
- Pull the spring off the shock absorber strut;
- Unscrew the nut securing the support;
- Remove the upper support with boot + bump stop;
- Compare springs;
- Assemble the shock absorber strut and support;
- Install the new assembled shock absorber strut;
- Complete assembly in reverse order.
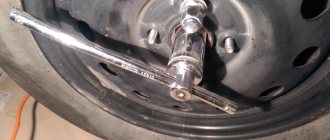
We lift the car on a lift. If you don't have a lift, you can use a jack on each wheel one at a time. Unscrew the rear wheel mounting bolts using a pneumatic gun and a 21 mm hex socket. We remove the wheel.
We determine the location of the shock absorber strut and check the mounting points of the strut.
Unscrew the two bolts securing the brake hose and ABS wire. We unscrew the brake hose bolts with a 13 mm hex head, and the ABS wire fastening with a 10 mm socket. We take them aside.
Check the upper mount of the stabilizer link. In case of sticking, the fastening must be cut off with a grinder.
The fastening is in order and yielded when unscrewed using a 17 mm hex socket. Move the stabilizer bar to the side.
Unscrew the two nuts of the lower suspension strut mounting with a 21 mm hex head and remove the bolts.
We remove the shock absorber strut from its mounting location.
Open the rear passenger door and remove the headrest from the rear passenger seat.
We take out the decorative plugs that hide the seat mounting bolts.
Unscrew the rear seat mounting nuts with a 12 mm socket.
Move the seat forward.
We open access to the upper support mount.
Using a large ratchet with a 13 mm socket, unscrew the upper support mount.
We are dismantling the rear shock absorber strut.
Place it on a flat surface and prepare a tie for the spring.
We compare the removed shock absorber strut with the new one.
We compress and tighten the spring with a spring tie.
Unscrew the support fastening and remove the support. We use a 19 mm socket.
The photo shows the stand disassembled.
Removed support with bump stop.
Let's compare the springs.
We compress the new spring and pull it onto the new shock absorber strut.
We install the support and secure it with a bolt. Important: if you are replacing a shock absorber strut + spring + support, then there is no need to disassemble the used strut and tighten the spring. We simply assemble new parts in the above order.
We check the correct assembly of the shock absorber strut + spring + support before installation;
We install a new rack and secure it with bolts. We complete the assembly in reverse order. We repeat all the steps for the second rear pillar.
About a year ago I changed all the struts all around and the silent blocks, in general, almost the entire suspension except for the rear strut supports, after disassembling they showed me they were quite serviceable and indeed, when everything was assembled, the suspension worked super like it came off an assembly line, from 06.2011 to 11.2012 and then the first cold weather arrived when something began to mumble behind me - the dull sound of rubber beating on metal - without thinking for a long time, I immediately realized that these were the rear strut supports!
Replacing rear springs and shock absorbers Camry 40 — logbook Toyota Camry on DRIVE2
We go into the salon and unscrew the three nuts that secure the strut support to the body, which we previously loosened! We remove the jack and the stand together with the hub falls and hangs in the air, hold it on the longitudinal and transverse rods, take out the stand and drag it to the garage on a workbench as it is more convenient there... Now the task is to unscrew the rod nut of the rear strut of the Toyota Camry which the support is wearing, for this I used a drill with a diameter of 12, 1 meter long, resting it on the garage: The lower part of the seats of the sofa.
The lower part of the rear seats of the car is dismantled and pulled out. The seat backs fold down.
Removing the shock absorber strut from the rear suspension of Toyota Camry
The sides of the rear seats will also need to be removed. The sides of the rear seats are removed. Attaching the rear struts. Behind the dismantled sidewalls of the rear seats is the upper mounting of the shock absorber struts. Removing rear shock absorbers. Unscrew the three fastening nuts from the upper cup of the body and the shock absorber rear strut of the Toyota Camry. Old shock absorber strut. Failed shock absorber strut.
General form. The hanging part of the rear suspension is on the lower arms. Decide where to carry out repairs, in whose hands to entrust your own car. Armed with knowledge, make a decision. When repairing yourself, all responsibility rests with you, and any ill-considered actions are undesirable, and they can also be disastrous in terms of the technical condition of the vehicle. You should purchase parts according to the proposed catalog for Toyota Camry rear pillar, select products that are suitable in terms of cost and quality.
The choice is enormous, and you should be guided not only by the advice of friends, but also by the technical data sheet of the car, and personal experience in the matter of repairs.
After preparatory research of the assortment, choose. No matter what mistake will result in additional waste.
So, a planned repair, how to remove the rear struts of a Camry 30, will cost the rear strut of a Toyota Camry an average of rubles. Preparation of the workplace. In the garage or on the inspection platform, you should prepare everything for repairs and decide how to remove the rear struts on the Camry 40 without much difficulty.
It is possible to use a lift and an inspection hole, stock up on safety equipment while working under the machine.
These include special supports, boots, stands. Repair and replacement of the rear strut on a Camry All procedures are carried out according to the rear strut of a Toyota Camry and operating regulations. Advice from professionals is taken into account on how to change the rear struts on a Camry. Test drive and control check at the technical site. External signs of problems disappeared during the test drive, in other words, there are no creaks, knocking noises, disgusting maneuvering, then you can hope that the work was carried out correctly and thoughtfully.
The cost is rubles. Rear left shock absorber support. A set of keys for car repairs if it is not available. What you need to repair and replace the rear strut of a Camry 30. Two rear supports to replace.
Keys and utility tools. It’s great when you have a whole arsenal of keys in the garage, because you will need to work as a whole, providing access to fastenings in very difficult areas. Kerosene is one of the cleaning agents for hard-to-unscrew bolts and nuts.
Supports for spring compression or compacted rope. The elements are useful when a complete replacement of the suspension is planned, not excluding the boot and spring. Jack A step-by-step process on how to change the rear struts on a Camry 40. Place the car on a level and strong surface so that there is a reliable base for the jack.
There should be enough space for at least 2 workers to maneuver. It’s more convenient to work with a couple, there is someone to bring, hold, serve. Prepare the car for repair, in other words, the rear pillar of the Toyota Camry must have access to the interior and to the rear wheel arches. Place all tools and components in an access step.
Raise the car a little, rear strut of the Toyota Camry and then loosen the necessary nuts on the lower mounting area. Removes the right and left wheels alternately.
How to replace shock absorbers and struts in a Toyota Camry
- 0.1 Replace front shock absorbers and struts in Camry
- 4.1 Replace rear struts in Camry
Replace front shock absorbers and struts in Camry
Step 1
Raise the front of the Camry with a floor jack and support it by the frame with a floor jack. Loosen and remove the nuts holding the front wheels using a tire iron and set the wheels aside. Locate the strut assembly under the front end of the vehicle. They look like springs with fasteners that run through them and attach the ends to the suspension and frame. They are installed directly behind the wheel hubs.
Step 2
Locate the brake hose at the wheel hub and follow it to the strut. Disconnect the mounting bracket as well as the anti-lock brake sensor. Remove the nut from the stabilizer line about halfway down the strut assembly. Pull out the bolts on the underside of the spacer as well as the nuts connecting the top to the frame. Pull out the spacer and repeat this step on the other side of the Camry.
Step 3
Remove the dust cover from the stand and compress the spring. Remove the lag nut and lay out all the parts in the order they were removed so you can assemble the struts: mounting bracket, boot, top spring seat, top insulator, coil spring, spring bumper, and bottom insulator. You should be left in shock. Replace any worn parts and reassemble the spacer. Set the disc on the torque wrench to 35 feet and tighten the spacer nut until the wrench slips off. Unpack the spring.
Step 4
Put the dust cover back on and attach the top bolts on the stand to the chassis. Torque them to 29 lb-ft. Insert the bottom bolts and tighten them to 113 ft-lbs. Install the brake hose mounting bracket and anti-lock brake sensor. Torque it to 21 feet. Screw on the stabilizer link nut and tighten to 55 ft. Repeat steps 3 and 4 on the other side of the Camry.
Install the front wheels and lower the front of the car. Have a professional perform an alignment on the front wheels.
Replace rear struts in Camry
Step 1
Remove the cover and disconnect the negative battery cable using a wrench. It is attached to the battery terminal and is marked with a blue, black or negative symbol. Pull out the rear seat cushions and backrests and lift the rear of the Camry. Support it by the frame, but insert the stand under the bridge. Remove the rear wheels.
Step 2
Disconnect any sensors or brackets from the strut and remove the sway bar link nut in the middle. Find the lever that supports the bottom end of the stand and slide another stand underneath it. Disconnect the lower strut bolts and remove the upper strut mounting nuts. Repeat this step on the other side of the Camry.
Step 3
Pull out the strut and compress the spring. Remove the nut in the center and place each piece next to each other so you know how they are put together. Remove the support, coil spring, insulator and bumper. Replace any worn parts. Assemble the post and tighten the center nut to 36ft. Remove the spring compressor.
Step 4
Position the spacer on the frame and install the top mounting nuts. Torque them to 29 feet. Attach the spacer to the arm, but only hand-tighten the bolt. Connect the stabilizer link nut to the strut and to any sensors or brackets you previously removed. Repeat steps 3 and 4 on the other side of the Camry.
Install the wheels and lower the rear of the car. There is little bounce on it to stabilize the suspension. Torque the mounting bolt to 188 ft. on each side of the vehicle. Install the rear seat cushions. Connect the negative battery cable to the terminal.
Replacing rear strut supports for Toyota Camry ACV40
Replacement of rear silent blocks — Toyota Camry CV40
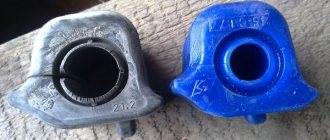
Well, then we just put a new LEFT one. This is important, the support is in the right position with the spot facing outward. Toyota Camry 40 rear suspension repair is so that the spot faces the street when the strut is installed on the car. Tighten the rod nut, make sure that the grooves of the rod fit into the grooves of the strut support, tighten without much enthusiasm so as not to rotate the rod and cage in the support, we put the strut in place in reverse chronological order, that is, first we insert the bolts securing the strut support to the hub and tighten the soaked, dried and lubricated nuts - without tightening them yet! If malfunctions occur, they should be corrected immediately, since your safety depends on it.
Exploitation. Maintenance and Repair. Camry V Rear suspension Toyota Camry V40 Retail prices…
All three ropes must be firmly tied at the base of the lower saddle of the spring, the other ends must be threaded around the uppermost rim of the spring and tensioned.
But I pulled onto a gravel road with a comb, the car goes much more pleasantly, I really didn’t drive. By the way, I did the alignment a couple of hours ago, it flew a hundred meters, the flight was normal! The supports themselves are 2 pieces 2.
I don’t know if I’ll wait for spring or not, but when the money appears, you’ll see and change it, for complete happiness.
By the way, I did the camber a couple of hours ago, it flew a hundred meters, the flight was normal! Another interesting information, I found out from the master why he made a homemade mount for the brake hoses on the struts, it turns out to be on Kayab struts, for some reason this mount is noticeably lower than on the original ones, and it is problematic to attach the original hoses to them. Maybe the Japs had already replaced the hoses with some non-original ones before me?
In short, HZ, this is surprising, but now it’s too late to rush around. Yes, and I double-checked them in the catalog - they are.
Cartridges in Krasnoyarsk cost approximately , and my stands were collapsible, but when they were removed, it became clear that the rods were bent, that is, naturally crooked, not like a Turkish saber, of course, but quite enough for the oil to drive.
In short, what would have happened with the cartridges? And the difference between the cost of a cartridge and the price of rubles is not critical for me.
This seems to be why I had a problem with attaching the brake hoses, I had to make a homemade one, apparently only cartridges were suitable for me. So whoever is going to change the racks, keep this in mind. Damn, live and learn, now people have learned that the cartridge is a full-fledged shock absorber, with a rod and everything else.
Except for the glass of the rack itself. Damn, you had to buy a cartridge, and there would be no brand with hose fastenings.
Front suspension device
The official manual characterizes the front suspension as an independent MacPherson link-spring system. The layout of the suspension elements shown in the figure below includes the following elements:
- The right shock absorber
and the left one are number 6. They are used to dampen vibrations. In addition to damping vertical movements, they are assigned the function of telescopic guides. A coil spring is installed on top of the shock absorber. There is a compression buffer and a top support. The shock absorber strut transmits force to the car body. - Anti-roll bar link. Connect the stabilizer bar to the shock absorber strut.
- Spherical bearing.
- Lower arm. Connected to subframe. The fastening is made using silent blocks and rubber-metal bushings.
- Stabilizer bar. It has rubber bushings mounted on it. With their help, fastening to the subframe is realized.
- Rounded fist. Connected to the shock absorber strut on one side and the lower arm on the other. Contains hubs installed. For the mobility of the structure, a double-row angular contact bearing is used.
The disassembled shock absorber strut, which is one of the main elements of the suspension, is shown in the photo below.
Typical rear suspension problems
The rear independent multi-link spring suspension is unpretentious and reliable. Breakdowns in it are much less common than in the front one, but still it is not without faults. The main problems that Toyota Camry 40 car owners most often encounter are shown in the table below.
Sources:
https://autodok24.ru/ustrojsTVo-avto/zamena-zadnih-stoek-kamri-40.html https://servis-novomotors.ru/zamena/zamena-zadnih-stoek-kamri-40.html https:// zapchasti.expert/toyota/camry40/podveska-camry-40.html
Rear suspension Toyota Camry V40 2006-2010
Friends, be careful, these assholes in stores can’t tell you anything, or don’t want to, the racks are more expensive than the cartridges, that’s bullshit, they didn’t sell what they needed. Well, it’s too late now, I’ll go as is.
The Toyota Camry 40 suspension is the connecting link between the wheels and the body. She has to work in an aggressive external environment. At the same time, the suspension fulfills a number of requirements and functions assigned to it: The above set of qualities possessed by the front and rear MacPherson-type suspensions used on the Toyota Camry 40 allows the car owner to feel comfort and safety while driving the car.
If the characteristics of the suspension do not suit the car owner, tuning and individual adjustment of all parameters is possible. Front suspension design The official manual characterizes the front suspension as an independent MacPherson link-spring system. The arrangement of suspension elements shown in the figure below includes the following elements: Right shock absorber and left shock absorber number 6.
We put the car on a support... The support is homemade - fierce - mega-stable 4.
Silent blocks in the rear trailing arms (replacement) torque rods
We go into the salon and remove the left part of the backrest - to get to the bolts securing the strut to the body 6. Loosen the three nuts securing the strut support to the body 7. Next, unscrew the nut of the transverse stabilization strut Link and the brake hose from the strut body in this position the link cannot be pulled out, it is clamped , it’s better not to do this, otherwise we’ll damage the thread - then it will come out easily. Unscrew the lateral stabilization strut and brake hose 8.
We unscrew the nuts of the bolts securing the strut housing to the wheel hub, the head is 19 high, we do not remove the bolts, and in fact they are clamped, they can only be knocked out - which is not necessary to do 9. You need to take three synthetic ropes with a diameter of mm. Our three ropes are approximately 1 in length.
All three ropes must be firmly tied at the base of the lower saddle of the spring, the other ends must be threaded around the uppermost rim of the spring and tensioned. We take a second jack; if there is no one, we remove the one that was used to lift the car! We place it under the wheel hub and lift the hub, thereby compressing the strut spring, compress it by eye! Here, at a certain moment, our clamped stabilization strut is released and pulled out easily:
Rear suspension device
Camry rear suspension design
40 shown in the image below includes the following items:
- Trailing arm.
- Fist. Connected to shock absorber strut. The fastening is made using two bolts. The transverse arms are attached to the knuckle using silent blocks. Also, the hub bearing housing is attached to the knuckle using bolts.
- Shock absorber strut. Dampens vertical vibrations of the body. The strut consists of a shock absorber, a coil spring, a compression buffer and an upper support through which it is attached to the body.
- Anti-roll bar link.
- Front wishbone.
- Rear
wishbone. - Anti-roll bar. Connects to the body using two brackets through rubber bushings.
The design of the rear suspension is such that it is not possible to adjust the camber angle. During operation, it is necessary to regularly monitor the camber, since it can be used to judge the general condition of the suspension elements.
Rear wheel toe adjustment is possible. For these purposes, it is necessary to change the length of the rear wishbones.