The filter ensures high-quality operation of the VVT-I valve on the 1NZ-FE power unit. The device is a cleaning metal mesh through which the oil supplied to the valve is driven. Situations are often observed when the valve timing system of an internal combustion engine begins to operate intermittently specifically due to clogging of the filter element. This can be caused by using low quality motor oil or failing to change it in a timely manner.
We wrote in detail about the design, cleaning, repair and replacement of the VVT-I valve in this material. In the presented text we will talk in detail about cleaning exclusively the valve filter and its effect on the functioning of the power unit.
Cleaning the VVT-I valve filter
Cleaning the VVT-I valve filter on 1NZ series power units involves washing a special mesh. The device is mounted on the motor jacket behind the generator. Before starting work, you will need to prepare the following tools and materials:
- hexagon 10;
- socket heads with extension for 12 and 14;
- tweezers;
- a tube of suitable diameter for use as a lever;
- carburetor cleaning fluid or household chemicals.
In order to get to the specified element, you will need to perform the following steps:
- Using a 14mm socket, loosen the lower mounting bolt of the generator;
- Unscrew the alternator belt tensioning bolt. To do this you will need a twelve head;
- Subsequently, the belt and tension bar of the generator are dismantled, which is fixed with a twelve-head bolt directly to the power unit. The device itself is moved away from the power unit as far as the lower fasteners allow. This will allow you to obtain the required space for further dismantling of the filter device;
- Using a 10mm hex, unscrew the plug with the filter mesh. Quite often, it gets stuck and you will need to use an additional lever. In this case, you need to pay attention to the o-ring. It can remain either on the unscrewed plug or on the power unit. If the gasket remains in the seat on the motor, it is recommended to remove it by hand, pressing with your thumb and gently moving it in any direction. If you use a screwdriver to pry up the O-ring, it may come off and get lost or damaged;
- The metal mesh itself can be removed along with the plug or remain in the seat. In extreme cases, you will need to use tweezers to dismantle the element.
After you have finished dismantling the filter, you can start cleaning it. To do this, you will need to use any carburetor cleaning liquid or household chemicals. When using the latter, you will need to thoroughly rinse the mesh with water or alcohol. Subsequently, the part is installed in the seat in the reverse order.
Stiff brake pedal and problem with the VVTi valve on Toyota 2NZ - how to clean it yourself
Background. Toyota Fancargo car. The 2NZ engine began to misfire and the car began to jerk, the revs were either high or low, fluctuating.
I decided to disassemble and clean the throttle valve (DZ) and idle air valve (IAC) - read how to do it yourself. After cleaning the DZ and IAC, the car seemed to drive smoothly. But the next day - high revs up to 2000.
Well, it seems like everything has been cleared?! I installed everything correctly! I decided to drive around a bit, maybe the computer will get used to it and slow down? Vice versa. The car began to stall at stops and at intersections. The brake pedal became wooden and stiff. You have to press the brake pedal as hard as you can to make the car stop. Maybe the vacuum has gone bad? Or again, there’s something wrong with the injector (read why the engine in a Toyota suffers). But then what does the stiff and wooden brake pedal have to do with it? And the engine began to stall, and not just stall.
I read the Internet. They say the problem may be a dirty VVTi valve. Should I try to remove the chip (contact) from this valve? I tried it - everything is fine. The car runs smoothly, the speed is normal, the brake pedal is soft, as before.
All that's left to do is change the VVTi valve on my Toyota Fancargo. Or clean it yourself.
Work for 1 hour yourself, not even in the garage, you can do it in the parking lot. The video explains everything and shows how to change the valve. I just cleaned the VVTi valve myself and put it back.
Attention: if you apply excessive force when unscrewing, the valve may break in the middle, and the second part will remain inside the engine. Not only do you have to buy a valve, you also have to remove the old piece, and this will be difficult and time-consuming.
Tips: When you remove the VVTi valve mounting bolt, spray the gap between the valve and the engine with WD-40 several times. Sprayed - waited 5 minutes and so on 4 times.
Then take a flat-head screwdriver, place it in the place where the bolt is attached and lightly tap it with a hammer so that the valve moves 1-2 mm. Then, using a gentle twisting motion, pull the valve out of the engine.
Take “Carbcleaner” or any carburetor cleaner and spray it liberally onto the valve, into all its cracks where you can reach. Soak it in a jar in carb cleaner for half an hour and then screw it back to the engine.
In addition to the valve, you can also wash and clean the oil filter mesh of the VVTI valve. This filter is located just below the valve itself and is unscrewed with a hexagon. You won't break anything there, but take a longer hexagon to make it easier to work with. Also wash the mesh in Carbcleaner and put it in place. That's it, the engine rustles and doesn't stall. The brake pedal is soft and stops immediately.
Cleaning the VVT-i filter on Toyota Vitz engine. 1NZ-FXE
The presented report with photographs describes in detail and shows the process of self-cleaning the VVT-ai filter on a Toyota Vitz with a 1NZ-FXE engine or washing the filter element of the VVT phase distribution system on the specified vehicle. This filter is either part of the VVT-ai valve, or it can be located itself in the engine block. Thus, if you check the phase valves and there is an indication that the system filter is dirty, then naturally it should be cleaned and the car will run as in the first days.
You will learn that there are problems in the phase distribution system through the Engine check on the panel, deciphering the code p0011.
The VVT-I system device (hereinafter referred to as VVT-ai) has long been located on modern engines and not only in Toyotas, but also on other cars. It is needed to shift the valve timing, so the following happens - in all speed ranges the engine produces the greatest power. If the VVT-ai works correctly, then the engine works more powerfully than if the VVT-ai is turned off or broken. This system phase distribution device is important, because if it is faulty, then there are cars in which the brakes may fail because of this, and some will accelerate spontaneously.
How else can you find out if VVT-ai is working? When starting the engine at idle, you should remove the connector from the VVT-ai valve; at constant speeds, the VVT-ai does not function. In case of changes, the VVT-ai may be in working order.
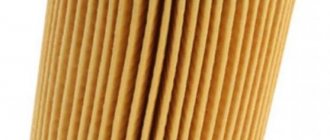
This is a type of filter in good condition.
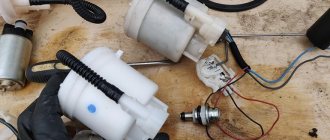
These tools will be needed.
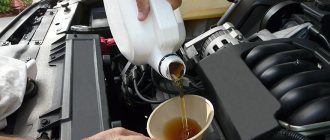
The cleaning products we need to remove grease.
This is our product.
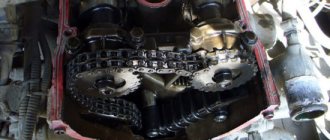
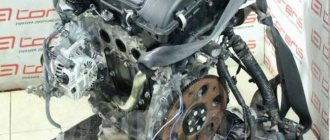
In a 1nz engine, the filter is located on the left side, below the cylinder head cover, under the VVT-ai valve.
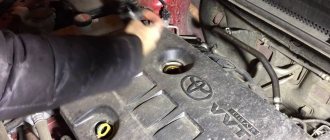
To gain access to the filter element, you need to remove the air filter frame, disconnect all wiring and pipes (wiring to the VVT-ai valve, to the gas vapor destruction valve and the double pipe). To avoid interfering with work, unscrew them and leave them to the side.
Using a tool such as a hexagon, unscrew the filter. It is firmly attached, so spray it with WD-40. Once unscrewed, do not lose the washer-gasket. No one will say whether you can install it properly, but I don’t have the second one, the old one is in working order.
We take out the filter. It consists of a mesh in a plastic frame in a metal bolt that is easy to remove. It happens that the mesh may remain in the hole, in which case you should use tweezers. This is how our filter is presented (on both sides).
We see that it is thoroughly polluted.
Let's take the lid and start soaking it in household chemicals.
After a third of an hour in solutions, this is the result.
As a result, the cleaning was only half done, so we lower the part into the solution again for half an hour.
The second time it cleaned well.
Reassemble in reverse order.