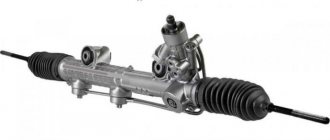
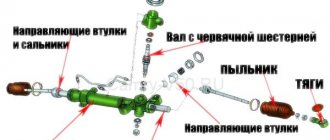
Steering rack mechanism
Experienced car enthusiasts know that twitching of the steering wheel in a car when driving on an uneven road surface indicates that the steering rack needs to be replaced. Often this effect is accompanied by characteristic knocking sounds. There are two ways to deal with the malfunction: delegate related concerns to service station specialists or take care of everything personally.
Note! The steering device is the most important mechanism in a car, which not only allows you to correct the movement of the vehicle in the horizontal direction, but also ensures safety when driving.
And if you do not trust domestic craftsmen, and there is no way to contact a specialized service center, it is advisable to repair the steering rack yourself. There is nothing complicated about this if you approach the issue consistently and with a certain theoretical basis. Below we will look at how to do this most effectively.
What tools will be needed for the work?
Required Tools
In order to replace a failed or poorly functioning mechanism, it is necessary to prepare a certain set of tools in advance:
- wooden supports;
- liquid key;
- thin screwdriver;
- medium hammer;
- a set of socket wrenches and a set of sockets with a ratchet;
- puller for tips.
Preparatory activities
Before changing anything, we strongly recommend that you read the service manual, which consistently describes the entire process and tips for its implementation. Generally, there are 3 steps to complete first:
- The machine should be placed on as level ground as possible, and then the parking brake should be locked. To secure the vehicle, it is necessary to place bricks under the wheels.
- The steering wheel is set to neutral position.
- Then you need to loosen the wheel nuts, and this must be done one at a time.
Loosening Wheel Nuts
Having completed the preliminary work, the car is placed on a jack and the wheel is removed from one side. After which the car is lowered again, but on wooden supports. The wheels on the other side should be removed in the same way. The described steps are aimed primarily at gaining access to the steering tips, which will greatly simplify the removal of the steering rack.
Advice! Before unscrewing the bolts, they are cleaned with a metal brush and treated with a WD-shkoy.
Unscrew the absorber
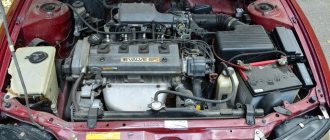
While the liquid consistency destroys rust, it makes sense to look under the hood and clear the area for access to the problematic mechanism. In order to remove the steering rack, it is necessary to remove the alarm siren and gas adsorber, having previously unscrewed the corresponding terminals. The extracted solutions are removed so as not to interfere.
Removing the tips
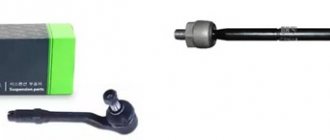
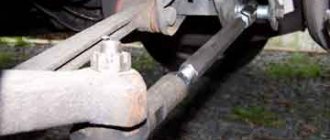
Experts emphasize that very often the steering rack is replaced along with the tips. They are dismantled using a conventional puller or knocked out with a hammer. Using pliers, the key is removed from the fastening nut, after which it is unscrewed.
Removing the steering tips
A fork-shaped mount should be inserted under the rubber seal, and the upper part of the pin should be placed on the base of the tip bolt. The puller nut is tightened to the maximum, and then a hammer is used to strike the rack mount, so that the tip can be removed without any problems. Removal and installation of all elements must be carried out extremely carefully.
More information about Toyota Camry steering
To reduce the required force that must be applied for one turn of the steering wheel, the Toyota Camry is equipped with a hydraulic booster. The auxiliary force is a special fluid transmitted under very high pressure to the cylinders of the steering control device. the working fluid is pumped into the cylinder due to the functionality of a special distribution valve, which, taking into account the angle of rotation, creates a certain pressure in the system.
The distribution valve begins to build up pressure only when the steering wheel is turned in a calm state, the liquid moved by the pump returns to the tank. in this case the working pressure is zero. The pump, which pumps liquid and creates pressure, is driven by a belt placed on the crankshaft pulley of the power unit.
More on the topic:
- How to choose the right auto parts
Removing the rack: step-by-step instructions
Steering Cardan Lock Bolt
How to remove the steering rack, regardless of the car model? The work is carried out in 4 stages.
- The mounting crosspieces are loosened (to access them, you should look under the brake pedal inside the car). To release it, it is enough to unscrew just 1 nut, since the fastening mechanism is implemented on the principle of a clamp.
- When restoring or repairing the steering wheel, you need to return to the area under the hood and use the steering wheel to release the clamp clamps.
- After performing simple manipulations, the rail is finally released; simply remove it: grab the base of the body with both hands and begin to gently and slowly loosen it, simultaneously pulling it towards you.
We remove the rack
4.After disconnecting all the clamps and fastenings, you need to pull out the steering rack using the hole in the arched wheel space: turn it first to the left and then to the right (as it turns out) so that the splined shaft gets into the structural recess.
Removing the rack
Craftsmen recommend carrying out work as carefully as possible. Replacing the steering rack should not damage the electrical wiring or fuel hose. You can't do this without an assistant. Installation of a new rail begins only after the old one has been cured.
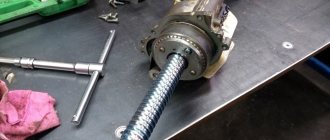
The process of installing a new mechanism is carried out in reverse order. Using graphite lubricant or ordinary grease, the landing areas of the studs are treated, and they are also cleaned with a brush. To prevent traction in the car from falling, all the plugs in the new rack are opened and they are filled with lithol.
New steering rack
The rack is rotated around its axis, but smoothly, in order to eliminate the possibility of damage to the wiring.
Note! You cannot do without the additional hands of an assistant when attaching the steering “worm” to the spitz part. One person should be in the cabin and directly connect the mechanism to the clamp, and the second should guide it from the outside.
We strongly recommend watching the thematic video about removing the steering rack yourself, presented below.
Replacement of crosspieces and shaft
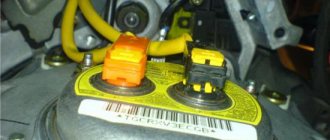
To replace the crosspieces, you need to set the steering wheel to the middle position and fix it firmly. Fixing is necessary in order to prevent breakage of the signal loop, steering wheel buttons and airbags, which can occur if the steering wheel is turned more than the prescribed two and a half turns. Only after these manipulations can you safely unscrew the bolts on the lower crosspiece with a 10mm wrench. It is located near the rack, under the hood. Then you need to unscrew the bolts of the upper crosspiece, which can be seen next to the brake pedal. In most cases, the lower crosspiece is faulty, but if the cardan shaft needs to be replaced, then both will have to be removed.
Next, you need to insert the mounting bracket between the rack and the lower crosspiece, and carefully pull the cardan out of the socket. From inside the crosspiece will have to be knocked down with a hammer, but this should be done carefully, otherwise the cardan splines may be damaged.
Diagnostics
Important! Carrying out diagnostics of the steering wheel when a knock appears in the steering column on a Toyota Camry v40 is the main task of the car owner, as well as repairing identified problems. If we take into account the reliability and build quality of Toyota Camry cars, then the appearance of any extraneous knocking in the steering wheel is a serious reason for immediate diagnosis in a specialized car service center. To determine the cause of a knock in the steering column on a Camry, specialists conduct a visual inspection of each part and connection. The purpose of such an inspection is to identify the presence of play in parts of the steering wheel or bearing faults. Testing each steering mechanism for loose fasteners allows you to reliably determine the source of the problem. After inspecting and troubleshooting the steering wheel, it is necessary to test the vehicle while driving. When driving the car, you should not hear a characteristic knock; if the steering wheel still knocks, it means that the problem is more serious and needs to be fixed immediately.
Of course, many car enthusiasts who have sufficient experience in car repairs can carry out similar steering wheel diagnostics on their own. In most cases, you can fix the identified problem on your own, if you have the necessary tools and spare parts.
Question: Owners of 130s with an axle from 78 Prado, please advise
The point is this: there was an accident at the end of 2021, after which I tried for a long time to solve the problem with the steering (more precisely, they looked for the reasons).
Now, in the end, everything has been done, but now it seems to me that previously the car drove somehow better (in terms of handling), or maybe not, and right now it drives the way it should drive (in short, I really don’t remember how it should anymore) be).
I know that there are a lot of owners of surf cars with a front Pradikovsky axle here: guys, please write down your opinion - is there any problem and how to fix it (if any)?
— changed the steering knuckles (because on the old ones the threads were covered, and the nuts on the studs kept unscrewing themselves);
— We welded cracks on the frame in the area of the steering gear + strengthened that place;
- Replaced the steering gearbox with a contract one (there was a lot of play on the old one).
In general, there are no further comments on the suspension (there are no plays, nothing is leaking anywhere, everything spins/rotates as it should): the bushings are normal, the tips are more lively, well, etc. The only exception is that the steering universal joint (45860-35150) was ordered to be replaced, and there is about 10 degrees of play on the steering wheel.
The damper costs a Chinese double, it seems to work.
And now the feeling when driving is like this:
— the car drives smoothly on a flat surface. As soon as it gets into a small rut (just a very small one) in the asphalt, the car practically turns sideways. There certainly wasn’t such crap before (more precisely, it was, but only in the “evil” rut);
— the steering wheel has become so light, it starts to spin just from breathing on it))) and it’s scary to drive))
- I began to directly physically feel the connection/coupling of the wheel - traction - gearbox - steering wheel. Those. through the steering wheel I feel how the wheel moves a centimeter, and how it pulls along all the other links in this chain (and vice versa). I won’t say that this is bad, but again, this kind of crap didn’t exist before, and I don’t know if it should be like this or not. In short, the sensitivity has greatly increased.
Is this all the norm? Or, conversely, there shouldn’t be increased sensitivity in the steering? I now have a feeling when driving, as if something is loose somewhere in the suspension (apparently, this feeling arises from the light steering), although there is nothing of the kind there.
People advise replacing the damper with one that returns to center. But I somehow doubt this: it is not cheap, and whether it will be of real benefit is unknown. When the bridge was rolled in, I drove for about six months without a damper at all (it was dead) and didn’t strain at all.
In general, give a diagnosis on the Internet))) What kind of management do you have?
How to replace the steering cardan
Then a new crosspiece can be installed, or the entire repair kit can be replaced at once. As practice shows, such a replacement is justified, because by replacing each spare part separately, you will have to constantly subconsciously expect that something else will break down in the power steering. This unit must be assembled in the reverse order.
Did the knocking and play go away after that? This means it’s time to pay attention to the wear of the steering rack. When designing this car, engineers left room for additional debugging. The adjustment is made with a bolt located next to the cardan shaft entrance. Tightening it clockwise reduces the backlash, but not for long. This will have its own inconveniences. After all, now controlling the car will require more effort from the driver, and in extreme positions, the steering wheel may bite. In this vein, such adjustment is akin to delaying the problem rather than solving it.
Toyota steering rack repair price
Draw your attention to! The prices given in the table below are for informational purposes only and may change in one direction or another, depending on the complexity of repairing each specific steering rack, and are determined based on diagnostic results.
| car brand | Steering rack repair*, rub. | Removal/installation, rub. | Camber adjustment**, rub. | Toe adjustment price, rub. |
| Toyota 4 Runner 2002 | 6500 | 7000 | 1900 | 1500 |
| Toyota Auris | 4500 | 5500 | 1500 | 1300 |
| Toyota Avensis (T25) manual | 5500 | 5500 | 1900 | 1300 |
| Toyota Avensis (T25) hydraulic | 7000 | 6000 | 1900 | 1300 |
| Toyota Avensis (ZRT27b ADT27) | 6000 | 6000 | 1900 | 1300 |
| Toyota Avensis Verso (AC) | 6000 | 6000 | 1900 | 1300 |
| Toyota Aygo | 4500 | 5500 | 1900 | 1300 |
| Toyota Camry IV | 6500 | 6000 | 1900 | 1300 |
| Toyota Camry V (ACV40,GSV40) | 7000 | 6000 | 1900 | 1300 |
| Toyota Camry VI (ACV51,GSV50) | 7000 | 6000 | 1900 | 1300 |
| Toyota Carina E (T19) | 5800 | 5500 | 1900 | 1300 |
| Toyota Celica (ZZT23) | 6000 | 5500 | 1900 | 1300 |
| Toyota Corolla III (E11) | 5500 | 5500 | 1900 | 1300 |
| Toyota Corolla IV (120) | 6000 | 5500 | 1900 | 1300 |
| Toyota Corolla V (150) | 4500 | 5500 | 1900 | 1300 |
| Toyota Corolla Verso (ZER_,ZZE_) | 4500 | 5500 | 1900 | 1300 |
| Toyota HI ACE (H1, H2) | 7000 | 6500 | 1900 | 1500 |
| Toyota Highlander (MCU2, ACU2) | 7500 | 6500 | 2200 | 1500 |
| Toyota Highlander II | 7500 | 6500 | 2200 | 1500 |
| Toyota Hilux | 7500 | 6500 | 1900 | 1500 |
| Toyota Land Cruiser 100(J10) | 8500 | 7500 | 1900 | 1500 |
| Toyota Land Cruiser 150(J15)/Prado (J15) | 9000 | 7500 | 1900 | 1500 |
| Toyota Land Cruiser 200(J20) | 10500 | 12000 | 1900 | 1500 |
| Toyota Land Cruiser 90(J9)/ Prado(J9) | 8000 | 7000 | 1900 | 1500 |
| Toyota Picnic II | 5800 | 6000 | 1500 | 1300 |
| Toyota RAV 4 I(SXA1) 1994-. | 7000 | 8000 | 2600 | 1500 |
| Toyota RAV 4 II(XA2) 2001-. | 6500 | 8000 | 2600 | 1500 |
| Toyota RAV 4 III(ACA,ACE) 2005-. | 5000 | 8000 | 2600 | 1500 |
| Toyota Sequoia | 6500 | 8000 | 2700 | 1500 |
| Toyota Sienna II | 6000 | 6000 | 1900 | 1500 |
| Toyota Tacoma | 6000 | 6000 | 1900 | 1500 |
| Toyota Tundra | 7000 | 7500 | 2700 | 1500 |
| Toyota Venza | 4500 | 5500 | 1900 | 1300 |
| Toyota Verso | 4500 | 5500 | 1500 | 1300 |
| Toyota Yaris (CP10,NC /LP2) manual | 4500 | 5000 | 1500 | 1300 |
| Toyota Yaris (CP10,NC /LP2) hydraulic | 6000 | 5500 | 1500 | 1300 |
| Toyota Yaris 2006-. | 5000 | 5500 | 1500 | 1300 |
| Toyota Yaris 2011-. | 5000 | 5500 | 1500 | 1300 |
*The cost of steering rack repair includes:
- primary diagnosis
- fault detection
- replacing all seals
- repressing the piston on the main shaft (if required by the design feature)
- replacing teflon rings
- replacing rubber seals
- grinding (if there are fragments of corrosion on the shafts)
- final check on a hydraulic stand
In case of non-repairability of the main shaft (unremovable corrosion, missing teeth), distributor gear (unremovable corrosion, missing teeth), deterioration inside the steering rack housing, damage to the hydraulic lines, the cost of repairing the steering rack is negotiated additionally.
**the price is indicated with a 20% discount when repairing the steering rack.
Toyota steering rack repair
Toyota steering rack repair is necessary for absolutely all cars of this brand. You just need to listen to see if your pet’s “fingers” are tapping when turning the steering wheel. This is the most obvious sign of an upcoming service trip. You can wait until dips begin to appear on turns caused by a faulty steering rack. Toyota here is no different from other car manufacturers: all the same cheap materials on parts that are produced on factory conveyors. This is beneficial for the supplier: investments are minimal, profits are maximum, but ordinary motorists suffer.
Actually, the solution to the problem is quite simple: due to the small limit of factory spare parts and their high cost, it is completely unprofitable to replace them every time. It is much easier to repair a Toyota steering rack. This procedure involves disassembling this complex mechanism for spare parts and replacing only damaged parts. There are, of course, situations when this is unprofitable and it’s easier to buy a new one. In any case, the qualified employees of our service center will tell you what to do better and more profitable for your wallet.
We repair racks of the following Toyota brands:
- 4Runner
- Auris
- Avensis (Avensis)
- Aygo (Aygo)
- Camry
- Carina (Karina)
- Celica
- Corolla
- HI ACE
- Highlander
- Hilux (HighLux)
- Land Cruiser/Prado (Land Cruiser/Prado)
- Matrix
- Picnic
- Prius
- RAV4 (RAV4)
- Sequoia (Sequoia)
- Sienna
- Tacoma
- Tundra
- Venza
- Verso
- Yaris
All rights reserved and protected by law. © 2014-2020 "Voltage-Rack Repair". All information on this site is for reference only and is not a public offer as defined by the provisions of Article 437 of the Civil Code of the Russian Federation. Moscow, st. Quarry, 2A tel. Site Map
