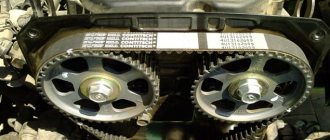
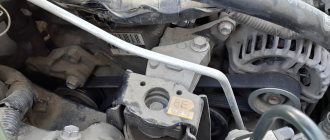
The Toyota 4A-FE engine was produced by the concern from 1987 to 1998 and was installed on the popular Corolla, sports Celica, stylish Avensis and its predecessor Carina.
In practice, it has been revealed that the first repair (not a major one, including the replacement of valve stem seals and rings) occurs after 250,000 - 350,000 mileage and depends on the quality of service. An important regulatory point is the timely replacement of the timing belt, on which, under the influence of natural wear and temperature changes, mechanical damage appears in the form of cracks.
It is important to remember that the belt-roller system of this engine is designed for 100 thousand km. mileage
Unlike the forced 20-valve 4A-GE, if the timing belt breaks on the 4A-FE, in 95% of cases the valves do not “meet” with the pistons, but a break is strictly forbidden.
Spare parts and tools
First of all, to replace the timing belt, you need to purchase the appropriate spare parts. It is recommended to purchase original parts, but proven and high-quality analogues will do: Gates (which supplies belts to the Toyota assembly line), Contitech, etc.
Manual for 4A-FE
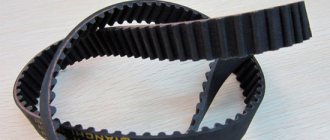
- Timing belt 4A-FE – OEM 13568-19046 (analogues of CONTITECH CT827, GATES 5403XS).
- Tensioner roller 4A-FE – OEM 13505-15050 (analogues of GATES T41072, SKF VKM 71007).
- You can immediately purchase a replacement kit, for example, CT536K1 Contitech or GATES K015027.
Bottom part of the page
Since replacing a belt involves removing the valve cover, camshaft and crankshaft pulleys, you also need to stock up on gaskets and seals:
- crankshaft oil seal 4A-FE – OEM 90311-35040 (VICTOR REINZ 81-53247-00 is a high-quality analogue);
- camshaft oil seal 4A-FE – OEM 90311-32020 (analogous to VICTOR REINZ 81-53234-00);
- valve cover washers 4A-FE - TOYOTA 90210-06010 (there is no point in purchasing an analogue);
- valve cover gasket 4A-FE - TOYOTA 11213-15071 (you can use the Danish ELWIS ROYAL 15.528.25, but the price of the original spare part is more than fair).
In addition to the parts themselves, replacement will require a number of tools and other small items:
- sealant;
- liquid key;
- lubricant (litol, grease);
- thread locker (can be replaced with grease);
- dynamometer wrench;
- keys, pullers, hammer, screwdrivers.
Bottom of page
General information about the 4E-FE engine
The engine is a 16-valve 4-cylinder engine, designed and manufactured in Japan, with a 1.3-liter fuel tank (usually AI-95 and AI-92 gasoline were used). The engine was produced from 1989 to 1999 and was equipped in the following cars:
- Corrolla;
- Corsa;
- Cynos;
- Tarcel;
- Passeo;
- Starlet.
Counterweights in the 5-support crankshaft unloaded the bearings, and holes were made in the crankshaft to supply oil, thereby protecting the rubbing elements from rapid grinding. The spark plugs in the engine were placed inside the hollow part of the cylinders, the camshaft was driven by the crankshaft timing belt. Moreover, the timing belt required replacement after every eighty thousand kilometers.
Despite their configuration and economical use of fuel, 4E-Fe engines did not become popular due to their short service life and low power.
Preparing to remove the timing belt
Before carrying out this procedure, it is advisable to read the manufacturer's instructions for car repairs.
Before starting many work on the car, it is necessary to remove the battery terminals. Replacing the Toyota Corolla 4A-FE timing belt is no exception. This is necessary to avoid short circuit.
Removing the washer fluid reservoir
Replacing the 4A-FE timing belt involves removing some attachments. First of all, we remove the front right wheel, after placing the car on a jack. Then the jack is removed (it will come in handy), and a tripod stand or any other support is installed in its place.
The next process is to remove the washer reservoir. It is removed using a 10mm wrench. The top bolt is unscrewed first, then the incoming tubes are disconnected and the power connector is removed. After this it is not difficult to get the tank.
Loosen the air conditioner belt tensioner roller
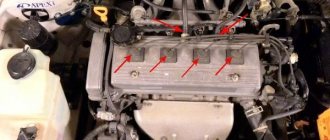
Next, the high-voltage wires are disconnected and the spark plugs are unscrewed with a special wrench.
Removing the A/C pump belt
To remove the air conditioner belt, you need to unscrew the nut on the smaller pulley, and then use a socket wrench to release the tension. Afterwards, the roller nut is unscrewed and the strap is dismantled.
Dismantling the generator
Disconnecting the wires from the generator
Determine the location of the generator connectors and disconnect them. Afterwards, the wires suitable for it are disconnected and the contact chip is snapped off.
To remove the wires, you need to remove the plastic trim on the side of the valve cover.
Generator axle bolt
Using a 14mm wrench, unscrew the upper axial bolt of the generator mounting, and then the lower bolt. After this, the strap begins to weaken, and when it sags thoroughly, we unscrew the generator from the remaining mounting points and remove it completely.
Dismantling the generator
Removing the power steering belt
The next obstacle when replacing the timing belt of a Toyota Corolla 4A-FE is the power steering belt.
Power Steering Belt Tensioner
It is necessary to loosen two bolts in the following sequence: first the tension bolt, and then the central axial bolt. Armed with a pry bar, we pull the strap off the water pump pulley.
Power steering axle bolt
In order not to damage the timing belt casing, you need to remove the pump pulley by unscrewing the four bolts with a 10mm front wrench. You are done with removing the attachment.
Removing the valve cover
After these manipulations, we proceed to removing the valve cover, which is secured with four bolts on rubber sealing nuts, and one near the bracket for the explosive wires.
Valve cover mounting locations
First, remove the hoses from the breather and crankcase ventilation valve. Then we tighten the bolts with a 10mm wrench and remove, in fact, the cover, which is installed in the grooves.
It is impossible to determine the condition of the engine by what is seen after removing the valve cover, but the quality of the oil used and its cleaning properties are determined by the amount of greasy deposits under it. You should also pay attention to the condition of the spark plug well seals. If they have become too hard, then now is the time to purchase new ones and replace them. The original spare part code is 11193-15010. They are knocked out after bending the antennae that secure them.
Replacing spark plug well seals
What additionally changes with the belt?
Toyota Corolla stopped installing a timing belt in 1998. Therefore, vehicles manufactured earlier than this year have a chain. And the belt was installed only on cars with a 4 A FE engine.
The following components are replaced along with the belt:
- front crankshaft oil seal;
- spark plug well seal;
- antifreeze pump.
It should be noted that the chain changes less often than the belt part. And the symptoms of its malfunction, which should make car owners wary, can be such as noise, the clanging of a metal mechanism when the engine is running.
Removing the protective cover and crankshaft pulley
We remove the previously unscrewed protective cover and, using a jack, hang the engine. This is done as follows: remove the engine protection, select a place under the engine near the crankshaft pulley, and jack up the engine in this place until you feel a certain pressure on the jack and the engine rises slightly. Between the jack and the engine it is necessary to use a soft gasket, rubber or caoutchouc, for example.
Removing the engine mount
Then, using a 14 mm socket wrench, unscrew the fastening of the power unit cushion. The mount is located below the support. Then unscrew the upper bolts of the engine mount and remove the cushion. After this, unscrew the bolt securing the pulley to the crankshaft and remove the remaining parts of the timing belt dust protection.
The next step in replacing the 4A-FE timing belt is to remove the crankshaft pulley. Using a special puller, this procedure is done quite simply.
But, if such a tool is not at hand, then it is possible to do without it. We fix the head of the crankshaft pulley bolt with a front key, rest it against a stationary part of the body and carefully turn it with the starter. The bolt should give way. There are no other ways without using a special tool.
After unscrewing the bolt, set the crankshaft mark with the zero mark on the protection casing.
Unscrewing the crankshaft pulley using a starter
Tags
Aligning the crankshaft pulley mark with mark 0
Before removing the belt itself, you need to understand the timing marks 4A-FE. Having completed the procedure for establishing the marks on the pulley and the engine block housing, you must additionally make sure that they match. This can be done by looking at the pistons. If the first and fourth piston are at the highest possible level, then the marks are set correctly.
Camshaft pulley marks
The camshaft marks of the 4A-FE engine are marked with the letter K. The hole under this letter must coincide with the recess of the shaft journal with the sealing oil seal. We check the correctness by removing the distributor cover. To do this, unscrew several ten bolts. The slider should be on the first cylinder, therefore, it is directed to the first explosive wire and everything is done correctly.
Distributor slider position
Consequences of untimely shift
When the drive is worn out, the engine begins to misfire. This is felt by a noticeable decrease in engine performance. The car slowly picks up speed or remains at low speed even when you press the gas pedal all the way.
If teeth fall off the drive, particles risk getting under other rotating elements, which will lead to deformation, rapid wear, or complete failure of the units. The camshaft pulleys may be damaged.
When a break occurs, the piston strokes cease to coordinate, and the cylinders begin to hit the valves, turning the engine into a device that cannot be restored.
Changing the timing belt in a Toyota is not at all difficult. The work is carried out with the vehicle standing on the ground. At the same time, dismantling the parts located around is quite simple, since the units and fasteners are in accessible places, and there is a lot of space under the hood. When changing this fundamental part of the power unit, it is extremely important to follow the sequence of installation of new spare parts. The pulleys must be locked in accordance with the manufacturer's instructions, since these marks indicate the correct position of the camshafts. With thoughtful and leisurely work, replacing this part yourself will be successful and will ensure stable operation of your Toyota Hilux car.
Removing the old timing belt
Finally we come to removing the worn 4A-FE timing belt. We remove the guide washer from the crankshaft pulley and release the tension roller, loosening the retaining bolt. Then we move it to the side and twist it. Only after this do we remove the belt.
Loosen the timing belt tensioner roller
Release the roller again, remove the tension spring and completely remove the tension roller. In reverse order, install the new roller, install the spring and return it to its place. There is no need to tighten the roller completely.
Replacement process
Tools
So that the procedure does not take much time, you need to prepare everything in advance:
- spanners;
- two screwdrivers;
- jack.
Step by step instructions
- First, disconnect the battery and set your Toyota Corolla to the parking brake. Support the wheels to keep the machine securely in place.
- Using a jack, lift the front of the car and place bricks under it, and then unscrew the bolts securing the right front wheel. The front wheel along with the bumper body kit can be removed.
- Next, unscrew the spark plugs, and then remove all drive belts.
- In the photo, the arrow marks the intermediate roller of the air conditioner drive belt; it needs to be removed.
- If your Toyota Corolla is equipped with a cruise control actuator, then you need to unscrew it and move it to the side. After this, remove the cylinder head cover.
- You need to place a stand under the engine, but it should not rest against the engine fluid drain plug.
- Now you need to set the piston of the first cylinder to the top dead center of the compression stroke. After this, you will need to pry and pull out the inspection hatch cover; to do this, secure the flywheel in advance with a screwdriver so that it does not rotate. If someone helps you, then ask a friend to unscrew the crank pulley screw, since it will not be very convenient to do this yourself. The crank pulley disc itself should be removed without problems.
- Remove the toothed belt covers. The timing belt flange must be removed, but before doing this, remember its location. In particular, the rolled part of the element must face outwards.
- You will then need to use a wrench to loosen the idler pulley adjustment pin. The roller itself will need to be pressed inward so that it does not interfere, and the screw will need to be tightened again. The timing belt can be removed from the driven gear. In the photo, two arrows mark the motor mounting nuts; they need to be unscrewed. It is also necessary to unscrew the upper screw, marked with an arrow, and lower the motor, then pull up the lower part of the support and stretch the strap between its upper and lower sections.
- Remove the belt from the drive gear and pull it out of the engine compartment. If the condition of the drive gear is not particularly inspiring, it must be replaced.
- You will then need to mark the position of the element's top dead center on the gear and oil pump so that the new element will be installed correctly. All further installation and marking procedures must be carried out in reverse order. If you did everything correctly, then you will not have any problems with this.
When replacing, the timing belt itself must not be turned inside out, and consumables such as oil, antifreeze or fuel must not be allowed to come into contact with it.
Due to lack of experience, it is better to entrust such a procedure to specialists. As you can see, this process is not easy, it will take time and certain knowledge to complete. If you do not understand something after reading the instructions, then it is better to entrust your car to professionals. And do not buy low-quality belts from dubious auto stores. It is better to install official products from the manufacturer on your car. By buying a low-quality product, you are dooming yourself and your car to possible problems in the future, think about this before purchasing.
Removing pulleys to replace seals
Holding the camshaft bushing with a variable size wrench, unscrew the main bolt with a 14th wrench. Then we take out the exposed oil seal with any convenient object, without fear of damaging it.
Unscrew the pulley to replace the oil seal
We treat the new oil seal with lubricant and install it in place using a knockout. We return the pulley back, tightening it with a wrench measuring a force of 60 N/m.
To remove the lower crankshaft pulley of the 4A-FE engine, you will have to make an effort and use any “liquid wrench” type tool, for example, VD-40. The chemical must be sprayed liberally onto the pulley itself. When the corrosion reacts, use two powerful screwdrivers or small crowbars, with soft supports placed under them, to loosen the pulley back and forth.
Removing a pulley without a puller. Be sure to place something under the improvised levers
If the pulley does not give in, you will have to use a reverse hammer, having first welded nuts onto the pulley with a thread suitable for the hammer. Using a puller on one side and a crowbar or pry bar on the other, you need to swing the pulley and remove it from its seat. After this, cut off the nuts and clean the surface until smooth.
Then we remove the wedge from the crankshaft and remove the oil seal using the already known method. The oil seal must be lubricated and installed in the same way as the camshaft oil seal. After this, we put the wedge in the groove and put on the pulley. Before tightening the pulley bolt, it is necessary to lubricate it with water-repellent thread locker or sealant. The bolt is tightened with a force of 120 N/m.
Main characteristics of the motor
Over the course of 10 years, 3 generations of 4E-FE engines with displacement from 1 to 1.5 liters and power from 85 to 99 hp were produced. (in 4E-FTE configuration – 133 hp). In each generation there were minor modifications and minor improvements to the mechanism.
Table No. 1. Unit characteristics
| Main settings | Parameter values |
| Engine tank capacity, liters | 1,331 |
| Configuration | L |
| Number of cylinders, pieces | 4 |
| Cylinder circumference diameter, mm | 74 |
| Number of valves per cylinder | 4 |
| Compression level | 9,6 |
| Piston movement, in millimeters | 77,4 |
| Gas distribution mechanism | DOHC |
| Sequence of cylinder operation | 1-3-4-2 |
| Ability to achieve engine power at crankshaft torque speed | 74 kW or 99 l. With. at 6.6 thousand rpm. |
| At crankshaft rotation speed the following maximum torque values are | 5.2 thousand rpm at 117 N*m |
| Weight, kg | 105 |
| Motor power system | Injection with distribution and electronic control |
| Minimum octane value for fuel | 92 |
| Norms and requirements of environmentalists | — |
Engine parameters of different generations
- The first generation engines were installed on cars from 1989 to 1996 and developed 99 hp. s at 6.6 thousand rpm and 117 N/m at 5.2 thousand rpm. They are most similar to 4E-FTE engines in the housing and size of the injectors, but otherwise the quantitative values of some indicators differ. The compression ratio, for example, of the 4E-FE unit is 9.6 to one.
- The second generation design was introduced to the market in 1996 and the engine power was reduced to 88 hp. With. at 5.5 thousand rpm (118 N/m at 4.4 rpm). Also, to reduce the amount of harmful gases released into the atmosphere, the engine control unit system was reconfigured and the manifold operating for intake and exhaust was slightly modified.
- The changes that occurred with the third generation engine are identical to the previous one. It has been installed since 1997 with a performance of 82-85 hp.
In 1999, production of the 4E-FE line of units was finally discontinued.
Installing a new belt
The final part of replacing the timing belt of the 4A-FE engine and probably the simplest. We check the tags we have set. They should remain in the same position. After this, the new belt is put on both pulleys and tensioned with a roller. To check the tension, you need to manually turn the gas distribution mechanism and, if necessary, adjust the tension.
Signs of worn parts
There are several symptoms that determine whether the chain needs to be replaced:
It is recommended not to skimp on this spare part and choose only the original one, because it affects the integrity of the engine and is changed once every 200 thousand kilometers. It’s better to spend five years’ money once and be sure that the engine valves will be in order.
The chain is much more reliable than the timing belt and lasts many times longer, but every coin has another side: changing it is much more difficult and expensive. For those who want to replace it themselves, detailed instructions are provided below.
Assembly
Assembly is carried out in reverse order. We install the pulley washer, assemble the casing, return the water cooling pump pulley and power steering strap to their place. Before removing the jack, be sure to reinstall the 4A-FE engine mount.
We put the valve cover in place with a new gasket, and put on the oil separator pipes. After installing the climate control belt, put on the alternator belt. All that remains is to install the windshield washer reservoir and tighten the wheels. Lastly, connect the battery.
After this, you can start the car and rely on your hearing: if the engine does not make previously unknown sounds, everything has been done correctly, and the procedure will not have to be repeated soon, after 100,000 miles.
Video
Removing and installing the Toyota Corolla timing chain
You will need: keys “14”, “17”, “19”, socket heads “14”, “17”, “19”, extension, wrench, flat-blade screwdriver. 1. Disconnect the wire from the negative terminal of the battery.
2. Remove the engine.
3. Remove the timing chain cover.
4. Remove two bolts
5. and remove the timing chain guide.
6. Remove the timing chain tensioner shoe.
7. Remove two bolts
8. and remove the upper chain guide.
9. Disengage the timing chain from the timing chain drive sprocket.
10. Remove the timing chain.
To install the timing chain, do the following:
1. Place the chain on the timing chain drive sprocket, aligning marked link B with the installation mark on crankshaft A. Rotate the shafts.
2. Place the chain on the camshaft sprockets, aligning the marked chain links with the marks on the variable valve timing system clutches.
NOTE. In order to align the marked chain links with the marks on the sprockets, turn the shafts clockwise by the hexagonal sections with a wrench.
3. Install the parts in the reverse order of removal, taking into account the following:
Before installing the hydraulic chain tensioner, lift the tensioner ratchet
press the plunger all the way
and hook the hook onto the pin. 4. Rotate the crankshaft two turns clockwise and check that the alignment marks of the crankshaft and camshafts match. If the marks do not match, reinstall the chain.
Source
How to change the timing chain on a Corolla 150
To replace the timing chain in the Corolla 1ZR FE engine, you need to change: sprockets, tensioners, dampers. You can immediately purchase a repair kit that contains all this.
It is important to know! If you do not change the entire set, the new chain can very quickly fail.
On a Toyota, to replace it, you need to remove the attachments from the engine:
- Top cover.
- Side cover.
- Belt (behind side cover).
The first step to replacing the timing chain on a Toyota Corolla 1.6 2008 and other years of production is to remove the front right wheel; behind it there will be a rubber protection that can be moved aside, as in the photo:
After the protection is pulled back, a cover will be visible on the motor, from which you need to unscrew the bolts and then remove it. After dismantling it, the chain will be visible:
Important! The timing chain must be placed according to the marks, as in the photo below. It itself has links whose color is different from the rest. These colors are different in different sets; in our case, two links are simply darker. The mark, indicated by a red arrow, must stand strictly between two links that differ in color.
In 1 ZR FE there will be a mark on the left sprocket of the gas distribution mechanism, which should fall into the middle of the link, which will differ in color, as in the photo.
Now we put the chain on from below, through the window from which we removed the protection. It will be visually clear that she is relaxed, but that’s how it should be. Then the tensioner will cock it into the desired position, which we will replace in the following step.
The hydraulic tensioner is located in the side cover, which we removed. We unscrew it from there and screw in a new one. It must be in the cocked position.
The next step is to rotate the crankshaft clockwise a couple of turns. After this, the hydraulic tensioner will work and tighten the chain sagging from below.
Why choose us?
Guarantee on all work
All work and spare parts are provided with an unconditional guarantee for up to 2 years.
Spare parts in stock
We have our own spare parts warehouse, which reduces repair time. We can offer both original spare parts and their high-quality analogues.
Experienced mechanics
Thanks to many years of experience and highly qualified personnel, our technical center can offer high-quality service for almost any car of your brand.
The Toyota brand is associated with progress, success and stability. Bold design decisions, as well as a design brought to the absolute extreme, very rarely require third-party intervention. By carrying out service and repair of this car in our service center, you will receive careful treatment and a professional approach to even the smallest problem.
The process of filling the cylinders with the mixture (suction valves) and releasing exhaust gases into the manifold (exhaust valves) depends on the timely replacement of the timing belt. So you don't need to be a qualified engineer to know that any faults in the timing system will cause engine problems. Additionally, when a belt jumps or breaks (due to age, due to another component failing), the drive unit loses "synchronization", which in turn prevents it from continuing to operate. This is why timing belt replacement service is very important.
You can make an appointment to replace the timing belt at an auto repair center by phone or submit an online application.
