Doors on Toyota Camry
Adjusting the doors on Toyota Camry 40, 50 cars can be useful if there is sagging, or it has stopped locking normally. In most cases, the front left door suffers from sagging, since it is on this side that the driver sits and in most cases uses it.
The main problem is that if the door has already sagged, it is not only not perfect, but also simply awkward. There is endless discomfort when opening or closing. This problem, in most cases, occurs on old Toyota Camry 40, 50.
Which doors should you choose?
There are no specific aspects and clear properties here and there never are. First, it is the choice of the owner himself, and his choice directly depends on his taste.
If you look at it technically, then, as already stated, it is necessary to select the size and type of the previous door. It should also be noted that this door must fit perfectly into the hinges and inserts of the previous door, so as not to create additional discomfort for installing the door
.
In this case, you still need practical advice on the cosmetic and external properties of the door , then one of the most popular, and along with this, beautiful materials is molding doors
, which are equipped with reddish wood on the inside. The holding is simply cleared of dirt and adds an element of luxury thanks to its shine, and the reddish wood will help make the interior more comfortable, while they come in variations that do not require trim. It is also worth examining the seal with which the door is equipped. It should fit tightly to the main part and not even allow the glass to move, and at the same time not interfere with its adjustment.
When it comes to buying a new door or a used one, there are different manufacturers and different door strengths. Some used doors last longer and are more durable than new models, although they cost less. But it doesn’t happen once in a while.
Features of the adjustment process that need to be remembered
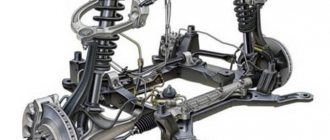
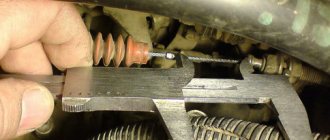
At the very beginning, it is necessary to diagnose the hinge axes. It is necessary to find out exactly what condition they are in. The hinges must be replaced in this case if the free play is more than 1.5 mm while swinging vertically.
The whole process can be summarized in one sentence. This is the movement of the door itself in the hinge holes, despite the fact that the bolts are lowered at this time. Naturally, after the adjustment is completed, all bolts are firmly tightened. When all checking, adjustment and installation procedures are completed, it is necessary to check the condition of the gaps along the entire circuit.
It is very important not to forget about the lock latch. At the end, its adjusted state must also be perfectly checked both horizontally and vertically. There is one indisputable condition for high-quality operation of the lock latch. The latch tongue should touch the very center of the latch. If this is not the case, then the latch must be adjusted.
Door adjustment on Toyota Camry 40, 50 can be useful in cases where:
- When working with a door you have to make physical efforts;
- While driving on a bad road, unpleasant sounds are heard (clicking, knocking, rattling or friction)
- When it rains, water gets inside the car through the seals;
- Scratches appeared on the thresholds of Toyota Camry 40, 50;
- The lock can click, but opens with difficulty.
The prerequisites for the appearance of sagging may be the following:
- The hinges on the door have become loose;
- The hinges are skewed;
- The hinges are worn out or the wasps have outlived their usefulness.
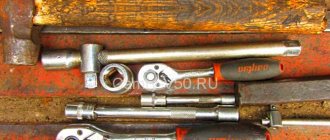
To adjust the door, the following repair kit will be useful:
- Socket wrench for fifteen;
- Head for thirteen;
- Twelve hex key.
Door replacement process
This paragraph will describe how to disassemble and remove the door on a Toyota Camry 40. It is worth noting that the process of installing a new door is identical to disassembly, but is performed in the reverse order. So:
- We disable the door lock, then pry and remove the trim on the handle.
- We unscrew the two screws that were under the trim using a Phillips screwdriver.
- We pry up the plastic part on the opening handle and remove it.
- One screw will also be visible under it. We twist it and remove the casing.
- We disconnect all the plugs one by one and remove the film.
- Use a 10 mm screw to disconnect the limiter.
- Using a 12mm wrench, loosen the 4 bolts and remove the door.
- We install the new door in the reverse order.
It is worth noting that the speed of this procedure should be minimal, and the priority should be on the accuracy and quality of the procedure.
Self-adjustment
Before making adjustments, you need to decide what exactly is the cause of the sagging. If the problem is solely in the axle, then it will be enough to just change it. If the hinges are completely broken, then it is better to change the entire set.
The procedure is as follows:
- It is necessary to remove the vertical part of the lock in order to facilitate the entire process in the future;
- We close the door to find out its clear position, focusing on the vertical axis. If it is tilted up or down, this can be removed by loosening the hinges and testing the lifting/lowering;
- We tighten the fasteners and check the placement of the door itself. In this case, if it is installed correctly, but the lock does not fit, we tighten the bottom loop again, but this time focusing on the lock;
- Now we adjust the door, focusing on the horizontal axis. With all this, it is bad if it is not recessed into the interior of the cabin. If this happens, then you need to move the loops slightly closer to the edge. If the doors opposite stick out a little, then they need to be moved closer to the inner edge;
- Now you just need to adjust the lock itself.
You can undertake adjustments without the help of others only in this case if you are completely convinced of your own knowledge of car structures. Otherwise, in the best case scenario, in a couple of days you will have to go to a service center to correct more severe problems.
The sequence of dismantling the door trim
- First of all, carefully remove the decorative trim that covers the mirror adjustment. We dismantle it using the same clip cutter or a flat screwdriver (but very carefully).
- Remove trim from door handle. Also, using a clip on the side of the lock, pry up the lining and remove it. Remove by hand to avoid cracks.
- Remove the screw from the door handle.
- Next, place the clip on the side under the handle and bring it to the middle of the width of the handle. The panel should pop out without much effort. The panel, as a rule, has a special spike in the center that can easily be broken. To remove it carefully, you need to slightly lift the panel and at the same time slightly pull the trim towards you with a clip puller.
- Now the wires are visible. They must be disconnected from the power window controls.
- At this stage there are 3 screws left at the bottom of the door. We unscrew them. Usually on all cars there are 3 screws at the bottom of the door.
- The casing is now held in place only by internal clips. We grab the casing from below and carefully pull it towards us. The clips should come loose and clicks will be heard.
- After the pistons have fired, we lift the casing up and release it. Clips can become fragile over the years, so it is advisable to install new ones.
How to remove lampshades: front and rear passengers
Rear passenger ceiling light
To remove the lampshade, you need to insert a small screwdriver between the lampshade body and the pressure glass of the lighting, then push it towards yourself and snap the glazing out of the hooks, as shown in the photo. Be very careful! The plastic body of the lampshade is very soft and flexible, but with extreme effort it turns white and wrinkles!
We perform the same operations with other glass.
The result of our operations is as follows
We did all this to open access to the mounting of the lampshade and ceiling. They are located around the perimeter of the lampshade, in the lighting niches, and are made of iron spring-loaded struts. There are four of them in total, for better understanding, they are placed in the photo below and circled in reddish circles. The photo shows the back side of the lampshade, and specifically the side mounts, a similar situation with the mounts on the other side.
To remove the lampshade from the hooks, insert a small screwdriver into the slot, press on the fastening unit and immediately use a large screwdriver inserted between the body of the lampshade and the ceiling. lift it as shown in the photo below.
After performing this technique with all 4 hooks, remove the ceiling lamp by disconnecting the electronic connector with a slotted screwdriver.
Ceiling light for front passengers
The front ceiling lamp is held in place by 4 bulbs located in the corners. To accurately understand the mounting location, you need to look at the photo below, which shows the back side of the lampshade. The fastening points are circled in reddish.
Open the compartment for glasses (eyeglass case), grab the lid with both hands and forcefully pull (pull) down. During the dismantling process, some of the bulbs may remain on the body; they will need to be pulled out with a screwdriver and returned to the mounting locations of the lampshade.
Next, use a screwdriver to disconnect the electronic connector.
To remove the dome light in a Camry you need to be as careful as possible, the plastic is soft and it is possible to repaint the parts if you handle it carelessly.
Types of damage and required replacement parts
What is needed, based on the nature and location of the damage, is a replacement of the door , and possibly both a working option and a partial one. It is clear that a full change is a change of the door completely, and a partial change is a change of a separate component part of the door (glass, handle, trim, lamp, etc.).
In case of a partial change, you will definitely need to check the similarity of the purchased part with this one in order to be 100% sure that it will successfully replace the previous one. And, when changing the skin, the owner of a Camry chooses the skin that he likes, but when changing other parts, he expects it to be as clear as possible.
Door stop Camry 40
At some point, every driver is faced with the fact that the open car door begins to “walk” randomly. slam shut or, on the contrary, swing open.
The first thing you need to do is pay attention. This is the door stop. Over time, this mechanism must be repaired or completely changed, depending on what exactly was the prerequisite for the detected problem.
The part consists of several components: a plastic lever along which the iron body of the closer moves, rubber shock absorber inserts and plastic clamps. The wear of the latter, in most cases, is the main reason for poor door fixation. Due to the abrasion of the plastic, the efforts of the block are simply not enough to hold the door open.
Materials and tools for self-soundproofing a car
To independently improve the acoustic comfort of your car, the following tools will be useful:
- The usual kit for a car owner to disassemble the interior,
- Camry V40 manual, which will significantly speed up the process of removing interior body panels,
- Clip remover, a thing NOT indispensable, but comfortable,
- A vacuum cleaner or brush for collecting dust and debris from body parts,
- Liquid for degreasing surfaces, 1.5-2 l is enough for the entire car,
- Ruler, tape measure, marker,
- Scissors must be sharp and comfortable,
- Painting knife,
- Industrial dryer,
- Stitching roller.
We’ll tell you what materials are useful for vibration and noise insulation of a Camry; using similar ones, of course, is not necessary. Use something similar in features.
- STP Aero, size 750-470 mm, thickness 2 mm. 12 sheets,
- STP Aero Plus, size 750-470 mm, thickness 3 mm. 10 sheets,
- STP Bimast Bomb Premium, size 750-530 mm, thickness 4.2 mm. 2 sheets.
- STP Noise Block, size 570-350 mm, thickness 2 mm. 12 sheets,
- STP Accent Premium, size 1000-750 mm, thickness 6 mm. 3 sheets,
- STP Biplast Premium, size 1000-750 mm, thickness 15 mm. 6 sheets.
- STP Barrier, 1000-750 mm, thickness 4 mm. 7 sheets.
Soundproofing doors
At first, the Toyota Camry doors are carefully disassembled, the speakers are removed and the protective film is removed, the wiring can be thrown in, it will not create interference during operation. After preparatory preparation (degreasing), the first vibration-absorbing layer of Aero is applied, the floor of which is glued with Accent Premium. We seal the holes in the inner layer of metal with a single piece of Aero.
Soundproofing Biplast Premium is applied to the inside of the door card. There is no point in worrying about the integrity of the door hinges after completing the work; their weight will increase by 2 kilograms.
Trunk soundproofing work
First, the trim is removed and the spare wheel is taken out, the metal is prepared for work. A layer of vibration isolation Aero Plus 3 is glued to the bottom of the trunk of the Toyota Camry 40, and the most effective noise-absorbing material is applied to the wheel arches. Bimast Bomb Premium. Aero Plus is covered with a layer of thermal insulation STP Barrier, Bimast Bomb Premium is closed with sound-absorbing Biplast Premium.
Disadvantages of sound insulation:
- Increasing the weight of the vehicle, i.e. Increased fuel consumption,
- Possible door sagging,
- If soundproofing work is carried out carelessly, additional “crickets” in the interior will occur.
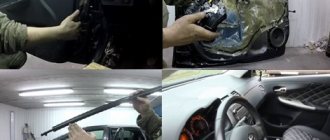
Front panel soundproofing
At first, the dashboard is freed from all the parts that are attached to it. The radio is dismantled (do not forget to remove the terminals from the battery), the glove box, air ducts, and the instrument panel. The control column moves to the lower position; otherwise the front panel cannot be removed. Part of the central tunnel is also dismantled and the wiring is disconnected.
To remove the front panel of the Toyota Camry 40 you need to Unscrew 5 bolts: the 2nd on the sides, the 2nd is screwed on the front passenger airbag, the 1st is located under the “dashboard” visor. After which the dashboard can be removed, the operation only seems complicated.
After which the front panel is freed from the air ducts, the previous sound insulation and fasteners. Vibration-isolating Aero is rolled between the stiffening ribs, the floor of which is laid as a solid sector of noise-insulating Noise Block. A second layer of insulating materials is also placed on the engine compartment shield.
Installing the Camry 40 dashboard housing into the grooves is not easy; it is better to do it together. The air deflector housings are covered with foam tape, and the glove box is also soundproofed.
Do-it-yourself noise insulation for Toyota Camry 40
The famous Japanese car, which enjoys well-deserved popularity among motorists, is an example in almost all qualities. But there are also some irrefutable minuses in it. Frankly bad sound insulation of the Camry 40. This defect is known, and special services undertake to remove it. If you want to improve the acoustic comfort of the Camry 40 without the help of others, we will tell you how to do it.
Sources:
https://razobrat-avto.ru/razobrat-toyota-camry/kak-snyat-plafon-toyota-kamri.html https://dombeetchim.ru/remont-ogranichitelya-dveri-toyota-kamri-40/ https:/ /toyota-camry-corolla.ru/camry/camry-40/shumoizolyatsiya-tojoty-kamri-40-svoimi-rukami/