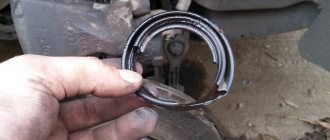
After replacing the rear brake rotor and rear disc brake pad, the nut that should be inside the rear disc brake wheel cylinder assembly is in the extended position, so you need to push it back inside the cylinder. The nut can be pushed back using the pad replacement mode.
Pad replacement mode
When to use GTS:
Connect GTS to DLC3.
Set the ignition switch to the ON position.
Enter the following menus: Chassis / ABS/VSC/TRC/EPB Utility / Check Mode
Follow the scan tool screen prompts and select Next.
Push the electric parking brake switch (electric parking brake switch assembly) toward the release direction and hold it in this position for at least 5 seconds.
The ignition must be turned on when performing this procedure.
When performing this procedure, make sure that the brake pedal is not depressed.
When the system enters the brake pad replacement mode, DTC C13A7/43 may be set. If a DTC is set, clear the DTCs after performing the procedure (replacing rear brake pads, etc.).
The parking brake warning lamp (red) flashes (at 0.25 second intervals). After a short period of time, the parking brake control assembly begins to operate (if the parking brake is locked, the motor is activated to release the parking brake, and then activated again). When the parking brake control unit is moved to the brake pad replacement position, the parking brake warning lamp (red) flashes (at 1 second intervals).
| Information on the device display |
| Check Mode |
When GTS is not used:
Set the ignition switch to the ON position.
Within 8 seconds, using the power parking brake switch (power parking brake switch assembly), perform 3 switching operations to the locked state (by moving the switch from the off (released) position to the on (pulled) position) and 3 switching operations to release state (by moving the switch from the off (released) position to the on (pressed) position).
When this operation is performed too quickly, the system may not respond. If the system does not respond, perform the operation again at a slower speed.
The parking brake must be released.
The parking brake warning lamp (red) flashes (at 0.25 second intervals).
Push the electric parking brake switch (electric parking brake switch assembly) toward the release direction and hold it in this position for at least 5 seconds.
The ignition must be turned on when performing this procedure.
When performing this procedure, make sure that the brake pedal is not depressed.
When the system enters the brake pad replacement mode, DTC C13A7 may be set. If a DTC is set, clear the DTCs after performing the procedure (replacing rear brake pads, etc.).
After a short period of time, the parking brake control unit will be operated (if it is carried out from the parking brake lock state, the parking brake control unit motor assembly will stop temporarily after being activated, and then the operation will resume), and immediately after the operation of the unit is completed, the warning lamp The parking brake indicator (red) will flash slowly (at 1 second intervals). (The nut moves back into the cylinder and the system enters pad replacement mode.)
Do not operate the power parking brake switch (power parking brake switch assembly) until work is completed. Otherwise, the system will return to its normal state.
When to use GTS:
Disconnect GTS from DLC3.
Restoring normalcy
After completing the procedure (replacing rear disc brake pads, etc.), turn the ignition switch ON and pull the power parking brake switch (integrated control panel assembly) toward the locking direction for at least 5 seconds.
When performing work (replacing rear disc brake pads, etc.), never operate the power parking brake switch (power parking brake switch assembly), or turn the ignition on or move the gear shift lever. Operating the power parking brake switch (power parking brake switch assembly) or moving the gear shift lever may cause the parking brake to engage and cause the rear disc brake cylinder piston to fall out. Also, be sure to disconnect the parking brake control assembly connector or disconnect the cable from the negative (-) battery terminal.
Despite the overall improvements, the Toyota Camry V70's braking system is still far from ideal; its performance characteristics need to be improved and are often refined.
The most popular truly effective solution is to replace brake calipers, discs and pads with professional ones made for high loads. The front axle of this Toyota Camry V70 has already undergone brake tuning with HPB installation. We have selected a kit for the rear axle that also best suits the owner’s requirements and driving style. The brake kit includes brake discs 330x28 mm, 6-piston calipers with an integrated electric handbrake mechanism.
HPB brake discs are manufactured using high-quality high-carbon steel. Thanks to this, brake discs retain their performance properties not only at high operating temperatures, but also during their sudden changes. The unique design of HPB brake discs includes a system of internal ventilation channels, which ensures effective heat removal and prevents overheating.
Camry 70
Toyota Camry 70 brake pads require periodic replacement. Their resource directly depends on driving style. Let's look at how to replace the front and rear pads of a Camry 70 yourself, as well as what spare parts to buy for replacement.
When to change brake pads on a Toyota Camry 70
You can determine that the Camry 70 brake pads need to be replaced by the following signs:
Examination
To determine the wear of the pads of the Toyota Camry 70 disc braking system, you will need to initially remove the wheel. Then the caliper is moved aside and the thickness of the friction layer is measured. You can try to perform the operation without lifting the caliper. You can also navigate using a special diagonal or longitudinal slot on the friction surface. Additionally, the condition of the caliper guides and the working piston is assessed by sliding the dirt guard. As necessary, lubricant is applied to these elements.
The minimum permissible thickness of the front and rear brake pads of Toyota Camry 70 is 1 mm. If the reading is lower, a replacement should be made.
Advantages of our service
Our trained and qualified technicians are ready to perform repairs of any complexity. Replacing the rear brake pads of a Toyota Avensis 2008 is not a difficult task for us. We do all the work quickly and efficiently. Our workshop is equipped with modern equipment and tools that significantly speed up the execution of a technical event. Every type of service we provide comes with a guarantee.
READ Where is the horn relay for VAZ 2110
Replacing Toyota Avensis brake discs is possible at any working time. To do this, just come by car to our auto repair shop or call the phone number listed on the website and sign up for the service. With us you will get the best service in Zelenograd and the region at an affordable price.
Moscow region, Solnechnogorsk district, Chernaya Gryaz village, Promyshlennaya street, 2 building 1
Articles
To replace Camry 70 brake pads with original ones, use the following catalog numbers of spare parts manufactured by TOYOTA/LEXUS:
- 0446533480 – front for Toyota Camry 70 models;
- 0446633220 – rear.
Analogues are also available for the Camry 70, their article numbers are:
- 43KT – KOTL company;
- NP1167 – NISSHINBO;
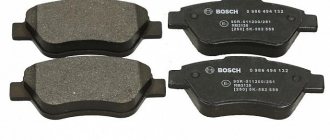
- 0986-4948-33 – BOSCH;
- 2276-801 – TEXTAR;
- PN1857 – NIBK.
- D2349 – KASHIYAMA;
- NP1112 – NISSHINBO;
- 2243-401 – TEXTAR;
- PN1854 and PN1854S – NIBK;
- 1304-6056-932 – ATE;
- 182262 – ICER;
- 8DB3-5502-5121 – HELLA.
What pads to put on Camry 70
Let's figure out which brake pads are better to use on the Toyota Camry 70 instead of the original. This will save money. But when using poor quality analogues, the disc is eaten, dust is formed and the Camry 70’s braking efficiency is reduced.
Spare parts from the Korean manufacturer Sangsin (Hi-Q) are a good option. Articles:
- SP4275 – front friction linings;
- SP4091 – rear.
Also suitable for the front of the Camry 70 is a version from NISSHINBO with catalog number NP1167, and for the rear the parts are made by Akebono.
The service life of the factory Camry 70 friction linings ranges from 80,000 to 100,000 km. A lot depends on your driving style. With an aggressive style, the resource decreases. At the same time, situations are often observed when the factory pads replaced with original linings purchased from a dealer wear out after 20-30 thousand kilometers.
Helpful Tips and Warnings
When replacing brake pads on a Toyota Camry 70, you will need to adhere to the following recommendations:
- The pads must be replaced in a set of four, all on both wheels of the same axle.
- The fluid level in the master brake cylinder is first checked - when the maximum value is recorded, the fluid should be pumped out using a syringe or rubber bulb. After installing the spare parts, the fluid level will increase, which is due to wear of the old linings.
- When changing the pads, you should evaluate the condition of the dirt protection covers of the guide pins and the free movement of the caliper relative to the guide pads. When fixing a problematic movement, you will need to apply lubricant to the caliper guide pins. After removing the finger, a lubricant is applied to it. Good lubricant for TRW PFG-110 guides. The remaining parts of the brake system can be lubricated with original grease with part number 0-8888-01206. If there is mechanical damage to the protective casing, it should be replaced.
- After installing new, even original pads on the Camry 70, there is a decrease in braking efficiency. This is due to insufficient grip on worn discs. The pads touch them unevenly, in most cases at the edges. To ensure high-quality grinding of the friction material, it is recommended to avoid sudden braking for a hundred kilometers. Otherwise, overheating of the working surface is observed, which is accompanied by a significant increase in the grinding process. Checking the braking efficiency of the installed pads should be carried out on roads without heavy traffic.
Safety first
There is no point in delving deeply into the intricacies of the operation of these important elements of driving control; in courses, before obtaining the right to drive, each driver takes classes to study the structure, operation of parts and mechanisms of the vehicle.
At the same time, it must be remembered that compliance with regulations and monitoring the condition of the brake system, in particular, serviceable brake pads, can save lives.
It is important to remember that all manipulations on the Camry related to removing wheels and lifting the car with a jack must be carried out with the gear engaged. In order to avoid injuries of varying severity during work, the use of additional “shoes” is mandatory even on level ground.
Brake pads are checked using the basic tool supplied with the car, as well as a measuring device in the form of a ruler, or better yet, a caliper. Purchase a set of new pads in advance.
Replacing front pads Camry 70
Camry V70 front brake pads are replaced in the following cases:
- wear of the friction layer has reached a minimum level;
- reducing the strength of the connection with the base;
- when oil gets on the working surface or chips or deep grooves form.
It is recommended to evaluate the condition of the pads during each maintenance of the Toyota Camry 70.
To carry out operations to change the front friction linings of the Toyota Camry 70, you will need a fourteen, seventeen key and pliers. You will need to do the following:
- The front left wheel of the Camry 70 is dismantled.
- While holding your fingers, unscrew the two caliper mounting bolts.
- The caliper is disengaged from the pad guides. Then it is moved to the side and fixed. To do this, you can use a wire, attaching it to the shock-absorbing mechanism. In this case, it is necessary to avoid twisting and pulling on the brake hose.
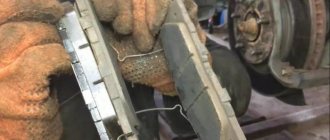
- The pressure springs of the friction linings, two in number, are dismantled.
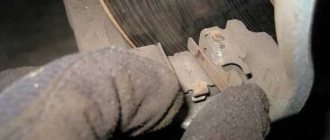
- The Camry 70 inner and outer pads are removed.
- The support plates at the top and bottom are removed from the guide pads. Then a lubricant is applied to them and the reverse installation is performed;
- Observing the reverse sequence, install the front brake pads of the Camry 70. It is recommended to apply a thread locker to the fasteners of the caliper guide pins to prevent spontaneous unwinding.
- The wheel is mounted and the fluid level in the Camry 70 brake master cylinder is monitored.
Replacing rear brake pads
Before replacing the Camry 70 rear pads, you will need to align the caliper pistons. The Camry 70 has a handbrake and rear calipers with an electric motor.
Let's look at the order of the operation in detail.
How to easily move the pistons in the rear calipers (electric handbrake)
To align the pistons of the rear calipers of the Toyota Camry 70, you will need to perform the following operations:
- The ignition is turned off, the automatic transmission selector is set to neutral or park position.
- The ignition is turned on, the brake pedal is pressed.
- Next, you need to raise the handbrake control button up three times, and then down three times. As a result, the parking indicator on the dashboard will blink frequently. The brake pedal is released. If the operation is unsuccessful, you should turn off and turn on the ignition again.
- To bring the pistons together, you will need to press and hold the handbrake control button in the lower position until the sound of the motors running is heard from the rear wheels. The completion of the operation is indicated by the parking indicator, which will blink less frequently.
- Camry 70 rear pads are being replaced.
- To press the pistons against the installed friction linings of the Camry 70, you need to hold the handbrake control button in the upper position. At the end of the operation, the parking indicator will stop blinking and will simply glow.
Replacement
To replace the rear brake pads of a Toyota Camry 70, you will need a fourteen and seventeen key. The operating procedure is as follows:
Toyota Camry is a sales leader in the D class; overall, it is a successful and reliable car: a spacious interior, a classic automatic transmission, and a reliable engine. However, it is the latest generation of the XV70, according to reviews, that has become somewhat less pleasing to its owners. Many car enthusiasts say that Toyota is no longer the same, there is no such uncompromising quality and reliability as it had in the past, the car is often annoying with various jambs and breakdowns. Let's look at the main, common problems that owners face.
The first problem that most owners of the Toyota Camry XV70 have probably faced is replacing the support bearings. There was even a recall campaign for this problem, so they were replaced during maintenance for everyone who was serviced by an official dealer. The problem, in fact, is simple - anthers (seals) were not installed for the support bearings, which is why they were constantly covered in dirt, as was the space in their vicinity - dirt got there from the front wheel arches.
It should be noted that before the official announcement of the recall campaign, some owners were denied a warranty replacement, since “it does not affect the speed”: they explained that this is how it should be - a “technological hole”! Bloggers have made many angry videos on this topic. One more nuance - few people do a wheel alignment after a warranty replacement of the bearings, because it was not provided for in the recall campaign.
The next common problem: clicks and squeaks of the windshield. Many dealers refuse warranty repairs, but some have achieved a solution to the problem.
In general, the quality of glazing is a sore spot for the latest generation Camry. Glass is flimsy and every hit by foreign objects ends in a chip at best, and often a crack. The most unpleasant thing sometimes happens to the rear window - it becomes covered with a network of cracks, that is, in simple terms, it bursts.
And now the most interesting thing in this story. Car glazing, attention. drumroll. - not covered by warranty. - this is the official response from the manufacturer:
Fundamentally, replacing brake pads on a Toyota Camry is no different from this procedure carried out on any other Japanese-made car. Depending on the year of manufacture and equipment of the car, several types of brake mechanisms on Camry differ, but in general they are not much different from each other.
Replacing brake pads on a Toyota Camry
The operation can be performed by car owners either independently or in a service center. Depending on the type of brakes, work can take from 1 to several hours.
Why is it important to get service from official Toyota dealers?
High level of professional skill of mechanics trained at Toyota Motor LLC.
Guaranteed authenticity of spare parts (no counterfeit). Guaranteed selection of parts specifically for your car.
You will be able to sell your car at a higher price on the secondary market.
Replacing front pads
Replacing Toyota front brake pads takes 20-30 minutes. This part of the brake system is always disc type, so work is carried out in the following sequence:
- To perform the procedure, the car is driven into the box and put on the handbrake.
- The wheels are unscrewed and dismantled.
- The machine is raised on a lift to a convenient height.
- The brake fluid reservoir plug is unscrewed.
- The pry bar is inserted between the pads to bring the caliper pistons together.
- After this, the cotter pins and pad stoppers are removed, which frees the latter.
- Fingers are cleaned and lubricated. Assembly occurs in reverse order.
Lubricant is applied between the new pads and pressure plates to prevent sticking due to high temperatures. If the pedal becomes weak, then the system is pumped.
How often should the pads be changed?
The manufacturer has set specific deadlines during which the brake system will work properly. After completion, it is important to replace the brake pads at a professional car service center of an official dealer. The Toyota brand has a replacement schedule of 40,000 and 80,000 km.
But sometimes it may be necessary to install new brake elements earlier. They will tell you about this:
- the light on the wear of the linings on the dashboard (indicator) comes on;
- metallic grinding sound when pressing the pedal;
- lengthening the braking distance;
- the pedal becomes loose or feels pounding;
- presence of metal shavings in adhered dust around the wheels.
Premature wear can occur due to improper installation of rubbing elements or frequent braking, which occurs during regular trips to the mountains or in traffic jams. If you find the above symptoms, you should contact the service without waiting for the next maintenance.
Replacing rear pads
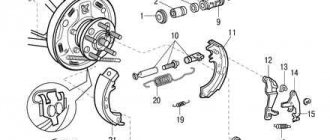
Replacement of Toyota rear pads is carried out in the same way if they are disc type. In the case of models with a drum brake system, dismantling and installation is even easier, because the linings are replaced together with the semicircular metal plates on which they are located.
To do this, dismantle the wheel and raise the car on a lift. Next, unwind the hub and release the cotter pins of the pins holding the lining. The handbrake cable is disconnected and the elements are removed out. New ones are installed in the reverse order and the system is pumped. To sign up for a procedure at Toyota Center Kuntsevo, just fill out a short application on the website.
Types of braking systems on Camry
Conventionally, all brakes used previously and now on Camry can be divided into the following types:
- Drums. Installed on the rear axle of Camry in 20 and 30 bodies, they are characterized by low efficiency and difficulty of maintenance.
- Disk. They are divided into ventilated and non-ventilated. Depending on the Camry configuration, they were installed both at the rear and at the front.
The most difficult thing is replacing the rear drum brake pads on a Camry v20 - in the time required to replace the drum linings on one wheel, you can easily replace the disc brake parts on all four wheels.
Replacing rear brake pads on a Toyota Camry with drum brakes is carried out as follows:
- The car is jacked up, then the wheel is removed. When carrying out work, you should not leave the car on a jack (as this is dangerous) - it is recommended to install it on beams or bricks.
- The drum is removed. If the drum cannot be removed by hand, then bolts should be screwed into the technological holes. As they are screwed in, they will rest against the wheel hub, thereby pushing the drum out.
- After removing the drum, you can begin dismantling the mechanism. To do this, you need to remove the retaining rings holding them in the mechanism, then pull them out.
- Before installing new parts, you should completely tighten the adjustment column: otherwise the drum simply will not fit.
- Assembly is carried out in reverse order.
Operating principle
To understand why they wear out, you need to know how the pads work. Brakes are cylinders that, when the pedal of the same name is pressed, press the pad against the wheel. The greater the pressure in the cylinder, the stronger the device is pressed.
However, during frequent sharp braking, the rubber wears off and the springs wear out. Therefore, old pads must be removed.
Replacing the rear brake pads of a Toyota Corolla can be done with your own hands without visiting a service center. To do this procedure correctly, just read and follow the following instructions.
Disc brake repair
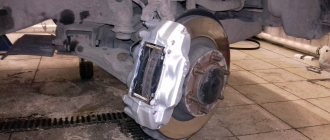
Replacing the front brake pads on a Toyota Camry is performed as follows:
- The car is jacked up and the wheel is removed.
- Then the lower bolt of the caliper bracket is unscrewed, after which it is turned upward, freeing the system elements.
- Then the pad installed on the back side of the disc is pulled out, after which the mounting is installed in the hatch located in the caliper.
- Acting as a lever, you need to completely compress the brake cylinder.
- Then the outer pads are installed, after which the caliper bracket is pushed into place and screwed.
- The wheel is put on, the car is removed from the jack.
This completes the replacement of brake pads on Camry 40, 50 or 30 with disc brakes. A similar operation is carried out with the other wheel.
Replacing the rear brake pads on a Camry with disc brakes will take no more than 20–30 minutes. However, there may be some difficulties associated with the handbrake system.
Diagram of rear brake pads on a Camry with disc brakes
There are 2 types of handbrake used on a Toyota Camry with a brake lever:
- Mechanical, the work of which is carried out by compressing individual brake pads.
- Electric handbrake. It is an electric motor that locks the rear disc brakes when you press a button. They are equipped with cars in the 50 body.
Since the second scheme of operation of the handbrake does not involve the use of separate pads, it is simpler. And it is for this reason that replacing brake pads on a Toyota Camry v50 is much faster.
How to choose the right parts
To select the necessary parts for a Camry, you should indicate the VIN of the car to the seller. There are many consumables on the market from various manufacturers, differing in both price and quality.
While under warranty service, brake pads on a Toyota Camry 40 are replaced by service center specialists. In this case, only high-quality original or OEM parts are selected to achieve the most effective braking.
The main factor that is recommended to be taken into account when replacing brake pads on a Camry 50 is the presence of a sensor on the new parts. The fact is that if it is absent, the on-board computer will constantly give an error, and it will be quite difficult to monitor the condition of the pads.
READ Replacing low beam lamp KIA LED
Replacing brake pads on a Toyota Camry 40 body
Operating a car with faulty brakes is fraught with the following consequences:
- the braking distance of the car increases significantly, which can cause an accident;
- wear can cause uneven braking of the car, which on a slippery road can cause the car to go into an uncontrollable skid;
- wear also causes damage to the brake discs, which subsequently significantly increases the cost of Camry .
It is for this reason that replacing the rear and front brake pads on Camry 40, 30 and 50 should be done in a timely manner.
