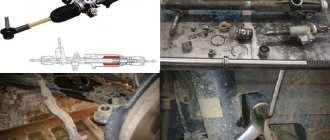
Each technical component in a car has its own specific service life - the length of which depends primarily on the degree of load applied to it. As we all know, components such as suspension and support systems are subject to special stress. However, special attention should be paid to the steering column of the car. Constant turns of the steering wheel make this unit one of the most vulnerable in the entire car. When this unit wears out, a knocking sound appears in the steering column, which at first becomes annoying while driving, and then begins to significantly irritate and cause particular inconvenience.
It is very important to eliminate it, since in a neglected state the column can jam while driving. This is very undesirable, since you can harm your health - if you get into an accident, as well as the car itself - for the same reason. In this article we will talk about what breaks in it, and we will also help in eliminating the knocking of the steering column on a Toyota Corolla.
What most often breaks in a Toyota steering column?
As a rule, the first thing that fails in it is the bushing. This element tends to wear out. Due to this, the column begins to play, and a slight knock appears. Replacing it is not very difficult; below we will tell you and show you how to correctly replace the bushing. The photo below shows the already pulled out bushing.
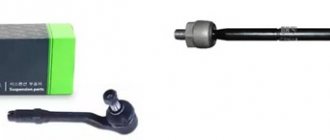
The second element of the column, which also tends to fail, is the lower cross. We will also talk about the process of replacing it. So, let's proceed directly to replacing these parts. In the photo below you can see the lower cross.
Why doesn't the EUR work?
The most common cause of electric power steering failure is natural wear and tear on connections and terminals. Any mechanism is designed for a certain period of operation, after which the driver must be attentive to the operation of the vehicle’s systems and components.
The amplifier may fail due to severe road conditions. This causes a knocking sound in the steering column. You need to check its power fuse in the mounting block.
Voltage surges in the electrical circuit, problems with the battery, and lack of ground also affect the operation of the power steering.
Strong humidity, condensation in the control unit, sub-zero temperatures have a negative effect. Temporary interruptions in system operation are possible.
The electric power steering may stop working due to problems with the speed sensor, since it is directly connected to the speedometer. At low speeds, the force applied to turn the steering wheel increases; at high speeds, it decreases. An increase in engine speed causes a malfunction of the amplifier.
Replacing the bushing: step-by-step instructions
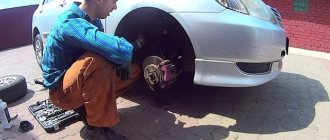
The process of replacing the bushing is not very complicated. First of all, the car must be driven into the garage, since repairs will take some time. So let's get started. We remove the steering column panel - this is very simple, we need to unscrew all the bolts and remove it from the latches. As a rule, it is held on by three bolts. After this, we remove part of the air vent - which does not interfere with washing - there will be a lot of dust in it.
After our workplace has been prepared, we unscrew everything that prevents us from removing the steering column. When this work has been done, we use a marker to mark the position of the column that we will need to establish during its final collection. So, the column is removed - we do it carefully, since it weighs a lot. In the photo below we will see the place without the column, as well as the column itself and its bushing in an approximate version.
Next, we need to put something soft on the floor, for example, foam rubber and a rag on top of it. Next, on the prepared surface, with the steering wheel down, we place the steering column itself. You won't be able to pull the bushing out by hand. Therefore, we screw several screws into it - they will serve as a support for us to further pull it out. When the self-tapping screws are not fully screwed in, cover the steering wheel with a rag and rest your feet on it, and with your hands, using pliers, pull the sleeve by the self-tapping screws. After some effort, it will come out of its place. In the photo you will see that the bushing is no longer there.
Next, we need to clean the shaft from old grease and dirt. After cleaning, treat it with new lubricant and install the new part in its place.
As a rule, after replacing it, the knocking disappears, but if the crosspiece is in order. If it was broken or worn out, it also needs to be replaced. Now it's time to replace the cross.
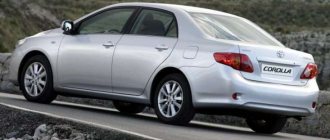
What kind of steering wheel is installed on the Toyota Corolla 150: briefly about the parameters
The steering wheel for the Corolla is available in three variations, which differ in size - the following models are classified:
- S – The diameter of the steering wheel is 37 cm, up to 3 full turns are required to completely turn the wheelbase;
- M – The average size of the steering wheel is 41-42 cm, which is installed on most cars;
- L – Models with a diameter of 43 cm.
When choosing the diameter of the steering wheel, it is important to take into account the driver’s body type: large steering wheel sizes will reduce the turn of the car’s wheelbase, but will interfere with large people - with small models it’s exactly the opposite.
After installing the steering wheel, it is also recommended to install a braid, which will reduce wear on the factory coating and increase the grip between the driver's hands and the steering wheel.
How to properly change the lower crosspiece of the steering column?
To carry out repairs to this unit, we will also need a garage. First of all, we unscrew the protective cover of the steering column itself, which prevents us from getting to the cross itself. We only need to unscrew three bolts - this is not very difficult to do.
Before unscrewing the steering column, you need to block it - this will allow you to leave the signal cable intact and not torn. Next, as when replacing the bushing, we need to mark the position of the steering wheel.
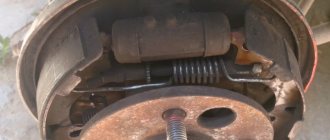
So, we have it in our hands - the lower cross assembly. You can see in the photo that it is slightly worn.
Next we need to disassemble it. We didn’t bother the part too much - we clamped it in a vice and cut off the crosspiece itself. This must be done very carefully so as not to damage the outer part of the knee.
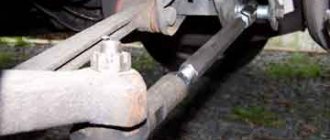
After the crosspiece was removed in such a rough way, we noticed that there was moisture inside it and there was a complete lack of lubrication - these two points became decisive in the process of destruction of the crosspiece and the appearance of knocking. Stop looking at the old cross - let’s take the seats and begin preparing them for the new part. To do this, we need to thoroughly clean the seats.
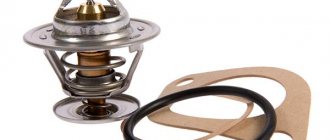
When the seats on both sides have been cleaned, we take the cross itself and begin to prepare it. We remove the caps and additionally treat everything with lubricant before pressing. The pressing process is very simple, and the photo below will help you understand it in more detail.
Speaking of the cross itself. It is best to buy an original spare part in stores, with technical specifications that will strictly correspond to your car model. However, there is also a cheaper option; on the Internet, many craftsmen say that the crosspiece from the steering column of a VAZ car is perfect for Toyota. That's what we did - it cost us 160 rubles. It is shown separately in the photo below.
When the crosspiece has been completely pressed in, we need to check everything again and lubricate it with additional grease to prevent moisture from getting inside, which destroys the assembly. Bottom photo is the lower cross assembly.
As we can see, there is nothing complicated in the process of replacing it; all we have to do is put everything back in its place. It won't be difficult to do this. Having put everything together, we can check our car - as you will notice, the steering wheel is like new - no knocks or play. This completes the procedure for replacing the crosspiece, enjoy your use.
Steering wheel for Toyota Corolla
Under the steering wheel, remove the instrument panel trim 2. We climb under the steering wheel and see the plug.
Using a hammer and a screwdriver, we unscrew the plug, under it we see a bearing, and around it this very bushing is shaped like an open ring and at the ends of the lock there are whiskers that create tension in this unit. We remove this plug. Using suitable tools, pull out the bushing.
Plug, spring bushing before modification, rubber gasket EUR worm shaft with bearing without spring bushing. This was not enough for me, I pulled the bushing back and saw that the “whiskers” of the spring bushing had returned to their original position. Then I decided to tighten these “whiskers” with a spring.
Then I inserted a screwdriver into the groove and, shaking the steering wheel, pressed the bearing. The knocking noise when rocking the steering wheel has disappeared.
I tightened the bearing with a screwdriver. Then I decided to tighten the “whiskers” of the bushing with a rubber band, bought a tube of suitable thickness from the nearest auto store, cut out a small piece and inserted it into the groove with some effort. I hammered the plug into place and drove home joyfully.
I didn’t even turn on the music, I listened to silence. And then bang “blink”.
Previously, at any speed, even crawling along a ridge, knocking noises were heard, but now only at high speed and impressive unevenness, once it rattles.
Tags:
2008 shaftcorollaintermediatesteering toyota
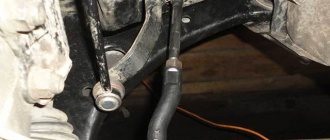
Removing the steering shaft spline clamp
Rice. 5.26. Marks of the relative position of the steering shaft splined clamp and the intermediate steering shaft No. 2
Note the relative position of the steering shaft splined clamp and the intermediate steering shaft No. 2 (Fig. 5.26).
Unscrew the bolt and remove the steering shaft splined clamp.
Removing the intermediate shaft No. 2 of the steering control
Rice. 5.27. Marks of the relative position of the intermediate shaft No. 2 and the main steering shaft
Note the relative position of the intermediate shaft No. 2 and the main steering shaft (Fig. 5.27).
Unscrew the bolt and remove the intermediate shaft No. 2 of the steering.