In cars with body numbers E120 and E150 2012 and some other years of production, the heater is designed almost identically, so maintenance and care do not make any fundamental difference.
If the stove fan whistles, the heating system itself has stopped working, the air has stopped circulating properly, or, conversely, the device heats up when it is not required, it is worth checking the stove radiator.
For example, let's look at how the heater works on a 2003 Toyota Corolla E12. This model is quite old, so the arrangement of its elements is simple. It is worth noting that cars in the 100 and 110 bodies have the same heater design. Problems appear over time, most often these are the following problems:
- The heater fan does not work on the Toyota.
- In general, the stove does not work.
- Air enters only from one side.
- There is a coolant leak.
- The stove does not heat well, or not all of its modes work.
- The radiator supplies moist air.
- The motor has failed.
- An unpleasant odor appeared.
- The heater cannot turn on.
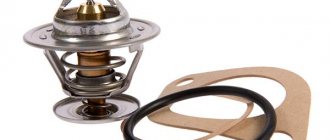
Removing the radiator of the Prado 120 stove
The most common cause of failure is contamination of the insides of the unit, which is caused by the owner himself.
What causes a knot to become clogged?
- Using low-quality antifreeze.
- Filling with water, not antifreeze.
- Replace coolant less frequently than necessary. If the coolant is not changed in a timely manner, sediment forms and clogs the channels.
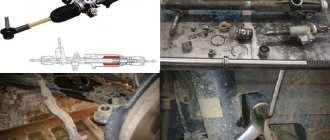
How to properly dismantle the radiator of the Prado 120 stove?
- It is necessary to remove three plastic panel trim elements located near the pedal assembly.
Inspect the item. If there is serious damage or strong signs of wear on it, then it is better to replace the part. If you do not see severe damage, then simply rinse the unit thoroughly.
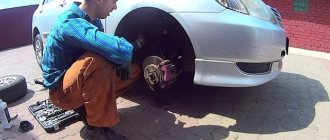
Flushing the system and replacing the heater radiator on a Toyota Corolla
Enter from the front passenger side. There is a glove compartment there that needs to be removed. And the panel from the gearbox is also removed. Otherwise, it will interfere with removing the torpedo. The fastening bolt is located here above the panel under the plastic flap. Open this element and unscrew the bolt.
You can find more than one similar story on the forums. In any case, when signs of malfunction appear and diagnostics are carried out, replacement of one or another spare part is often required. Let's look at how to replace the radiator and other components of the system yourself.
Replacing the Corolla heater radiator Work is carried out from inside the car. Remove the central panel. Remove the driver's side glove compartment. Remove the plastic panels near the box. Unscrew the steering column mounting bolts 4 pcs.
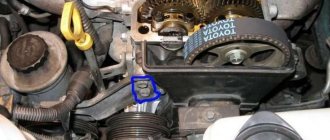
Remove the battery terminals and all wires. Remove the second glove box located near the passenger and the gearbox panel. Remove the radiator fan. Go to the hood of the car - the rest of the work will be carried out in.
Release the radiator of the Toyota Corolla 120 heater and dismantle the air conditioning compressor.
Remove the tubes leading from the faucet to the stove and place a container under them to drain the antifreeze. Remove the hoses from the air conditioner.
Remove the heater on the Corolla and replace the radiator located in it with a new one. Reassemble the device in reverse order. Replacing the stove on a Corolla of later generations is done in the same way. You can also install a new radiator on a Corolla and a heater radiator for a Toyota Corolla 120 STO, but due to the fact that in the process it is necessary to remove the dashboard, the price tag for this procedure is rather high - from 6 thousand. If you change the radiator yourself, it is important to take into account that the whole process takes from 1 to 2 days, so it is better to carry out the replacement in the garage.
You can use the above guide to find out how to remove the heater radiator on a Toyota Corolla - the principle will be the same.
see also
Comments 26
Can you explain to the ne'er-do-well how to pull off the panel correctly, I've already unscrewed everything I can, everything is shaking, I'm pulling and nothing happens
How did you determine which stove is worth it? I have a car with climate control, the heater body itself is broken (I don’t know how it could be broken), and the radiators are very dirty, both outside and inside. Because of all this, it’s wildly cold in the car. It only gets warm at rpms above 2k, and still some of the air blows past the radiator and immediately cools into the cabin. I want to change the whole assembly at once, and install a cabin filter, otherwise right now I have everything taped there with tape so that at least some of the holes can be patched. I started looking for a stove, and there were a lot of them. I understand that I need to look for electric drives, but which one exactly?
Good day. Listen, no offense meant, but why did you film the whole ponel? People will look and gasp at the amount of work. The entire collection is removed much easier, disassemble the mess, remove the stove engine, remove the evaporator case, analyze the middle panel is where the tape recorder and the stove control unit are removed the entire stove with the radiator. WHY REMOVE THE PANEL!
Greetings! Returning to your advice - I will change the heater radiator on the 110th Corolla. First, I already removed all the plastic and the center console from below. And then - I think I’ll try it on your recommendation, and a couple of questions - do I need to unscrew the steering column and where exactly should I pull out the heater with the radiator, in which direction?
Hello. To be honest, I don’t remember which way anymore. You don't need to remove the steering wheel. Disassemble only the central part
Thank you! I'll try to complete this "project" this weekend.