For stable operation of the power plant, it is necessary to create an air-fuel mixture with an optimal ratio of its components. The throttle valve is responsible for supplying air.
If any deviations in the operation of the unit occur, the dynamics of the car deteriorate, fuel consumption increases, and the engine speed begins to fluctuate. Therefore, during the operation of the machine, regular cleaning and adaptation of the throttle valve is necessary, and in extreme cases, replacement of the unit may be necessary.
Throttle valve
Review of the throttle body on the Toyota Corolla 120 and the approximate cost of the unit
The original Toyota Corolla 120 throttle body has article number 2203021030. The cost of a new product is high and can reach 45-50 thousand rubles. For this reason, there is a wide selection of branded components from auto dismantling yards on sale.
The cost of a used Toyota Corolla 120 throttle body depends on its condition. So, for a node with an unknown residual resource you need to pay from 1 to 3 thousand rubles. Foreign car wreckers charge from 5 to 12 thousand rubles for a spare part with accompanying documents.
When purchasing a throttle valve removed from a car, the owner cannot be sure of its long-term and flawless service. Therefore, many drivers are inclined to buy analogues of the original product. At the same time, the price is usually lower, and the quality is in no way inferior to branded spare parts. The best throttle options for the Corolla 120 can be found in the table below.
Table - List of analogues of the original throttle valve for Corolla 120
| Manufacturer's company | Article number | Approximate cost, thousand rubles |
| OSSCA | 14336 | 12-14 |
| AISAN | THR321030 | 9-11 |
Fuel system or dirty intake?
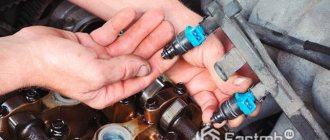
When mentioning a dirty intake, many drivers immediately begin to suspect the fuel injectors for all the troubles. It must be said that such a fear exists, but, alas, it is not always confirmed. Let's first look at the symptoms associated with a faulty fuel system and a dirty intake. So, if the fuel system in a car is faulty, the following problems may occur:
- difficult starting;
- “triple” of the engine, both at idle and while driving;
- significant reduction in traction;
- slow speed increase;
- the car may stall frequently;
- The “Check Engine” icon appears on the dashboard.
Not a small set of problems, is it? With a faulty fuel system, all of these problems can occur individually or all together. However, such malfunctions are typical not only in the case of a faulty fuel system, but in 70% of cases, if several of the symptoms listed above are present, the problem lies in a faulty fuel pump or fuel injectors. This problem is difficult to solve on your own, because this will require the help of a qualified specialist and diagnostics of the electronic control unit (ECU) using a special scanner.
The problem with a dirty inlet is much easier to solve; for this you do not need to disassemble the fuel rail, etc., it will be enough to unscrew a few screws, disconnect the electrical wiring and remove several pipes. It is also worth noting that the problem of “dirty intake” is not displayed on the dashboard by the “Check Engine” indicator, but this only happens if the sensors (TPS and MAF) are working properly.
Let's look at the symptoms associated with a dirty intake:
- high idle speeds at the time of start-up, which do not fall below a certain level (usually the speeds do not fall below 1200-1500, less often - 900-1100);
- increased fuel consumption (can reach from 0.5 to 1.0 liters, depending on the condition of the engine);
- poor response to the gas pedal “the car stalls, does not drive at full power.”
Remember that if similar symptoms appear on your car, but the “Check Engine” warning light does not light up on the dashboard, and scanners do not detect errors during diagnostics, in 95% of cases the problem lies in a dirty throttle valve.
Required tools and materials for removing, installing and cleaning the throttle body
To replace or clean the throttle body, you will need the tools from the table below.
Table - List of tools and materials required for dismantling and installing the throttle assembly, as well as cleaning it
| Name | Note |
| Screwdriver | Flat slot |
| Head | "on 10" |
| Special means | Injector or carburetor cleaner, for example, “carbicleaner” |
| Pliers | Can be replaced with pliers |
| Rags | Lint-free |
| Lubrication | Penetrating and consistent |
| Cotton buds | Can be replaced with a sharp rod or toothpicks |
Special means for cleaning the throttle body
Method No. 2 – Dancing without a tambourine, but with a pedal and ignition
Throttle valve calibration can be divided into three stages:
- Training with the gas pedal released;
- With throttle fully closed;
- Air supply at idle.
First of all, warm up the car engine to operating temperature. We turn off the engine and wait 10 seconds.
Stage one
We make sure that the accelerator pedal is released and nothing is pressing on it. Turn on the ignition for 2 seconds and turn it off.
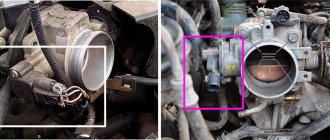
The throttle valve is a key element of the engine power system. It regulates the amount of air supplied to the cylinders, which, in turn, affects the idle speed and the number of revolutions. From time to time, the operating mode of this part changes, so it is necessary to adapt it. Moreover, you must first clean the damper, otherwise all efforts may be useless. Unfortunately, not every motorist knows how these procedures are carried out, although in fact they are not anything complicated.
Node cleaning procedure
Cleaning the throttle valve is possible either with or without removing the assembly. In the second case, care should be taken to ensure that the cleaning agent does not get on the body. To clean the damper, follow the recommendations below.
- After removing the throttle assembly, it is necessary to assess the degree of contamination.
Assessing the degree of throttle valve contamination
- When cleaning, attention should also be paid to the throttle valve mesh. It should be removed and washed using a cleaning agent. If there is noticeable damage to the mesh or sealing rubber, they should be replaced.
Mesh that needs cleaning
View after removing the mesh with rubber seal
Cleaned rubber seal and mesh
- It is recommended that the throttle assembly be generously filled with injector or carburetor cleaner. After removing the dirt, when visually inspecting the damper against the light, the car owner may find small gaps along its edges. Their presence is due to the design of the unit and is completely normal.
Presence of gaps
- If it is impossible to clean the unit the first time, do not use excessive force. To combat contamination, it is better to re-treat the damper with cleaning agents.
Cleaned damper
Cleaning the 1ZZ-FE throttle on Toyota: photo report
I think someone will find the throttle cleaning report useful..
I decided to clean it because the car behaved strangely during warm-up speeds: the speed fluctuated and after some time the car stalled... well, the second reason was simple interest...
I bought carburetor cleaner and WD-40 in advance, I will also need a bunch of rags and a toothbrush (a small brush would be very useful, but I couldn’t find one). The rest - head keys, etc., are always in the car...
Let's start with the procedure for completely flushing the throttle valve and XX valve.
- First, remove the (+) terminal from the battery, then the plastic cover from the unit...
- unscrew the two bolts securing the throttle cable...
- bend the fastening (loosen the cable itself) and pull it out...
- putting it aside...
- using a Phillips screwdriver, loosen the air duct clamps on both sides...
- Next, remove the rubber air duct, and towards it...
Pay attention to the iron frame, which is secured with 2 bolts. Unscrew the bolts and remove the frame...
unscrew the remaining two nuts and 1 bolt securing the throttle. We unclip 2 connectors, the XX sensor and the remote control position sensor.
Carefully (without damaging the rubber sealing gasket) remove the throttle itself from its place. It remains to remove two hoses (cooling system). The clamps should be removed using pliers, but it’s not very convenient to climb under there. Having tried a bunch of tools, I removed it with a screwdriver (the main thing is not to damage it), a little antifreeze will spill out.
The hoses themselves, if you bend them upward, the antifreeze will not pour out. But so as not to suffer, we screw into them two bolts that we removed from the throttle...
This is what the removed throttle looks like from the reverse side (oil deposits) from below the XX sensor
Using a Phillips screwdriver, unscrew the three bolts securing the XX sensor. (everywhere they write that they are difficult to unscrew,... they unscrew normally after soaking with WD-40, the main thing is that the screwdriver fits exactly!!!)...
We also see carbon deposits in the grooves, which also need to be removed...
Attention: to disassemble the XX sensor you need a screwdriver for such bolts...
Before you unscrew it, YOU NEED TO MAKE MARKS!!! scratch thin lines between the plastic and metal with a knife, I did 3 pieces (preferably more than 4-5). Three is the minimum! (red lines, shown by arrows). To put it in the same position during assembly... Well, then we will need the same cleaner and WD-40, a long-haired brush and cotton swabs.
Inside there is a rod that should rotate freely, on which there is a damper... (IT WAS NOT SPINING AS SUPPOSED).. Next, we clean everything inside without sparing the cleaner... we blow it... we dry it... we treat it with a WD cleaner... and we put everything in place using those the marks that we made before disassembling... I put the plastic on the sealant to make it easier to place the marks...
(one more thing - when we put on the plastic, we make the flap in a half-closed state (you can insert a cotton swab inside to fix it))
Let's start with the actual cleaning, pour plenty of carburetor cleaner into everything...
let it soak for a couple of minutes...
In the meantime, let’s clean the throttle seat, having first removed the sealing rubber...
We clean everything with a toothbrush, using the same cleaner...
I decided to clean the inside this way (there is also quite a bit of carbon deposits and oil residues there)…
after using cleaner, a toothbrush, a bunch of rags, and a little time. our throttle takes on this clean look...
then, in reverse order, we put everything back in its original place. Don’t forget to put on all the hoses, rubber bands and connect the connectors.
useful tools...
OK it's all over Now…. everything is easy and simple...
Throttle valve adaptation
In order to perform training of the throttle assembly, you must use the instructions given below.
- Disconnect the vehicle's electrical system for 15 to 30 minutes. To do this, you need to reset the negative terminal of the battery.
- Connect the on-board network to the battery.
- Turn off all electrical consumers in the car, for example, the multimedia system or lights.
- Insert the key into the ignition.
- Start the power plant. Let the engine run for 10-15 minutes. In this case, the revolutions will float from 2000 down. It is prohibited to perform any actions in the car during adaptation, for example, turning the steering wheel or pressing the brake pedal.
- As soon as the speed returns to normal and stops floating, you need to let the engine run for a few minutes and turn it off. At this point, training of the throttle assembly can be considered complete.
Method number 1 – dancing with a tambourine, battery and ignition
Warm up the engine to operating temperature. Usually 80-90 degrees is enough and we turn off the engine.
Disconnect the battery and remove the terminal from it. This is necessary to reset the parameters in the control unit. In a simple way - reset the ECU to factory settings. This will allow the unit to retransmit the damper values in the closed position.
We wait five minutes. This is enough for the control unit to be completely de-energized. We connect the terminal to the battery. Don't forget to tighten it to make better contact.
Turn on the ignition and wait 30-40 seconds without touching or pressing anything. At this time, you may hear a buzzing noise under the hood. This adapts the throttle, the motor moves the damper, determining its position and recording this data in the ECU. This is typical only for electrical and electromechanical remote sensing devices.
Turn off the ignition and wait 15 seconds. After this time, we turn on the ignition, wait until all the indicators on the dashboard go out and start the car. We check the engine at idle speed, the speed should be normal.
It may not work on cars: Audi with a 1.8 liter ADR engine, Opel Corsa, Octavia Tour 1.6 akl engine, 4th generation Golf, Audi A4 ADL B5 body. All cars have non-volatile memory, which cannot be reset by removing the terminal from the battery.
If you were unable to teach using this method, write your car model in the comments.
What causes pollution?
Among the main causes of pollution are the following:
- Operating a vehicle using low-quality fuel. Low quality gasoline with a large amount of sediment and impurities is one of the reasons for the formation of contaminants in the throttle assembly.
- Dirt entering through the air supply system. Dust and dirt settling on the parts of the throttle assembly enter the intake tract through a dirty air filter or an air duct with a broken seal. It is recommended to change the air filter in accordance with the manufacturer's regulations (maintenance).
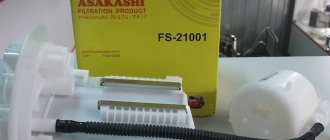
- Fuel filter is dirty. A fuel filter, unlike an oil or air filter, needs to be replaced much less frequently, but this does not mean that it is less dirty and does not pose a threat to engine parts. Dirt from it can also get onto the damper.
Precipitation in the form of oil dust from crankcase gases is also dangerous. Oil with dirt and dust on the valve is formed from crankcase gases, which usually enter through the valve cover.
