- Replacing power steering 1 253
- Replacing the steering shaft crosspiece 1 253
- Replacing the steering shaft1 253
- Replacing the steering cardan1 253
- Replacing the steering column1 253
- Replacing the steering rack1 253
- Replacement of steering tips1 253
- Replacing steering rods1 253
- Replacing the steering wheel1 253
- Replacing the oil seal 1 253
- Replacing CV joint1 253
- Replacing the electric booster1 253
- Upgrading gur1 253
- Steering rack adjustment1 253
- Repair of power steering1 253
- Repair of steering cardan 1 253
- Repair of steering mechanism1 253
- Repair of steering gear1 253
- Steering rack repair1 271
- CV joint repair1 253
- Repair of electric power steering1 253
Knock in the steering column of Toyota Corolla
to shilayev_anton:
shaft with a cross?
Hello Forum members, I have the same problem on a 2008 Corolla with a mileage of 42,000. I went to get the chassis diagnosed. they said everything was fine. We drove along the tram tracks - it was fine. And when you start to move away or slowly drive onto a small curb, a knock appears in the steering wheel. What could it be? The car service either doesn’t understand me or doesn’t want to understand me.
shilayev_anton:
I had the same problem, I replaced the upper steering shaft and the knocking went away (the cost of the shaft was 4500) #
where did you buy or order?
Does the knocking occur when braking?
Check the tightness of the drives and the condition of the support bearings.
to sawa45:
The shaft sleeve at the entrance to the electric motor is changed.
I want to add my 5 cents to the topic, because until last week on my 2006 Corolla, I observed the same annoying knock in the steering column. Before that, I changed the bushing in the steering rack (with ESD), steering rods and ends. But the knocking in the steering column still remained, quite unpleasant, when passing small irregularities. Using scientific research, it was determined that the source of the knock was in the cabin. Namely, in the upper crosspiece of the steering shaft. But the fault was not the crosspiece itself - with a mileage of 175,000, both crosspieces are still in good condition. The problem was in attaching the cross to the shaft. Those. the crosspiece is put on the shaft splines, and then the clamp is tightened with a bolt. First I tried to tighten the bolt (it is possible that even this simple operation will help someone). Upon closer inspection, I discovered that even if the bolt is fully tightened, the clamp still dangles just a little on the shaft. And this is what makes an unpleasant knock when driving over uneven surfaces. All the fuss is due to the bolt itself. Its thread does not reach the head, that is, it turns out that when you tighten it all the way, the thread is already running out, but the clamp is not yet tight enough. I decided simply and without expense - I added another grower and tightened it. Now I enjoy the silence in the cabin.
to Barry:
This knocking is really annoying me, the car is 2 years old, the mileage is 55 thousand from 35 thousand, this knocking started, everyone says that everything is normal, the chassis works only, but that is the knock)) I wanted to ask, did you take it apart yourself? How complicated is the procedure and where should I start? Please tell me if it’s not difficult, thank you in advance..
to Denis_77:
This is easy to determine if you grab the steering shaft while simultaneously rocking the steering wheel in both directions.
Source
Replacing the steering shaft
Replacing the steering shaft on a Land Cruiser 200 should be done by professionals.
Before carrying out maintenance, the chassis should be diagnosed. It is necessary to check the units, components, technical fluids and play of the steering shaft crosspieces for defects and wear. If any mechanism is found to be faulty, it should be replaced.
To replace the steering shaft, change the cardan:
- Remove protection.
- First unscrew the locking bolt, and then remove the cardan from the spline connection.
- Be sure to lubricate the splines and carefully install the new shaft.
- When you finish installing the new part, install the protective boot.
Experts write that it will take you about 50 minutes.
Eliminating knocking noise in the steering column on a Toyota Corolla
Each technical component in a car has its own specific service life - the length of which depends primarily on the degree of load applied to it. As we all know, components such as suspension and support systems are subject to special stress. However, special attention should be paid to the steering column of the car. Constant turns of the steering wheel make this unit one of the most vulnerable in the entire car. When this unit wears out, a knocking sound appears in the steering column, which at first becomes annoying while driving, and then begins to significantly irritate and cause particular inconvenience.
It is very important to eliminate it, since in a neglected state the column can jam while driving. This is very undesirable, since you can harm your health - if you get into an accident, as well as the car itself - for the same reason. In this article we will talk about what breaks in it, and we will also help in eliminating the knocking of the steering column on a Toyota Corolla.
Bottom line
You need to follow a number of rules and carry out diagnostics at a service station from time to time, then your car will serve you for many years. Specifically for slats, it is worth highlighting the following rules:
- drive through curbs and potholes at minimum speed;
- less often turn the steering wheel to its extreme position;
- in cold temperatures (winter), before starting to drive, turn the steering wheel with the engine running - this will warm up the fluid in the car system;
- If you detect any extraneous noise or defects, contact a specialist.
Have a good trip!
What most often breaks in a Toyota steering column?
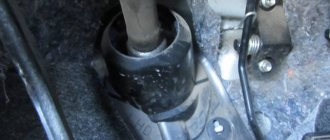
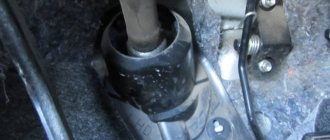
As a rule, the first thing that fails in it is the bushing. This element tends to wear out. Due to this, the column begins to play, and a slight knock appears. Replacing it is not very difficult; below we will tell you and show you how to correctly replace the bushing. The photo below shows the already pulled out bushing.
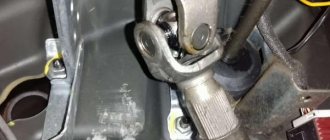
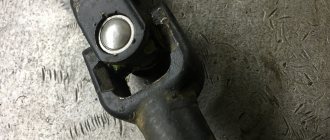
The second element of the column, which also tends to fail, is the lower cross. We will also talk about the process of replacing it. So, let's proceed directly to replacing these parts. In the photo below you can see the lower cross.
Replacing the bushing: step-by-step instructions
The process of replacing the bushing is not very complicated. First of all, the car must be driven into the garage, since repairs will take some time. So let's get started. We remove the steering column panel - this is very simple, we need to unscrew all the bolts and remove it from the latches. As a rule, it is held on by three bolts. After this, we remove part of the air vent - which does not interfere with washing - there will be a lot of dust in it.
After our workplace has been prepared, we unscrew everything that prevents us from removing the steering column. When this work has been done, we use a marker to mark the position of the column that we will need to establish during its final collection. So, the column is removed - we do it carefully, since it weighs a lot. In the photo below we will see the place without the column, as well as the column itself and its bushing in an approximate version.
How to properly change the lower crosspiece of the steering column?
To carry out repairs to this unit, we will also need a garage. First of all, we unscrew the protective cover of the steering column itself, which prevents us from getting to the cross itself. We only need to unscrew three bolts - this is not very difficult to do.
Before unscrewing the steering column, you need to block it - this will allow you to leave the signal cable intact and not torn. Next, as when replacing the bushing, we need to mark the position of the steering wheel.
So, we have it in our hands - the lower cross assembly. You can see in the photo that it is slightly worn.
Next we need to disassemble it. We didn’t bother the part too much - we clamped it in a vice and cut off the crosspiece itself. This must be done very carefully so as not to damage the outer part of the knee.
After the crosspiece was removed in such a rough way, we noticed that there was moisture inside it and there was a complete lack of lubrication - these two points became decisive in the process of destruction of the crosspiece and the appearance of knocking. Stop looking at the old cross - let’s take the seats and begin preparing them for the new part. To do this, we need to thoroughly clean the seats.
When the seats on both sides have been cleaned, we take the cross itself and begin to prepare it. We remove the caps and additionally treat everything with lubricant before pressing. The pressing process is very simple, and the photo below will help you understand it in more detail.
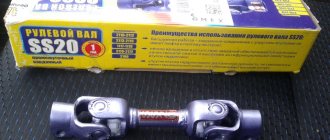
Speaking of the cross itself. It is best to buy an original spare part in stores, with technical specifications that will strictly correspond to your car model. However, there is also a cheaper option; on the Internet, many craftsmen say that the crosspiece from the steering column of a VAZ car is perfect for Toyota. That's what we did - it cost us 160 rubles. It is shown separately in the photo below.
When the crosspiece has been completely pressed in, we need to check everything again and lubricate it with additional grease to prevent moisture from getting inside, which destroys the assembly. Bottom photo is the lower cross assembly.
As we can see, there is nothing complicated in the process of replacing it; all we have to do is put everything back in its place. It won't be difficult to do this. Having put everything together, we can check our car - as you will notice, the steering wheel is like new - no knocks or play. This completes the procedure for replacing the crosspiece, enjoy your use.
Source
Replacing the steering column crosspiece and bushing in a Toyota Corolla 110
Hello everyone, today we’ll talk about self-repair of the EUR or, more simply, the steering column itself... I’ll start with a little background about what and why I went there, so I’ll answer simply, if anyone has been following my on-board vehicle for a long time and carefully reads every entry, he’ll remember how I suffer with this damn steering wheel, this is the only but crippling sore of the Corolla in the 120th body... so I’m stubborn and won’t stop there, after all this I decided to try the contract column, and I didn’t like it after a couple of weeks of use and a knock of unknown origin appeared again, and not metal or plastic, but annoying and intrusive like a child’s ratchet in the steering wheel area... so, having smoked the forums and together with FLaB4eG I decided to get into the EUR on my own
So, after surfing a bunch of forums, conclusions were drawn about the problems of the EUR 1. Wear of the spline connection of the upper output shaft of the EUR and the upper shaft 2. Wear of the bearings of the EUR gearbox 3. Wear/play in the splines of the EUR gearbox (worm-wheel)
so, as a test speaker, I took my original speaker, which came with the car and was more damaged than the contract one... I won’t tell you the principle of removing the speaker from the car, everything is simple: 1. Remove the steering cardan shafts 2. Unscrew and remove the AIRBAG, not forgetting before this removes the terminals from the battery 3. Remove the steering wheel 4. Disconnect all the chips suitable for the column 5. Unscrew the three bolts securing the column and carefully remove the column without damaging the wiring
Toyota Tercel steering repair in Moscow: addresses of technical centers
1,146 auto repair centers
- Stoa
- Novofedorovskoe settlement, block No. 135, Torgovaya Square, 12, building 1
- +7
- daily, 09:00–22:00
3.2 4 ratings
- My Motor Service
4.6 18 ratings
- Triad Service
4.4 99 ratings
- AB-Lux
4.4 193 ratings
- Grew Motors
5.0 44 ratings
- ASG-Market
4.2 11 ratings
- Autopilot
4.7 40 ratings
- Soundauto
4.7 16 ratings
- BenzBMW
4.5 48 ratings
- Vianor
4.7 23 ratings
- Volvo
5.0 42 ratings
- Gadget
4.6 18 ratings
1 115 Show car services on the map
Knocking in the steering column: causes
The performance of controls in a car is one of the main points of safety on the road.
The rack in the TLK 200 is of high quality and episodes related to the repair or replacement of the Land Cruiser 200 steering shaft are extremely rare. This knocking noise occurs when driving on rough roads. There are many reasons for knocking, but more often it is due to high mileage, corrosion of the crosspiece, and deformation of the driveshaft.
Let's highlight the most common causes of column failure:
- The support sleeve, which is located on the reverse side of the unit, broke. If the knocking noise comes from under the hood, it means it is simply worn out. To find out what the problem is, place the machine on a lift and, grabbing the shaft, move it in a vertical direction. If there is play, then the bushing is worn out. You can replace it at a service station.
- Over time, the bearing may wear out.
- The tie rod ends could break.
- The problem may be with the steering shaft bearing. It needs to be lubricated and adjusted.
- The bolts have come loose from the steering control. To fix this problem, you need to tighten the bolts.
- The appearance of an annular excavation inside the housing wall directly in the power cylinder of the rack. Replacing or sanding should solve the problem.
- Power steering pump. The bearing in it wears out more often, and knocking begins. You need to either change the bearing, or disassemble the pump, or go to a service station.
- The cause of play in the steering wheel may be a defect, a column cross or a broken rack.
Don’t forget the state of our roads, foreign cars are simply not designed for them, so a situation arises in which the mechanisms wear out faster and the steering column of your Toyota Land Cruiser 200 knocks.
Installation of spline play compensators
If the knocking noise comes from the spline part, then you will need spline play compensators. You can install them yourself by following the instructions:
- you need to lock the steering wheel and remove the plastic covers from the steering column space;
- disconnect all connectors from the column;
- remove the airbag;
- Remove the heater air duct in the place where the driver's feet are usually located.
- loosen the bolt on the shaft so that the mechanisms can be moved freely;
- to avoid wheel alignment, you need to make a mark on the steering wheel;
- unscrew the bolts securing it to the body and pull out the column;
Steering intermediate shaft with compensators
- Disassemble the column into two parts by unscrewing the bolts.
- Remove the retaining ring from the bearing and pull out the intermediate shaft.
- In the shaft (1), drill holes (3,4) with a diameter of 8 mm and a depth equal to the length of the plastic cap. The first is at a distance of 14 mm from the edge, and the second is 55 mm.
- Lubricant must be applied to the front part of the shaft (1). Litol will do, it is quite thick.
Reassemble in reverse order.
