Toyota RAV 4 is a Japanese crossover that has compact overall dimensions. In 1994, the manufacturer introduced the first generation of this car. The platform from the Toyota Celica GT-Four was chosen as the basis for it. Initially, the crossover was produced only in a three-door body style, but since 1995, extended five-door versions have become available to consumers. Toyota Rav 4 was equipped with one of two engines: 3S-FE and 3S-GE. Both of these engines are in-line four-cylinder and have a displacement of 2 liters. However, their maximum power is different: the first can develop 135 horsepower, while the second 178 horsepower. Two transmission systems were offered for them, namely a five-speed manual gearbox and a four-speed automatic gearbox. Also, the car can have either front-wheel drive or all-wheel drive, depending on the version. In 1998, the configurations were slightly expanded. Now a version with a fabric roof has become available to consumers. For all other versions, a slight restyling was carried out.
Serial production of the second generation started in 2000. This generation was also available in both three-door and five-door body styles. The manufacturer produced front-wheel drive models for the American and Japanese markets; all-wheel drive versions were available in all other markets. The range of installed power plants has been expanded and now includes four engines: a petrol four-cylinder in-line 1ZZ-FE with a displacement of 1.8 liters and a power of 123 horsepower (installed on the front-wheel drive version), a petrol four-cylinder in-line 1AZ-FE (and its modification 1AZ -FSE) with a displacement of 2 liters and an output power of 150 horsepower, a gasoline four-cylinder in-line 2AZ-FE (and its modification 2AZ-FSE) with a displacement of 2.4 liters and an output of 160 horsepower, and a diesel four-cylinder in-line D-4D power plant, which has a displacement of 2 liters and a maximum developed power of 116 horsepower. In 2005, the second generation was removed from mass production.
The third generation was introduced to the Japanese domestic market in the fall of 2005. The car was introduced for the American and Canadian markets in the winter of the same year. In this generation, the manufacturer has significantly changed the technical component. If previously there were versions with permanent all-wheel drive, then starting with this generation the crossover received a plug-in front-wheel drive.
Restyling work was carried out in 2010. Then the model received modified head and rear optics, a new radiator grille, which was integrated into the front bumper, a functional steering wheel and many other changes. For the American market, the car is equipped with a 2.5 liter four-cylinder in-line engine with a maximum output power of 220 horsepower. The power of the previous two-liter engine was increased to 158 horsepower. The 2.4 liter engine was also modified, which ultimately received a rated power of 184 horsepower. The automatic transmission was replaced by a Multidrive S CVT with a manual shift mode for 7 preset gears, and a six-speed gearbox with mechanical shifting also appeared. The four-speed automatic transmission remains the same here and is installed on a 2.4 liter power unit.
The manufacturer presented the fourth generation of the Toyota RAV 4 at the Los Angeles Motor Show in 2012. Compared to the previous generation, the new model has increased overall dimensions. The fourth generation became available to consumers in 2013.
Changing the transmission oil
The car owner can perform a partial replacement of the transmission fluid independently. Below are instructions from expert mechanics on how to change the lubricant for beginners. You will definitely need:
- original oil;
- filter and gaskets;
- gloves;
- container for draining;
- funnel for filling lubricant.
Procedure steps:
- Warm up the CVT of the vehicle Rav 4.
- Drive into a pit or overpass.
- Remove the protection and unscrew the drain plug in the CVT pan.
- Place a container for drainage with measuring marks.
- Wait until the oil has all flowed out and unscrew the sump bolts.
- Carefully remove it and pour the remaining oil into a container. Wash the tray and magnets from metal shavings.
- Remove the old filter device and replace it with a new one.
- Install a new gasket on the pan and put it in place.
- Tighten its bolts and drain plug.
- Unscrew the dipstick and insert a funnel to fill in the lubricant.
- Fill in as much lubricant as drained.
- Reinstall the dipstick.
- Start the engine and warm up the box.
- Check level.
This is how the transmission lubrication from Toyota Rav 4 is changed.
Automatic transmission oil Toyota Rav 4 Direct Shift-8AT (8 gears)
The innovative 8-speed automatic transmission Aisin Direct Shift-8AT can be seen on the latest fifth generation Toyota Rav 4. However, in terms of the oil used in its operation, it is practically no different from its 6-speed predecessor. Therefore, feel free to fill it with transmission fluid with Type WS approval (Toyota Type WS, RAVENOL ATF T-WS Lifetime, Redline D6 ATF).
| Toyota Type WS | 4 liters Article: 08886-02305 Average price: 4000 rubles 1 liter Article: 08886-81210 Average price: 1300 rubles |
| RAVENOL ATF T-WS Lifetime | 4 liters Article: 4014835743397 Average price: 2700 rubles 1 liter Article: 4014835743311 Average price: 700 rubles |
| Redline D6 ATF | 4 liters Article: 30705 Average price: 5500 rubles 1 liter Article: 30704 Average price: 1800 rubles |
Toyota Rav 4 oil in transfer case: what kind
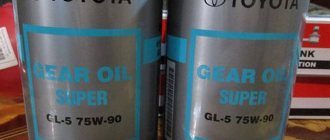
The manufacturer recommends using its own synthetic oil 75W-90 of the GL-4/GL-5 standard in the transfer case and rear gearbox. However, 80W-90 options can be filled.
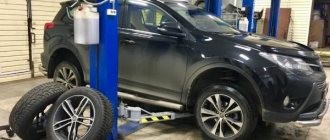
Toyota Rav 4
Next, we consider changing the oil in transmission units of the 3rd and 4th generations of models 2007, 2008 and 2013, 2014.
The third generation of Rav 4 exists in front-wheel drive versions, but in most markets all-wheel drive modifications were offered. The car was equipped with manual and automatic transmissions, as well as a CVT. For the fourth generation Rav 4 they offered the same types of gearbox and drive.
2007
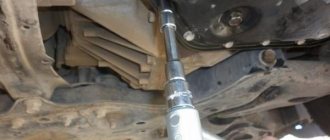
To access the Rav 4 transfer case, you need to remove the protection. Unscrew the drain plug with a 10mm hexagon and drain the oil into a pre-installed container. After the entire volume of liquid has flowed out, tighten the drain plug and unscrew the filler plug with the same tool. Due to the fact that the plugs are similar in appearance, they are easy to confuse. The difference is the magnet on the drain.
You can use the manufacturer's original gear oil 75W-85. The liter capacity is indicated in the spare parts catalog 08885-81060. It is permissible to change the oil to options 80W-90 and 75W-90 of the GL-4/GL-5 standard. The Rav 4 dispenser includes 450 g. These are two full syringes and another 2/3. Filling can be done through a rubber hose.
The filling of the transfer case is indicated by the reverse flow of liquid from the filler plug. It is necessary to bring it to a level 5 mm below the edge of the filler hole. It is recommended to install a new gasket in the plug. After tightening (the tightening torque is 39 N*m), the residues are washed off with carburetor cleaner.
The rear gearbox oil of the 2007 Rav 4 is drained in the same way by unscrewing the drain plug. The filler plug is located near the drive on the opposite side to the drain. Both plugs are designed for the same hexagon. This oil is also suitable for the Toyota Rav 4 gearbox. Filling is carried out in the same way. The gearbox holds about 300 g. Therefore, one container is enough for both it and the transfer case.
2008
The oil in the 2008 Toyota Rav 4 transfer case is replaced according to the same rules, since the car has retained its design (although it has undergone an update in some markets).
2013
Changing the oil in the rear gearbox of a 2013 Toyota Rav 4 is carried out in a similar way, however, the volume in the differential has increased to 0.9 liters, in the transfer case - to 0.7 liters.
2014
The 2014 Toyota Rav 4 has retained its design, so the same rules for changing the oil in the gearbox and transfer case are relevant.
Toyota manual transmission oil change
Changing Toyota manual transmission oil
The design of a car includes many important components. One of them is the gearbox. It contains various gears and other moving parts, so it requires special transmission fluid to function properly. We will tell you what its purpose is, when and why to change it, and how to do it in your garage in a Toyota car.
All parts are subject to wear. This is especially true for the gearbox, because it contains a large number of moving parts that need to be lubricated and cooled. Gearbox oil can handle this difficult task. It allows you to reduce friction and, accordingly, preserve the original shape of the part for a longer period, minimizing wear.
This liquid also serves to remove and dissipate heat. Bad or old oil can simply foam, causing high stress on the teeth. The gearbox will simply jam at one point. A complete replacement of a manual transmission will cost a fortune.
In addition, transmission oil contains a number of useful additives that protect key gearbox components from corrosion. Over time, these additives lose their quality, so it is necessary to change the oil in the Toyota manual transmission.
What does the market offer?
All existing brands of oils can be divided into three large categories:
- mineral;
- synthetic;
- semi-synthetic.
Mineral gearbox oil is used in older foreign cars with rear-wheel drive. It has no cleansing properties, but it has the lowest price. You will have to change this type of oil most often (on average every 35 thousand km).
Synthetic is recommended for use in new cars with rear- and front-wheel drive. This type contains a huge variety of useful additives and is characterized by a long service life. The main disadvantage is the high price.
Semi-synthetic oil is a compromise between the two categories described above. It is used in economy class cars, as well as some budget models. It has fewer additives compared to synthetics, but is in great demand due to its affordable cost.
When to change Toyota manual transmission oil
The oil change period for a Toyota manual transmission does not depend on the mileage of your vehicle. You can look up this number in the technical manual of the machine. This is the best option, since it contains information specifically for your model. If you haven’t found anything in the manual on this issue, then you should resort to general advice.
Car service specialists and many experienced drivers recommend replacing them after a mileage of 50-60 thousand km. If you drive actively with constant sharp acceleration and braking, then the replacement period is reduced to 30-40 thousand.
An unscheduled oil change must be performed in the following cases:
- a strong hum appeared in the box;
- dips have appeared in the clutch pedal (it’s worth checking the oil);
- being involved in a traffic accident with transmission damage;
- difficulty shifting gears;
- the appearance of transmission oil leaks.
Each of these points indicates that there is something wrong with the gearbox, and the reason for this may be old oil.
What to buy
The car manual (in addition to the replacement period) should contain information about the brand of recommended oil. If you have the opportunity to purchase one, be sure to do so. Only original products guarantee the declared service life and will also eliminate transmission breakdowns due to low-quality oil. It is recommended to buy synthetic or semi-synthetic oil.
The original oil can be of Japanese or European origin. If it is not a fake, then there is not much difference between them. There are plenty of cheaper analogues on the market. But be sure to pay attention to the packaging and also read the specifications. Using the wrong oil will cause a hum in the box and accelerated wear of the teeth.
How to change manual transmission oil in Toyota
The procedure will not require much time and effort from you. First you need to find a container of several liters for used oil. Replacement must be carried out on a lift or overpass. If you do not have this option, you will have to put the car on a jack. First, you should drive the car to warm up the transmission oil. When heated, it is more fluid.
Next, follow these steps:
1. Place the car on a lift or jacks.
2. If necessary, remove the crankcase protection.
3. Unscrew the drain plug in the crankcase area with a suitable key, after first placing a container for the liquid. If necessary, replace the gasket.
4. Then unscrew the filler plug. Several hundred grams of oil may also leak from there.
5. Clean the threads of the drain hole.
6. Next, you need to pour oil into the filler hole. You can string a special hose onto it, and then use a regular funnel. Continue this process until new oil flows out of the other hole.
7. Screw the caps on both holes securely.
The service center will charge you exorbitant amounts of money for this procedure. But why overpay? It is enough to buy high-quality oil and then do everything yourself in your garage.
If the material was interesting or useful for you, publish it on your social network page:
jrepair.ru
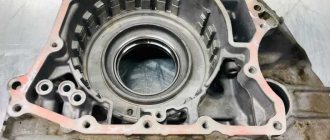
Changing the oil in the transfer case and gearbox
To change the lubricant, you will need the following materials and tools:
- transmission of the appropriate degree of viscosity. The original Toyota 75w90 lubricant, or any other brand whose quality is beyond doubt (for example, Castrol 75w90) is suitable. Volume – 1–1.5 l;
- large-volume pharmaceutical syringe (150-160 ml);
- an extension hose through which the waste will be pumped out;
- fill tube;
- hex wrench No. 10;
- containers for waste;
- set of car keys.
The procedure for replacing a Rav 4 car:
- For comfortable work, the machine is placed above the inspection hole or driven onto an overpass.
- Remove the side control and filler plugs of the gearbox using a hex wrench.
- The container for processing is prepared, the lower drain plug is unscrewed. Now you can wait until the waste completely drains into the prepared container.
- Afterwards, the gearbox is cleaned of any remaining old lubricant. To do this, a syringe is attached to the hose (tube). The latter is inserted into the drain hole and pumping out of the remaining liquid begins.
- Then the drain plug is cleaned of dirt and installed back. Fresh oil is collected with a syringe and poured into the gearbox. The gearbox needs to be filled until oil begins to flow from the control hole (according to experience, it takes about 500 ml).
Changing the oil in the Rav 4 transfer case is done in a similar way, but requires a preparatory procedure. To make replacement easier, the protection from the internal combustion engine is first removed using a regular car set of keys. The transfer case, again according to the crossover owners who changed the oil, receives a little less lubricant, about 450-500 ml. The numbers differ from the official information of the manufacturer.
How often should the oil be changed in a Toyota Rav4 automatic transmission?
The oil change in the Rav 4 automatic transmission should be done at the following intervals:
- A241E/A247E/A540E - every 55 thousand kilometers
- U140F/U241E - every 60 thousand kilometers
- U660E/U760E - every 45 thousand kilometers
- Direct Shift-8AT - every 50 thousand kilometers
How to choose oil for a Toyota RAV4 engine and not stumble upon a fake? We'll tell you in this article.
Changing the transmission oil
The car owner can perform a partial replacement of the transmission fluid independently. Below are instructions from expert mechanics on how to change the lubricant for beginners. You will definitely need:
- original oil;
- filter and gaskets;
- gloves;
- container for draining;
- funnel for filling lubricant.
Procedure steps:
- Warm up the CVT of the vehicle Rav 4.
- Drive into a pit or overpass.
- Remove the protection and unscrew the drain plug in the CVT pan.
- Place a container for drainage with measuring marks.
- Wait until the oil has all flowed out and unscrew the sump bolts.
- Carefully remove it and pour the remaining oil into a container. Wash the tray and magnets from metal shavings.
- Remove the old filter device and replace it with a new one.
- Install a new gasket on the pan and put it in place.
- Tighten its bolts and drain plug.
- Unscrew the dipstick and insert a funnel to fill in the lubricant.
- Fill in as much lubricant as drained.
- Reinstall the dipstick.
- Start the engine and warm up the box.
- Check level.
This is how the transmission lubrication from Toyota Rav 4 is changed.
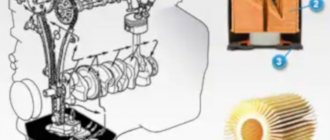
How to properly replace the oil filter?
To correctly replace the oil filter on a Toyota Rav 4, you must follow safety precautions and strictly follow the step-by-step instructions.
The safety precautions when performing work to replace the oil filter in a Rav 4 car are quite simple. It looks like this:
- The first step is to put on rubberized gloves. They are needed so that when removing the oil filter you do not get burned by the remaining lubricant in it.
- It should be remembered that the lubricants used in the car are flammable, so work on replacing the oil filter should be carried out at a sufficient distance from open flame sources.
- The car owner needs to take into account that lubricants in the engine oil system are very toxic, so replacing them or consumables used in oil systems should be done in a well-ventilated area.
- Fabric gloves should be worn over rubberized gloves. They will improve the grip of your hands on the surface of automotive parts. They also prevent them from slipping off the parts during operation.
- We must not forget that the disposal of consumables and used lubricants must be carried out at special landfills. It is necessary to take into account that disposal of automobile consumables in an inappropriate place is punishable by a fine of up to 25,000 rubles and the removal of 2 penalty points from the driver’s license. There's no point in taking unnecessary risks.
DETAILS: Explanation of engine oil markings
Also, before starting work on replacing the oil filter in a car, you need to make sure that while performing this work, the car owner has the entire list of necessary tools and consumables.
List of necessary tools for replacing the oil filter in Toyota Rav 4:
- New oil with a volume of at least 5 liters.
- Oil filter for a Rav 4 model car. If possible, it is recommended to use the original Toyota oil filter 04152-YZZA1 from Toyota.
- Rubber gasket under the oil filter seat.
- Oil filter cover gasket.
- Gasket for oil pan plug. As a rule, its replacement is not required, but in some cases it becomes unusable at around 15,000 kilometers, so it is worth purchasing it in advance.
- Automotive screwdriver set.
- Set of ratchet wrenches with replaceable heads.
- Special key for removing the oil filter.
- A container into which the car owner will drain used oil.
- Torque wrench. It is needed to check the clamping force of parts with a threaded connection.
Representatives of the Toyota company advise using exclusively original consumables and lubricants for filling into the oil system of a Toyota Rav 4. The use of non-original consumables and materials is allowed only if they are completely identical to the technical requirements specified in the technical documentation for the vehicle.
In all other cases, the use of non-original automotive components and consumables can cause serious damage to the engine installed in the car. Repair and restoration work will cost up to 185,000 rubles.
If the engine breaks down in a Toyota Rav 4, replacing it can cost from 95,000 to 278,000 rubles. As you can see, the amounts for repairs and complete replacement of the engine in a Toyota Rav 4 are quite large. Therefore, car owners should not take unnecessary risks using non-original car components.
Stage one
If a car owner is replacing the oil filter for the first time, then he should not be afraid of anything. In this car, all work on changing the oil filter is performed as in any other car. No problems should arise, because all steps are described in detail in the instructions for replacing the oil filter.
The step-by-step instructions are as follows:
- As with any car, before replacing the lubricant and oil filter, you need to warm up the car's engine properly. This is necessary because when the engine warms up, the lubricant becomes more liquid, which allows it to be quickly drained from the engine oil system.
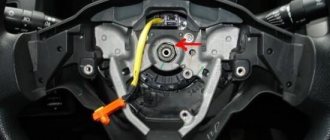
- The second step is to remove the fill valve cap in the engine oil system.
- Then we remove the crankcase protection. You should be careful here, since often the bolts that secure the protection to the bottom of the car are made of aluminum. If you apply excessively high force when removing them, you can strip the threads on them. Therefore, you need to remove them carefully. It is best to use a torque wrench when unscrewing. It will warn if the car owner uses excessive force when unscrewing them.
- After dismantling the crankcase protection, you can begin to drain the lubricant from the engine oil system. To do this, you need to unscrew the oil system drain valve plug using a spanner wrench, which evenly distributes the load on the bolt head.
- Then we place a container into which the used oil will be drained.
- After the lubricant has completely drained from the oil system, you can begin to remove the oil filter. To do this, it is better to use a special wrench to remove the oil filter.
- After removing it, you need to disassemble it.
DETAILS: Tinting headlights - instructions for implementation, Avtopub
This completes the partial disassembly process. It is worth noting that the plugs on the drain valves of the oil system of the Toyota Rav 4 and Toyota Corolla 2010-2012 vehicles are the same. Therefore, if during removal of this part it is damaged, then it can be easily replaced with the same one from a Toyota Corolla car. The index numbers for these parts are as follows:
- Toyota Rav 4 - 04152-37010;
- Toyota Corolla 2010-2012 - has the following oil system drain valve plug index OX 416 D1.
It is also worth considering that the rubber seals on these two cars are the same, so they can be interchanged if they are damaged.
Practical advice on choosing oil in a Toyota Rav4 automatic transmission
High-quality original oil in the box plays an important role. Only the original has the necessary technical properties that allow the oil to:
- build up a protective film on metal parts to protect them from premature wear;
- prevent foaming;
- protect copper parts from oxidation.
The original oil will not lose its properties even with severe overheating, and in frosts down to minus 30 degrees it will not freeze.
Original oil
The original oil for automatic transmission of Toyota Rav4 is ATF Type IV with catalog number 0553-00405 and Toyota WS with number 08886-01705. The first oil is recommended for use in automatic transmissions created before 2005, and the second - after 2005.
The oil is sold in black iron liter cans and 4 liter canisters. Manufactured in Russia. There is no clear opinion about the quality of this type of transmission fluid. I personally doubt buying such a lubricant.
Therefore, I usually buy the original from Japan in tin cans. European canisters are gray in color. They only come in five-liter sizes. If you see plastic canisters with this name, then they are from America.
Analogs
This oil has no analogues. Therefore, I would not recommend buying lubricants of dubious quality that are passed off as analogues of this transmission fluid. I believe that ATF Type T IV is the only transmission fluid that needs to be poured into a Toyota Rav4 automatic transmission.
Oil leaks and breakdowns
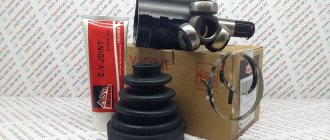
There are two main reasons for oil leakage from a manual transmission in a Toyota RAV4: damage to the car’s crankcase housing and wear of oil seals and O-rings. The last problem can be solved by simply replacing worn parts.
The gearbox housing can be damaged if it is physically impacted. For example, when hitting a high obstacle. In this case, it is necessary to identify places of damage by traces of oil stains. They are marked, after which the box is disassembled and welded by hand. A simpler and more expensive method is to completely replace the body or pan.
Preliminary and main disassembly activities
When selecting a new oil seal, give preference to the original spare part over the part manufactured under license. The oil in the gearbox must comply with the manufacturer's technical recommendations.
- If repair work is carried out in an inspection hole, place the car on the handbrake. When using a lift, the parking brake does not need to be applied.
- Before starting repairs, drain the oil from the gearbox into a prepared container. The drain plug is located on the left side in the direction of travel of the car. It is unscrewed with a hexagon.
When draining the oil, pay attention to its consistency, color and the presence of small metal shavings. The appearance of foreign elements is often a sign of wear of rubbing parts