Repairing a Toyota gearbox in our specialized service is not just replacing bearings and seals in the gearbox, but also correct tuning (adjustment) and a 12-month warranty without mileage limitation.
In the process of overhauling Toyota gearboxes, we use only original spare parts, which we always keep in stock in our warehouse. Spare parts for Toyota gearboxes can also be purchased from us.
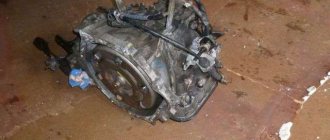
In addition to repairs, you can purchase reconditioned gearboxes (pre-rebuilt, with seals, bearings, etc. replaced) in exchange for your faulty one. All that remains is to remove the faulty gearbox and install a restored one; this is the minimum amount of time spent on car repairs.
Toyota RAV4: Replacement of rear differential drive shaft oil seal
With a mileage of 50 thousand km or more on Toyota RAV4 vehicles, the rear differential drive shaft oil seals begin to leak (mainly on the left side).
Some drivers, having learned about this problem, do not rush to service, but continue to drive the car (sometimes up to 10 thousand km), only periodically checking the oil level in the rear differential. If the leak is not large, then this is quite acceptable.
However, it is still advisable not to delay and to replace the seals at the first opportunity in order to avoid more serious problems in the future.
So, to replace the rear differential drive shaft oil seal, you need to
:
- Remove the muffler;
- Unscrew all cardan bolts;
- Unscrew the bolts of the 3 mounting points of the rear differential to the silent blocks (2 bolts in the front and one in the rear, indicated in the photo with red arrows).
It may happen that one of the bolts rests on the gas tank, then you should unscrew the bracket from the differential completely (2 bolts on the differential, indicated by blue arrows);
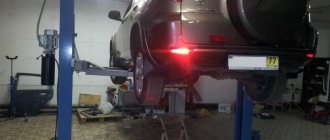
Place a jack under the differential and remove the bracket bolts, then carefully lower the differential down.
When it is lowered enough, disconnect the cardan and move it to the side. If the cardan is not removable, then you can easily hit it with a sledgehammer a couple of times;
Pull out the drive shaft using a pry bar or pry bar and a hammer. To do this, insert the tip of the pry bar into the inner drive shaft joint. Then, using the ribbed part of the rear differential cup as a lever, disconnect the drive shaft.
Be careful not to scratch the shaft boot in the process and do not lose the retaining ring that is located on the shaft (indicated by a red arrow in the photo);
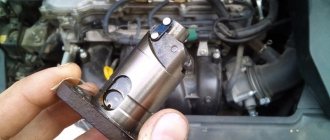
Using a special puller or a screwdriver, carefully remove the oil seal. Do this carefully so as not to damage the case.
The cause of leakage of the old oil seal is the abrasion of its edge;
We clean and degrease the seat, then insert a new oil seal there (Toyota 90311-37004).
You can hammer it into place with the old oil seal if it remains intact. From the edge of the oil seal to the edge there should be approximately 0.5 cm;
Until the differential is completely secured to the brackets, it is advisable to clean the breather, which is located on top, of dirt. If it is clogged, this may lead to repeated oil leakage.
Replacing the drive shaft seal of the rear differential of a Toyota RAV4 is a rather labor-intensive operation, so it is recommended to change 3 seals at once (left/right shaft seals and shank seal) so as not to climb under the car anymore.
Source
Causes of malfunction
Any oil seal itself is a consumable item. Any seals sooner or later wear out and begin to lose their sealing properties. The reason for this is most often simple physical wear and tear. However, oil seal leakage can also be caused by the aggressive composition of the transmission oil, for example, when using uncertified or low-quality oil. A leak can also be caused by poor quality, defective oil seal itself or its sealing gasket.
Wear of the oil seal is manifested by the formation of a leak at the point where the gearbox is attached to the driveshaft. If the leak appears as protruding drops of oil at the mounting location, the oil seal must be replaced. Often you have to not only replace the oil seal, but also repair the gearbox itself. This is because oil leaks can also be a sign of bent or broken gears.
If the mounting location is only covered with a thin oil film, then there is no need to rush into replacing the oil seal for now. However, you will have to monitor its condition and possible leaks.
Toyota RAV4: Replacement of rear differential shank oil seal
Look at the driveshaft flange and the front part of the rear differential housing of your Toyota RAV4, if there is fogging (fur coat) there, then it is definitely time to change the oil seal.
The first thing to do is drain the oil. On the gearbox housing there are 2 hexagon plugs: the bottom left plug is a drain plug, and the top right plug is a filler plug. First, it is better to unscrew the top one, and only then take on the bottom one.
When the oil is drained, we proceed to unscrew and remove the propeller shaft. We unscrew the 4 bolts connecting the cardan flange to the gearbox flange and separate them by using a screwdriver to pry them into the special recess between them (red arrow on the gearbox flange in the photo below).
To remove the gearbox shank, you need to unscrew the brackets from it with a 17 wrench, which are attached to it with 2 bolts on each side (white arrows in the photo below). We take out these bolts, loosen the bolts securing the pillows with a 17 wrench (green arrow in the photo below) and remove the brackets down from the gearbox.
Next, take a 12mm wrench and unscrew the 4 bolts (blue arrows in the photo below) that hold the gearbox shank. Place a container under the gearbox for residual oil and use a lever to remove the housing.
The next step is to pull out the black magnetic ring that is inside.
To do this, you must first disconnect the terminal, which is located on the upper right side of the gearbox.
Inside we will see the oil seal, which needs to be replaced.
However, before we start replacing, we take a caliper and measure the seating depth of the old oil seal (usually about 7 mm) in order to seat the new one in the same way.
Now, we wipe the entire internal cavity from oil and dirt, degrease and dry. We also remove any remaining sealant from the edge. We take a new oil seal (Toyota 90311-54006) and put it in its original place so that there are no distortions.
Next, we proceed to assembly in reverse order and install the gearbox shank with DONE DEAL DD6733 sealant. We find the breather in the upper part of the gearbox and clean it from dirt. Then, you can safely screw everything else into place. And at the very end, fill in half a liter of transmission oil with a viscosity index of SAE 90.
Source
Changing the gearbox seal on Rav 4
Replacing the oil seal is quite easy, but requires knowledge of certain details. The work includes several stages:
- Before starting the replacement, drain the oil and unscrew the filler plug located on the right. And only then unscrew the drain plug on the left.
Filler plug (link to photo source)
Drain plug (link to photo source) - Then, you need to put marks on the cardan and disconnect it. This is necessary so that after replacing the coupling, the part can be assembled correctly.
- To disconnect the cardan from the flange, install a screwdriver in a special recess on the flange and pull the part away from the gearbox.
- Using a 17mm wrench, unscrew 2 bolts and loosen 1 bolt of each support.
- Turn the supports down.
- Using a 12mm wrench, unscrew the 4 bolts and disconnect the housing.
Schematic disassembly - And do not forget to provide a container to drain the oil that will pour out after you disconnect the device.
- Disconnect the terminals on the other side of the mechanism to remove the magnet.
Location of the terminal on the gearbox (link to photo source) - Remove the remaining three screws and wipe the edge and cavity free of oil and sealant.
- Record the seating depth and install the new spare part at the same distance.
- Original spare part for Toyota Rav 4 with article number 90311-54006. It doesn't need to be lubricated.
Original gearbox oil seal - Reassemble the parts in reverse order, place the housing on the sealant and fill with oil.
Replacing the gearbox seal in Toyota Rav4
To prevent oil leakage from the rear axle gearbox, a gearbox seal is installed on the Toyota Rav4. Over time, due to operation, the part loses its properties and the unit depressurizes. Replacing the rear gear oil seal in a Toyota Rav4 is the only right solution. It is important to detect the drive malfunction and make repairs.
Step-by-step instruction
Sequence of actions during maintenance:
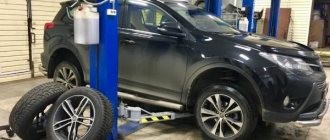
- Place the car on a lift or in a garage box with an inspection hole.
- Unscrew the fasteners and remove the power unit protection that prevents oil from draining from the transfer gearbox.
- Clean the crankcases near the drain and inspection plugs with a wire brush or rag.
- Unscrew the inspection plugs and wipe the parts from dirt. To remove traces of oil, you can use gasoline or organic solvents. It is better to carry out manipulations with protective rubber gloves that protect the skin from the negative effects of the liquid.
- Unscrew the drain plug in the transfer case and place a container to collect waste. The draining procedure lasts 10-15 minutes due to the reduced fluidity of transmission lubricants.
- Wipe the plug from oil and metal dust, install a new sealing washer and screw it into the hole.
- Fill a syringe with a portion of lubricant and insert it into the crankcase through the inspection hole. The lubricant level should coincide with the lower edge of the channel. Instead of a special tool, you can use a medical syringe with a capacity of 100-150 ml with an extension tube for droppers placed on the spout.
- Tighten the inspection hole plug, first installing the sealing washer.
- Repeat the procedure for draining old oil and filling fresh material with the rear axle gearbox.
- Install the engine protection sheet in its original place and take a test drive. Additional level control is not required, since there are no hidden cavities in the crankcases, which are filled with lubricant after the start of movement. If traces of transmission oil leakage are found under the car, the defect must be eliminated (for example, tighten the plug with a wrench without using excessive force).
Design Features
The gearbox oil seal is a part that is a small ring made of oil-resistant rubber. The seal is installed on the inside of the axle bearing. In case of delayed repairs, the amount of lubricant in the gearbox may decrease to a critical level.
Because of this, all rotating parts will be subject to rapid wear. A characteristic hum will be heard in the rear axle area while driving. If repairs are not carried out in a timely manner, an expensive replacement of the gearbox assembly may be required.
How to identify a malfunction
In order to determine the need for repairs to replace the oil seal, periodically perform a visual inspection of the gearbox. If traces of oil leakage are found in the shank area, then in almost all cases this is a sign that an urgent replacement of the Rav4 rear gearbox oil seal is needed.
It is difficult to carry out this operation in a garage, since it requires an inspection hole or a lift; the latter condition is preferable. In this case, you need to have special pullers and tools, as well as stock up on a new part. If the oil's service life is already coming to an end, it is better to fill in new technical fluid.
Subtleties of gearbox maintenance
NSK Rav 4 rear gearbox clutch bearing size 120*95*17 mm
, the NSK part size 120*95*17 mm is most often suitable . But there are cars in which the Rav 4 rear gearbox clutch bearing has a non-standard size of 120*95*13 mm . It is difficult to find and will take time to ship to order.
That is why, when making repairs yourself, it is recommended to look for the part in advance.
Several manufacturers produce bearings measuring 120*95*13 mm:
- ISB 120x95x13mm - Italian concern ICGroup,
- SKF 120x95x13mm is the largest Swedish manufacturer of the SKF group of companies.
ISB Rav 4 rear gearbox clutch bearing size 120x95x13mm
New parts do not have a rubber ring. In order for the part to hold tightly, it is placed on sealant compounds .
In addition, Toyota Rav 4 cars are equipped with couplings for large bearings of 13 and 17 mm, which differ by year of manufacture. To avoid mistakes, the selection of parts should be made according to the VIN number.
Location of the plate with the Vin number on the Rav 4
For example, if a Rav 4 produced in 2000 is equipped with a clutch numbered 41303-42020 with a bearing 120x95x17 mm, the part numbers will be as follows:
- 90363-95003 for the big one,
- 90363-65002 for the little one.
And when installing the rear gear oil seal, you may need 450 ml of 75W-90 GL5 gear oil .
Rear gear oil seal
Service station technicians say that when a hum occurs in the viscous coupling, it is the large bearing that fails .
In most cases, the failure occurred due to the vehicle crossing deep puddles or small rivers.
Preliminary and main disassembly activities
When selecting a new oil seal, give preference to the original spare part over the part manufactured under license. The oil in the gearbox must comply with the manufacturer's technical recommendations.
- If repair work is carried out in an inspection hole, place the car on the handbrake. When using a lift, the parking brake does not need to be applied.
- Before starting repairs, drain the oil from the gearbox into a prepared container. The drain plug is located on the left side in the direction of travel of the car. It is unscrewed with a hexagon.
When draining the oil, pay attention to its consistency, color and the presence of small metal shavings. The appearance of foreign elements is often a sign of wear of rubbing parts.
- Start the procedure for disconnecting the cardan by unscrewing the two nuts holding it in the middle. There are washers between the plate and the car body, which you should remember to put in place during assembly.
- Before unscrewing the driveshaft gears from the flange, make a mark corresponding to the factory position.
This must be done in order not to upset the balance set at the manufacturer. If the factory settings are not followed during assembly, an imbalance will occur during movement, which in the near future will lead to the repair of suspension elements, for example, the outboard bearing. - To prevent the gearbox shank from rotating, insert two bolts into it and hold it with a mounting spatula. This way you can easily unscrew the four nuts.
- To disconnect the assembly, use a flat-head screwdriver, which must be inserted into the special recesses located between the flange and the cardan. They are opposite each other. Having pryed one, rotate the cardan 180 degrees and insert a screwdriver into the opposite hole. Gently move the driveshaft to the side, freeing access to the shank nuts.
- In order to get to the four nuts holding the shank, unscrew one of the bolts securing the mounting of the gearbox silent blocks.
Removing the shank may require little force, since its front part is seated on a special sealant that is resistant to oil-containing substances. - After removing the electrical connector located on the right in the direction of travel, remove the retaining ring. This procedure is necessary to release the magnetic ring.
- After this, you need to unscrew the three bolts securing the metal holder of the magnetic ring with a hexagon.
The Toyota Rav 4 rear gear oil seal must be removed without damaging the seat. Therefore, do not use force, but work using a special tool. Pay attention to how it is installed so as not to mix up the sides during assembly.The new oil seal must be installed without distortion. To do this, use a frame of the required diameter.
Before assembling the unit, it is necessary to clean the surface of the shank from old sealant and degrease it. Apply a fresh layer evenly, in such an amount that when joining parts, the sealant is visible along the entire perimeter of the joint.
- Assembly operations are carried out in reverse order.
The new Rav4 rear gearbox seal should not interfere with rotation. If done correctly, it happens with virtually no effort. When tightening, use a dynamic wrench. This will allow you to comply with the tightening torques of the bolts (nuts) recommended by the manufacturer. After assembly, do not forget to install the electrical connector and fill in the transmission oil.
Source
Toyota Rav 4 replacing the rear gearbox shank oil seal (video)
Replacing the gearbox seal in a Toyota Rav4
To prevent oil leakage from the rear axle gearbox, a gearbox seal is installed on the Toyota Rav4. Over time, due to operation, the part loses its characteristics and the unit depressurizes. Replacing the rear gear oil seal in Toyota
Rav4 is the only right solution. It is important to find the drive malfunction and make repairs.
Required amount of lubricant
The dimensions of transmission units depend on the generation of crossovers. Accordingly, the volume of the oil bath located inside the gearboxes also differs. For a complete replacement, 1 to 2 liters of gear oil is required. The remaining lubricant can be used for topping up. Please note that the shelf life of the material in an open container is limited (information is indicated on the sticker). The configuration and capacity of the units do not depend on the displacement and power of the engines (the rule applies to cars within the same generation).
First generation
The cars were offered only with a 2-liter gasoline engine, designed for a manual or automatic transmission. The dispensing unit was connected to the rear wheel gearbox by a cardan shaft. It is not possible to disable the all-wheel drive system. The capacity of the crankcases is 900 ml. During maintenance, some of the old lubricant remains on the walls and gears. 830-850 ml of material is poured into the units.
The first generation Rav 4 was equipped with a 2-liter gasoline engine.
Second
The second generation could be equipped with gasoline engines ranging from 1.8 to 2.4 liters. For a number of markets, a modification with a diesel engine equipped with a supercharging system was supplied. The transmission retained permanent all-wheel drive (crossovers with front-wheel drive were offered for some regions), but a viscous clutch was introduced to lock the differential. The crankcase capacity remained unchanged.
When filling dry, you will need 1.8 liters of oil. When re-servicing, no more than 1.7 liters of lubricant will enter the units.
Third
Starting from the third generation, crossovers featured a plug-in all-wheel drive system with a multi-disc viscous clutch. Torque was supplied to the rear wheels when the front wheels were slipping. The driver can increase cross-country ability by pressing the differential lock button, which distributes the flow of torque between the axles. The viscous coupling in the rear axle gearbox supports the anti-skid function. The total capacity of the gearbox housings is 1 liter (500 ml each). During maintenance, the gearboxes contain approximately 0.95 liters of oil.
The third generation transfer case distributes the flow of torque.
Fourth
The new generation has received modernized engines with improved performance and reduced fuel consumption. The spare wheel has moved from the trunk door to a niche under the trunk floor, eliminating a long-standing defect of crossovers - the gradual sagging of the lid hinges due to excess weight. The transmission migrated from generation III without changes.
To service the transfer case and rear wheel drive gearbox, you need to purchase 1 liter of gear lubricant.
Fifth
In 2021, a new generation of RAV4 debuted, receiving Dynamic Force series gasoline engines and a hybrid version. The diesel engine disappeared from the production line. The dispensing unit has a capacity of 450 ml, and in the drive of the rear wheels there are 2 types of gearboxes. The basic version with dynamic torque distribution requires 387 ml of oil. The version with dynamic power flow control (with additional couplings) uses a gearbox with a 500 ml oil bath.
The fifth generation received a Dynamic Force series engine.
Toyota Rav 4 Replacement of Rear Gear Seals
Replacement Transmission Seal for Toyota Rav4
To prevent oil leakage from the rear axle, the Toyota Rav4 has an oil-lubricated gearbox. Over time, the workpiece loses its characteristics as a result of operation, and the unit reduces pressure. Toyota gearbox
Rav4. the only correct decision. It is important to find the drive fault and repair it.
Design Features
The transmission oil seal is a small ring made of oil-resistant rubber. The seal is installed on the inside of the axle bearing. For which the deferred repair design is intended, the amount of oil in the gearbox can be reduced to a critical point.
For this reason, our customer needs to ensure that the spinning parts are subject to rapid wear. In the area with the rear axle
there is a corresponding hum in time.
In case of untimely repair,
the gearbox assembly to replace
Troubleshooting
If you have a goal to find the need to repair the oil seal, periodically inspect the gearbox. If signs of oil leakage are found in the shank area, then in almost all cases this indicates an urgent need. replacement soft gearbox reverse gear
Rav4.
In garage conditions, this operation is difficult to perform because you need an inspection hole or a lift, the latter condition is better. However, you need to have special pullers and tools, and stock up on the latest parts. If there is a passage, if the resource for using oil has already been exhausted, it is better to fill in the last technical fluid.
Previous and main dismantling activities
When selecting a new oil seal, choose a unique part over one that was manufactured with the part's approval. Gear oil must meet manufacturer's specifications.
Toyota Center Lyubertsy. Rav-4. Replacing the oil seal and oil seal on the rear axle, rear axle gearbox.
My group in VK. If you need help, call 89161982839 Maxim. Partners :.
- If repair work is carried out on the inspection hole, set the vehicle to the handbrake. When using an elevator, the parking brake can be released.
- Before starting repairs, drain the oil from the gearbox into a prepared tank. The drain plug is located on the left side towards the vehicle. He unscrews the hexagon.
When draining the oil, pay attention to its consistency, color and the presence of small metal shavings. Third-party elements are often a sign of wear and tear on rubbing parts.
Failure to maintain factory settings during assembly will result in imbalance while driving, which will soon lead to repair of suspension components such as the suspension bearing.
Removing the shank may require little effort, since its front part is placed on a special sealant that is resistant to oily substances.
The Toyota Rav 4 rear oil seal must be removed without damaging the seat. Therefore, do not use force, but work with a special tool. Pay attention to how it is installed so as not to mix up the sides when assembling.
The new oil seal must be installed without distortion. To do this, use a frame of the required diameter.
Before folding the assembly, clean the surface of the shank from old sealant and degrease it. Apply a fresh layer evenly so that when joining parts, sealant is visible along the entire perimeter of the seam.
Assembly operations are performed in reverse order.
Toyota Rav 4, Transmission, Rear oil seal.
rear gear cuff should not interfere with rotation. If done correctly, it happens almost effortlessly. Use a dynamic wrench to tighten. This will allow you to tighten the bolts (nuts) recommended by the manufacturer. After assembly, be sure to install the electrical connector and fill with transmission oil.
If the material was interesting or useful to you, post it on your page on social networks:
Description of replacing the Rav4 gearbox bearing
To replace the Rav 4 rear gearbox bearing you will need a pneumatic gun and a press .
- To begin with, the cardan is removed, moved to the side and suspended. After this, the clutch is unscrewed from the gearbox and the clutch engagement block is disconnected, as well as the rubber tube.
The coupling must be carefully disconnected from the main mechanism and the drive removed. In some cases, oil leakage is possible . If such a situation arises during the replacement process, simply add oil upon completion of work.
Rear gear maintenance
Breakage of the gearbox and coupling can be avoided if the unit is serviced in a timely manner. If a small leak appears, then it is enough to immediately change the oil seal. It also protects parts from dirt and moisture.
But it is not always possible to predict the failure of the rear axle, since the main sign of failure is hum and extraneous noise. And if it appears, then you only need to replace the Rav 4 viscous coupling bearing.
Car service centers claim that repairs to the rear gearbox of a Toyota Rav 4 often have to be done because the car has gotten into large puddles. Therefore, when servicing the unit, it is imperative to use high-quality lubricant, which must have water-repellent properties.
Preliminary and main disassembly activities
When selecting a new oil seal, give preference to the original spare part over the part manufactured under license. The oil in the gearbox must comply with the manufacturer's technical recommendations.
- If repair work is carried out in an inspection hole, place the car on the handbrake. When using a lift, the parking brake does not need to be applied.
- Before starting repairs, drain the oil from the gearbox into a prepared container. The drain plug is located on the left side in the direction of travel of the car. It is unscrewed with a hexagon.
When draining the oil, pay attention to its consistency, color and the presence of small metal shavings. The appearance of foreign elements is often a sign of wear of rubbing parts.
This must be done in order not to upset the balance set at the manufacturer. If the factory settings are not followed during assembly, an imbalance will occur during movement, which in the near future will lead to the repair of suspension elements, for example, the outboard bearing.
Removing the shank may require little force, since its front part is seated on a special sealant that is resistant to oil-containing substances.
The Toyota Rav 4 rear gear oil seal must be removed without damaging the seat. Therefore, do not use force, but work using a special tool. Pay attention to how it is installed so as not to mix up the sides during assembly.
The new oil seal must be installed without distortion. To do this, use a frame of the required diameter.
Before assembling the unit, it is necessary to clean the surface of the shank from old sealant and degrease it. Apply a fresh layer evenly, in such an amount that when joining parts, the sealant is visible along the entire perimeter of the joint.
The new Rav4 rear gearbox seal should not interfere with rotation. If done correctly, it happens with virtually no effort. When tightening, use a dynamic wrench. This will allow you to comply with the tightening torques of the bolts (nuts) recommended by the manufacturer. After assembly, do not forget to install the electrical connector and fill in the transmission oil.
Warranty
Delivery of components: You can order repair kits and components in our online store;
deliver couplings according to the following schemes: 1. Send us your coupling, we service it and send it back on the same day; 2. We send you our clutch, you install it on your car, and send us your removed clutch;
*** Shipping is carried out by the Transport Company Business Lines and the courier service SDEK .
Timing for changing the oil in the gearbox and the required volume
Changing the oil in the Toyota RAV 4 gearbox should occur according to the technical user manual every 25 thousand kilometers. Before replacing the gearbox lubricant, you must use the following methods to determine the need to change the transmission fluid:
- Determination by color and viscosity of transmission fluid. The oil that requires replacement becomes too viscous and thick, and its color becomes dark. Transparent lubricant indicates that a change is not required.
- Determination using a special universal probe.
- Determination using a special litmus test, which, when the color changes, can indicate to the car owner the need to change the transmission fluid.
When choosing rear gear oil, you should focus on the following indicators:
- Viscosity of the liquid.
- Transparency of the liquid.
- Originality of the manufacturer.
The oil volume for Toyota Rav 4 is 1.5 liters. Every driver needs to pay due attention to checking the level of transmission fluid in the system. Experienced experts recommend regularly checking the lubrication level of the rear gearbox, since if the car owner notices a certain amount of burning from under the hood, it is necessary to immediately replace the transmission fluid. The primary signs of an oil change are the following: sagging of the car, both at idle and when driving, as well as a general decrease in the power of the vehicle.
Lubricant selection criteria
When selecting, you should take into account the requirements of the car manufacturer:
- for the transfer case, it is allowed to use oil with a viscosity of 75W-85, corresponding to class GL-5 marked LS or LSD;
- for the rear wheel drive gearbox, it is necessary to use GL-5 class lubricant with a viscosity of 80W-90 or 75W-85 or 75W-90 and marked LS or LSD;
- on early generation machines (I and II), it was allowed to use GL-4 category gear lubricant in the dispensing unit.
Original
Vehicles are shipped from the factory filled with original Toyota Genuine Differential Gear Oil, which has a viscosity of 75W-85 and meets GL-5 and LX standards. When carrying out maintenance at an official service center, the transmission units are filled with similar material, which is supplied in plastic cans or metal barrels. It is not recommended to use other types of original Toyota materials due to the risk of premature wear of parts.
Toyota Genuine Differential Gear Oil is an original imported lubricant.
Unoriginal
When choosing transmission oil from third-party manufacturers, you should take into account Toyota's requirements for viscosity and properties. Compliance information is indicated on the labels. You should purchase materials that are identical in characteristics to the original.
It is recommended to buy oils at large retail outlets or from official representatives, which reduces the risk of purchasing counterfeit products.
“It started kicking and pulling”: The owner of a Toyota RAV4 spoke about eliminating an error in the automatic transmission
The drive seal in the car was replaced, after which the “box” began to work incorrectly, but diagnostics made it possible to quickly determine what was wrong.
The YouTube channel “We are from Siberia” published a video in which the owner of a third-generation Toyota RAV4 talked about eliminating error P0776 in the automatic transmission. According to the motorist, after replacing the drive seal, the gearbox in the car “began to kick and jerk.” In addition, she worked in two gears.
With a problem, the motorist went to specialists in his Toyota RAV4 to carry out diagnostics. It turned out that the car had error P0776, which in the described case indicated incorrect operation of solenoid valve B. After replacing solenoid B, the operation of the gearbox was completely normalized.
It is noteworthy that error P0776 occurs quite often in the Japanese, and not always everything happens as smoothly as in the case described above. For example, on one of the thematic forums, the owner of a 2002 Toyota Camry with a 2.4 engine said that his car had a similar problem with the automatic transmission, but to solve it, the gearbox was completely rebuilt, all possible defects were eliminated, potentially faulty elements were replaced, and a known-good one was installed. valve body with solenoids, but all in vain - the car also “kicked” when switching to second gear.
What to expect from “Jerboa”? An expert named the problem areas of a used Hyundai Tucson
According to the blogger, the 2010 Korean crossover is still not bad, but it has a lot of “sores”.
Let us remind you that the third generation Toyota RAV4 appeared in 2005. This car is considered one of the most reliable crossovers on the secondary market, and is valued in Russia. The average cost of an SUV in the Russian Federation is 600,000 rubles.
Subscribe:
Share:
According to the blogger, the 2010 Korean crossover is still not bad, but it has a lot of “sores”.
- Home page
- Army and weapons
- Show Business
- Sport
- Beauty and fashion
- Automedia
- The science
- Internet
- Health
- Society
- Crime
- Incidents
- Culture
- Policy
- Hi-Tech
- Advertising
- Feedback
- Vacancies
- Contacts
VladTime publication (news from Russia, Ukraine and the world).
CVT survivability
Toyota workers increasingly continue to combine their creations with lightweight and economical Aisin CVTs. The K111F model was already installed on the previous generation Toyota RAV4 and has earned a good reputation, or more precisely, this CVT belongs to the caste of one of the most reliable.
The CVT can only be seen on 2-liter models. Previously, you shouldn’t worry about 200 tkm, but with proper care, that is, without overheating and timely oil changes, it can last all 300 tkm. Cases of breakdowns at 50 tkm also happen and, fortunately, are very rare.
The Aisin K111F variator belongs to the caste of some of the most reliable
You can find out about the weak points of the U760F automatic transmission, which works with a 2.5-liter unit, in our Toyota Camry review. I will only say that under the hood of the Rav4 such a gearbox works with no less devotion and dedication, allowing 300 tkm to be driven without serious incidents, but again subject to periodic oil changes.
Periodic oil changes in the automatic transmission will be mandatory if you are going to drive the car indefinitely.
The diesel engine received one of the most problematic gearboxes - Aisin U660F, known from the Camry sedan with 3.5. It’s just that under the hood of the Rav4, the automatic transmission, surprisingly, behaves more compliantly, even despite the fact that the torque of the heavy fuel 2.2 is similar to the gasoline 3.5, and the car’s weight is greater. Probably, low diesel speeds reduce the risk of “frying” the clutches and less wear products are formed.
With all-wheel drive there are no problems here. Even if you want to find fault with something, you can mention the tendency to blow snot through the seals of the rear gearbox. And in search of truly weak points, you need to look lower, that is, the chassis and steering.
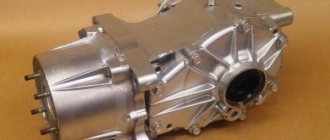
Transfer case and gearbox what is it
RK Rav 4 3rd generation
Transfer case (transfer case), being an element of the transmission of cars with all-wheel drive, allows the driver to distribute power from the internal combustion engine to the axles in different modes. Structurally, the Rav 4 transfer case consists of two devices (a multiplier and a splitter) placed in a housing. The multiplier expands the power capabilities of the installed transmission, and the splitter divides one output stream into two.
The operation of the Rav 4 transfer case as an independent unit is not adjusted by the gearbox (gearbox). The unit is also dismantled separately. The connection to the gearbox is via a driveshaft; sometimes the transfer case is connected to the rear of the gearbox. The material for making the transfer case housing is silumin.
The Rav 4 transfer case has one engine output input (coming from the gearbox) and two outputs (to the front and rear axles). In the box, the rotation axes of the shafts are parallel. Moreover, on the same line there can be driven and driving shafts, the second driven in parallel. Another option is driven shafts on one axis, driving shafts on the other.
The torque is split by means of a gearbox.
The gearbox housing contains a differential, which is responsible for distributing torque in a certain proportion. The gearbox reduces the speed at which the output shafts rotate relative to the input. The parts of the device are lubricated, so the important question here is how and when the oil is changed.
Changing the oil and filter in the fourth generation Toyota RAV4 engine
Toyota RAV4 has long gained a reputation as a reliable, technologically advanced and comfortable car. However, in order for the car to continue to please its owner with dynamics and trouble-free operation, it is necessary to change the oil and filter in a timely manner. In addition to the replacement itself, it is important to decide on the oil itself.
Replacement frequency
The manufacturer recommends changing the engine oil every 10,000 kilometers, but factors such as:
- dynamic driving;
- frequent movement of the car over rough terrain or in dusty places;
- increased load (trailer, transportation of heavy loads);
- low quality fuel;
- previous low-quality oil;
- engine oil mismatch.
Choosing oil for RAV4
There are 3 engine options available for the Russian market.
- The first is a two-liter gasoline with a power of 146 horsepower. The required oil volume is 4.2 liters. The best options are 0w20, 5w20, 10w30, 15w40, 20w
- The second option is a 2.5-liter gasoline engine with a power of 180 horsepower. Oil volume – from 4 to 4.4 liters.
- The third is a diesel engine with a volume of 2.2 liters. The power of this unit is 148 horsepower. Such an engine is filled with oil with a viscosity of 5w30, 10w30, 15w40, 20w50, 0w. From 5.5 to 5.9 liters of oil is poured.
When choosing a viscosity, you need to pay attention to the weather conditions of the region in which the car is operated. Most often, car owners fill in 5w30.
Car owners most often prefer the following brands of oil:
When changing engine oil, you can safely pay attention to these brands. However, the Toyota manufacturer recommends using only original oil, since it is the most suitable for these engines.
Engine oil change procedure
- The first thing to do is warm up the engine to operating temperature. This is necessary so that the oil pours out in a larger volume and faster, since cold oil is more viscous. After this, the car can be driven into a pit or onto a lift.
- After this, the Toyota must be completely immobilized and de-energized. To do this, the negative terminal is removed from the battery, the car is placed on the handbrake, and locking shoes are placed under the wheels.
3. Next, unscrew the engine cover located on top. You need to prepare the container in advance, after which you can crawl under the car and unscrew the drain plug. It is located in the engine crankcase. The container should be large enough to accommodate all the lubricant.
4. Fourth is to study the drained oil. If there is debris, abrasive particles or an unusual color in it, then this may indicate problems with the motor, which it is advisable to quickly sort out.
5. Once everything is ready, you need to clean the plug with a rag, replace the O-ring and then screw the plug back on.
6. Changing the engine oil also means replacing the oil filter. It is located below, near the drain plug. It is twisted manually or using a special puller.
7. Installing a new filter is as follows: first, the surface where the filter will be screwed is cleaned, the filter gasket is lubricated with oil, after which it can be screwed on. Experts recommend tightening the filter by hand, because... the housing may be damaged.
8. Next, oil is poured through the neck from above. You need to fill until the dipstick reads “Full”. We must not forget that oil does not drain instantly like water, so you first need to fill in an approximate volume, then wait until it is distributed throughout the system and top up if necessary.
9. The car starts, warms up and turns off. You need to give it about 10 minutes for the oil to drain down, after which a control measurement is taken.