24.03.2020
| (Votes: 2, Rating: 5) |
Issues discussed in the material:
- What you need to know about replacing the chain tensioner in a Toyota
- How to replace the chain tensioner in Toyota
- How to understand that it is not the chain tensioner in a Toyota that needs to be replaced, but the chain itself
- How to replace the tensioner and chain in a Toyota Corolla
- Replacing the chain tensioner in Toyota through the eyes and hands of car enthusiasts
Replacing the chain tensioner in a Toyota, at first glance, is not the most difficult procedure that even a novice car enthusiast can handle. However, the apparent simplicity can result in more serious engine repairs if something goes wrong.
To replace the chain tensioner in a Toyota, as well as the chain itself, it is better to contact an authorized service center. If you want to know how such repairs are carried out in order to supervise the master or expand your own horizons, read our material.
What you need to know about replacing the chain tensioner in a Toyota
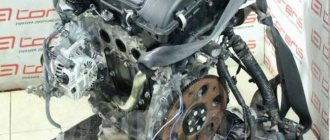
Toyota cars equipped with a 1ZZ engine are preferred by many motorists around the world to other brands. This is explained by the fact that such an engine is equipped with a timing chain (gas distribution mechanism), and not a belt. That is why the car is considered more reliable.
It is worth noting that replacing the Toyota Corolla chain tensioner is done much less frequently when compared with the exact same engine with a timing belt. In addition, a car with a power of 140 hp. With. consumes less fuel compared to cars equipped with 7A, 4S engines with a timing belt. And another advantage of the engine with a small displacement of only 1.8 liters is that it is more powerful than belt-driven engines.
The timing belt is necessary for the operation of not only the engine, but also other vehicle systems. This mechanism supplies fuel to the cylinders and then removes combustion products.
The timing belt is driven by a chain or belt that is connected by 2 gears. A chain or belt drive plays the role of a transmission mechanism during engine operation. If the gas distribution mechanism fails, the internal combustion engine will also not be able to function.
Many motorists are interested in when to replace the chain tensioner in a Toyota. If extraneous sounds appear under the hood while driving, then replacement cannot be avoided. Moreover, this must be done in advance, as soon as the first signs of a malfunction arise. Don't delay replacing and wait until the chain breaks.
How to change the timing chain on a Corolla 150
To replace the timing chain in the Corolla 1ZR FE engine, you need to change: sprockets, tensioners, dampers. You can immediately purchase a repair kit that contains all this.
It is important to know! If you do not change the entire set, the new chain can very quickly fail.
On a Toyota, to replace it, you need to remove the attachments from the engine:
- Top cover.
- Side cover.
- Belt (behind side cover).
How to replace the chain tensioner in Toyota
When there are oil leaks and the chain starts to ring, it means replacing the tensioner in Toyota is mandatory.
What tools and consumables will be needed for replacement:
- tensioner No. 13540-0D010 for Toyota;
- RTV silicone based sealant;
- wrenches or sockets with a ratchet and an extension for 10 and 22.
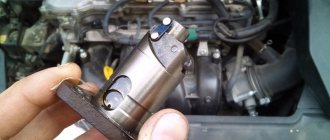
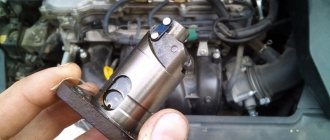
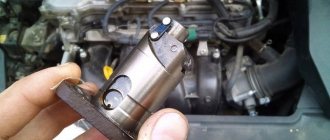
The procedure for replacing the chain tensioner in a Toyota is as follows: retract the rod on the new part. It must be locked in a compressed position; to do this, use a hook. On the 1.8 liter Toyota 1ZZ-FE engine, the mechanism is located on the passenger side at the rear of the cylinder block.
When unscrewing the second fastening bolt, you must be careful - the tensioner in the Toyota is spring-loaded and can jump out. Use a flathead screwdriver to lightly pry the mechanism, this will make it easier to remove.
Oil or silicone-based sealant should be applied to the rubber sealing ring in Toyota. It is important that the lubricant does not come into direct contact with the tensioner itself. Apply sealant in small quantities. Otherwise, the compound will squeeze out when you start tightening the bolts.
When replacing the chain tensioner in a Toyota, make sure that it is installed correctly. How to do it? The hook should be positioned at the top, then the fastening bolts should be tightened to the required force, approximately 20 Nm.
We recommend
“Toyota transmission oil for responsible car owners of all brands” More details
Next, take a 22mm key or socket and turn the generator pulley. This way you can turn the motor counterclockwise. This is necessary to release the locking hook and bring the rod into working condition. If you do everything correctly, you will hear a click.
Toyota Corolla Transmission Fluid Change Guide - 2003 to 2008 Model Years
Toyota Corolla Transmission Fluid Change Guide How to drain and fill “ATF” (automatic transmission fluid) in a 9th generation Toyota Corolla from 2003 to 2008. sedan.
| 2005 Toyota Corolla 1.8L I4 | 1ZZ-FE @ 115,000 miles | Pull Up Transmission Dipstick |
| This vehicle service manual was specifically written to assist owners of ninth generation (2003, 2004, 2005, 2006, 2007 and 2008) Toyota Corolla with version 1.8L I4 engine when performing a simple drain and top up of automatic transmission fluid or "ATF". Owners of other Toyota or related vehicles Pontiac vehicles with similar automatic transmissions such as Matrix, Vibe, Voltz, RAV4, Celica, Camry, Yaris, Tacoma and Avalon These DIY instructions may also be helpful. Toyota claims that ATF should last the "life" of the vehicle under normal driving conditions. conditions. Therefore, by performing a quick drain and adding about 50% ATF fluid at least once every few years or every 15,000-30,000 miles, your vehicle's preventative maintenance will be much better than the average Corolla. Items needed to complete the procedure include a 14mm socket with a 3/8" ratchet wrench, a waste oil container, a gallon jug with a quart mark, a car funnel, a new crusher, and 4 quarts of US genuine Toyota ATF Type T- IV . Additional items include a floor jack and two jacks or car ramps to raise the vehicle for easier access to the drain plug. | ||
| Raise the front of the car | Support with Jack posts | Gallon bottle and 4 liters of ATF |
| This procedure should be done with the engine warm to prevent the introduction of contaminants. inside the old transmission fluid and allow the old fluid to drain faster. If the engine is very hot, allow it to cool slightly to prevent a fire. yourself on the underside of the engine compartment or when ATF fluid is drained. The first two steps are to open the hood and then pull up the transmission oil dipstick with the red plastic knob an inch or two. The oil dipstick is located on the front right (driver's side) of the engine compartment next to the 12 V car battery and below the air intake hose. Removing the transmission dipstick helps prevent a vacuum from forming and allows old fluid to drain more quickly. You can reach the transmission fluid drain bolt without lifting the car. I found it easier to lift the front of the car with a floor jack at the jack point under the center of the engine compartment. Then securely support the car with two jacks . | ||
| Half quart marked jug, lines | Transmission oil pan | Drain bolt 14 mm |
| Assemble the used oil pan, 14mm socket wrench, and 3/8-inch drive wrench. I would recommend wearing Nitrile rubber gloves Be sure to keep your hands clean during the following steps. Used automobile oil can be carcinogenic (cancer-causing). Slide under the front driver's side of the engine compartment and locate the black metal transmission oil pan. Transmission The oil drain bolt is located at the rear edge of the pan with the head of the bolt facing down to the ground. | ||
| Pan valve for drain bolt | Loosen counterclockwise | Unscrewable drain bolt |
| Install a used oil pan just below the drain bolt. Loosen the transmission fluid drain bolt counterclockwise using a 14mm socket and a ratchet wrench. | ||
| Inspect and replace washer | Draining old ATF fluid | Dark liquid after 115,000 miles |
| Unscrew the drain bolt, clean it and inspect the metal washer. It is best to replace the crusher washer, but you can reuse it if it is in good condition. If the washer seems to be falling apart, use a new one. Catalog number Original Toyota gaskets 90430-12031 . (These are also the same washers for the 14mm oil drain plug.) Allow the old transmission fluid to drain for at least a few minutes or until the flow drops to an intermittent drip. I first "changed" transmission fluid on our 2005 Corolla at 115,000 miles, so I wasn't surprised that it was a very dark brown or black color with a slightly pungent burning smell. Fresh ATF is a translucent bright red liquid. color and just smells like most other new petroleum based automotive fluids. Bought new Toyota T-IV ATF at my local Toyota dealership, but I plan to buy it online. in future. | ||
| Screw-in drain bolt 14 mm | Torque clockwise 13 ft. lbs. | Funnel in measuring jug |
| Clean the area around the drain hole with paper towels or a clean rag. Make sure the old crusher washer is not still attached to the transmission pan. If necessary, attach a new crushing washer into the drain bolt. Tighten the drain bolt by hand a few turns. clockwise to prevent cross threads. Tighten the drain bolt clockwise. direction using a 14 mm socket wrench and a ratchet wrench until hand-tight or about 13 ft-lb (156 lb-in) of torque if you have a torque wrench . Double check the tightness of the ATF drain bolt. before moving on to the next steps. | ||
| Refill old ATF fluid | About 3.65 US quarts | Insert a funnel into the dipstick hole |
| Insert the car funnel into the gallon jug that you have marked with a line every half quart. (To create a measuring jug, simply pour two cups of water from a kitchen measuring cup and mark the level with a permanent marker. Every 2 cups is a half quart, and every 4 cups is a quart.) I was able to drain about 3.65 US. liters of old ATF fluid. This matches what I've read about Toyota. Forums of other Corolla owners drain about 3.5 quarts per drain and refill procedure. (If you want to clean metal shavings from a transmission pan magnet and replace the filter, here are some filter kits with part numbers: Wix 58040 , If you have raised the car, lower it from the jack stand using a floor jack. | ||
| Lower the car from the stands | Fill with new T-IV ATF | Filled with 3 US quarts |
| Insert a small car funnel into the transmission dipstick hole. 2005 Toyota Corolla S Owner's Manual. indicates that the automatic transmission capacity for draining and refilling is 3.2 US quarts (3.0 liters or 2.6 imperial quarts). Slowly pour in about 3 to 3.2 US. quarts of the new Toyota ATF T-IV there is a hole in the transmission fluid dipstick. It's much better to have a little less fluid in the transmission than to overfill it. | ||
| Start the engine - Check the dipstick | ~3.6 US quarts added | Check and replace dipstick |
| Temporarily replace the transmission dipstick while you follow these steps to check the transmission fluid level. 1. Turn on the engine. 2. Set the emergency/parking brake and press the brake firmly. pedal. 3. Move the shift handle to shift the transmission through all gears. during a pause in each gear (eg "P" Park, "R" Reverse, "D" Drive) for a few seconds. 4. Set the gearbox to “P” and leave the engine running. 5. Pull out the transmission fluid dipstick, wipe it clean, reinsert it and pull it out again to check the level. The ATF level should be somewhere between the two notches indicating the "HOT" range of the dipstick. If the fluid level is much below "HOT", turn off the engine, slowly add more ATF and repeat the process until the dipstick level reaches the correct range. To keep things simple, I simply added about 3.6 US quarts of new ATF to replace the amount I drained, measured by the jug per gallon. Fortunately, the level on the dipstick was almost in the middle of the “HOT” range. I recommend checking your ATF fluid level again after your next trip. Be sure to record the ATF fluid change in your vehicle's service records. For more details, see my other Corolla DIY tutorials at the links below - 2003-2008 Toyota Corolla repair and maintenance manuals 2009-2013 Toyota Corolla Repair and Service Manuals | ||
.
How to understand that it is not the chain tensioner in a Toyota that needs to be replaced, but the chain itself
If a Toyota engine is equipped with a timing chain, it means that it transmits rotational force from the crankshaft to the camshaft located in the cylinder head (overhead valve type engines).
All chains in Toyota are divided into two types: gear and roller, and the latter are practically not used. On most machines with a gas distribution mechanism, gear systems are installed if a chain drive is used.
Toothed units ensure smooth operation, have increased reliability, and make virtually no noise during operation. In operation, gear systems are similar to belt drives. It is impossible to accurately answer the question of which is better. If you start discussing this topic, you will get a full-fledged article.
Hydraulic tensioners, the working fluid of which is engine oil, tension the chain in Toyota. Oil flows through the engine lubrication system. The number of tensioners depends on the number of camshafts. There may be one, two or three.
The timing chain system includes the chain itself, the tensioner, and the lubrication system. Over time, due to wear of parts, the mechanism begins to work worse: the tensioner or the chain itself in the Toyota needs to be replaced.
How to understand that the timing belt has become unusable? To do this, listen to how the motor works. We heard metallic sounds and a crackling noise at high speeds, which means that the gas distribution system has failed.
Press the accelerator pedal sharply, you will immediately understand that the circuit is faulty. In this case, the ignition will not work properly, and when the speed increases, you can see black exhaust gases coming out of the exhaust pipe. This indicates that the fuel mixture is over-rich.
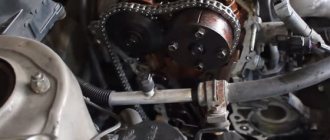
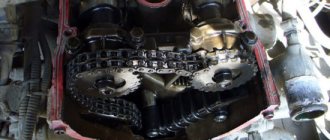
To identify wear on the chain drive, you need to inspect the motor. We remove the valve cover, even a beginner can handle this, the main thing is to take a suitable key. After 10 bolts are unscrewed, remove the cover. Now you can easily reach the chain. Carry out a visual inspection of it. If it is in working condition, it will not sag at the top.
You should also inspect the tensioner in the Toyota. It should be in such a position that the chain is well tensioned. Have you noticed that it is sagging? This means it needs to be replaced. Many motorists who do not have the opportunity to replace the chain do the following. They install bolts on the tensioner or even install a second tensioner. This manipulation is considered a last resort and can only be performed in emergency cases. After all, the effect will be temporary, and it will be more difficult to repair the mechanism later.
How long a chain will last depends on the material from which it is made. It must be high quality. You should also pay attention to the degree of effectiveness of the heat treatment of the material.
Timing sprockets must also meet the above requirements, because they participate in the operation of the mechanism. The lubrication system must not be allowed to malfunction, as it affects the functioning of the unit. Only high-quality lubricant should be poured into the engine and changed on time.
We recommend
“Changing the oil in a 6-speed automatic transmission: main stages” More details
If the chain drive is made of durable material and the required tension is set during maintenance, and the oil is changed regularly, the mechanism will properly serve as long as the engine.
On the contrary, a stretched chain will quickly fail. To avoid the need to replace it, you should buy a high-quality part, set the tension correctly, and use a suitable lubricant.
How to replace the tensioner and chain in a Toyota Corolla
To replace the chain tensioner in a Toyota Corolla, you will need the following consumables:
- timing chain;
- tensioner;
- shoe;
- drive belt.
If you are not confident in your abilities, you should not do the replacement yourself. At first glance, the work seems easy. However, if you make a mistake, it will not be easy to correct the situation: the motor will fail. Be prepared for the fact that you will spend a lot of time and effort replacing the tensioner in a Toyota. You should be extremely careful while working.
To replace the tensioner in a Toyota, the chain will have to be removed. You need to proceed as follows:
- We remove the protective cover of the motor, as well as the ignition coil of the spark plugs.
- Remove the valve cover. There is a reusable gasket under it; it must be left and installed back upon completion of the work.
- The machine must be fixed; for this we use a jack or a lift. We dismantle the front right wheel, as well as the protection (fender liner), it is located in the wheel arch.
- You now have access to the pulley on the crankshaft. We jack up the engine and remove the support to reach the chain.
- After the tension is loosened, remove the chain.
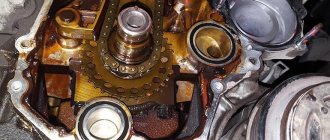
- To remove the chain, we pull out the lower sprocket; it easily moves along the crankshaft to a distance of 1–1.2 cm. Then we remove the chain.
- We stop the crankshaft pulley by wedging the flywheel. When the bolt on the pulley is unscrewed, remove it from the key.
- We dismantle the generator and power steering pump. Then unscrew the side cover.
- After the coolant has been drained, remove the tensioner and shoe.
- Using compressed air, we remove dirt and install a new tensioner and chain in the Toyota.
How to install a tensioner in a Toyota:
- We place marks on the camshaft pulleys, as well as on the crankshaft. This must be done for the motor to work properly.
- We begin to install the chain, first from above, then from below.
- Set the desired tension. We insert the tensioner using the hook, install it, and tighten the mounting bolts. Then you can remove the hook. If everything is done correctly, the rod will be in the desired position and the chain tension will be normal.
- Then install the side cover and screw it on.
- We perform assembly in reverse order.
The resource of the Toyota gas distribution chain is quite large. However, you should regularly check its serviceability. If this part wears out, the timing belt will not be able to function properly, and the engine shoe will fail, just like the damper. In order not to spend a large sum on restoring the mechanism, it is necessary to periodically check the tension. Of course, the chain breaks infrequently, but such a breakdown cannot be excluded with 100% probability.
Website about joints
Actually, when I was repairing the steering rack, I saw a slight oil leak in the area of the timing chain tensioner.
I didn’t change one o-ring, I replaced it straight away with a new tensioner, I thought I’d solve this problem
. I didn’t solve the problem, but my soul is calmer =)
Removing the old tensioner is easy. It is located behind the engine in the upper left part (if you stand on the hood side). Unscrew the 2 nuts and remove the tensioner. When removing, a little oil will spill out, this is normal, don’t worry =)
To put the tensioner back, you first need to squeeze the tensioner itself and fix it in this position using a locking hook
Replacing the chain tensioner in Toyota through the eyes and hands of car enthusiasts
- Replacing the tensioner is not a panacea “I wondered how the chain should behave after replacing the tensioner? The other day I made a replacement on my Toyota, and strange sounds appeared when I pressed the accelerator pedal. Then the noise disappeared, but I'm wondering if everything is okay? A friend says there will be problems with the timing belt. After all, if the chain is stretched, the new tensioner will quickly fail.”
- Changing the tensioner yourself is scary
“I picked up a tensioner for Toyota today.” But I'm afraid to replace it myself. I've read reviews from car owners who change them themselves. Often, after such intervention, even more problems appear. I studied the instructions on how to make the replacement, everything is shown there, how to and how not to change, but I didn’t see the difference.” - There's nothing scary
Replacing the tensioner in a Toyota with your own hands is easy; even a beginner can do it. Personally, I installed the tensioner on the hook and applied sealant to the gasket. I installed the part, tightened the bolts, took a 19mm socket and a ratchet. Then he rotated the crankshaft in the opposite direction to rotation. I heard a click - it was the tensioner that jumped out. Then he scrolled again, but this time in the direction of rotation. Everything is perfectly audible and understandable.”We recommend
“Replacing an automatic transmission in a Toyota Corolla: at a service center or on your own” Read more
- I replaced it, but nothing is clear
“I encountered the following problem when replacing the tensioner in a Toyota: I turn the crankshaft clockwise, but I don’t know how many turns I need to make. I clicked twice in 1 revolution; when I started the engine, there were 2-3 more clicks. That is, when the crankshaft rotates clockwise, it tensions the chain when starting the engine?When I started the car another time, nothing clicked. I turned the crankshaft - nothing. There are no noises, everything seems to be fine.”
How to remove the radiator of Toyota Corolla: 1995-2000
VIDEO TRANSCRIPT
Hello. This is Eric from Velocity Labs with a quick guide to DIY and driving with used Pull-A-Part auto parts. We're going to remove the radiator from this '99 Toyota Corolla. Radiators are fairly easy to pull and can be done with just a few basic hand tools.
Let's start at the top and disconnect the upper radiator hose. Simply use pliers to remove the metal clamp and slide the hose. Do the same with the smaller bleed line next to it. Next, we'll remove the two top brackets by removing the four bolts holding them in place. When they go out, disconnect the two electrical connectors going to the radiator fans. One is on the driver's side and the other is on the passenger's side. Now let's move under the car and remove the lower radiator hose. This is the same process as with the top hose. Simply use pliers to remove the metal clip. There are also several smaller lines that need to be disconnected that go to the transmission. The first one will be near the large lower radiator hose. The second one is hidden behind a plastic cover. Remove a few bolts holding it in place and then disconnect the second small line in the same way as the other line.
After disconnecting all these lines, the radiator should be free. Remove it from the car by lifting it up and out, and then go check it out.
.
