One of the scheduled maintenance procedures for Toyota RAV4 is replacing the filter elements in the engine and inside the car. These consumables are responsible for cleaning air flows from dust, dirt, chemicals and other foreign particles. Most often, such parts are changed along with the engine oil, but an unscheduled replacement may also be required, for example, if the car was used for deep off-road travel.
The procedure can be done with your own hands, it will take 10-15 minutes. They go to a service center or to official dealers, as a rule, if they don’t want to get their hands dirty or for scheduled maintenance.
Replacement interval and filter purchase
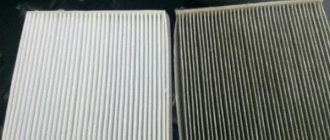
Dirty and clean air filter for Rav 4 (link to photo source)
Depending on the modification of Rav 4, you can purchase the following spare parts:
- 1780128010 – article number of the original spare part for the 3rd generation Rav4 with a 2.0 engine;
- 1780138011 – catalog number of the filter element for Rav 4 30 with a 2.4 liter engine;
- 17801-0V020 – original filter component for incoming air in the VJNJH Rav 4 4th generation.
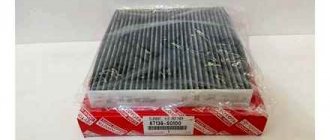
Air filter. Article 1780128010
In addition to original spare parts, you can also purchase analogues:
- Toyota Rav 4 third generation:
- TSN 9.1.168PU;
- Sakura A-1123;
- JS Asakashi A161J.
- Toyota Rav 4 IV generation:
- K&N 33-2381;
- Sakura A-33960.
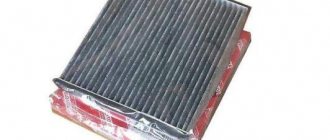
Air filter Sakura A-33960
The cost of analogue spare parts is significantly cheaper, but the differences in quality are insignificant.
Component Replacement Frequency
According to the regulations, the cabin filter on a Toyota Rav4 needs to be changed every 10-12 thousand kilometers. If you frequently use the car on sandy and dusty roads or in areas with heavily polluted ecology, it is recommended to replace it every 7-9 thousand kilometers.
Some experienced car enthusiasts, when changing the oil, air, fuel, oil protective element or lubricant in an automatic transmission, combine this with installing a new cabin filter.
It is also recommended to change the component after the summer period, when there is a lot of poplar fluff.
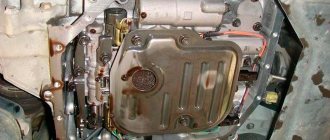
Replacing the air filter of a Toyota RAV4 engine from 2013
The engine air filter on a car is changed every 30,000 km. However, from time to time we recommend that you still open the filter housing and shake out sand, leaves, and other debris from it between maintenance when it is replaced. The machine can be equipped with a filter 17801-21050 (Japanese market) or 17801-0T020 ( Asian market) or 17801-0D060 (European market).
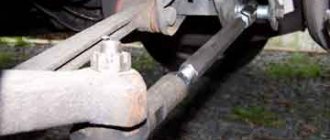
It is better to clarify which air filter you need, you need to provide the VIN number to the store, or look into the air filter housing to read the markings on it yourself. The algorithm for replacing it will be similar for all options. Initially, you need to pull aside the two fasteners holding the top cover of the filter element.
The picture shows these fasteners 1 and 2
The cover can then be lifted, step 3, upwards. We take the filter out of its place (the photo shows a different filter model, but the essence is the same).
This is what a worn filter will look like.
All that remains is to put a new filter in its place, while observing the alignment, and assemble everything in the reverse order.
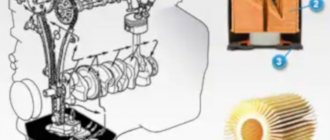
Why an air filter?
The Rav 4 engine operates using a fuel mixture of gasoline and air. Fuel is supplied through channels directly from the tank. In turn, air is taken from the atmosphere through a filter element.
However, it is not capable of holding large amounts of water. Penetration of sand elements is especially dangerous. As a result of exposure to high temperatures, they melt, acquiring a structure identical to glass. These particles will gradually settle in the internal cavity of the engine, which will lead to disruption of the intake and exhaust valves, deterioration of compression indicators, etc.
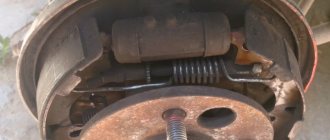
Cylinder wall destruction
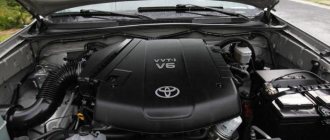
Replacing the Rav 4 air filter
The process of replacing the air filter element on Rav 4 3rd and 4th generations is almost the same. Let's look at it in detail on the Rav 4 IV generation.
You don’t need to prepare a special tool for the job, just a rag. It will be needed to remove dirt particles from the internal cavity of the protective housing of the filter device. The body itself is mounted in the area of the left wing behind the battery.
Replacement procedure:
- Two metal latches are unfastened on the right side of the filter element housing.
- The unfastened part is carefully lifted.
- The left side comes out of two plastic clips.
- The old incoming air purifier is removed. If the condition is satisfactory, it is sufficient to thoroughly clean the filter element. Otherwise, you need to install a new one.
- The internal cavity of the protective housing is cleaned.
- The filter component is mounted in the seat.
- The housing cover is inserted into plastic clips and lowered.
- The housing cover is secured with latches.
This completes the change process. The work can be carried out in any conditions and it takes no more than 10 minutes. To save personal time, you can adjust this procedure to the time of changing the engine oil.
Replacing the cabin air filter of Toyota RAV4 from 2013
First of all, even before you start replacing the filter, you will have to decide on the replacement, that is, which filter element will replace the existing one. Many people prefer to use originals, while others do not complain about analogues. We will not recommend this or that here, as this is the choice of each of us
Let’s just say that the original cabin air filter for Toyota RAV4 from 2013 is Toyota 87139-52040, and it doesn’t matter what engine you have, 2.0 (gasoline) or 2.2, 2.5 (diesel)
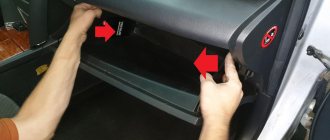
There are also plenty of filter analogues: Avantech CF0107, Bosch 1 987 432 190, Gufu Parts HCF-21102..., or carbon filter analogues Gufu Parts HCF-51102, JS Asakashi AC108C, Sakura CAC-1114, Vic AC-108EX... As we have already said, decide for yourself. The original filter will look like this. Now about the replacement procedure itself. The cabin air filter is installed behind the cabin glove box. To do this, you need to lower the box itself down. We take everything out of the glove box and disconnect the rod - the shock absorber, it is located on the right.
After this, you can recess the latches on the glove box body and lower the glove box down. The latches are retracted inside the glove box due to the flexibility of the plastic walls.
Next, remove the latch on the cover of the ventilation system casing and remove the door. Behind it will be the filter element itself. Now all that remains is to pull it out and install a new one.
When replacing, install the new element according to the air flow.
The flow marking is on the filter, and then goes from below, from under the feet, and towards the instrument panel. We put the lid back, then lift the glove box and fasten the rod. At this point, the process of replacing the cabin air filter for Toyota RAV4 from 2013 can be considered complete.
Causes of malfunctions and signs of part contamination
When the fan is turned on, polluted air enters the heating and air conditioning system. Dust particles settle on the paper surface, gradually reducing throughput. Additional dirt (such as leaves or lint) enters the ventilation system through the grille located under the lower edge of the windshield. The filter is installed perpendicular to the air flow, preventing debris from falling onto the fan impeller and entering the vehicle interior ventilation system.
Main signs of filter contamination:
- reduction in air flow power;
- formation of condensation on glass (the problem is observed at negative ambient temperatures);
- slow heating or cooling of the interior when the heater is working properly and the air conditioner is charged;
- constant unpleasant odor that disappears when the fan is turned off.
Signs of a dirty filter are reduced power and slow warm-up.
The filter does not provide 100% protection of heat exchangers and air ducts from dust. During operation, a layer of dirt settles on the walls, which becomes saturated with moisture and promotes the growth of bacteria. It is recommended to periodically disinfect the air conditioning system (either independently using aerosol cans or in a service setting with the connection of special equipment).
Signs of a clogged air filter
Signals to replace the Toyota Rav 4 air filter will be:
- reduction in engine power;
- increased fuel consumption;
- difficult starting of the internal combustion engine;
- decreased cravings;
- increased detonation.
The above factors are caused by a dirty air purification filter element. At the same time, the pistons of the Rav 4 engine spend more energy to suck in the required volume of air. This is due to the fact that the filter itself acts as a barrier.
During prolonged operation of the Rav4 engine with a clogged air filter element, the spark plugs fail. In the future, problems with electronics may appear, which will be accompanied by error messages.
Cabin filter installation instructions
This part should be replaced when it becomes dirty, as indicated by the following signs:
- The appearance of an unpleasant odor. Dirt accumulates on the dust collector; organic particles, insects, and plants can get there. As a result of clogging, they all remain on the surface of the filter part, decompose over time, and the interior begins to smell unpleasant.
- When you turn on the stove, dust flies out of it - a characteristic sign of a complete blockage of the interior.
- The air conditioner stops working.
- Even with the fan running, condensation appears on the glass.
The procedure for replacing the cabin filter is carried out in stages; this also does not require special tools or devices. Basic actions:
- Open the glove compartment, remove the restrictive loops located on the right side. After this, the sides need to be compressed. This will allow you to carefully lower the glove compartment.
- Press the lock, which is located on the right side of the filter element, and remove the cover. After this, you can remove the consumable device.
- Install a new filter. To correctly determine the location, you need to look at the marking: if the product has the inscription “Up” or UP, then you need to place it so that the arrow points upward. If there is an Air Flow marking on the surface, then you need to position the part with the arrow pointing down.
- Fix the element, place the glove compartment on the fixing parts, install the damper and close the lid.
The procedure is identical regardless of which generation the Toyota RAV 4 belongs to.
In some cases, instead of installing a new part, the old consumable is cleaned, but this procedure is often carried out temporarily, until a complete replacement. In addition, you should check whether the synthetic surface is deformed: if there are defects in the form of tears or deformations, cleaning will not help.