Today, robotic gearboxes are one of the most common in the world. This is due to the fact that it is convenient and reliable.
But despite this, in Toyota Corolla models that have MMT (Multidrive) installed, there is a slight “flaw” that manifests itself in the form of overheating of the clutch, jerking and shock during gear shifting.
Therefore, in this article we will take a closer look at such an element of the system, without which the operation of the gearbox would be impossible ; we will talk about the actuator, or as it is also called a servo drive.
Device and purpose
Thanks to this part the required gear is selected so that the engine speed is used more efficiently, while providing comfort to the driver.
The device includes:
- Travel sensor. Shifts to the desired gear;
- Electric motor. Thanks to him, the gears work;
- The gear shift mechanism consists of a shaft that comes from the ring gear and electric motor, a selector lever shaft and an internal lever that changes gears.
Refinement of the mechanism
As mentioned earlier, the Toyota Corolla E150 robot clutch actuator is an extremely “capricious” part that requires constant maintenance. Due to wear of the bushings, failure of the actuator motor, or problems with sensors, the robotic gearbox behaves “inappropriately,” which can lead to problems with the car’s engine.
Many car enthusiasts are trying to upgrade their clutch actuator. The first modification is that it is necessary to replace the bushings, wiring and motor. After replacing these components, the robotic box begins to show more stable and reliable operation. A modernized actuator can serve faithfully for a long time. However, the deep modernization of the MMT clutch actuator ends with the replacement of certain components.
Common problems, modernization
Common servo drive problems include:
- There is no help at start;
- When changing gears there are jerks. This problem in the actuator is difficult to notice , since the ECU adapts to the driving style and the problem may not be immediately noticed;
- Clutch overheats. It’s quite easy to understand that there are problems with this: a red gear lights up on the instrument panel, which is accompanied by a sound signal, a burning smell appears, and the gearbox freezes in the “N” position.
If error p0810 appears, then it is not recommended to carry out any work on initializing the ECU yourself . Since you can reboot the unit, as a result, all settings will be reset and errors will disappear, but this is only at first glance, and this can lead to more serious damage, so it is prohibited to carry out any actions with the ECU.
Negative consequences may be of the following nature:
- The clutch will begin to wear out quickly, as all data will be updated and disc wear will no longer be taken into account. In addition, differences in disk operation will appear, as the reporting point will become new;
- There will be a high probability that deviations associated with MMT will arise . The disk will move slowly, resulting in error p0810.
- Due to recent clutch wear, the ECU will partially fail. As a result, the car will be able to move with difficulty, or will not be able to move at all.
The problem is especially felt on models released between 2006 and 2008, which have MMT 89530-12290 installed; owners of these models more often than others encounter problems in operating this box . You can find out which version is installed on your car in the following way: you need to remove the lower glove compartment and the number will be visible on the body shell on the driver’s side.
Causes of breakdowns
The Toyota Corolla clutch actuator is one of the most vulnerable parts of a robotic gearbox. The reasons for the breakdown of this mechanism are both extreme driving and service life.
So, if the clutch release actuator is out of order, or you already feel that this mechanism will soon “break down,” then you need to try to repair it. Or replace it with a new one if the repair does not bring the desired result.
- Initializing the Toyota Corolla robot box: what is it and how to do it?
However, before you repair the Toyota Corolla clutch actuator with your own hands, you need to figure out what the problem is and what its causes are.
This is interesting: Repair of the Toyota Corolla clutch actuator - we disassemble it from all sides
MMT Clutch Maintenance
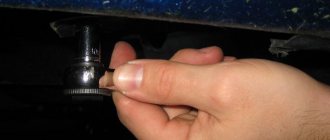
If for some reason you need to remove the actuator, then first of all you need to set the robot's shift lever to the neutral position, then disconnect the terminals from the battery, after which the part can be removed. If the mechanism is faulty and it is impossible to do this in automatic mode, then the lever should be switched to manual , to do this, the plug is removed from the transmission housing, and the required position is set along the slot; if the slot is located in the neutral position, then this should be corrected. This is done like this: insert a flat screwdriver into the slot and turn it.
The picture below shows the provisions to be followed:
Checking the brushes on the actuator motor
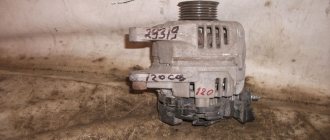
So, the question arises: how to check whether the problem is really in the brushes? The answer is very simple. First we need to remove the servo itself. It's not difficult to do this. First we need to lift the hood of the car and disconnect the battery terminals. The second step is to remove the battery itself and begin to unscrew the platform on which it was located. This is not difficult to do, since it is secured with only four bolts. Having unscrewed it, we take it out - here we have a view of the part we need - the clutch actuator. In the photo below you can see what it looks like from above.
Having gained access to the required node, disconnect all connectors from it. As a rule, there is only one, but on more modern models there may be several. Having disconnected the wires, we find three bolts on which it is attached. Ultimately, we unscrew them and freely remove the Toyota Corolla actuator. In the photo below you can see the removed servo drive and examine it in more detail.
Having removed it and examined it in detail for external damage, we begin to look for the motor contacts. Everything is very simple here. The motor contacts are those connectors that were disconnected at the very beginning of the work and they look as shown in the photo. Once again, it is worth repeating that their appearance may differ slightly on newer models.
Next we need to disconnect the motor from the gearbox. We will need a hexagon in order to unscrew the three fastening bolts and remove it. So, unscrew the bolts. We remove the motor. Now we can check it. To do this is very simple, we just need to apply 12V to the motor contacts - if the motor does not work, then try pressing the brushes with a screwdriver or any other available means and connect it to the battery again. If the motor spins only with the brushes pressed, then the problem is with them, and we continue to investigate further. If the motor does not respond at all, we just need to replace it with a new one and the problem will be solved. In the photos below you can see the motor from all sides in more detail.
Having examined the motor, let's take it apart. To do this, we halve it - you need to make some effort. Next we will see magnets inside the motor housing, and the elongated part will consist of a cover armature with a bearing and a power supply. The photograph shows a close-up of an elongated part.
Having pulled out this part of the motor, we proceed to our main task - replacing the motor brushes of the Corolla clutch actuator. In order to change the brushes, we need to remove the plastic cover that holds the bearing. It is logical to think that in order to remove the plastic we need to remove the bearing. In order to do this, we will need a two-legged puller, which you will simply modify later. When you remove the bearing you will understand why. None of the standard pullers will work here. We will also need a brush assembly from the VAZ generator. It looks something like the photo below.
So, when everything is purchased, we will need a vice. We insert the anchor back into the body and carefully clamp it. We sharpen the puller's legs to the size we need and install it on the anchor to remove the bearing. Here we had a problem with the fact that we were unable to rest the puller shaft against the armature - the problem was solved by shimming the key. To secure the process, the puller's legs were secured with Velcro - this made it possible to clearly fix them on the bearing. The wrench, by the way, began to serve as a good lever for removing the bearing. The photos below show the whole process step by step.
After some time the bearing was removed. Next we need to remove the plastic cover. There is nothing stopping us from doing this, we just pull the anchor out of it. In our case, one brush fell out on its own, the second had to be torn off with tongs. The photographs below show used and new brushes - feel the difference. It was because of this wear and tear that the engine stopped working.
Having pulled out the old brushes, we insert new ones in their place. Then you need to carefully solder each of them to its own contact on the connector. This is very easy to do - take a soldering iron, tin and rosin and start soldering according to all soldering rules. First you should thoroughly clean the wires from plaque, oxidation, etc. The work must be done efficiently, as constant vibration will tear off poorly soldered wires. You can see the result of the work in the photo below.
After replacing the brushes, we put everything back into place in reverse order and are satisfied with the quality of the actuator’s work. The work done will eliminate the problem and give the engine a new life.
Dismantling and repair
To get to it, you need to remove the battery together with the platform, after which you need to disconnect the chips from the actuator motor and sensor, then unscrew the three bolts and remove the part we need.
It is important to know that when the mechanism is disconnected from the engine, we clean it from dust, check the condition of the brushes, if the length is less than three millimeters, then they need to be changed, you should also check the condition of the wiring, it should be clean without the smell of burning or debris.
To disassemble and repair the Toyota Corolla actuator you need:
- Unscrew all existing sensor fasteners, remembering the location in which it is located;
- Unscrew the plate with antennae under the sensor;
- Set the position of the rod. To do this, in the groove where the drive motor is located, you need to turn the torque element with a screwdriver. These actions help to adjust the rod; the adjustment must be made in such a way as to compress it inward as much as possible;
- Unscrew all the bolts in a circle and remove the cover;
- Unscrew and remove the stem;
- Clear the entire block.
When everything is removed, you can identify problems using diagnostic tools. The main problems are the malfunction of the drive itself, as well as wear of the bushings. But in any case, you need to identify all faults individually .
Everything is put together in reverse order.
Important: during assembly, all lubricant must be replaced (the oil must have temperature characteristics such as -40°C to +250°C)
After the part is assembled, the rod is installed in such a way that it is positioned as far outward as possible, and the turn is made half a turn. Then the sensor is installed on the antenna itself and we turn it clockwise so that the holes in the part located on the bolts coincide with the holes located on the body. The clutch fork is treated with a universal type lubricant, then the drive is installed in place with a gap of 5 to 9 mm, then chips, a drive sensor, and a battery with a cover are installed on the engine.
see also
Comments 57
www.drive2.ru/l/540215077689622571/ large bearings. When remodeling, you must also look at the engine. brushes. the motor is loaded. and heating gradually demagnetizes the magnets. In the end, it is best to install bearings and a new motor. then this knot will be forgotten for 5 years
With this ini, do eyeliners wear off? And another question, maybe you can tell me. At the robot service, I changed the clutch assembly Aisin + release LUK, switched the actuator to bearings, also changed the bearings on the worm, initialization was successful, but damn I don’t like how the actuator works. There are some shocks from 1-2 to 2-1 as if the clutch is being dropped. Sometimes it’s incomprehensible, you slow down, then press on the gas and thinks for a couple of seconds, then accelerates. My guess is that the gap between the fork and the rod is not set. The service says it's normal, otherwise there would be errors. I'm worried about the new clutch)
Eyeliners do not wash off. Make a clamp, check the rod. Remove the gap or interference, then remove the clutch. The new clutch takes some time to break in. I also have mild tremors.
Yes, the problem is that I don’t have a lace, I need to learn how to make a clamp through a paper clip and check the tension. It's already been worn in for 1.5 tkm and won't wear in at all (Yes, I turned to specialists so as not to force my brain with the actuator and changed everything at once.
Thanks for the info.
When driving in “M” mode, shift gears up and down at the speeds indicated in the table. Make sure the gears shift smoothly. If after calibration the gear shift occurs with jerks, then repeat the calibration.
Note: Maintain at least 2 seconds in each gear.
Yes, I did the calibration, it doesn’t help.
Yes, the problem is that I don’t have a lace, I need to learn how to make a clamp through a paper clip and check the tension. It's already been worn in for 1.5 tkm and won't wear in at all (Yes, I turned to specialists so as not to force my brain with the actuator and changed everything at once.
After adjustment, BEFORE Adjustment, check the rod to ensure there is no play or tension on the cam. Then the clutch starts.
Eyeliners do not wash off. Make a clamp, check the rod. Remove the gap or interference, then remove the clutch. The new clutch takes some time to break in. I also have mild tremors.
My friend, tell me, robot, mileage 142k, not Basili anywhere, everything is original, only ini, should I set the gap like this? I make a clamp, then insert the gap then ini? or not?
That’s right, you make a “clamp” with control that the rod extends, there is a video there. Then you check the gap or tension, eliminate it by moving the actuator on the bolts. Then the clutch starts.
If the actuator jams while moving, you can catch the wedge in the “clamping” mode, since the actuator extends the rod to its extreme position.
In general, if the actuator has not been opened, it is advisable to check how the bushings are functioning.
Eyeliners do not wash off. Make a clamp, check the rod. Remove the gap or interference, then remove the clutch. The new clutch takes some time to break in. I also have mild tremors.
My friend, thank you for the cool articles. Judging by your nickname, you have honey. education, but from the engineers I bow to you. You're a cool dude, good luck to you in life! What am I getting at, engineers are much more stupid than you!
With this ini, do eyeliners wear off? And another question, maybe you can tell me. At the robot service, I changed the clutch assembly Aisin + release LUK, switched the actuator to bearings, also changed the bearings on the worm, initialization was successful, but damn I don’t like how the actuator works. There are some shocks from 1-2 to 2-1 as if the clutch is being dropped. Sometimes it’s incomprehensible, you slow down, then press on the gas and thinks for a couple of seconds, then accelerates. My guess is that the gap between the fork and the rod is not set. The service says it's normal, otherwise there would be errors. I'm worried about the new clutch)
I hope you didn't lubricate the release lever?
I wasn't present, but they seem to be robot specialists.
With this ini, do eyeliners wear off? And another question, maybe you can tell me. At the robot service, I changed the clutch assembly Aisin + release LUK, switched the actuator to bearings, also changed the bearings on the worm, initialization was successful, but damn I don’t like how the actuator works. There are some shocks from 1-2 to 2-1 as if the clutch is being dropped. Sometimes it’s incomprehensible, you slow down, then press on the gas and thinks for a couple of seconds, then accelerates. My guess is that the gap between the fork and the rod is not set. The service says it's normal, otherwise there would be errors. I'm worried about the new clutch)
What is the delta of Clutch Touch and Clump?
I haven’t looked =( I’ll have to try to get these parameters out of the launcher. Tomorrow only
It doesn’t hurt to look at the actuator current log. I have a post on how to do this.
With this ini, do eyeliners wear off? And another question, maybe you can tell me. At the robot service, I changed the clutch assembly Aisin + release LUK, switched the actuator to bearings, also changed the bearings on the worm, initialization was successful, but damn I don’t like how the actuator works. There are some shocks from 1-2 to 2-1 as if the clutch is being dropped. Sometimes it’s incomprehensible, you slow down, then press on the gas and thinks for a couple of seconds, then accelerates. My guess is that the gap between the fork and the rod is not set. The service says it's normal, otherwise there would be errors. I'm worried about the new clutch)
Check the parameters of the gear selector mechanism. Your position sensor leads are probably loose. Those. You have the effect of a lost box. Soon I will have an engineering article on diagnostics and reverse engineering of the MMT algorithm. But for now, butthurt with loading (.
Repairing the clutch actuator on a Corolla, in particular replacing the motor brushes, is not a very complicated process. At the very beginning, it is worth saying that worn out motor brushes are, so to speak, a disease of these servos. So if you have a situation where the car has stopped on the road due to the gear being reset to neutral, the first thing you should check is the clutch actuator.
The actuator is a simple mechanism (or rather, electromechanical), through which the program changes gears and also turns the clutch on and off. The control unit controls everything.
Adjustment 2006-2008
In order to adjust the clutch on a Toyota Corolla, you need to start the car and within a few seconds press the brake pedal at least 7 times; after pressing, a couple of signals should appear.
You need to release the pedal for ten seconds and press it again, a signal appears, it informs that the clutch clamp mode is turned on, then release the brake and press it again, two sound signals will appear. Press and hold the brake pedal, turn on the ignition and wait about 9 seconds, disconnect the CG and TC wires from the DLC3 unit. After these steps, the adjustment is complete.
Results
The Toyota Corolla robotic gearbox has two actuators: MMT and AMT. The first is responsible for the clutch, the other for shifting gears. When the MMT fails, the AMT also begins to operate unstably. Almost all mechanisms of the Corolla robot operate according to this “domino principle”: if one is broken, then the other will not be able to function as it should. To repair it, you need to completely disassemble the box repair kit. There are many descriptions and photos on the Internet that tell not only about manual transmission breakdowns, but also about methods for deep modernization of the MMT clutch actuator.
Replacing a robot with an automatic transmission Toyota Corolla
Initializing the Toyota Corolla clutch in our car service costs rubles. Replacing a clutch in our car service costs rubles. The price of the original clutch is rubles. And such a situation inevitably awaits all owners of Toyota Corolla and Toyota Auris cars, , , , and year of manufacture, because the mileage is thousands. Old problems do not go away: To all of the above, add also the manner of driving, when the moment of changing gears is felt with all your gut.
Article rating:
Toyota Corolla actuator repair Link to main publication
Related publications
- Replacing a wheel bearing in a Toyota Corolla
Adaptation of robotic gearbox
Replacing the clutch with MultiMode must necessarily be accompanied by an adaptation of the Toyota Corolla, Auris, etc. robot, during which the electronic control unit receives the necessary data about the installed parts, since the thickness of the new disc and the height of the basket have changed. Any repair or even disassembly and reassembly of the transmission for diagnostic purposes must end with adaptation of the robot
, which allows you to significantly extend the uninterrupted operation of the unit.
The procedure for setting up and initializing a robotic gearbox for Toyota cars is recommended to be performed every 10 thousand km.
Adaptation of the clutch engagement point is performed using a special scanner and Toyota Techstream software. Regular implementation of the procedure makes driving comfortable and reduces fuel consumption.
A number of malfunctions
Malfunctions in the functioning of the clutch actuator manifest themselves both in a sluggish start when moving away from a vehicle (slippage), and accompanied by jerking and jerking of the transmission gear shift. In addition, overheating of the clutch discs may occur.
But the listed deviations in the operation of the box only indirectly indicate the need to repair the clutch actuator. Don't jump to conclusions. By adapting the ECU, you can get rid of the described symptoms, since in this case the control unit will make adjustments to the operation of all sensors, drives and even the car engine based on a specific driving style.
Consequences of resetting the ECU
After initialization of the control unit, the reference point will be shifted in accordance with the factory parameter. If there is significant wear on the clutch discs, then when the gear is engaged, some gap will remain between the discs, which will lead to slipping and/or jerky gear shifting. At the same time, the speed of movement of the clutch disc will decrease, as evidenced by error code P0810.
The solution to the problem is to replace the bushings with bearings by turning a hole in the aluminum housing of the actuator. At home, it is almost impossible to achieve alignment and alignment; this is done on expensive machines that are found in industrial factories.
E Clutch actuator repair – Toyota Corolla Club Russia
To do this, you need to take a screwdriver and turn the rotating element in the groove of the drive motor.
Clutch actuator motor repair
We are ready to change everything until the car runs, but this is not an option.
The Toyota Corolla clutch actuator is one of the most vulnerable parts of a robotic gearbox. Besides,
It is worth purchasing only original spare parts or their equally high-quality analogues, and also beware of Chinese counterfeits. And here’s the most interesting part: disassembling the actuator, remove the actuator sensor, two bolts with a Phillips screwdriver, remember where the sensor is located, unscrew the plate with antennae under it, nut 6, preferably mark where the antennae are located. Also, at one time, the officials allegedly installed stronger motors, which temporarily helped solve the problems.
Afterwards you need to lubricate the clutch fork, install the drive, chips on the motor and the drive sensor. After some time the bearing was removed. The photographs below show used and new brushes - feel the difference.
We read MMT errors if there are any. Insert a paperclip and turn on the ignition. Don’t be afraid, all the lights on the panel will start blinking; this is normal; the diagnostic mode has turned on. If there are errors, then in the left corner the red gear will start blinking, that is, the well-known error is 35, it will look like this: it blinked 3 times, the gap blinked 5 times, there is a larger gap between errors, and so on in a circle. If there are no errors, it will simply blink without intervals.
6 users said thank you:
However, these signs are not obvious. The thing is that the electronic control unit (ECU) adapts the operation of the sensors, clutch system and even the engine to a specific driving style.
Overheating of the clutch system is much easier to detect: If error P occurs, do not reset the ECU settings. The fact is that by resetting the settings, you can skip the notification about the breakdown of the gear selection actuator.
Consequences of resetting the ECU The clutch is not working stably: There is a high risk of severe wear of the clutch - the ECU will update the sensor readings, which will no longer display the actual degree of wear of the clutch disc.
Well, if the clutch is badly worn, then errors and breakdowns associated with the robotic gearbox may occur. The speed of movement of the disk will also decrease, and this leads to the appearance of error P. The result of all of the above malfunctions is the inability to move in such a car.
THIS IS INTERESTING: Question: How to connect Mi Action Camera 4K to your phone?
Toyota Corolla cars are famous for their reliable performance and unpretentiousness. Dynamic, durable cars have earned enormous popularity in Russia, as they seem to be created for domestic road and climatic conditions.
However, all the positive aspects are offset by the presence of a robotic gearbox - a convenient thing, but a priori capricious and fragile. The “robot” does not tolerate excessively low and high temperatures, extreme driving techniques, or even long continuous operation of the vehicle.
The article will discuss how to stabilize the operation of MMT and adapt it for operation in the harsh Russian reality.
Causes of breakdowns
The Toyota Corolla clutch actuator is one of the most vulnerable parts of a robotic gearbox. The reasons for the breakdown of this mechanism are both extreme driving and service life.
So, if the clutch release actuator is out of order, or you already feel that this mechanism will soon “break down,” then you need to try to repair it. Or replace it with a new one if the repair does not bring the desired result.
However, before you repair the Toyota Corolla clutch actuator with your own hands, you need to figure out what the problem is and what its causes are.
A number of malfunctions
One of the most common signs of a malfunction of the Toyota clutch actuator is both an “inexpressive” start when the car starts moving, and the occurrence of shocks and jerks when changing gears. In addition, so-called clutch overheating may occur.
However, these signs are not obvious. The thing is that the electronic control unit (ECU) adapts the operation of the sensors, clutch system and even the engine to a specific driving style.
Overheating of the clutch system is much easier to detect: firstly, by obvious signs: an icon in the form of a red gear will light up on the dashboard. And a “burnt” smell may appear in the car interior. The manual transmission may “freeze” in neutral.
If error P0810 occurs, do not reset the ECU settings. The fact is that by resetting the settings, you can skip the notification about the breakdown of the gear selection actuator.
Consequences of resetting the ECU
The clutch is not working stably: firstly, the electronic control unit will set a new reference point, as a result of which discrepancies may arise in the operation of the clutch disc.
There is a great danger of severe wear of the clutch - the ECU will update the sensor readings, which will no longer display the actual degree of wear of the clutch disc. Well, if the clutch is badly worn, then errors and breakdowns associated with the robotic gearbox may occur.
The speed of movement of the disk will also decrease, and this leads to the appearance of error P0810.
The result of all of the above malfunctions is the inability to move in such a car.
A few words about regular MMT
Toyota Corolla 150, 2007, 2008 cars are equipped with MMT 89530-12290. This device has a number of imperfections and shortcomings, which, by the way, was recognized by the automobile concern.
In order to find out which actuator is installed on the car, it is necessary to remove the lower glove compartment cover, and from the driver's seat on the car body you can find the number of the MMT installed on the vehicle.
Actuator device repair
Repairing the Corolla E150 clutch actuator will stabilize the operation of the robot. Do-it-yourself repair procedure.
Check clutch
To do this, you need to accelerate the vehicle to 50–60 km/h, switch the robot to manual adjustment mode and engage fifth gear. In this case, you need to depress the gas pedal as much as possible and make sure that the speedometer and tachometer needles move synchronously. This indicates that the clutch is working properly.
Determine actuator error
To determine possible errors, it is necessary to stop the machine, move the robot to the neutral position, turn off the parking brake and the ignition system. Using SST, connect the TC and CG pins of the DLC3.
Next, you need to turn on the ignition system, while releasing the brake pedal. The diagnostic system will start. All dashboard lights will flash, and if an error occurs, a red gear will appear and flash at regular intervals.
If no errors are found, then blinking will occur without long breaks.
Remove and disassemble the MMT
In order to troubleshoot the actuator, it must be removed. You can get to the mechanism only by removing the battery and its platform. Then it is worth disconnecting the chips from the engine and sensor. Afterwards, you can remove the actuator directly (it is secured with three bolts).
Next, the engine is disconnected from the actuator, and the internal space of the mechanism is cleaned of dust and dirt.
In addition, during disassembly it is important to check the brushes and replace them if necessary (if their length is less than three millimeters).
Replacing brushes should be carried out with extreme caution, since new breakdowns are possible during this process. You should immediately check the Corolla 150 clutch actuator motor; to do this, you need to look at the wiring. There should be no plaque, dirt or “oldness” on it. If there is an unpleasant burning smell, it means that the actuator motor has burned out and should be replaced.
Next, you can disassemble the MMT. To do this, you need to unscrew the fastening elements of the sensor; it is also worth remembering the exact location of this part. After the sensor has been removed, you need to find a plate with antennae; it is attached to nuts that need to be unscrewed. To determine the correctness of the disassembly process, the rod is placed in a certain position. To do this, you need to take a screwdriver and turn the rotating element in the groove of the drive motor. The rod should be extremely compressed inward.
Afterwards you can dismantle the fastening elements and open the MMT cover. Next, the drive rod is untwisted and pulled out. It is necessary to clean the mechanism from old grease and clean the block from dirt and dust.
After cleaning, it is necessary to diagnose the MMT for the presence of possible breakdowns. One of the simplest diagnostic methods is the following: you need to pull out the spring and assemble the entire mechanism to check. Most often, bushings wear out, and the most common problem is a poorly manufactured drive. Therefore, before purchasing a new actuator, you should ask yourself: where is this important mechanism made?
It is worth purchasing only original spare parts or their equally high-quality analogues, and also beware of Chinese counterfeits.
Install the device
During assembly, all components are installed in the reverse order. In this case, it is necessary to lubricate all bushings, bearings and the worm shaft. After installing the actuator, the rod is placed in its outer limit position and “started” half a turn. The sensor is placed on the antennae, after which the part is rotated clockwise, this is necessary to fix the sensor with fasteners. Afterwards you need to lubricate the clutch fork, install the drive, chips on the motor and the drive sensor.
In the end, all that remains is to install the battery and adjust the clutch position.
Refinement of the mechanism
As mentioned earlier, the Toyota Corolla E150 robot clutch actuator is an extremely “capricious” part that requires constant maintenance. Due to wear of the bushings, failure of the actuator motor, or problems with sensors, the robotic gearbox behaves “inappropriately,” which can lead to problems with the car’s engine.
Many car enthusiasts are trying to upgrade their clutch actuator. The first modification is that it is necessary to replace the bushings, wiring and motor. After replacing these components, the robotic box begins to show more stable and reliable operation. A modernized actuator can serve faithfully for a long time. However, the deep modernization of the MMT clutch actuator ends with the replacement of certain components.
Results
The Toyota Corolla robotic gearbox has two actuators: MMT and AMT. The first is responsible for the clutch, the other for shifting gears. When the MMT fails, the AMT also begins to operate unstably.
Almost all mechanisms of the Corolla robot operate according to this “domino principle”: if one is broken, then the other will not be able to function as it should. To repair it, you need to completely disassemble the box repair kit.
There are many descriptions and photos on the Internet that tell not only about manual transmission breakdowns, but also about methods for deep modernization of the MMT clutch actuator.
Source: https://clubmashin.ru/toycor/correpair/remont-aktuatora-tojota-korolla-svoimi-rukami.html
| Replacing a clutch on a Toyota Corolla with a robot gear shift. Everyone has heard a lot about how the robot on Toyota is very capricious and should be avoided. If you have come to this site, then apparently you are the owner of this car and you need qualified help. I will try to describe everything clearly for you. First of all, the clutch fails in MMT. The average clutch mileage in our practice is 70 - 90 thousand mileage. It all depends on the intensity of driving and the conditions in which the car is used. During city driving, the mileage is less because the clutch is constantly working. But when used in intercity mode it is larger. There are several tips to extend the life of your clutch. The first is to switch the MMT to neutral when stopping at long traffic lights and in traffic jams. This will relieve the load on the clutch actuator and the clutch itself. Second, don’t drive aggressively. The entire load when changing gears falls on the clutch. And thirdly, from time to time it is worth driving in manual transmission mode. Over time, the control unit remembers your driving style and will try to repeat it automatically. THIS IS INTERESTING: Quick answer: How many pomegranates can you eat? Change the oil in MMT every 60 thousand mileage. The manufacturer does not provide for changing the oil in MMT. He calculates it for the entire service life - 100 thousand kilometers. But in practice, problems arise with MMT. Mechanical faults of the MultiMode gearboxMechanical failure is mechanical wear of clutch parts. Basically, this is wear and overheating of the clutch, in which the clutch loses its functionality. The main sign of clutch failure is slipping. This leads to a loss of torque at high speeds or during sudden starts. In the event of mechanical failures, the system enters emergency mode and resets the transmission to neutral. Displays error code P0810. To eliminate the problem, you need to replace the clutch kit, which includes the basket, clutch disc and release bearing. Crunching sound in MMT when shifting from second to third gear . This is due to wear of the third gear synchronizer. The reasons are partly not due to timely oil changes, failure to adapt the clutch or its violation. In the neglected version, it leads to failure of the third gear gear pack and the gear selection mechanism. Noise from the MMT when the car is moving. Due to untimely oil changes or oil leakage, the bearings of the primary and secondary shafts fail. Eliminated by replacing the rear bearings of the primary and secondary shafts. Electrical faults of the MultiMode gearboxMalfunctions in the electrical system of this gearbox are expressed in several ways. The first is a malfunction in setting or initializing the clutch. Characteristic signs are jerking at startup. The second is a reset to neutral when the clutch overheats. A red icon in the form of a gear lights up on the display, indicating a fault in the transmission. After some waiting time, the system starts working again. When performing diagnostics, you can find out the nature of the malfunction by the error code. Let's look at a couple of the most common ones. The first is P0810 - clutch position control error .This error occurs both with a mechanical malfunction of the clutch and with an electronic malfunction. The second is The drive motor is replaced separately. The cost of the motor is 6,000 rubles. Let's consider in practice replacing the clutch on a robot. |