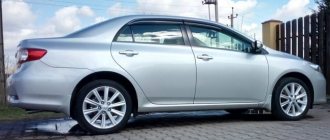
Japanese cars, in particular Toyota, are famous for their reliability, comfort, and quality of parts. Every component, every single detail is created for people. It is very important that the car is easy to repair. In this article we will look at the issue of repairing the rear suspension on a Toyota Corolla. During its complete disassembly, we will replace the rear springs and struts. We will talk about repairing the suspension on a Toyota Corolla, a model with 4WD, i.e. all-wheel drive.
Before you start talking about disassembly and the repair itself, you should familiarize yourself with the structure of the suspension. Get acquainted with the details of which it generally consists. As everyone knows, there are more parts in the all-wheel drive version than in the front-wheel drive version. Therefore, it is important to familiarize yourself with them and not confuse them during repairs. So let's get started.
replacement of rear shock absorbers Toyota Corolla 150 body
The time has come to replace the rear shock absorbers; suspicious and unpleasant sounds from the suspension have long been present, and there is no smoothness during movement.
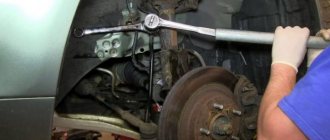
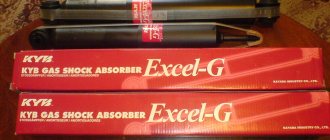
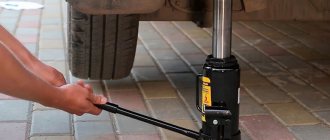
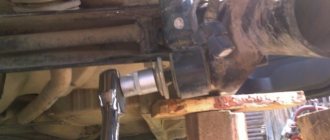
When driving off a curb, for example, the car sagged a lot, as if it was hanging on only by springs (in principle, it was). There was nothing suitable in the city stores (the store had KYB for 1850, but the database at the time of purchase was not carried out, and the next day they were gone, what a bummer :-(). The stores offer TOKIKO made in China for 2000 rubles and many other things Made in China. As a result, they were purchased on the existential:P Gas suspension shock absorber, rear Excel-G Kayaba 341816 costing 2,384.80 each, total for two: 4,769 rubles 60 kopecks. How to identify fake PKayaba or not? KYB shock absorbers 341816Pproduced in Spain Made in Spain. While I was choosing what to install, I learned how to detect a fake KYB, and that one range of shock absorbers is produced only at one plant. That is, Kayaba P341816 shock absorbers are produced only at a plant in Spain, if the shock absorber says production in elsewhere, then it is a fake, although on fakes the place of production is usually not written and the name of the shock absorber will only be on stickers.Only the nomenclature is usually embossed on the counter on a fake. Well, accordingly, on the original KYB racks, all welds are neat, the name is stamped on the rack. In general, the original is in the photo above. First of all, before replacing the rear shock absorbers, I parked the car on wooden blocks, dismantled the trim in the trunk and filled the bottom nut with liquid wrench (similar to WD-40). Since the bottom nut is exposed to all weather conditions, it is a little rusty. To unscrew it, I set the key to 19 and rested it with a jack. After briefly tapping the nut with a hammer, it gave way and was safely unscrewed, also on the second side. Next, you need to loosen the shock absorber rod nut; to do this, insert a hex key into the end of the rod and use a spanner to remove the nut. After this, unscrew the two nuts and one bolt of the shock absorber cup, this is done for ease of removal. First, I unscrewed two nuts, they were marked with pink and purple paint, then I unscrewed the bolt from below and pulled out the shock absorber drain. All rubber bands, washers and spring gaskets on the shock absorbers are in good condition, there is no need to change them.
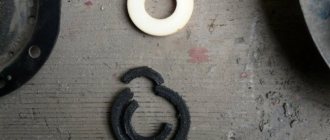
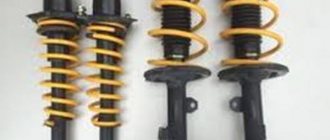
So to replace the rear shock absorbers, you only need to purchase the shock absorbers themselves. Then, using spring ties taken from a neighbor in the garage (you will have to buy one for yourself, the ties are the simplest, I saw them in a UAZ store for 220 rubles), we compress the shock absorber spring, unscrew the upper rod nut completely and disassemble the shock absorber in parts. All components were cleaned and washed, the condition seemed to be slightly used. Only the springs could be tinted at the points of contact. For painting various surfaces, including cars, a good solution would be to use an electric one. Of course, you don’t need it to paint a shock absorber spring; you can use a sponge to restore the coating, but it will be a good helper around the house. This spray gun can use paints of different thicknesses and consistencies. Now you need to assemble everything in the reverse order, since the old rubber bands are still there; the place for the spring has already been pressed in, so there is no need to remember the position, everything is assembled simply and quickly. We do not tighten the shock absorber rod nut too much; it is finally tightened when the car is already standing on both wheels.
Therefore, shock absorbers are replaced at the same time, left and right. We install the shock absorbers, tighten all the bolts except the top nut of the rod, with the tightening torques specified in the instructions, lower the car onto the wheels, tighten the nut of the rod. And as a result, we enjoy the performance of the new shock absorbers during the trip. Here is a video of the condition of the right shock absorber, the rod extends much longer than on the new shock absorber, on the left shock absorber there were no signs of life at all, the rod stood still. I changed the rear struts + springs + bump stops, boots, etc. After the replacement, everything seemed great. It doesn’t throw its ass when turning, it holds the road better. more confident, became a little tougher and my ass grew by 4-5 centimeters. While I was driving in a straight line everything was great, but as soon as I hit a bump the jokes started. Hard metal blow. And every other time. When you are driving on a flat road and then there is a sharp downward transition or a hole, or when leaving a recumbent, this blow is repeated. I hope you understand me =)) In short, I’m trying to understand what this could be, a marriage? Was something left unturned? (although I looked, visually everything is ok
