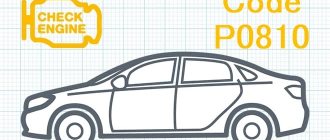
Possible causes and tips for troubleshooting problems that led to the error.
Possible causes and tips for troubleshooting problems that led to the error:
Causes:
Possible Symptoms - Engine light on (or engine maintenance warning light).
Troubleshooting Suggestions:
Passenger Power Window Motor Circuit Short to Ground is the general description for code B1421, but the manufacturer may have a different description. We do not have further information about the B1421 OBDII code at this time.
DTC Body System Errors B1421
On our resource you can ask questions and share your own experience in troubleshooting problems associated with error B1421. By asking a question within a few days you will be able to find the answer.
Taking into account the fact that OBD2 errors in the operation of the engine or other electronic systems of the car do not always directly indicate a non-functioning element, and the fact that for different brands and models of cars the same error can arise as a result of a malfunction of completely different elements of the electronic system, we have created this algorithm for assistance and exchange of useful information.
We hope, with your help, to form a cause-and-effect relationship for the occurrence of a particular OBD2 error in a specific car (make and model). As experience has shown, if we consider a specific make and model of a car, then in the vast majority of cases the cause of the error is the same.
If the error indicates incorrect parameters (high or low values) of any of the sensors or analyzers, then most likely this element is working, and the problem must be looked for, so to speak, “upstream”, in the elements whose operation is analyzed by the sensor or probe.
If the error indicates a constantly open or closed valve, then you need to approach the issue wisely, and not thoughtlessly change this element. There may be several reasons: the valve is clogged, the valve is jammed, the valve receives an incorrect signal from other faulty components.
Errors in the operation of the OBD2 engine and other vehicle systems (ELM327) do not always directly indicate a non-functioning element. The error itself is indirect evidence of a malfunction in the system, in a sense a hint, and only in rare cases a direct indication of a faulty element, sensor or part. Errors (error codes) received from a device or scanner require correct interpretation of the information, so as not to waste time and money on replacing working elements of the car. The problem often lies much deeper than it seems at first glance. This is due to the fact that information messages contain, as mentioned above, indirect information about the disruption of the system.
Here are a couple of general examples. If the error indicates incorrect parameters (high or low values) of any of the sensors or analyzers, then most likely this element is working, since it analyzes (produces certain parameters or values), and the problem must be looked for “upstream”, so to speak, in elements whose operation is analyzed by a sensor or probe.
If the error indicates a constantly open or closed valve, then you need to approach the issue wisely, and not thoughtlessly change this element. There may be several reasons: the valve is clogged, the valve is jammed, the valve receives an incorrect signal from other faulty components.
Another point that I would like to note is the specifics of a particular brand and model. Therefore, if you recognize an error in the operation of the engine or other system of your car, do not rush to make hasty decisions, but approach the issue comprehensively.
Our forum was created for all users, from simple car enthusiasts to professional auto electricians. A drop from each will be useful to everyone.
All errors TOYOTA 4RUNNER, ALLEX, ALLION, ALPHARD, ALTEZZA, ARISTO, AURION, AURIS, AVALON, AVENSIS, AYGO, BB, BELTA, BLADE, BREVIS, CALDINA, CAMI, CAMRY, CELICA, CELSIOR, CENTURY, COROLLA, ECHO, ESTIMA , FJ CRUISER, FORTUNER, FUNCARGO, GT86, HARRIER, HIACE, HIGHLANDER, HILUX, INNOVA, IPSUM, iQ, ISIS, IST, KLUGER HYBRID, KLUGER V, LAND CRUISER, LAND CRUISER PRADO, MARK, MARK X, MATRIX, MR 2 , NADIA, NOAH, OPA, PASSO, PLATZ, PREMIO, PREVIA, PRIUS, PROBOX, PROGRES, RACTIS, RAUM, RAV4, RUSH, SAI, SEQUOIA, SIENNA, SIENTA, SOLARA, TACOMA, TUNDRA, URBAN CRUISER, VANGUARD, VELLFIRE, VENZA, VERSO, VITZ, VOLTZ, VOXY, WILL CYPHA, WILL VS, WINDOM, WISH, YARIS.
Table with errors
Full description of error codes for Toyota cars:
General faults
The following components are subject to diagnosis:
- all sensors installed on wheels;
- anti-slip system control unit;
- wires from the ABS control module to the controllers and control unit;
- contacts on the regulators.
Transmission faults
- malfunction of the speed shift sensor;
- gear drive failure;
- damage to the cable or one of the contacts on it;
- software malfunction of the control unit or use of an old version of software (software);
- lack of communication between the engine and gearbox control modules.
Possible causes of the malfunction:
- selection mechanism stroke sensor;
- incorrect operation of the selector drive unit and speed switch assembly (system electric motor);
- automatic transmission module malfunction;
- damage or wear to the shift joint or fork rod.
- malfunction of the drive device for selecting and switching speeds in the assembly;
- short circuit in the transmission electric motor line;
- problems in the operation of the TCM module.
More details on what to check:
- Screen filters for the solenoid valve of the variable valve timing drive. These elements can be clogged or torn, and sometimes they are not installed correctly.
- Leakage of motor fluid at the seating surfaces of the gas distribution valve drive unit seals.
- Interruption of the supply of engine fluid to the solenoid valve of the drive mechanism.
- Integrity of the timing belt for wear.
Possible causes of the problem:
- incorrect compression in the engine cylinders;
- air leak;
- damage to the cylinder head gasket or head;
- faulty or clogged mass air flow sensor;
- failure of the lambda probe or damage to one of the contacts on the devices;
- fuel filter clogged;
- injector malfunction.
- failure or incorrect functioning of the electric pneumatic valve for controlling the turbocharger;
- break or short circuit on the vacuum control line;
- malfunction of the turbocharger device;
- breakdown of the recirculation system valve;
- damage to vacuum pipes or leakage;
- malfunction of the power unit control unit.
- malfunction of the fuel filter device;
- leakage or loosening of the fuel line clamps (you need to check the integrity of the nut for tightening the fuel pump cover and housing);
- breakdown of the fuel pump device.
Possible causes of the malfunction:
- battery discharge or damage;
- malfunction of the ignition switch or Start/Stop system;
- regular use of low-quality fuel;
- problems with the immobilizer;
- malfunction of the anti-theft system;
- critical engine failure;
- clogged one of the filters that affects startup;
- faulty injectors or oxygen sensors.
Sensor malfunctions
To resolve the issue, it is recommended to do the following:
- Check the integrity of the connectors on the block connecting the sensor to the dashboard. Perhaps the contact has come loose and needs to be reconnected.
- Diagnose the integrity of the cable through which the sensor is connected to the instrument cluster.
- Check the quality of the connection between the controller and the transmission unit.
- Carry out diagnostics of contacts for short circuits.
- malfunction of the boost pressure controller, sensor parameters are not within the range of normalized values;
- problems in the functioning of the turbocharger control drive unit.
- damage to the sensor power wiring or the bulbs installed in the brake lights;
- failure of the relay or safety device of the optical elements;
- damage to the fuse socket or contacts;
- malfunction of the sensor installed on the brake pedal;
- problems with the control unit.
- malfunction of the left or right front engine speed controller;
- damage to the wiring supplying the regulator;
- malfunction of the rotor speed mechanism;
- errors made when installing the sensor;
- Malfunction of the brake actuator control module assembly (ABS).
Electrical and electronic faults
Possible causes of the malfunction:
- the heating element has failed;
- the lambda probe fuse is blown;
- the wiring supplying the sensor is damaged, or a short circuit has occurred in the electrical circuit;
- the contact on the controller power supply has oxidized;
- The ECM motor control unit has failed or is not working correctly.
- stopping the engine when idling;
- difficulty starting the engine;
- “triple” of the power unit when driving uphill;
- RPM surges.
Possible causes of the malfunction:
- battery discharge;
- damage to the battery, which led to leakage of electrolyte and its inoperability;
- oxidation of the battery terminals or damage to the clamps;
- generator device malfunction;
- failure of the regulator relay;
- Damage or breakage of the drive belt.
Possible causes of the problem:
- failure of the clutch release actuator device;
- the smoothness of the fork or release bearing is impaired;
- failure of the clutch basket;
- use of non-original spare parts to repair the system;
- errors made when installing parts;
- using a control unit with outdated software.
- line damage or short circuit on the reverse light switch wire;
- failure of the switching mechanism travel controller;
- breakdown of the travel sensor of the selection mechanism;
- a malfunction of the TCM module or a software failure in its operation;
- Reverse light switch is broken.
- the control unit has not calibrated the zero position of the deceleration controller;
- the vehicle position was not stabilized during calibration;
- the SRS control module is faulty or operates intermittently;
- the control unit has failed or is not functioning correctly.
- broken or damaged line of the speed shift solenoid valve SR;
- SLU is shorted or disconnected.
damage to the wires on the instrument cluster or disconnection of contacts;
malfunction of the main wiring harness in the engine compartment;
failure of the left front anti-skid sensor;
Possible causes of the problem:
damage or wear of the harness with electrical circuits connected to the instrument cluster;
malfunction of the twisted wire assembly;
failure or disconnection of the contact from the horn button;
- the anti-skid system control module detects an impulse of a break or damage to the power line of the rear left squib;
- breakdown of the airbag knock sensor;
- failure of the control module or software failure of the SRS device.
- short circuit in the power supply wiring of the driver's knee airbag knock sensor;
- failure of the device's squib;
- breakdown or software malfunction in the operation of the SRS control module.
- Communication error between the engine control module and the ID code block. A detailed diagnosis of the wiring harness is required.
- Communication line failure. It is recommended to diagnose the ECM module.
- Identification element differences detected during the exchange of information between the identifier module and the ECM. It is necessary to check the operation of the modules.
To diagnose, you need to do the following:
- Check the battery. The cause of the problem may be its discharge, which causes the generator to work in increased mode, which leads to an increase in voltage. You need to make sure that there is no damage to the battery case, as well as the integrity of the contact clamps.
- Perform diagnostics on the generator drive belt. If the product is worn out, it must be replaced.
- Check the operation of the generator device. The cause of the problem may be a faulty regulator relay.
To find the cause, perform the following steps:
- the sensor itself is checked - the contact may have come off the device;
- diagnostics of the electrical circuit connected to the sensor is performed;
- The parking radar control unit is diagnosed.
Two-digit Type 9 codes
Possible causes of the malfunction:
- damage to the pins on the connection block;
- cable break or wear of the insulating layer;
- malfunction of the EFI unit itself;
- software problem;
- Battery malfunction.
- candles;
- coils;
- high-voltage wires;
- distributor.
Fault codes are considered for the following Toyota models:
- 4Runner
- Avensis T25 (Avensis T25);
- Avalon (Avalon);
- Auris (Auris);
- Aristo (Aristo);
- Brevis (Brevis);
- Caldina (Kaldina);
- Carina (Karina);
- Cami (Kami);
- Camry V40 (Camry);
- Chaser (Chaser);
- Corolla MMT, Ceres, SV40 (Corolla);
- Corona Premio (Crown Premio);
- Crown 1G FE (Crown);
- Estima (Estima);
- Fielder;
- Isis (Isis);
- Ipsum (Ipsum);
- Gracia (Grace);
- Granvia (Granvia);
- Highlander (Highlander);
- Hilux (Hilux);
- Land Cruiser 200 (Land Cruiser);
- Majesta (Majesta);
- Mark, Mark2 (Mark);
- Nadia (Nadia);
- Noax (Noah);
- Passo (Passo);
- Platz
- Prado (Prado);
- Previa (Previa);
- Prius (Prius);
- Rav4 (Rav 4);
- Soarer (Sorer);
- Surf
- Town;
- Verso (Verso);
- Vista (Vista);
- Vitz (Vitz);
- Wish (Wish);
- Yaris (Yaris);
- Windom (Windom);
Decoding common Toyota Rav 4 errors
Knowing the most common faults makes it easier to repair your car yourself.
S1201
In this case, the system considers the engine to be operating incorrectly. Engine speed is unable to reach normal values. If code C1201 is detected, you need to check the idle speed controllers and shafts.
With error C1201, the engine does not operate correctly.
The problem may also lie in the power unit, for example, damage to the gasket or cylinder head.
C1223
Indicates a malfunction of the ABS. You need to check the control module.
S1241
Occurs when the voltage measured at the current terminals of the additional battery deviates from the norm. In this case, the controller signal does not correspond to the standard parameters.
S1280
Indicates a break in the electrical circuits. The error occurs when the control module breaks down.
S1298
This combination is displayed when there is a problem with the pressure regulator solenoids. If the unit is working properly, the cause is looked for in the wiring or the all-wheel drive control unit.
S1441
Stands for “low braking system performance.” Malfunctions should be looked for in the directional stability module (its reinforcing component).
Error C1441 means low braking performance.
C1299
Indicates a failure of the all-wheel drive control system. They look for the problem in the clutch system and the transmission itself. It can occur when the gearbox sensor or torque converter breaks down.
B279a
The code is displayed when communication between the control unit and the ECM is disrupted. The cause of the error is a low battery.
Less often, failures are associated with voltage surges.
B1421
This combination means problems with the solar light controller. The part is located in the front, on the passenger side.
B2799
The appearance of the code is facilitated by:
- Lost communication between the control unit, engine and identification code module. The cable harness connecting these components must be carefully checked.
- Open circuit. The ECM needs to be diagnosed. You also need to pay attention to the integrity of the cables.
- Identity discrepancy detected when transmitting data from the ECM. This module needs to be diagnosed.
U011b
On some vehicles, this combination of symbols is detected when communication with the valve control lever control system is interrupted.
Perhaps the node has recognized the lack of information exchange with the digital CAN bus.
P0012
The number indicates a malfunction of the timing regulator. It occurs due to a decrease in the fluid level in the power unit.
P0012 means a malfunction of the gas distribution mechanism.
Less commonly, the cause is incorrect installation of the camshaft, timing belt or phase controller drive. You need to check:
- Filters for magnetic valves of the gas distribution system. Parts may be dirty or damaged.
- Liquid leakage near the seating surfaces of the gas distribution phases.
- Stopping the fluid supply to the drive mechanism.
- Check the timing belt for signs of wear.
P0037
The main reason for the appearance of such a code is a violation of the integrity of the cable connected to the heating element of the oxygen controller.
The control system detects a deterioration in the signal coming from the sensor.
The malfunction occurs due to:
- breakdown of the heating part;
- failure of the lambda probe fuse;
- violation of wiring integrity, short circuit in the circuit;
- oxidation of the contact in the power supply;
- interruptions in the operation of the ECM unit.
P0138
Occurs due to an increase in the pulse passing through the oxygen regulator circuit. Check the part located in 1 jar.
P0138 indicates an increase in the oxygen regulator pulse.
P0171
Indicates that the fuel-air mixture in the cylinders is lean. First of all, check the engine compression.
The air flow sensors and oxygen controller that affect the formation of the mixture are also subject to diagnostics.
P0420
Indicates a decrease in the efficiency of the catalyst; the problem should be looked for in 1 bank. Signs of failure appear 5 minutes after starting the engine. In this case, the heating system of the oxygen controller must be repaired.
P0627 on diesel
The code indicates a faulty fuel pump circuit. It is necessary to inspect the wires, contacts, relays.
Error 41
The throttle control is sending the wrong signal. Check the mechanism itself and the cables connected to it.
P264a
The wiring is damaged or the pads are disconnected from the drive mechanism regulator. We are talking about the components located in the first row.
If the wiring is damaged, you will see a P264a error.
P1047
In this case, the Valvematic unit is faulty.
The microprocessor records an error made when setting up the module. The problem occurs due to a break in the wiring of the first row.
P1049
Indicates that the Valvematic node parameters have been entered incorrectly. Less often, when such a code appears, a short circuit is detected.
P1155
Indicates that lambda probe 2 is not operating correctly. Failure occurs due to breakdown of the wiring insulation or contamination of the terminals.
P1603
The combination reflects malfunctions in the EEEPROM module. You cannot do without a thorough diagnosis of the processor.
P1604
The causes of the error are:
- battery damage or discharge;
- breakdown of the ignition system;
- filling with low-quality fuel;
- incorrect functioning of the immobilizer;
- improper operation of the anti-theft system;
- critical engine failures;
- clogging of filters that are activated during startup;
- failure of injectors.
The cause of error P1604 is a low battery.
P1605
This combination indicates that incorrect idle speed data is being received. The problem occurs due to many reasons, such as ECU or cylinder failure.
Most often, a failure of the knock controller is detected.
P1589
The code appears when:
- incorrect calibration of the deceleration sensor position;
- SRS system malfunctions;
- unstabilized vehicle position during calibration;
- incorrect operation of the control unit.
P1750
Indicates problems with the braking system. Inspect the stability mechanism or ABS module.
P2195
Indicates that the fuel mixture is lean. The problem is related to the data sent by the bank 1 oxygen sensor.
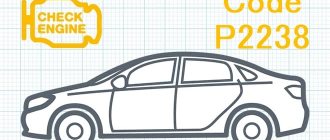
P2238
In this case, inspection of the lambda probe is required. The signal sent by the regulator is too weak.
If you see error P2238, check the lambda probe.
P2646
Indicates that the valve drive is stuck when the engine is turned off. Other problems in the operation of this system are less frequently identified. You need to thoroughly diagnose the device.
awd error
The code indicates that the all-wheel drive needs to be checked.
Accompanied by wheel slipping and spontaneously disappears after a few hours. If this does not happen, a scanner check is required.
Charge the battery
The message appears not only when the battery is low. Sometimes a faulty diode bridge is detected. The part needs to be replaced.
4wd
The main reason is considered to be the installation of wheels of different brands or sizes. The error does not cause problems, it disappears when the car is restarted.
Installing wheels of different brands results in a 4wd error.
However, you should not put off replacing the wheels with identical ones. The engine is sensitive to such moments.
ABS error
In this case, the corresponding lamp lights up. The cause is sought in a breakdown of the wiring or a breakdown of the controller.
Airbag malfunction
Associated with damage to the cable or cable in the steering column. In some cars, this combination appears when the airbag deploys.
4lo
Indicates a breakdown of the transmission drive system. You need to carefully inspect all connectors and sensors. The problem lies in the incorrect functioning of the center differential lock.
TRS error
The code does not indicate a malfunction. In this way, the system reacts to the installation of an alarm or an additional immobilizer. A slight delay in turning on the ignition helps to reset the error.
How to diagnose the error?
The self-diagnosis process for Toyota vehicles can only be performed using connectors DLC1 and DLC2.
The test block is made in the form of a small plastic module equipped with a lid. Depending on the car model, the location of the connector may vary, but usually it is located in the engine compartment on the left side. On the block cover there is the inscription “Diagnostic”. In older versions of Toyota, the device is located next to the battery.
For Toyota Karina cars 1992-1997, as well as Corona and Mark 1992, error codes can only be read by reading the blinking LEDs. In newer versions of vehicles, the DLC2 module is located in the vehicle interior. It can be seen under the center console panel or near the driver’s feet, under the steering wheel. The module is made in the form of an oval or circle. The diagnostic process consists of closing certain contact elements of the block, which must be connected in a specific sequence.
Algorithm for checking:
- The protective plastic cover is removed from the connector. On the reverse side of the lining there is a special diagram showing the terminals of the block.
- Using a piece of wire, cable or paper clip, you need to make a jumper that is mounted between the pins numbered TE1 and E1.
- The key is inserted into the lock and the ignition is activated. When conducting diagnostics, the heating and air conditioning systems must be turned off.
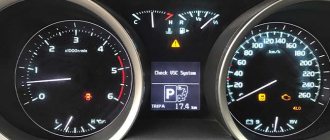
- During the test, you need to look at the Check Engine LED indicators (for diagnosing the power unit) and at O/D (for the gearbox). The user must record the number of blinks of the light bulb, as well as the intervals.
Pin designation on the DLC diagnostic block
You can determine the absence of malfunctions in the operation of the internal combustion engine (ICE) and gearbox by two symptoms:
- LED lights blinked evenly at the same interval and duration 11 times;
- The Check indicator blinks continuously and evenly at intervals of 4.5 seconds.
If there is no contact diagram on the cover or it has been erased, you can determine the required pins as follows:
- The car's ignition system turns on.
- One of the contact elements of the light indicator is connected to any standard engine ground bolt.
- The second output of the light bulb is connected in turn to each contact of the diagnostic block.
- At the moment when the Check indicator lights up on the dashboard, we can conclude that the required pin has been found.
To read the code you need to count the LED blinks:
- when a combination appears, the LED blinks quickly, lights up for a few tenths of one second;
- the time interval between decimal and unit readings will be no more than 1.5 s;
- the pause between each subsequent code will be 2.5 seconds;
- series of codes for various problems are separated by a pause of 4.5 s.
Video: Toyota car self-diagnosis
The JDM27 channel in its video showed the process of diagnosing the engine and automatic transmission of a Toyota car.
How to reset the error?
To clear a fault code, perform the following steps:
- The car's ignition system turns on.
- On the diagnostic block, to reset the memory of the control unit, contacts TC and E1 are closed.
- Over the next three seconds, the user must press the brake pedal at least 8 times.
- Then you need to make sure that the LED indicator blinks with a pause of 0.5 seconds.
- The ignition is turned off and the jumper is disconnected from the pins. If the error codes are successfully cleared, the anti-lock brake indicator will not illuminate on the instrument panel.
You can use a computer to remove combinations of faults. If the diagnostics were performed using a laptop, software is used to reset the memory.
More category errors
B1422/22B1423/23B1424/24B1441/41B1442/42B1443/43B1446/46B1451/51B1471/71B1472/72B1473/73B1474/74B1475/75B1476/76B1477/77B149 7/97B1498/98B1499/99B1602/83B1603/83B1607/84B1608/84B1610/13B1612/83B1613/ 83B1615/14B1617/84B1618/84B161A/8AB1620/21B1622/81B1623/81B1625/22B1627/82B1628/82B1630/23B1632/81B1633/81B1635/24B1637/82B1 638/82B1642/81B1643/81B1647/82B1648/82B1650/32B1653/35B1655/37B1656/38B1660/ 43B1661/44B1662/45B1675/82B1676/85B1677/85B1690/15B1692/81B1693/81B1694/85B1695/16B1697/82B1698/82B1800/51B1801/51B1802/51B 1803/51B1805/52B1806/52B1807/52B1808/52B1810/53B1811/53B1812/53B1813/53B1815/ 54B1816/54B1817/54B1818/54B1820/55B1821/55B1822/55B1823/55B1825/56B1826/56B1827/56B1828/56B1830/57B1831/57B1832/57B1833/57B 1835/58B1836/58B1837/58B1838/58B1840/59B1841/59B1842/59B1843/59B1845/61B1846/ 61See all errors →
The cost of diagnosing errors for Ford at service stations in Moscow and St. Petersburg
Approximate prices for computer diagnostics of faults:
| City | Company name | Address | Phone number | Price |
| Moscow | North Motors | St. Dubninskaya, 83 | +7 | 2500 rub. |
| Silver elephant | St. Pyalovskaya, 7 | +7 | 3500 rub. | |
| Saint Petersburg | Automagic | St. Uchitelskaya, 23 | +7 | 2000 rub. |
| ClinliCar | Bolshoy Sampsonievsky Ave., 61k2 | +7 | 3000 rub. |
Video: removing Toyota Levin errors
The Auto Sam channel in its video showed the process of erasing error codes from the memory of a microprocessor module using the example of a Toyota Levin car.
On our resource you can ask questions and share your own experience in troubleshooting problems associated with error B1421. By asking a question within a few days you will be able to find the answer.
Taking into account the fact that OBD2 errors in the operation of the engine or other electronic systems of the car do not always directly indicate a non-functioning element, and the fact that for different brands and models of cars the same error can arise as a result of a malfunction of completely different elements of the electronic system, we have created this algorithm for assistance and exchange of useful information.
We hope, with your help, to form a cause-and-effect relationship for the occurrence of a particular OBD2 error in a specific car (make and model). As experience has shown, if we consider a specific make and model of a car, then in the vast majority of cases the cause of the error is the same.
If the error indicates incorrect parameters (high or low values) of any of the sensors or analyzers, then most likely this element is working, and the problem must be looked for, so to speak, “upstream”, in the elements whose operation is analyzed by the sensor or probe.
If the error indicates a constantly open or closed valve, then you need to approach the issue wisely, and not thoughtlessly change this element. There may be several reasons: the valve is clogged, the valve is jammed, the valve receives an incorrect signal from other faulty components.
Errors in the operation of the OBD2 engine and other vehicle systems (ELM327) do not always directly indicate a non-functioning element. The error itself is indirect evidence of a malfunction in the system, in a sense a hint, and only in rare cases a direct indication of a faulty element, sensor or part. Errors (error codes) received from a device or scanner require correct interpretation of the information, so as not to waste time and money on replacing working elements of the car. The problem often lies much deeper than it seems at first glance. This is due to the fact that information messages contain, as mentioned above, indirect information about the disruption of the system.
Here are a couple of general examples. If the error indicates incorrect parameters (high or low values) of any of the sensors or analyzers, then most likely this element is working, since it analyzes (produces certain parameters or values), and the problem must be looked for “upstream”, so to speak, in elements whose operation is analyzed by a sensor or probe.
If the error indicates a constantly open or closed valve, then you need to approach the issue wisely, and not thoughtlessly change this element. There may be several reasons: the valve is clogged, the valve is jammed, the valve receives an incorrect signal from other faulty components.
Another point that I would like to note is the specifics of a particular brand and model. Therefore, if you recognize an error in the operation of the engine or other system of your car, do not rush to make hasty decisions, but approach the issue comprehensively.
Our forum was created for all users, from simple car enthusiasts to professional auto electricians. A drop from each will be useful to everyone.
Every car, regardless of the country of manufacture, has problems from time to time. You can often diagnose and fix the error yourself without turning to professionals. This topic is especially popular among car owners, because it is not always convenient to contact a car service center and repairs can be expensive.
B1421 Lexus error
According to the client, the car was purchased a month ago, and quite quickly a leak appeared in the inverter cooling system, which was generously reported by the indicator with the motor. The car service solved the problem, but a few days later the brake warning lights and exclamation mark came on. The check engine light did not come on. The owner (which is quite logical) first returned to the service center, where he was not told anything clearly. And here is the car in front of me. I assumed that the current problem had nothing to do with cooling and that there was clearly a blow to the front. We read the codes for all systems and see the following picture:
1. C1310 - Active Booster Solenoid/HV System Malfunction
2. U0293 - Lost Communication With Hybrid Vehicle System
3. P0A84 - Hybrid Battery Pack Cooling Fan 1 Control Circuit Low
4. P3000 - Battery Control System Malfunction
5. B1421 - Solar Sensor Circuit
6. B1423 - Pressure Switch Circuit
When the car is running, we have the following: it drives normally, the VVB fan seems to turn on, but is noisy, the panel from the inside is heavily stained and deposited, which affects the readability of information, the heater control on the monitor works, but there is no air flow, no air temperature, no intake interior/outdoors are not physically switched, but the fan speed is regulated normally. Also, when the engine starts, there is a strong vibration in the body. Let's start dealing with errors:
1. The most obscure error, there are a million possible occurrences, so I decided to postpone it until later.
2. The error was clearly in the history, most likely after the installation of the alarm, so it was removed without problems.
3 and 4. Errors for different systems, but they indicate one thing - a malfunction of the VVB fan (it is located behind the trim in the rear right wing and periodically cools the battery).
5. The problem is with the sun sensor. It is only needed for the auto mode of the stove. It breaks extremely rarely. Strange.
6. There is no freon pressure in the system. Well, if the car is broken, then there is nothing surprising in this, I was even sure that the pipes were either not screwed on or a part was missing, but I was wrong.
As for the climate, I thought about one problem, due to which the dampers do not move, that is, the servos do not work and there is an error in the sun sensor. Well, all three drives can’t break?
Okay, there’s nothing to do, I’ll remove the upper part of the torpedo. It’s immediately obvious that it’s already been removed, and all of it has been removed, but it’s simply assembled in a disgraceful manner, a bunch of fasteners are missing, the harnesses are out of place, and so on. I also observe traces of oxides and corrosion. Well, there are already assumptions. I open the transmission unit that hangs under the heater on the passenger side
Beautiful, isn't it? By the way, the oxide on the board itself is not fatal. I monitored the availability and prices of these blocks, yes, they exist and cost 500-1500 rubles, but there was only one room per room. The rest differed by one digit. Although I think they would have fit, it just so happened that it was Saturday evening, so a beard loomed with the purchase. I decided to just wash this block and see what happens. And lo and behold, error number one disappeared! We cross out and warn the client that it is advisable to replace the unit. Well, since this block has been in water, it means most likely the others are in the same condition. I start opening everything I see: motor block, hybrid block, mpx block, power managment block
Surprisingly, everything is like new. Either when the Chinese car was in the paint shop, or on the street without a windshield (water couldn’t have gotten in any other way, the car wasn’t heated, in this regard the owner was lucky) these blocks were removed away or stupidly replaced. Well, it’s already easier, especially financially. Okay, let's get to the climate control unit. It is located in the middle, above the SRS unit behind the air duct for the rear passengers' feet, about there
By the way, the airbags are intact, but the steering wheel is not original, apparently the assembly was replaced. So, let's look at the stove block
The oxidation, although not strong, is there. I called my friends for disassembly not far away, they just have such a Prius for disassembly. The required block is present. Great, but in order to avoid having to travel twice, I decided to look at the VVB fan and at the same time remove what was broken. It is located, as I already said, behind the trim in the rear right wing. The control unit, or rather the speed control unit, is located in the air duct nearby and riveted to it. Everything can be disassembled quite simply and quickly, but again, everything is put together in an obscene manner, there are not a lot of bolts. Did he really get hit in the stern? Here's the poor guy...
I turn the impeller by hand and clearly feel a wedge. I apply 12 volts to it - it doesn’t spin, I help with my hand - it gets oily, but it’s very noisy. Well, it’s clear that the water did its job. Only replacement (by the way, I later took it apart, there will be a separate story). I'm on my way to dismantling, here he is a donor
I remove the stove block and the fan, and at the same time collect various fasteners from the floor to screw into the patient
I arrived, installed the fan, started it at different speeds using a scanner, it worked perfectly and the error naturally disappeared. Then I installed the stove block and... nothing. That's not the problem. It was possible to return it, but given the cheap price, there was no point in doing so. Okay, I'm starting to study the circuit and check the signals to the servo drive and the sun sensor. And what’s surprising is that the signals are all going as they should, the mass is present everywhere (this was the main version), but they don’t work. Since access to them is not the easiest, I put off the decision to remove one and look into its guts until the last minute. But there is no choice, we must do it. The easiest way is to remove the motor on the interior/outdoor damper. To do this, I removed all the tubes and plastic in the middle behind the monitor
I unscrewed two screws with a long screwdriver and it’s on my table
The motor is completely rusty. How did I not think of this before??? Now we will have to remove the other two, and this is not easy (at first I thought so). But it wouldn’t be a bad idea to start by getting serviceable ones as replacements. I return to the donor and take them off pretty quickly. Now the same thing happens to my poor guy. The procedure is as follows: first you need to remove the efi and hybrid blocks, which are to the left of the heater body
Then unscrew the M6 bolt that holds the panel from the bottom left
Then unscrew the nut from below, it holds part of the stove, which we will need to move to the left, unscrew the two screws that fasten our part to the rest (well, everything is actually visible there) and, using force, move it as far as possible to the left, so that there is access to drives
Well, another thing, using a short screwdriver, we remove the remaining two motors comfortably and without scratching your hands. I advise you to remember or take a photo of how they originally stood, I later struggled with this a little. We install the correct ones, assemble them, check them, and we’re done. Here, along the way, I screwed the pipe with two M8 bolts, they almost forgot to screw them in there
During the inspection process, another unpleasant point was revealed. The stove fan (which is not at all surprising) turns out to also jam. At first it seemed to work and I didn’t think about it, but then I had to knock on the stove body so that it would start spinning. But there is a specific ambush with it, it comes with this part of the stove, and in order to remove it entirely, it seems that you need to remove the pipe and a bunch of other things. The owner of the car said that we won’t touch it for now. And to be honest, I wasn’t upset.
Let's move on to the sun sensor. In the diagram it is drawn as a photodiode. I don’t know whether it just reacts to light or only to ultraviolet. On the one hand, a voltage of 5 volts is applied to it and, apparently, when the conditions change, it changes the resistance. At least, using a scanner and displaying the current parameters, I selected a resistor so that the value was approximately in the middle of the range (the range, as well as other data, I took from the official manual). Of course, it was possible to change it, but I didn’t find it at that disassembly, and I didn’t want to travel all over the city for it. The client didn’t care, which means I won’t get ahead of my dad. In any case, the error for this sensor disappeared, only the freon pressure remained. As luck would have it, I tried to evacuate the system and lo and behold, it turned out to be sealed! We filled it with freon, turned on the air conditioning - it’s cold!
Well, for dessert, I decided to do a little favor for the owner of the car, clean the tidy. First, I separated it from the top of the torpedo, then carefully disassembled it on the table. This procedure is not complicated
It's all so sad. But it’s okay, I have two assistants
After 15 minutes everything was sparkling and shining
And it looked just great
The only problem that remains is vibration during engine operation. I jacked up the car and inspected it, but alas, I didn’t see anything criminal. Need a lift. So, let's summarize the work done: 1. Conducted an audit of all blocks. 2. Replaced the climate control unit. 3. Replaced three heater servo drives. 4. Fixed the sun sensor error. 5. Cleaned the transmission block. 6. Replaced the battery fan. 7. Cleaned the tidy. 8. Refilled the air conditioner. 9. Restored the fastening of the panel elements. I secured the harnesses. 10. Erased fault codes for all systems, checked the current parameters of the engine and hybrid installation, everything is normal. As a result, the result was a ridiculous amount of 8,500 rubles, including spare parts. Because I care about my clients’ budgets. This is what it looks like – a sick Prius 20.
How to diagnose the error?
Now almost every car has many electronic sensors that transmit information about an existing malfunction to the engine control unit. Based on this, a specific error code is generated, which is needed for diagnosing and eliminating the malfunction.
There are several indicators that indicate different problems:
- If a malfunction is detected in the engine, the Check Engine light appears on the dashboard of your Toyota vehicle.
- The O\D OFF indicator notifies the driver that something is wrong with the automatic transmission.
- If a problem is detected in the passive safety system, the SRS will light up.
- The ABS indicator indicates that the anti-lock braking system is faulty.
- If there is a breakdown in the traction control system, the driver will see a glowing TRC light.
From english:
Decoding the error B1421/21 from Toyota: Throttle / Pedal Position Sensor / Switch “A” Circuit High Input
Make:
Toyota
Code:
B1421 21
Definition:
Throttle/Pedal Position Sensor/Switch "A" Circuit High Input
Description:
Monitor runs whenever the following DTCs are not present: None Either of the following conditions A or B is met: A.Engine switch on (IG): 0.012 seconds or more B.Electronic throttle actuator power: ON
Cause:
- Throttle position sensor (built into throttle body)
- Open in VTA1 circuit
- Open in E2 circuit
- Short between VC and VTA1 circuits
- ECM
Failure Type:
Signal Amplitude
This sub type is used for failures where the control module measures a signal voltage below a specified range but not necessarily a short to ground (eg, low gain).
How to carry out self-diagnosis of a car?
Toyota cars usually have 3 blocks of dynamic connectors: DLC 1, DLC 2 and DLC 3. These blocks can be either under the hood or inside the cabin. It all depends on the year of manufacture of the car. Without a special scanner, you can carry out self-diagnosis of the car. This will require wire. It should be bent like the letter P.
To carry out diagnostics, first of all, you need to turn off the ignition in the car. Next you need to do the following:
- You need to open the hood of Rav 4 and remove the cover from the DLC 1 unit. Diagnostic will be written on the cover.
- There is a list of connectors on this cover.
- The pre-prepared wire must be inserted into the sockets, which are labeled on the cover as TE1 and E1. If the car has a DLC3 connector, then you need TC and CG sockets.
- Close the wire.
Next you need to start the car and check the CHECK indicator. Based on this, the error number can be determined.
It is not difficult to determine the error code. You need to count how many times the indicator flashes at intervals of half a second or less. If the light stops blinking for about 1.5-2.5 seconds, then the next blinking will indicate the second digit. For example, the indicator may blink 2 times with an interval of half a second, then pause for 1.5-2.5 seconds and blink 3 times again. This means error code 23.
There may be a situation when several problems are detected at once. Then there will be more than one code. A pause between flashes of 2.5-4.5 seconds means a transition to the next code.
If the indicator blinks more than 11 times without pauses, then there are no problems with the transmission or engine.
It will be easier for the driver to determine the essence of the problem if there is a special auto scanner for diagnostics. It can be used to configure and diagnose the on-board computer. Without a scanner, you need to decipher error codes yourself using a table.
There are errors mainly related to malfunctions:
- transmissions;
- sensors;
- body components;
- engine;
- electricians.
On Toyota Rav 4, the error code usually consists of five characters, but there are also two-digit ones.
Common mistakes on Toyota Rav 4
| Error code | Decoding |
| c1298 | Detection of this fault code means that the pressure control solenoid device is not functioning properly. It is necessary to check whether the mechanism is intact. If yes, then you need to check the wiring and then the all-wheel drive control module |
| S1201 | This error code is recorded when the engine speed is below the set limit. It is necessary to check the idle speed sensor and diagnose the shafts. It is necessary to check the power unit. |
| P1047 | Code P1047 may appear when a problem is detected in the Valvematic module settings. It is possible that power supply circuit B1 is damaged. |
| P2646 | The detected fault code makes it clear that the VTEC sensor does not receive information about the presence of pressure, and the valve opens |
| P1750 | Code P1750 appears when there is a problem with the brake system control unit. |
| P0138 | Combination P0138 is a sign that the oxygen output level in the first tank has been exceeded. |
| P2757 | When P2757 is detected, you should check the operation of the DSU sensor on the transmission. |
| P1604 | Code P1604 may appear on cars produced in 1992, 1997, 1993, when there was an unsuccessful attempt to start the engine. This can happen for several reasons: |
- the battery is discharged or damaged;
- the ignition switch is faulty;
- the driver uses low-quality fuel;
- the immobilizer does not work correctly;
- the anti-theft system is faulty;
- engine breakdown;
- the filter that affects engine starting is clogged;
- The problem is in the injectors or oxygen sensors.
Decoding the dashboard indicators Toyota Rav4 4th generation
All cars, including the Toyota RAV 4, have many electronic sensors built in that transmit information about an existing malfunction to the engine control unit. Based on this, an error code is generated, which is important for diagnosing and eliminating vehicle malfunctions. A Toyota car service center will help you diagnose car malfunctions and eliminate them. Indicators indicating problems: 1. Check Engine indicator - a malfunction in the engine operation has been detected on the dashboard of a Toyota car. 2. OD OFF indicator - notifies that something is wrong with the automatic transmission. 3. SRS indicator - lights up when a problem is detected in the passive safety system. 4. ABS indicator - indicates that the anti-lock braking system is faulty. 5. A glowing TRC light indicates a breakdown in the traction control system. Toyota RAV 4 cars usually have 3 blocks of dynamic connectors: DLC 1, DLC 2 and DLC 3. These blocks are located under the hood of the car and inside the cabin, depending on the year of manufacture of the crossover. Self-diagnosis of a car can be carried out without a special scanner. For this you need wire. It should be bent like the letter P. First you need to turn off the ignition in the car. Next you need to: 1. Open the hood and remove the cover from the DLC 1 unit. 2. Diagnostic will be written on the cover. 3. Study the list of connectors. 4. Insert the prepared wire into the sockets, which are labeled on the cover as TE1 and E1. 5. If the car has a DLC3 connector, then TC and CG sockets are needed. 6. Close the wire. Next, start the car and check the CHECK indicator. This will help determine the error number, which is not at all difficult. You need to count how many times the indicator flashes at intervals of half a second or a little less. If the light stops flashing for about 1 - 2 seconds, then the next flashes will indicate the second digit. For example, the indicator may flash 3 times with an interval of half a second, then pause for 1 - 2 seconds and flash 4 times again. Therefore the error code is 34.
Sometimes several problems are detected at once and then there will be more than one code. A pause between flashes of 3 - 5 seconds means a transition to the next code. When the indicator blinks more than 10 times without interruption, this means that there are no problems with the transmission or engine. It is recommended to purchase a car diagnostic scanner, which can be used to diagnose and configure the on-board computer. If there is no scanner, then the error codes are deciphered using a table. There are errors, mainly related to faults in the electrical system, transmission, sensors, body components, and engine.
| Item no. | Explanation of the error name | Error code |
| 1 | The presence of this malfunction error indicates that the operation of the pressure control solenoid device is impaired. It is necessary to check the integrity of the mechanism. If it is intact, then you need to check the wiring, and then the all-wheel drive control module. | c1298 |
| 2 | This error code is displayed when the engine speed is below the set limit. It is necessary to check the idle speed sensor and diagnose the shafts, as well as check the power unit. | S1201 |
| 3 | The error may appear when a problem is detected in the Valvematic module settings, the power supply circuit B1 is damaged. | P1047 |
| 4 | The fault code makes it clear that the VTEC sensor does not receive information about the presence of pressure, and the valve opens. | P2646 |
| 5 | The error appears when there is a problem with the brake system control unit. | P1750 |
| 6 | The combination is a signal that the oxygen output level in the first tank has been exceeded. | P0138 |
| 7 | The error indicates that the operation of the DSU sensor on the transmission should be checked. | P2757 |
| 8 | The code appears on cars produced in 1992, 1997, 1993 when an unsuccessful attempt was made to start the engine. This can happen for several reasons: the ignition switch is faulty; the immobilizer is not working correctly; the battery is discharged or damaged; the driver uses low-quality fuel; the anti-theft system is faulty; a breakdown in the engine; a filter that affects engine starting is clogged; a problem in the injectors or oxygen sensors. | P1604 |
| 9 | The error means there is an open circuit on the driver's side. The SRS safety system unit detects this malfunction and requires diagnostics to correct it. | B1811 |
After diagnostics, you need to erase the fault code. This can be done by following the following algorithm:
- Turn on the ignition system.
- Close the contacts called TC and E1, after which the control unit memory will be reset.
- The driver needs to quickly press the brake pedal for 5 seconds (at least 10 times).
- Next you need to check the indicator. It should flash every second.
- Turn off the ignition system, then disconnect the jumpers from the pins. To ensure that the trouble code is cleared correctly, you need to check that the anti-lock braking system indicator on the dashboard is not illuminated. If it doesn't light up, then everything is correct.
You can also reset error codes using technical means. For example, a laptop can help with this. This will require a special program designed for these purposes.
How can I reset the error?
After diagnostics, you need to erase the fault code. This can be done by following the following step-by-step algorithm:
- Turn on the ignition system.
- Close the contacts called TC and E1. After this, the control unit memory will be reset to zero.
- The driver needs to quickly press the brake pedal for 3 seconds (at least 8 times).
- Next you need to check the indicator. It should flash every 0.5 seconds
- Turn off the ignition system, then disconnect the jumpers from the pins. To ensure that the trouble code is cleared correctly, you need to check that the anti-lock braking system indicator on the dashboard is not illuminated. If it doesn't light up, then everything is correct.
You can also reset error codes using technical means. For example, a laptop can help with this. This will require a special program designed for these purposes.
This article describes the most common error codes. If there is an error that is not in the material, we recommend contacting the service.