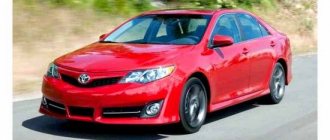
RAV4 represents a family of full-size, compact crossovers from the Japanese brand Toyota. The model was first put into mass production in 1994. Initially, the jeep was aimed at young people who love active recreation, in fact, this is confirmed by the name of the model. Translated from English it means “active wheels”, and the digital symbol “4” means permanent all-wheel drive.
The variations in the manufacture of the body part are very diverse: two-three-five-door five-seater SUV with a 4 × 2 or 4 × 4 wheel arrangement. The vehicle layout is front-engine, front-wheel drive with rear-wheel drive connected via an electric coupling. The range of power units is not very pleasing to the buyer; there are only two types: petrol and diesel with volumes of 2.0 and 2.4 liters, respectively.
In view of the fact that we quite often receive questions about the specifics of installing an outboard bearing, using the Toyota Rav 4 as an example, we will consider step-by-step diagnostics with subsequent replacement.
How the RAV 4 outboard bearing works and works
An outboard bearing is a classic type of roller bearing that is commonly installed on cars. The external shape is in the form of a regular circle. The material used for manufacturing is a metal alloy with special chemical additives to increase strength. The suspension bearing is attached to the body part using a metal protective housing and two bolts size “17”. The permanent location is the connecting sections of two driveshafts under the bottom of the car.
Important! The principle of operation is to transfer the torque as completely as possible from the first cardan to the second. As a secondary function, the preservation of the geometry of the articulated drive structure should be specified.
Toyota RAV4 2.0 suspension bearing faults
In principle, there are not many faults with an outboard bearing, since this element is quite simple and does not have a large number of components. In addition, outboard bearings have the following characteristics:
- resistance to high temperatures,
- oxidation resistance,
- high strength,
- reliability of design, etc.
So, let's go over the main faults: Wear of the internal components of the bearing. This is accompanied by the presence of a hum, rumble, crunching sound emanating directly from the suspension. Such a malfunction occurs due to several reasons, including natural aging, violation of the integrity of the bearing body, corrosion processes, deterioration of the lubricant, etc. Violation of the integrity of the bearing body. This malfunction may occur in rare cases. As a rule, it is caused by serious mechanical damage, for example, impacts on the bearing. However, especially on special equipment and off-road vehicles operated in difficult conditions, the bearing can become deformed due to sudden temperature changes (when passing through fords and the like).
Damage to the integrity of the bearing housing. The reasons why the bearing housing becomes unusable are the same as in the previous case. This is a serious problem, since the holding function of the bearing is not fully performed.
Wear of bearing sealing elements. This malfunction is indicated by strong vibrations transmitted to the car body from the driveshaft. This happens most often due to natural obsolescence and exposure to negative environmental factors. Regardless of whether the outboard bearing is faulty, our specialists will help you get it up and running or replace it.
The concept and principle of operation of the crosspiece on the Toyota Rav 4
The crosspiece of any car, as well as Toyota, is part of a common system called the chassis. Consists of a cardan shaft, a suspension bearing, a splined gearbox shaft, and a rear axle gearbox.
The external shape of the cross is cruciform. The material used is a special metal alloy. The crosspiece structurally consists of several parts: base, oil seals, rotation bearings, removable pin caps. The principle of operation is to transmit torque from the gearbox shaft to the cardan and rear axle gearbox. The permanent location is the connecting areas of cardans and adjacent parts.
Replacing the outboard bearing Toyota RAV4 2.0 liters
The outboard bearing is replaced when it cannot be repaired. At the same time, our experts recommend not to resort to repairing bearings of this type, because replacing them is not too expensive, but they guarantee stable and high-quality operation of the element.
There are no big difficulties when replacing a suspended one. The main thing is to remove the driveshaft, remove the bearing from the joint and install a new one in place. However, the treatment of the bearing itself before installation and its inspection plays an important role. Here are some rules for installing a bearing:
- The suspension bearing is installed exclusively in place of the old one, otherwise a slight misalignment of the shaft articulation may occur, which over time will lead to unbalancing of the unit.
- Before installation, be sure to check the new bearing for noise and ease of rotation; if you suspect that something is wrong, it is best to contact the supplier and request a replacement part.
- During the installation process, be sure to lubricate the new part - this will significantly extend the life of the bearing, and also during operation, monitor the lubrication and update as necessary, then the element will last much longer.
- When attaching the bearing housing to the bottom of the car, treat the fasteners with lubricant - this will simplify future work on removing the suspension.
- It is advisable to lubricate the rubber seal with silicone grease and repeat this procedure as necessary; remember that the condition of the rubber seal is the key to your comfortable ride, the absence of noise and vibration.
Instructions on how to replace the RAV4 crosspiece
Important! Despite the fact that the design of the mechanism is quite simple and intuitive, it is not recommended to try to fix the breakdown yourself. Even the slightest inaccuracy leads to undesirable consequences. There are cases when service technicians had to eliminate errors made by third parties. To avoid similar incidents in the future, it is recommended to have it serviced only at service centers using diagnostic equipment.
Since the entire main assembly is located under the bottom of the car, the master initially uses a lift to provide access to the mechanism.
- The regulations do not provide a clear algorithm for dismantling the hinge support. Therefore, the practice has developed of unscrewing the fasteners from the rear axle;
- places a movable support under the back of the cardan to support the mechanism and avoid damage;
- in the middle part of the hinge, unscrew the pressure bearing, which is attached to the body with two bolts;
- in the front part, the technician unscrews the four bolts securing the front driveshaft and the gearbox eye;
This completes the procedure for dismantling the hinge support. The master removes it from under the car and clamps it in a stationary vice.
- Since all the crosspieces in the cardan shaft must be replaced, the master presses each one out of the seat one by one. Only two crosses. For convenience, a three-fingered puller is used. If it is not available, then you can take a substitute in the form of a metal spacer;
- After dismantling each pin and crosspiece, the seat is inspected and the presence of signs of wear, damage, and deformation is checked. A decision is made on the merits;
- the master applies a thin layer of lubricant, presses each finger of the cross in turn, using the same puller;
- After final assembly, if there are no other breakdowns, the cardan is sent for balancing. This procedure is mandatory because new equipment has been installed. Balancing will help avoid beating, vibration, and align the geometry of the structure.
The assembled part is installed and tested for functionality. It is recommended to drive the car at medium and high speeds to study the runout.
Removing and disassembling the propeller shaft
Procedures for removing and disassembling the driveshaft should only be carried out in a specialized car service center using special equipment. The qualification of the master must be high enough to carry out such operations.
Removing the knot is not too difficult and, as a rule, this procedure takes no more than half an hour. Experts recommend that all operations with the driveshaft be carried out exclusively in the removed state, since then the technician has maximum access to all elements of the shaft.
The driveshaft is disassembled, most often, in several cases:
- replacing the suspension bearing,
- replacing crosspieces,
- replacing cups of crosspieces,
- replacement of cardan components.
When disassembling, you must follow several rules: Mark the position of the cardan before disassembling it, otherwise when reassembling you will get an unbalanced shaft. Simply apply marks indicating the position of the component parts relative to each other.
Use extreme caution when working on the shaft. The slightest damage to the cardan body can cause the part to lose balance. Accordingly, the operation of the shaft will be incorrect.
Follow all vehicle manufacturer recommendations for driveshaft maintenance and repair. This is an extremely serious element that determines the vehicle’s ability to move.
Toyota Rav 4 driveshaft repair
The poor quality of Russian roads, garbage and aggressive chemicals lead to premature wear of the driveshaft on Toyota RAV 4 SUVs. As a rule, official dealers offer a complete replacement of the unit, which is not always justified from an economic point of view: in most cases the part can be restored. provides repair services for driveshafts on cars of all makes and models. We offer comprehensive solutions for restoring the performance of shafts in case of any breakdowns.
Repairing cardan gears on this model requires complex technological operations that only qualified craftsmen can do. It is necessary to dismantle the element, perform troubleshooting, carry out diagnostics and a thorough visual inspection. This requires specialized equipment, practical skills and knowledge of the design features of the Toyota RAV4 transmission.
Thus, the crosspiece on this model is fixed in the seats using local deformation of the metal (punching), so new elements should be fastened in the same way. Today, some organizations offer services for replacing it by welding, and such repairs entail certain defects.
Welded fastening of the assembly can lead to a number of negative aspects:
- inaccurate alignment of crosspieces and the appearance of runout;
- violation of the geometry of the shaft caused by thermal effects (due to misalignment of the axes of the holes), which leads to misalignment of the bearing and a sharp decrease in its service life;
- the appearance of inhomogeneous formations on the surface of the forks (the structure of the metal changes), which makes it impossible to subsequently replace the crosspieces by punching;
- unreliable fastening of the crosspieces, which can lead to misalignment.
Our company has the necessary technical base and sufficient experience to restore the functionality of elements on all modifications of the famous Japanese SUV. We carry out thorough diagnostics, repairs and subsequent balancing of units, bringing them to the condition they had after factory assembly.
Rav 4
Toyota Rav 4 cars suffer from one significant drawback. After the odometer shows a figure from 40 to 70,000 total mileage, a hum begins in the viscous coupling bearing.
Changing the oil seal will prevent further moisture and dirt from entering the Rav 4 gearbox. But the clutch bearing of the Rav 4 rear gearbox needs to be replaced. It includes two stages:
- dismantling the small and large rings;
- installation of original parts from the manufacturer.
If the problem is not corrected immediately, you will have to completely replace the rear axle gearbox.
Subtleties of gearbox maintenance
For Rav 4 cars, the NSK part with dimensions of 120*95*17 mm is most often suitable. But there are cars in which the Rav 4 rear gearbox clutch bearing has a non-standard size of 120*95*13 mm. It is difficult to find and will take time to ship to order.
That is why, when making repairs yourself, it is recommended to look for the part in advance.
Several manufacturers produce bearings measuring 120*95*13 mm:
New parts do not have a rubber ring. In order for the part to hold tightly, it is placed on sealant compounds.
In addition, Toyota Rav 4 cars are equipped with couplings for large bearings of 13 and 17 mm, which differ by year of manufacture. To avoid mistakes, the selection of parts should be made according to the VIN number.
For example, if a Rav 4 produced in 2000 is equipped with a clutch numbered 41303-42020 with a bearing 120x95x17 mm, the part numbers will be as follows:
- 90363-95003 for large,
- 90363-65002 for the small one.
And when installing the rear gear oil seal, you may need 450 ml of 75W-90 GL5 gear oil.
Service station technicians say that when a hum occurs in the viscous coupling, it is the large bearing that fails.
In most cases, the failure occurred due to the vehicle crossing deep puddles or small rivers.
Description of replacing the Rav4 gearbox bearing
To replace the Rav 4 rear gearbox bearing you will need a pneumatic gun and a press.
- To begin with, the cardan is removed, moved to the side and suspended. After this, the clutch is unscrewed from the gearbox and the clutch engagement block is disconnected, as well as the rubber tube.
- The coupling must be carefully disconnected from the main mechanism and the drive removed. In some cases, oil leakage may occur. If such a situation arises during the replacement process, simply add oil upon completion of work.
Changing the gearbox seal on Rav 4
Replacing the oil seal is quite easy, but requires knowledge of certain details. The work includes several stages:
- Before starting the replacement, drain the oil and unscrew the filler plug located on the right. And only then unscrew the drain plug on the left.
Conclusion
Rav 4 crossovers with all-wheel drive may cause noise in the rear axle gearbox bearing after overcoming deep puddles. Close attention to these details should be paid, starting from the fourth maintenance. Noise during driving appears when driving over 40 thousand kilometers. Replacing a new gearbox gasket will save you from installing a new mechanism. The work is carried out independently using available tools.
Front drive shaft assembly (for single axle drive) REMOVAL
Drain U140F Automatic Transmission Fluid (See Page Click Here).
Drain U241E Automatic Transmission Fluid (See page Click here).
Drain transmission oil for E352F/E359F (See page Click here).
Drain transmission oil for E352 (See page Click here).
Drain the transmission oil for EA64F (See page Click here).
Using SST and a hammer, open the nut part.
Special Tool (SST): 09930-00010
Loosen the capped part of the nut completely, otherwise the drive shaft screw may be damaged.
With the brake applied, remove the wheel hub lock nut.
Disconnect the sensor connector.
Remove the sensor retainer (A), bolt (B), and sensor clamp (C).
Remove the sensor retainer (D), bolt (E), and sensor clamp (F).
Remove the bolt and remove the sensor housing from the knuckle.
The procedure for performing the work is the same as for the left side.
| 7. DISCONNECT THE FRONT LEFT DISC BRAKE WHEEL BRAKE CYLINDER ASSEMBLY |
Remove the 3 bolts and remove the cylinder.
| 8. DISCONNECT THE FRONT RIGHT DISC BRAKE WHEEL BRAKE CYLINDER ASSEMBLY |
The procedure for performing the work is the same as for the left side.
| 9. REMOVE LEFT FRONT STABILIZER MOUNT ASSEMBLY |
Unscrew the 2 nuts and remove the stabilizer link.
| 11. DISCONNECT LOWER LEFT ARM NO. 1 FRONT SUSPENSION ARM ASSEMBLY |
Remove the bolt and unscrew the 2 nuts.
Disconnect the lower arm from the ball joint.
The procedure for performing the work is the same as for the left side.
| 13. DISCONNECT THE STEERING KNUCK FROM THE LEFT WHEEL HUB |
Mark the drive shaft and wheel hub.
Do not mark with your beard.
Using a plastic-coated hammer, remove the steering knuckle from the wheel hub.
- Do not excessively push the drive shaft out of the axle assembly.
Remove the cotter pin and castle nut.
Using SST, disconnect the rod end from the steering knuckle.
The procedure for performing the work is the same as for the left side.
| 17. REMOVE LEFT FRONT DRIVE SHAFT ASSEMBLY |
Using SST, remove the front drive shaft.
Special Tool (SST): 09520-01010 09520-24010 (09520-32040)
- Be careful not to damage the transmission housing seal, inner joint boot, and drive shaft dust boot.
- Be careful not to drop the drive shaft.
Set the brass rod to position (1) as shown in the figure and use a hammer to remove the drive shaft.
- Be careful not to damage the seal.
- Be careful not to damage the drive shaft boot.
- Do not allow the drive shaft to fall.
Squeeze the ends of the circlip and remove the circlip from the bearing bracket.
Remove the bearing bracket bolt and remove the front drive shaft from the bearing bracket.
- Be careful not to damage the seal.
- Be careful not to damage the case.
- Do not allow the drive shaft to fall.
The wheel bearing can be damaged by the weight of the vehicle, for example, when the vehicle is driven with the drive shaft removed. Accordingly, if there is an urgent need to transfer the vehicle's weight to the wheel bearing, first support it with SST.
Replacing the front wheel bearing in Toyota Rav 4 (3rd generation), photo and video tutorial
We have a Toyota RAV 4 car under repair, 3rd generation, 2011, mileage 160 thousand km, the front wheel bearing needs to be replaced. We will show you a detailed photo and video lesson on how to do it yourself in a garage.
The front left wheel bearing is noisy. We raise the car, unscrew the wheel, spray all the threaded connections we need with penetrating liquid WD-40, then wait 5 minutes and get to work. We insert a strong screwdriver into the ventilation hole of the brake disc, take a 30-point twelve-sided head and unscrew the drive nut (before this, you should flare it a little).
Using a 17mm socket, unscrew the two caliper bracket fasteners:
Unscrew the brake hose mounting bolt:
Then unscrew the ABS sensor with a 10mm head. Remove the caliper and hang it by the spring. Use a 19mm socket to loosen the steering tip:
We remove the brake disc, since it was stuck to us and did not want to be removed using standard methods, we had to screw M8 bolts into special holes, tighten each of them in turn several turns until the brake disc comes off its seat:
Now you can apply two or three sharp blows to the trunnion of the tip:
Using a 22mm socket, unscrew both bolts securing the rack:
We unscrew the ball joint from below, there we have two nuts and one bolt, for this we use a 17 socket:
After this, you can knock out the bearing along with the hub. We do this in weight, through a mandrel, which we use as a head from a set of tools:
We have a new wheel bearing from Zekkert, order number RL-1484, with a magnetic ring for the ABS sensor. We clean the seat, it is convenient to do this with a brush with metal bristles. Then we lubricate it with copper grease so that in the future we will not have problems with parts sticking. We perform assembly in the reverse order; I also recommend lubricating all threaded connections with copper grease.
Video of replacing the front wheel bearing in Toyota Rav 4
Backup video on how to replace the front wheel bearing in Toyota Rav 4:
Operating principle and replacement of viscous coupling bearing
The principle of operation of the clutch in a radiator fan
Watch the video and everything will become clear:
The viscous coupling rotates the cooling shaft thanks to a special fluid. It is round in shape and filled with lubricant. This part regulates the operation of the fan by rotating the crankshaft, which transmits energy to the first clutch shaft. As you accelerate, the viscosity of the silicone increases, as a result of which the assembly is blocked and the second shaft begins to rotate. Due to its high reliability and safety, Viscomfuta is used on almost all engines. For example, it is equipped with a special protective mechanism that blocks the operation of the unit if it is accidentally hit by a hand.
Why should you turn to us to replace your outboard bearing?
Our service center services and replaces outboard bearings with a guarantee. Here are some of the main reasons why you should contact us:
- We have extensive experience, which allows us to quickly solve any problems and carry out the most complex replacements, regardless of what type of bearing is used on your car.
- We work with a wide variety of car models and brands, including large trucks and special equipment, so you can confidently contact us with both rear-wheel drive compact cars and all-wheel drive trucks.
- Our workshop is equipped with the most modern equipment, including balancing stands, removable tools, equipment for repairing components, etc.
- In our work, we always focus on the client, which is expressed, for example, in the possibility of your presence during diagnostics and repairs - you can see for yourself what is happening with your car.
- We provide a guarantee for all types of work, regardless of their specificity and complexity, so you can be calm about the further functioning of your vehicle.
- We work with both individuals and organizations and, of course, provide a full package of necessary documents (work orders, checks, reporting, etc.).
- Just call our specialists and you can get advice on any issue that interests you. Our manager will also help you make an appointment with a specialist at any time convenient for you.

