Despite the superficial attitude of some crossover owners towards continuously variable transmissions, the owners of the 2015 Toyota RAV4 with the K111/K112 series CVT have nothing to complain about. Except for the relatively frequent oil changes in the CVT. When to change the fluid in the Toyota RAV 4 variator, which one is better to pour, how to replace the variator filter, we’ll figure it out right now.
Features of changing the oil in the Toyota RAV 4 variator
The operating rules of the vehicle provide for the timing of changing fluids in the units. It is not necessary to change the oil for the Toyota RAV 4 variator according to the maintenance instructions for this model. Therefore, there are recommendations to monitor this yourself after the warranty period. It is advisable not to delay the frequency of this procedure.
This especially applies to cars that are purchased after being used by other people. Professionals say that a vehicle purchased secondhand requires a complete replacement of fluids in all units, including the variator. After all, there is no guaranteed information about operating conditions and quality of service.
There are two ways to change the oil in the Toyota RAV 4 variator: partially or completely.
It is preferable to carry out guaranteed maintenance of the node, i.e. complete replacement. It is better to contact the specialists at the service station for this. Servicing will increase the durability of the unit and significantly affect driving comfort.
The technology for replacing fluid in the RAV 4 variator differs from carrying out a similar procedure in an automatic gearbox. The only thing they have in common is the need to remove the pallet.
A high-quality replacement of lubricant in a CVT gearbox includes:
- removal of waste liquid;
- dismantling the pallet;
- washing the filter (coarse);
- cleaning the magnets in the tray;
- replacing the filter (fine);
- washing and purging the cooling circuit structure.
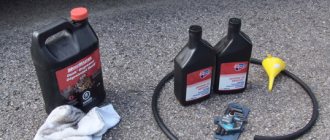
Replacing the lubricant in the variator will require from 5 to 9 liters of fluid, depending on the car model and the chosen replacement method. It is best to prepare two 5-liter bottles. If you are replacing it yourself, you will need an inspection hole or a lifting mechanism.
How to change the oil on a 5th generation Toyota 5Runner
4th generation 4th generation oil change2018-06-112018-06-19https: //trail4runner.com/wp-content/uploads/2017/08/Trail_4R_Logo-4.pngTrail4R. com - 5th generation 4Runner Modshttps: //trail4runner.com/wp-content/uploads/2018/06/5th_gen_4runner_oil_change_01.jpg200px200px
Step by Step 5th Generation 4Runner Oil Change
Oil change
How to change a 5th generation Toyota 4Runner
There are many different types of maintenance that you can perform on a vehicle, but perhaps the most important is changing the oil in your car. If you want a reliable and long-lasting car, I would suggest changing the oil every 5,000 miles. You may not have to change it quite often with synthetic oil, but it's worth it. You really should only use synthetic oil like Mobil 1. Although the 4Runner is pretty bulletproof, oil changes are necessary and will only help in a smoother, longer lasting car.
WHAT YOU NEED
There are some key components that you will need to change the oil on your 5th gen 4th gen. Here is a list of everything you will need:
HOW TO CHANGE YOUR OIL - STEP BY STEP
Step 1 - Good Location
The first step is to find a place to change the oil in your car. I can fit under my 4Runner without any ramps or lifts; however, if you need or prefer to lift the vehicle, do so accordingly.
Step 2 - Get some latex gloves
Prepare to change your 4Runner's oil by wearing latex gloves. While it's not necessary, I think it's best to try to keep your hands as clean of oils and grease as possible. Using gloves also helps with quick cleanup because sometimes grease can be very difficult to come off of your hands.
Step 3 - Remove the skid plate cover
If your 4Runner is equipped with a front skid plate, you will need to remove a small cover located on the skid plate which will give you access to the oil drain plug.
You will need to remove this cover using a 12mm socket and ratchet. After removing the bolts, install a small skid plate that covers the oil drain plug to the side. I suggest placing the bolts on the top of this small skid plate so you can easily find them once it's time to put that cap back in place.
Step 4 - Remove the Oil Drain Plug
Prepare to remove the oil drain plug and drain the oil from the 4Runner. To do this, you will need a container to catch any spilled oil below. Although some oil is lost due to the operation of the vehicle, plan to lose at least 6.6 quarts (as this is the amount you put in).
After placing a container to catch the oil under the drain plug, use a 14mm socket and ratchet to unscrew the drain plug. Once the drain plug is loose enough, unscrew it by hand.
Be sure to hold onto the drain plug and try not to drop it into the oil container. Once you remove the drain plug, the oil will flow out quickly, so be prepared to move your hand out of the way and let the oil drain into the container.
In the meantime, you can go ahead and wipe any dirt off the drain plug with a clean microfiber cloth. After that, set the drain plug aside for later.
Step 5 - Remove the Front Skid Plate and Cover
While the oil is draining, go ahead and remove the front skid plate and skid plate cover. You may be asking why you should do this, and the simple reason is to change the oil filter. You will not have access to the oil filter unless you remove the front skid plate and skid plate cover.
To remove the cover, you will need a 10mm socket and a ratchet to remove five (5) bolts. There is also one (1) push pin that you will need to remove. Once you remove the cover, you will have access to remove all four (4) bolts that secure the skid plate.
To remove these bolts, use a 12mm socket and ratchet. Tips that are very important: First remove the front bolts from the skid plate. After this, you will need to hold the skid plate while removing the two back ones at the same time. If you don't hold the base plate when removing the last bolt, the base plate will fall and hit you. Although it doesn't weigh too much, it probably won't feel good. The front of the skid plate is on a hinge that releases.
Take your time and rotate the back of the skid plate toward the ground to remove the skid plate from the hinge. Once you remove the skid plate, install it to the side with the bolts or side by side.
Step 6 - Remove the Oil Filter
At this point, you'll want to remove the oil filter - which I think is the most difficult part of the whole process, but is still quite simple. Before removing the filter, reinstall the drain plug and the small skid plate that covers the drain plug. After this, move the container you are using to catch the oil so that it is under the oil filter.
Using a 3/8-inch extension ratchet, remove the metal plug from the oil filter. Some oil will drip, so make sure you have a container to catch it. Your new oil filter should come with a plastic tool to drain the oil later. All you have to do is insert it into the base of the filter. The oil should then drain out. Wait for the oil to drain and remove the plastic drain tool. Along with removing the plastic drain tool, a small O-ring should also appear. It's trash, so throw away the drain tool and the small O-ring.
Now you can remove the filter itself. Use a 64mm filter wrench and remove the filter housing. Be sure to pay attention to the small metal latch on the side of the case. This tab should be aligned in the same location when you turn the filter back on. After unscrewing the filter completely, remove the old filter from the housing and discard it.
There is also an O-ring on the body that needs to be removed. You don't need any prying tools and you can easily remove this o-ring by hand. I recommend doing this by hand as you don't want to damage the plastic threads.
Step 7 - New O-ring from the filter box
Take the new O-ring from the filter box and apply a small amount of oil to it. After that, place it on the filter housing. Make sure it fits all the way around. Then place the new filter into the housing. You don't have to worry about orientation as there is no right way.
Step 8 - Screw the filter assembly back into
Be sure to continue tightening until the metal indicator tab returns to its original position as it was before removing the filter housing. Now install the small O-ring into the filter housing by first coating it with a little oil and then placing the O-ring in place in the drain area of the filter housing. After this, you can install the metal drain plug into the filter housing. You don't need to draw this out too long, so just make sure it's neat.
Step 9 - Oil Change
After checking that the drain plug and oil filter are back in place, install 6.6 quarts of 0W-20 oil in your 4Runner. Use a funnel for this as you don't want to spill any oil on the engine.
Step 10 - Check for Leaks
Once all 6.6 quarts of oil have been installed, check around the drain plug and filter housing to make sure there are no leaks. If you can't spot any, you can go ahead and install the skid plate and skid plate cover.
Step 11 - Resetting the Maintenance Light
Now that you have completed the actual oil change procedure, you need to reset your maintenance light so you know when it needs to be changed. To do this you will need your car key.
Turn the key to accessory mode (as far as the key will go without actually starting the car).
Make sure your odometer shows trip A. If it doesn't, press the knob to the right of the speedometer to move to trip A.
After checking for shutdown A, turn the key to the off position. Press and hold the odometer button and then return the key to accessory mode. The screen should show factory reset.
Continue holding the odometer button until the maintenance light is reset. After that, you can drive another 5,000 miles.
CONCLUSION
While there are some vehicles that make oil changes a little easier, the 4Runner's oil can be changed relatively easily and in a short amount of time.
Since the 4Runner is capable of working in some pretty tight places, you'll need to take the time to maintain your vehicle as best as possible and avoid potential damage.
Taking the time to change your oil every 5,000 miles with a quality synthetic like Mobil 1 will only improve your vehicle's performance, durability and reliability on the track and on the open road.
The dirty truth about how often you need to change your oil
Changing your oil is just one of the many small hassles that come with car ownership, but they are essential to keeping your car in good shape. Additionally, if you don't change your oil on time and with the right products, it could void your vehicle's warranty.
However, experts now say that the standard oil change interval of every three months—or every 3,000 miles (4,828 kilometers)—is old news, and most cars can only go a little further before needing an oil change. If you're changing your oil more often than necessary, this will not help your car. This doesn't hurt either, but you're wasting money, time and resources. Remember also that throwing away oil that is still usable puts a strain on the environment.
There are four main "recommended" oil change intervals, depending on factors specific to you and your vehicle:
- Every 1,000 miles (1,609 kilometers) or every six months
- Every 3,000 miles (4,828 kilometers)
- Every 5,000–7,500 miles (8,046–12,070 kilometers)
- Every 10,000–15,000 miles or every six months (16,093–24,140 kilometers)
Let's look at the circumstances for each.
Change every 1000 miles
First, if some experts say 3,000 miles is too often, why do those same experts recommend intervals every 1,000 miles? It all depends on your driving habits. If your driving pattern consists primarily of trips of 10 miles or less, you should consider changing your oil more frequently than every 3,000 miles for two reasons.
- Unless you drive for long periods of time at high, steady speeds (like on the highway), your engine doesn't get hot enough to boil off the condensation that builds up in the system. This can cause the oil to break down more quickly.
- Most of the wear and tear on your engine happens when you start your car, and unless you drive very far, most of your driving is very hard on your engine. More frequent oil changes will help minimize the damage.
In short, if you drive your car infrequently because the mileage is much less than the recommended service interval, you should still change the oil twice a year since oil degrades over time.
change more often
Some auto experts believe the 3,000-mile interval is actually beneficial for oil change shops because the more often you come in, the more money they make. However, if you have an older model car that recommends this interval, you're probably better off sticking with it.
Scientific American is suitable for longer intervals, especially every 5,000 to 7,500 miles, based on the assumption that this is what most car owner's manuals recommend. Intervals between 5,000 and 7,500 miles are becoming more common, although some manufacturers recommend taking your driving style into account as well. and habits.
For example, if your car is fairly new and you typically drive for 20 minutes or more at fairly steady speeds (as opposed to stopping and cruising while driving), you're a prime candidate for extending the time between oil changes. However, if your car older, it is better to adhere to the manufacturer's recommended maintenance schedule.
Change every 10,000 miles
If your vehicle's manufacturer recommends synthetic oil, or if you decide to make the switch, you could go up to 10,000 miles or more between oil changes. Although synthetic oil is much more expensive than conventional oil, it has more benefits. It works better than regular oil (see "It's Interesting," below) and is better for the environment.
Opinion differs, however, on whether the upgrade is worth it. While some experts suggest doing it in most cases, Consumer Reports says that, as a general rule, you shouldn't upgrade to a synthetic unless your vehicle needs it. If you frequently tow heavy loads, synthetic oil can help reduce the strain on your engine. If you have a model that is known to be prone to sludge problems (that is, when your engine is clogged with degraded oil residue), synthetic oil can help solve these problems and extend the life of your engine.
What do these lights on the dashboard mean?
It's best to keep track of the miles you drive between oil changes, although some cars make this easier with an indicator that tells you it's time to go to the store, as part of what's called an oil life monitoring system. These systems track your mileage and also use data of your driving, which are analyzed by your car's computer to determine when your car needs an oil change. When the light comes on, it's best to change the oil as soon as possible, but it doesn't have to be urgent.
If your vehicle has an oil life monitoring system, please note that this light is different from the oil pressure light, which lights up on the dashboard if your vehicle's oil is not flowing properly due to low levels, a faulty oil pump, leaks in the system or some other issue. Learn the difference between the two turn signals because if the oil pressure light comes on, you need to stop driving as soon as possible to avoid engine damage.
Get into the habit of checking your oil at least once a month to make sure your car isn't leaking or burning oil. If the level is low, add oil. Good oil should be a clear brown-black color, although the Automobile Association of America warns that color is not the only indicator of oil life. If the oil is cloudy or opaque, it may be time for a change, and if it's milky, your engine may be leaking coolant. If your car has one of the above oil monitoring systems, you may not have a dipstick to check your oil.
Moral of the story? If you are unsure how often to change your oil or how to check your oil between oil changes, consult your owner's manual. These habits will help ensure the longevity of your engine.
,
Oil change intervals
The variator uses a special type of oil, because The very principle of operation of this unit is not similar to conventional automatic transmissions. Such a product is marked with the letters “CVT”, which in translation from English. language means “continuously variable transmission”.
The properties of the lubricant differ significantly from ordinary oil.
According to the recommendations of professionals, the lubricant in CVT gearboxes should be changed no later than every 30,000-40,000 km on the speedometer. It's better to change a little earlier.
With an average load on the car, this mileage corresponds to 3 years of operation.
The owner determines the frequency of fluid changes independently, but it is recommended not to exceed 45 thousand km.
Signals to change the lubricant:
- The mileage has reached the limit for replacement (45,000 km).
- The color of the oil has changed significantly.
- An unpleasant odor appeared.
- A solid mechanical suspension was formed.
The vehicle's controllability depends on timely work carried out.
What kind of oil should I pour into the variator? Select ATF.
For a long time, domestic motorists avoided a continuously variable transmission or simply a variator. But recently, the situation in the automobile market has begun to change, if not radically, then at least noticeably: more and more often, motorists are choosing car models with CVT. This trend has emerged due to two main factors: more and more famous manufacturers of transport equipment began to equip passenger cars and SUVs with CVTs; Today, this type of gearbox has been almost completely studied, and the main advantages and disadvantages of CVT are known.
Specialists and entire workshops regularly appear offering their services for the repair and maintenance of continuously variable transmissions. Getting parts, consumables and components for it is no longer a problem even in a small city.
Is it necessary to change the oil?
After 30-40 thousand kilometers traveled, the oil begins to lose its ability to effectively perform its tasks. The intensity of the loss of properties is largely related to the unfavorable conditions listed above. That is, the more often and more aggressively a car is used, the faster the ATF becomes unusable. It becomes contaminated with metal shavings - a product of wear and tear on the mechanical parts of the box. Deterioration of oil quality has a destructive effect on the components of the CVT - belt, pulleys.
And if you consider that the variator has a hydraulic unit - one of the most expensive parts - then the oil change must be carried out not only in a timely manner, but also responsibly. Refer to the original oils and all the instructions specified by the component manufacturer in the instructions. You may have noticed that ATF fluid may be red or green in color. You cannot mix two substances of different colors. The best oil for your car's gearbox is the product indicated in the service book. This is where all acceptable brands are listed.
Video about proper fluid replacement
At the same time as replacing the fluid, experts recommend changing the filters and cleaning the magnets installed in the pan of the unit. The filter in the iron casing - coarse cleaning - is enough to rinse the first time, but during the next replacement it is best to replace it with a new one. The paper filter element - fine filter - should be changed each time at the same time as the ATF. It is best to clean the magnets that catch metal shavings thoroughly.
| Coarse filter | Fine filter |
How much and what kind of oil to fill
In 2010, the Toyota RAV 4 with a CVT transmission first appeared on the European market. In some models, Japanese manufacturers supplied a specialized gearbox with the proprietary Aisin variator. Car enthusiasts highly appreciate these options.
I liked the dynamic acceleration, economical fuel consumption, smooth running, high efficiency, ease of control.
But if you don’t change the oil in a timely manner, the variator won’t reach 100 thousand.
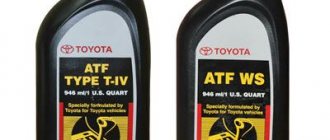
The ideal lubricant for the Aisin unit is considered to be Toyota CVT Fluid TC or TOYOTA TC (08886-02105). These are original oils for cars of the specified brand.
Some RAV 4 owners use materials with a different marking, often CVT Fluid FE (08886-02505), which is categorically not recommended by professionals. The specified technical fluid is characterized as gasoline-saving, which will be superfluous for the Toyota RAV 4.
The amount of oil poured directly depends on the year of manufacture of the car and the chosen method of change. In case of a partial procedure, it is recommended to replace the drained volume plus 300 g. When completely changing the lubricant, you will need two 5-liter bottles, because... the total volume of the variator is 8-9 liters.
Weaknesses, advantages and disadvantages of the Toyota Corolla Fielder
Toyota Corolla in the E140 body is the tenth generation of cars produced under this name, production of which began in 2006 and ended in 2012. During its production, the car had different names for different markets. For example, for Europe, cars of this model in the hatchback body were delivered under the name Auris, in the sedan - Axio, and in the station wagon they received the beautiful name Fielder, while for Australia they bore the familiar name Corolla. But different names did not change the essence of the car, so their advantages and disadvantages are absolutely the same. Like the previous generation, the Corolla in the E140 body was built on the Toyota MC platform, which actually transferred all the weak points of the previous generation to the new car. We will tell you further about exactly what shortcomings “settled” in the 10th generation Corolla Fielder.
Specifications
But, before listing the pros and cons of this machine, we will describe its main technical characteristics:
- Engine: in-line, 4-cylinder;
- Working volume: 1.5 or 1.8 l.*;
- Power: 105 or 110 hp for 1.5-liter, 125 or 136 hp. for 1.8-liter*;
- Transmission: 5 manual transmission or variator*;
- Body: station wagon;
- Number of doors: 5;
- Drive: front or full*;
- Fuel consumption (mixed mode): 6.2 l/100 km;
- Tank volume: 55 l.;
- Ground clearance: 165 mm;
- Dimensions (LxWxH): 4409x1694x1485 mm;
- Maximum weight: 1445 kg;
- Front suspension: independent, with shock-absorbing struts, multi-link;
- Rear suspension: semi-independent, torsion beam;
- Brakes (front): disc;
- Brakes (rear): drum.
Fuel type: gasoline;
* — data is specified depending on the configuration.
Advantages and benefits of Toyota Corolla Fielder
Like any car, especially a Japanese one, the example in question has a lot of advantages. Here are just the main ones:
- Spacious interior and trunk;
- Low fuel consumption among direct competitors;
- Simplicity of design;
- High quality assembly and finishing materials;
- Inexpensive to maintain;
- Strong and corrosion-resistant body;
- High level of comfort;
- Pleasant appearance;
- High reliability;
- A small amount of tax in the Russian Federation due to the low-power engine;
- Soft and reliable suspension;
- Excellent view from the salon.
Weaknesses of Toyota Corolla Fielder 2006-2012 release
Having described the strengths of the car in question, it is worth talking about the operating problems that their owners often encounter. These include:
- Front shock absorber struts;
- Valve cover gasket;
- Variable speed drive;
- Front bumper;
- Generator;
- Steering rack;
- Rear gear oil seals;
- Cooling system pump;
- Vacuum brake booster;
- Steering wheel ribbon.
Let's look at them in more detail:
- Front shock absorber struts.
At a mileage of about 80 thousand, a disease often appears, the essence of which is an oil leak from the front shock absorber struts. Since this unit is not serviceable, the only way to correct the defect is to completely replace it. Fortunately, its cost is not high and fluctuates around 3 thousand rubles for one rack.
- Valve cover gasket.
On 1.5-liter engines there is a vulnerable spot, which manifests itself in the form of oil leakage from under the valve cover. The solution to this issue is also not something complicated, and, with a minimum set of tools and theoretical knowledge about the structure of the car, can be solved independently. The cost of repairs, however, is unlikely to exceed 500 rubles.
It must be said that this unit is relatively reliable and durable among other representatives of similar transmissions. Many say that 300 thousand km. it runs without any problems, which is a very big achievement for a CVT. But, if you do not pay due attention to this type of gearbox, the death of the gearbox may come to you after a mileage of 50 thousand, while the cost of repairs will amount to tens of thousands of rubles.
- Front bumper
Despite the high quality of materials used in the manufacture of body elements of this car, the Japanese made a mistake with the plastic for the front bumper. In severe frosts, which are not uncommon in our country, the already fragile plastic of the bumper becomes even more delicate and, at the slightest touch to it, can simply crack, causing great trouble to the owner and dooming him to repair or replace the bumper with all the ensuing consequences .
The generator itself is a very reliable unit that can easily last 300+ thousand km. The only weakness of this unit is that the manufacturer has not provided a certain power reserve for it, and if you try to connect a non-powerful external consumer (for example, a subwoofer) to the on-board network, the winding and diode bridge of the generator may not withstand it and fail .
To correct these shortcomings, many owners recommend installing generators from the previous generation model (preferably from 2005), since the manufacturer has a large power reserve and all generator mounts are identical, which greatly simplifies replacement.
- Steering rack
Another common breakdown is premature wear of the steering rack mechanisms. Most often, this happens on runs over 100 thousand km. and manifests itself in the unevenness of the forces that need to be applied to the steering wheel to turn the wheels, as well as in significant play in the steering wheel.
- Rear gear oil seals
With runs of more than 150 thousand km. Sometimes there may be a problem with oil leakage from the rear gearbox. Of course, this only applies to all-wheel drive versions. The cost of repairs will be small (about 1.5 thousand rubles), but the very fact of the presence of such a defect is unpleasant.
- Cooling pump
It is very rare to encounter the problem of a water pump leaking at its connection to the cylinder head, which is caused by a factory defective gasket. A new gasket, the cost of which does not exceed 500 rubles, and a little free time will help correct the situation.
- Vacuum brake booster
It is even less common to hear about a VUT malfunction, which occurs due to damage to the membrane inside it. Science still does not know what laws the manifestation of this malfunction obeys, but the fact of its existence should not be denied. Symptoms of brake booster failure will be floating idle speed, loss of engine power due to unaccounted-for air suction, as well as a “wooden” brake pedal when you press it.
- Steering wheel ribbon
Closing the list of main malfunctions is damage to the cable inside the steering wheel, due to which it stops responding to commands sent to the audio system and cruise control, and the sound signal will also stop working. The cost of the cable is up to 500 rubles, and changing it yourself is also not difficult.
Main disadvantages of Toyota Corolla Fielder 2nd generation, E140
- Poor sound insulation;
- Poor fastening of the standard 2DIN radio, which is why it can fall on your feet when driving on uneven roads;
- Poor quality factory audio system;
- Low ceiling for rear passengers;
- Low dynamics due to low-power engine;
- Low ground clearance, which increases the risk of breaking the already fragile front bumper;
- The spare tire is located under the trunk floor, making it difficult to change;
- Weak windshield, prone to cracks and chips;
- Long engine warm-up in winter;
- Picky about fuel quality.
Conclusion.
To summarize, we can confidently say that this car is simply a gift from heaven for those who are looking for comfort, unpretentiousness, practicality, fuel efficiency and do not want to “throw” bags of money into their iron horse for repairs and maintenance. If you minimally look after your car and do scheduled maintenance, then you can be absolutely sure that tomorrow, regardless of your mood, weather, position of the stars and what they say in the horoscopes, your Toyota Corolla Fielder will definitely start and take you wherever you want . No questions or unexpected breakdowns.
Of course, it is not without its shortcomings. But luxury Maybachs or Rolls-Royces are also not without them, because cars without flaws simply do not exist, and chasing the ideal of the automotive industry is a waste of time.
Partial or complete oil change in the variator: which option to choose
The standard set of tools at the disposal of any car enthusiast does not allow a complete change of lubricant in the variator. You will need special equipment available at service stations. Purchasing such tools and units for personal use is not rational.
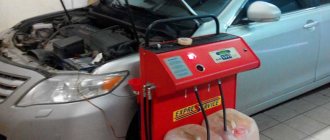
The process of completely replacing the lubricant in a variator involves pumping out the old lubricant from the radiator and pumping in new lubricant under pressure using a special apparatus.
A preliminary procedure for flushing the entire system is carried out in order to remove obsolete non-working deposits that have formed on individual variator spare parts and in the oil pan.
It is more common to carry out a partial change of lubricant in the variator. The procedure can be performed without contacting specialists. No special tools or consumables are needed. Therefore, the work is available to any car owner.
The most important thing during replacement is to strictly follow safety regulations. It is necessary to secure the car with a hand brake and wheel chocks, and only then begin servicing.
Changing oil and fluid in the automatic transmission of Toyota Corolla Fielder
Task: change the oil and fluid in the automatic transmission on a Toyota Corolla Fielder.
The color of the liquid, even on the dipstick, was very far from pink and was no longer even brown, but closer to black, which indicates that it is unlikely that this liquid was replaced by anyone before me. Like we went and didn’t worry. The last owner did not hide the fact that he did nothing at all to the car except changing the oil in the engine.
Progress of work on changing oil and fluid in the automatic transmission for Toyota Corolla Fielder
Here is an incomplete arsenal of our supplies for work
The work begins. We climb into the hole and conduct an initial inspection of the car: what is snotty, what is hanging out, where there are traces of falling into holes on our roads, etc. and so on.
We climb into the hole and conduct an initial inspection of the car.
Next, take the hexagon and unscrew the drain plug on the automatic transmission pan, having previously substituted a container of at least 4 liters for the old fluid.
Here is the pallet. And at the bottom you can see a dirty drain plug
Watching the drain, we are very surprised by the color of the liquid, which is significantly different from pink.
drain the old black liquid
Next, we take out the container with the old liquid from the pit and pour it into a bottle. We are convinced that until now hardly anyone has bothered with replacing the fluid in the box.
The color of the drained liquid is simply wonderful...
Next, take a 10mm wrench/socket and unscrew all the bolts from the pallet, leaving only a couple so that the pallet doesn’t fall on our heads. Then, holding the pallet, unscrew the remaining bolts and carefully remove the pallet
then we take the pan outside for cleaning, after draining the remaining liquid from it.
This is such beauty in a pallet...
We wash the pan with gasoline/solvent and wipe it dry.
Next, we climb into the hole again and, after unscrewing three bolts, remove the old automatic transmission filter. The sponge inside the filter is in terrible condition. I did not regret at all that I bought a new original filter to replace it.
Gently wipe everything dry with a clean cloth.
We put a new gasket on the filter and secure it in place.
It was decided to leave the old pan gasket. Next, we secure the pallet: first we fasten it on two bolts without force so that it does not fall, then we tighten all the remaining bolts, and then we begin to tighten them diagonally, pressing the pallet. The main thing is not to overdo it, because... it doesn't require much effort. The gasket is cork, not rubber, and it is not recommended to squeeze it.
the pallet returns to its rightful place
Upon completion of this step, we climb out of the hole and fill
4 liters of new pink TOYOTA ATF Type-IV
(Art. 0888681015).
This is the liquid I bought
It was decided to do a partial fluid change twice, instead of completely bleeding the system and replacing it completely. That is, first drain the old one, replace the filter, add new fluid, then drive a little and repeat the procedure, but without replacing the filter. Result : work on changing the oil and fluid in the Toyota Corolla Fielder has been completed.
Changing the oil in a Toyota Corolla Fielder automatic transmission does not require any special devices. What they offer to do at the service using an oil change machine, you can easily do yourself. Consumables required when replacing: - Toyota ATF Type T-4 automatic transmission oil, about 12 l. ) — automatic transmission filter (35330-0w020) — automatic transmission filter gasket (90301-32010) — automatic transmission pan gasket (35168-52020) — plug sealing washer (90430-18008)
The process of changing the oil in an automatic transmission Toyota Corolla Fielder:
-unscrew the drain plug from the automatic transmission pan and drain the fluid -then unscrew and remove the pan. There is a little liquid in it, be careful. -remove the automatic transmission filter. It also contains fluid, about 250g. - in the end you should gain about 4 liters. - we wipe the parts of the box from below - we lubricate the ring of the new filter with new liquid and put it in place - we thoroughly wash the pan and magnets, put on a new gasket, and screw the pan into place. - screw the plug into place with a new washer - fill 4 liters of new ATF through the hole in the automatic transmission dipstick - find the hose that goes from the radiator to the crankcase (marked with a red arrow in the photo)
-undo the hose and put on a transparent hose instead of the original one. We will use it to drain the liquid into a container. -put the car on the handbrake, and move the automatic transmission selector to position N (neutral), start the engine, monitor the level in the tank. When 1 liter is filled, turn off the engine, add 1 liter of new ATP through the dipstick. -we repeat the procedure several times until pure crimson ATP comes out of the hose. -connect the original hose back. Move the automatic transmission selector to P (parking). -start it, check for leaks. -warm up the engine and automatic transmission to operating temperature, move the selector to different positions with a delay in each. -we check the level using the dipstick with the engine running, it should be at about -after driving 10-20 km, we check the level with the engine running.
as they say, feel the difference between old and new ATP.
Replacement procedure
Before starting the procedure, you need to purchase and prepare
- new oil recommended by the manufacturer;
- replacement gasket for the pallet;
- fill hose;
- set of wrenches and hexagons.
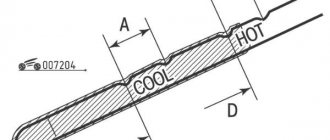
The design of the variator does not provide for a control dipstick, so it is necessary to monitor the level of drained oil so as not to make a mistake when filling.
Replacement algorithm:
- Remove the plastic protection that covers the variator housing. It is held in place by bolts and plastic fasteners.
- Remove the longitudinal beam, which is located slightly to the right of the variator and is attached with four bolts.
- After this, all the bolts that hold the pallet will become accessible. When removing its cover, you need to be careful, because... there is some lubricant there.
- After removing the pan, the drain plug will become accessible. It should be unscrewed with a 6mm hexagon.
- Drain all possible liquid through this hole (volume about one liter).
- Using a No. 6 hex, unscrew the level tube in the drain hole. The liquid will then continue to flow out.
- Unscrew the pan mounting bolts located around the perimeter and drain the remaining liquid.
The height of the drain hole cylinder is more than one centimeter. Therefore, replacing the lubricant without removing the pan (partial) means that some of the used fluid will remain inside.
- Unscrew the three securing bolts and remove the filter. The remaining lubricant will begin to leak out.
- Wash the oil filter and pan thoroughly.
- Return the filter back and install a new gasket on the pan.
- Place the pallet in place and secure it with bolts.
- Screw in the level tube and drain plug.
- Remove the bead protection attached with two clips and unscrew the nut at the top of the variator.
- Add new oil using a hose.
- Reassemble the dismantled parts in reverse order after setting the oil level.
If you carry out this work yourself, without relevant experience, you should use video or photo instructions for greater clarity.
Toyota Corolla 1.6/1.8 2013-2018 (TOYOTA COROLLA E180)
1. Original engine oil Toyota Corolla 1.6/1.8 2013-2018 (TOYOTA COROLLA E180) 5W40 (5l) 0888080375GO
2. Original oil filter Toyota Corolla 1.6/1.8 2013-2018 (TOYOTA COROLLA E180) 04152YZZA6
3. Original drain plug gasket for Toyota Corolla 1.6/1.8 2013-2018 (TOYOTA COROLLA E180) 9043012031
4. Original cabin filter Toyota Corolla 1.6/1.8 2013-2018 (TOYOTA COROLLA E180) 8713902020 / 87139YZZ16
5. Original air filter Toyota Corolla 1.6/1.8 2013-2018 (TOYOTA COROLLA E180) 178010D060
Please include your VIN in the order comments to verify part availability.
Free shipping to the following countries: Show more Show less
- 6.2 kg
- Few
- Delivery within 1-3 business days 1
1. Original engine oil Toyota Corolla 1.6/1.8 2013-2018 (TOYOTA COROLLA E180) TOYOTA 0W20 (4l) 0888012605 / 0888013205
JAPAN
2. Original oil filter Toyota Corolla 1.6/1.8 2013-2018 (TOYOTA COROLLA E180) 04152YZZA6
3. Original drain plug gasket for Toyota Corolla 1.6/1.8 2013-2018 (TOYOTA COROLLA E180) 9043012031
4. Original cabin filter Toyota Corolla 1.6/1.8 2013-2018 (TOYOTA COROLLA E180) 8713902020 / 87139YZZ16
5. Original air filter Toyota Corolla 1.6/1.8 2013-2018 (TOYOTA COROLLA E180) 178010D060
Free shipping to the following countries: Show more Show less
- 5.2 kg
- In stock
- Delivery within 1-3 business days 1
1. Original engine oil Toyota Corolla 1.6/1.8 2013-2018 (TOYOTA COROLLA E180) 0W30 (5l) 0888080365GO
2. Original oil filter Toyota Corolla 1.6/1.8 2013-2018 (TOYOTA COROLLA E180) 04152YZZA6
3. Original drain plug gasket for Toyota Corolla 1.6/1.8 2013-2018 (TOYOTA COROLLA E180) 9043012031
4. Original cabin filter Toyota Corolla 1.6/1.8 2013-2018 (TOYOTA COROLLA E180) 8713902020 / 87139YZZ16
5. Original air filter Toyota Corolla 1.6/1.8 2013-2018 (TOYOTA COROLLA E180) 178010D060
Free shipping to the following countries: Show more Show less
- 6.6 kg
- Few
- Delivery within 1-3 business days 1
Production - JAPAN .
AISIN is one of the world's largest manufacturers of automotive transmissions. Subsidiary of Toyota Group
The oil in the variator Toyota Corolla 1.6/1.8 2013-2018 (TOYOTA COROLLA E180) needs to be changed every 40,000 km.
Replacement requires 6 liters (2 cans)
Free shipping to the following countries: Show more Show less
- 4 kg
- In stock
- Delivery within 1-3 business days 1
Production - JAPAN .
The oil in the variator Toyota Corolla 1.6/1.8 2013-2018 (TOYOTA COROLLA E180) needs to be changed every 60,000 km.
Replacement requires 6 liters (2 cans)
Free shipping to the following countries: Show more Show less
- 4 kg
- Few
- Delivery within 1-3 business days 1
The filter in the variator Toyota Corolla 1.6/1.8 2013-2018 (TOYOTA COROLLA E180) needs to be changed every 60,000 km.
Please include your VIN in the order comments to verify part availability.
Free shipping to the following countries: Show more Show less
- 0.9 kg
- In stock
- Delivery within 5-8 working days 1
The variator gasket for Toyota Corolla 1.6/1.8 2013-2018 (TOYOTA COROLLA E180) needs to be changed every 60,000 km.
Please include your VIN in the order comments to verify part availability.
Free shipping to the following countries: Show more Show less
- 0.6 kg
- In stock
- Delivery within 5-8 working days 1
The sealing ring of the variator filter for Toyota Corolla 1.6/1.8 2013-2018 (TOYOTA COROLLA E180) needs to be changed every 60,000 km.
Please include your VIN in the order comments to verify part availability.
Free shipping to the following countries: Show more Show less
- 0.1 kg
- In stock
- Delivery within 5-8 working days 1
Spark plugs for Toyota Corolla 1.6/1.8 2013-2018 (TOYOTA COROLLA E180) need to be changed every 100,000 km
For cars with production date
2013-2015/03/31
Please include your VIN in the order comments to verify part availability.
Free shipping to the following countries: Show more Show less
- 0.4 kg
- In stock
- Delivery within 1-3 business days 1
Please include your VIN in the order comments to verify part availability.
Free shipping to the following countries: Show more Show less
- 1.4 kg
- In stock
- Delivery within 1-3 business days 1
Please include your VIN in the order comments to verify part availability.
Free shipping to the following countries: Show more Show less
- 1.4 kg
- In stock
- Delivery within 1-3 business days 1
Please include your VIN in the order comments to verify part availability.
Free shipping to the following countries: Show more Show less
- 1.2 kg
- In stock
- Delivery within 1-3 business days 1
price for 2 discs
Please include your VIN in the order comments to verify part availability.
Free shipping to the following countries: Show more Show less
- 7.8 kg
- Few
- Delivery within 1-3 business days 1
price for 2 discs
Please include your VIN in the order comments to verify part availability.
Free shipping to the following countries: Show more Show less
- 6.2 kg
- Few
- Delivery within 1-3 business days 1
price for 2 discs
Please include your VIN in the order comments to verify part availability.
Free shipping to the following countries: Show more Show less
- 6.2 kg
- Few
- Delivery within 1-3 business days 1
Please include your VIN in the order comments to verify part availability.
Free shipping to the following countries: Show more Show less
- 1.4 kg
- In stock
- Delivery within 1-3 business days 1
Please include your VIN in the order comments to verify part availability.
Free shipping to the following countries: Show more Show less
- 1.4 kg
- Few
- Delivery within 1-3 business days 1
Please include your VIN in the order comments to verify part availability.
Free shipping to the following countries: Show more Show less
- 1.2 kg
- Few
- Delivery within 1-3 business days 1
Please include your VIN in the order comments to verify part availability.
Free shipping to the following countries: Show more Show less
- 7.8 kg
- Few
- Delivery within 1-3 business days 1
Please include your VIN in the order comments to verify part availability.
Free shipping to the following countries: Show more Show less
- 6.2 kg
- Few
- Delivery within 1-3 business days 1
ABS-WITH (WITHOUT VSC)
Please include your VIN in the order comments to verify part availability.
Free shipping to the following countries: Show more Show less
- 6.2 kg
- In stock
- Delivery within 1-3 business days 1
Name - TOYOTA MOTOR OIL
ACEA Specifications - B3, B4, A3
API Specifications - CF, SL
OEM Specifications - BMW Longlife-98, MB 229.3, Porsche, 502.00, 503.01, 505.00
Free shipping to the following countries: Show more Show less
- 5kg
- Few
- Delivery within 1-3 business days 1
Engine oil Toyota Corolla 1.6/1.8 2013-2018 (TOYOTA COROLLA E180) needs to be changed every 10,000 km.
Free shipping to the following countries: Show more Show less
- 5kg
- Few
- Delivery within 1-3 business days 1
Name - TOYOTA MOTOR OIL
ACEA Specifications - B3, B4, A3
API Specifications - CF, SL
Free shipping to the following countries: Show more Show less
- 5kg
- In stock
- Delivery within 1-3 business days 1
Name - 0W20 MOTOR OIL
ILSAC Specifications - GF5
API Specifications - SN+
Made in JAPAN.
How to set the oil level
Having poured new oil into the unit, it is necessary to distribute the lubricant over the entire area, and then drain the excess. Description of the procedure:
- Start the car.
- Move the variator handle, fixing it at each mark for 10-15 seconds.
- Wait until the fluid in the CVT transmission warms up to 45°C.
- Without turning off the engine, you need to unscrew the sump plug located near the front bumper. Excess oil will be drained.
- After waiting for the leak to stop, screw the plug back on and stop the engine.
The final stage of replacement is installing the plastic protection in place.
general information
Many cars today are equipped with a similar device. Particular attention should be paid to the Toyota Corolla Fielder, which began production before 2013.
Like any car, it sometimes needs to be serviced, lubricant and oil filters need to be replaced. This will increase the operating period.
Toyota CVT
Changing the CVT oil looks simple at first glance. Often the complex design of the variator makes the procedure difficult. Of course, you can always contact a specialized service, but then you will have to spend a lot of money.
It is much better to try to figure out on your own how the variator works, what is the algorithm for changing the oil fluid in it.
Changing the oil in the Toyota RAV 4 variator of various generations
Changing the lubricant in Toyota RAV 4 units has not changed significantly since the car first went on sale.
Different CVTs were installed in different years of production (K111, K111F, K112, K112F, K114). But the manufacturer’s recommendations for the brand of lubricant and replacement intervals have not changed much.
When changing the oil in a 2011 Toyota RAV 4 CVT, you can use Toyota CVT Fluid FE.
It is less “stringy” in structure. Therefore, fuel is consumed more economically.
But when changing the oil in the Toyota RAV 4 variator of 2012 and subsequent years, especially if the car is operated in Russia, Toyota CVT Fluid TC is required. The efficiency will deteriorate slightly, but the service life of the box will increase significantly.
Changing the oil in the Toyota Rav 4 variator is practically the same in the 2011, 2012, 2013, 2014, 2015 or 2021 models.
There are small individual differences in the CVT boxes themselves, but they are insignificant and do not affect the standard procedure for changing the lubricant in the unit.
Find the right oil for your Toyota
The right grade of oil is essential to keeping your Toyota engine running smoothly. Your Vehicle Guide will confirm the correct rating for your vehicle and your region. Alternatively, use this official online tool to determine which oil to use.
Motor oil is not something you want to compromise on. Using the right lubricant keeps your engine running smoothly and extends the life of your components. In fact, using the wrong grade of oil can be a costly mistake.
This is especially true for diesels, which are very sensitive to the wrong grade. If you or anyone servicing your vehicle changes the oil in your diesel engine with the wrong type of lubricant, it may cause the diesel particulate filter . You might want to look at a four-digit bill to correct this.
Motor oil: what do the numbers mean?
Motor oil is surrounded by a lot of numbers, letters, and jargon, which can make it difficult to find the right brand.
Basically, you need to use oil that has the recommended viscosity value. This is the "thickness" of the oil and is usually displayed on the packaging. An oil with a high viscosity will have a more molasses-like consistency, while an oil with a low viscosity is thinner and more pourable. Modern Toyota engines typically use low viscosity oils. They reduce engine friction, reduce wear and improve fuel economy.
The following table shows recommended oil specifications for all current Toyota models and engine types.
| TOYOTA MODEL / ENGINE | RECOMMENDED ENGINE OIL |
| Aygo | 0W-16 |
| Yaris 1.0 | 0W-16 |
| Yaris 1.5 | 0W-20 |
| Yaris Hybrid | 0W-20 |
| Corolla 1.2T | 0W-20 |
| Corolla 1.8 Hybrid | 0W-16 |
| Corolla 2.0 Hybrid | 0W-16 |
| Camry | 0W-16 |
| C-HR 1.2T | 0W-20 |
| C-HR 1.8 Hybrid | 0W-20 |
| RAV4 | 0W-16 |
| GT86 | 0W-20 |
| GR Supra | 0W-20 |
| Prius | 0W-16 |
| Prius Plug-in | 0W-16 |
| Prius+ | 0W-20 |
| Land Cruiser (all) | 0W-30 |
| Hilux (all) | 0W-30 |
| Proace (all) | Please contact your local Toyota center |
| Proace Verso (all) | Please contact your local Toyota center |
Motor oil: how a specialist can help
When in doubt, contact your local Toyota Center for assistance. Our trained technicians and service advisors know Toyota vehicles inside out and can advise you on the correct oil and maintenance schedule for your vehicle (Proace and Proace Verso). Genuine Toyota engine oil is specially formulated for use with our engines. You can't buy a better oil for your Toyota.
Whether you change your oil yourself or have a Toyota service center do it for you, regular oil changes at the specified mileage or time are important. Even long-lasting oils become less effective over time as repeated cycles of heating and cooling continually degrade the oil.
Your local Toyota center is not the only place to buy genuine Toyota motor oil. Visit our eBay and you can have oil delivered to your home or office. Wherever you buy your Toyota Genuine motor oil, using the correct grade is vital to maintaining your vehicle's performance, economy and reliability.
,
What happens if you don't change the oil on time?
Ignoring oil change intervals and warning signals recommended by professionals leads to unpleasant consequences:
- Contamination of the unit, which affects vehicle controllability.
- Unexpected breakdowns when the vehicle is moving, which can lead to an accident.
- Possible errors in gear shifting and damage to the unit, which is also dangerous while the machine is running.
- Complete failure of the variator.
To prevent such breakdowns in the Toyota RAV 4 CVT gearbox, it is necessary to observe the frequency of oil changes. Then the operating time of the car will increase significantly.