7992 Apr 20
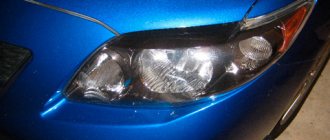
Replacing a low beam lamp on a Toyota Corolla 120 (2000–2006) and 150 (2006–2013) does not require professional knowledge of an electrician. This operation is not at all complicated, and if you follow the instructions below, you won’t have to wonder how to change the light bulbs.
Before purchasing new lamps, you need to know which ones are included in the Corolla optics.
For clarity, below is a picture indicating suitable light bulbs for the Corolla.
Important! Middle HB4 not to be confused with H4
I filled up with diesel instead of gasoline.
Published: 01/13/2019
Spread the love
Spread the love Filled with diesel instead of gasoline. What should I do?Contents1 I filled up with diesel instead of gasoline. What to do?1.1 Hurry up, different cars and... done1.2 Can help... Gas station1.3 Will it be expensive or very expensive1.4 Diesel in gasoline? It will work, but...1.5 Bad fuel? What to do - step by step1.5.1 We are on VK Contrary to appearances, such things happen, and...
I filled up with diesel instead of gasoline. Read completely "
A little about security
During the replacement process, follow some safety rules:
- When replacing, do not touch the glass of the new lamp with your hands. There may be particles of fat from your fingers or oil left on it, which you may inadvertently stain your hands with. The thin glass of the lamp heats up to very high temperatures and grease that gets on it will easily damage the lamp. Before installation, it is advisable to wipe it with a dry, lint-free cloth.
- Never work under voltage. In addition to the fact that you may receive an electric shock (and this in itself is unpleasant), there is a danger that even a burnt-out minion may shatter into small pieces (and there have been such precedents). Therefore, whenever possible, wear safety glasses.
Winter tires in summer - why shouldn't winter tires be used in summer?
Published: 05/20/2019
Spread the love
Spread the love Can you use winter tires in summer? Contents1 Can you use winter tires in summer?1.0.0.1 What are the requirements from modern car tires?1.1 How do winter tires differ from summer tires?1.1.1 Winter tires in summer - why not use them?1.1.2 What do we need to remember? Winter tires have been designed to provide the highest level of safety during the months when the average daily temperature is below...
Winter tires in summer - why shouldn't winter tires be used in summer? Read completely "
Replacement
To replace the low beam bulbs, you must first open the hood. In its space you will see a plastic protection that is held on by six clips. Each clip has a plug in the middle that you need to lift up by pressing on its core. This is best done with a knife with a thin blade.
Remove the entire protection panel and set it aside. Now we have access to the low beam headlight unit and the sidelights. Looking there, you can see that each headlight has a chip with two wires.
Carefully remove it, trying not to damage the wires. The chip came to the base of the light bulb, which was unscrewed with a quarter turn counterclockwise.
The headlight with low beam lamp on the Corolla E120, E150 and Fielder may have a rubber plug that can also be unscrewed counterclockwise.
As soon as you unscrew the base with the light bulb and install a new one, do not hold onto the light bulb itself, because it may fail.
The fact is that if finger oil gets on the glass, the thread can burn out. The low beam bulb for the 2008 Toyota Corolla is now installed. Similar operations are performed for versions of other years. This instruction is suitable for both right and left headlights.
Important: replacing headlight bulbs should be done in dry weather. Because if moisture gets on the lamp contacts, it may fail. In bad weather, it is better to install in a dry garage.
If the low beam still does not light after replacing the bulb, then the problem lies in the rest of the electrical part: pay attention to the fuse, relay and whether the base is inserted all the way.
Low beam not lit: reasons
If your lights don't turn on, this doesn't mean the problem is with the lamps. There are several reasons for this malfunction:
- The fuse has blown.
- A replaced fuse can just as quickly fail if there are problems with the vehicle's wiring.
- Relay fault. This electrical element is used to turn the headlights on and off, so very often the essence of the problem lies precisely in it. It is not necessary to immediately replace the relay - it may be working properly, just carbon deposits or oxidation have formed on the contacts. These contacts can be cleaned, after which the low or high beam headlights will work as before.
This problem can be solved simply: by replacing it with a new one, but be sure to install a fuse of the same rating as the burned one, otherwise it will immediately fail.
With prolonged use, the lamp bulb dims. The problem is that this process occurs gradually, and the car owner does not notice the difference. For example, in 2004 the headlight shines brightly, in 2007 it is a little worse, and in 2011–2012 it is very bad, but over such a period of time it is difficult to notice gradual changes.
Car interior reupholstery
Published: June 16, 2018
Spread the love
Spread the love Do-it-yourself car interior reupholsteryContents1 Do-it-yourself car interior reupholstery1.1 Car interior reupholstery1.2 Do-it-yourself car interior reupholstery1.3 Do-it-yourself car interior reupholstery Master class1.3.0.1 More articles about cars A car is a very practical means of transportation, especially long distances with family. Of course, traffic jams and difficulties with parking overshadow the joy of ownership. One of the factors highly valued by car owners is ...
Car interior reupholstery Read more »
How to easily change a tire without a jack
Published: 01/08/2019
Spread the love
Spread the love How to change a tire without a jack in a simple way Quite often there are situations when a tire breaks on the road. While changing a wheel, it turns out that the jack is broken or left in the garage. When you try to stop someone to ask for help, no one stops. We have to figure out how to get out of the situation. I'll give you some simple advice: how...
How to easily change a tire without a jack Read more »
Replacing rear lights
To carry out this operation, we will need to open the trunk and pay attention to the plastic cover, which is located directly behind the headlight. We open it by lifting the two latches on which it is fixed. By opening this cover we have direct access to all the rear lamps.
The next step: removing the chip from the one we want to replace.
When removing, you must pull not by the wire, but by the plastic head.
Next, simply unscrew the rear marker socket ¼ turn counterclockwise and replace the light bulb. This technique is also typical for the Carolla 160 body, produced since 2016.
Sequence of actions when replacing lighting elements on a Toyota Corolla 150
We carry out preventive maintenance in advance, identify faulty elements, and check (call) the electrical wiring as necessary. For such purposes, it is better to use a special device - a multimeter.
Every driver should have it, as it is used to carry out comprehensive preventive maintenance of the electrical power system and troubleshoot problems. If not, contact the service center specialists for help.
We install the Toyota Corolla 150 on a flat surface, turn the steering wheel in the opposite direction of the burnt-out headlight. Use a Phillips screwdriver to unscrew the plastic splash guard. We remove the two latches and lower the mudguard down. We turn the PTF base counterclockwise, remove it, and replace it with a new one. We do not touch the flask with our hands.

