- home
- Work examples
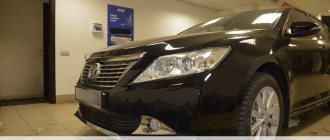
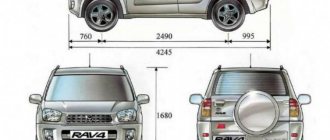
- Toyota Camry (2017 onwards)
»
»
Photo report of complete sound insulation of a 2021 Toyota Camry using the StP Premium line of materials.
Video about this Camry in the second part of the short video.
Factory sound insulation of Toyota Camry cars leaves much to be desired. Like most owners of similar cars, the owner of this Toyota Camry wanted to improve sound insulation. But the matter was not limited to one desire and we got to work.
Material used: Accent Premium - 3 pcs. Aero - 21 pcs. Aero Plus - 19 pcs. Biplast Premium 15A – 5 pcs. Noise Block 2 - 23 pcs. Barrier 4KS - 3 pcs. Barrier 8KS - 6 pcs. Bimast Bomb Premium - 4 pcs. Biplast 10K - 5 pcs. Madeline-N tapes – 3 pcs. Black Ton 4 - 3 pcs.
Soundproofing doors
The right front door is without trim.
We remove the standard film and temporarily remove the acoustics for high-quality installation of the material. By the way, as a result, the acoustics in the entire car will sound better, and even without unnecessary noise coming from outside.
We install the first layer - StP Aero. A material that is even used in aviation due to its good vibration-damping properties and low weight.
Next we install Accent Premium. A good sound absorber with moisture-resistant impregnation, which is useful for the internal cavity of the door, because in this place the formation of moisture from temperature changes is inevitable.
As a final layer, we again install StP Aero onto the metal frame of the door. We're bringing the acoustics back. We used the lightest materials so that the door closing mechanisms remain intact.
View of the removed plastic door card.
We wash and degrease for maximum adhesion to sound insulation.
Hollow plastic has noticeable noise when knocking and vibration. We use StP Aero Plus material for weighting, i.e. its purpose is to add a little weight to the plastic.
Now we glue Biplast Premium to the door - to reduce the noise level of those frequencies that we have not taken care of yet.
In this photo, the right front door with another layer of BlackTon 4 and its plastic card are maximally protected from all types of noise.
Let's move on to the right rear door.
We permanently remove the factory film, it will no longer be needed. We wash and degrease the door and its cavity.
1st layer - StP Aero.
2nd layer - StP Accent Premium.
3rd layer - StP Aero again.
4th layer - BlackTon 4 is very light with a waterproof adhesive layer. The material is odorless and environmentally friendly, like all Standardpalst materials.
Let's proceed to the plastic card of the right rear door.
Wash and degrease.
We make it heavier.
Here is the actual 5th layer - Biplast.
We will not overload you with an abundance of photos. We treated the left front and rear doors in the same way.
Sound insulation of a Toyota Camry according to the “PREMIUM” option
SOUND INSULATION OF TOYOTA CAMRY ACCORDING TO THE “PREMIUM” OPTION IN ONE WORKING DAY IN YOUR PRESENCE
ANTI-NOISE studio network presents to your attention a photo report on the noise insulation of a Toyota Camry in one working day!
Our studios have visited hundreds of similar cars of different generations, so our technicians have extensive experience working with Toyota Camry of any year of manufacture!
We are pleased to offer you high-quality sound insulation of Toyota Camry STP (StP) materials in Moscow, St. Petersburg, Novosibirsk, Yekaterinburg, Nizhny Novgorod, Chelyabinsk, Krasnodar, Rostov-on-Don, Tyumen and Sochi , and in any of our studio work will be carried out exactly as described in this photo report. All of the above work is carried out in one day and in your presence. If you cannot be present in our studio all the time of work, we will provide you with a full photo report of our work!
The most popular business-class sedan, Toyota Camry, came to us for sound insulation with complaints about “empty” and ringing doors, indistinct acoustics, as well as a high overall noise level in the cabin when driving at speeds above 100 km/h. Since the car is used for frequent work trips, the car owner chose the maximum “Premium” , and also ordered additional services for sound insulation of all wheel arches and fender liners.
The price for complete soundproofing of the Toyota Camry car interior according to the “Premium” option is 45,000 rubles.
The price of soundproofing the front panel with removal is 15,000 rubles.
The price of sound insulation for one pair of wheel arches and fender liners is 6,000 rubles.
The price for modifying the door seals of 4 doors is 4,000 rubles.
The price of soundproofing the rear shelf is 3,000 rubles.
So, let's start our photo report about the sound insulation of the Toyota Camry with a story about the sound insulation of the roof of this popular car.
SOUND INSULATION OF THE ROOF OF A TOYOTA CAMRY CAR ACCORDING TO THE “PREMIUM” OPTION
Soundproofing the roof of a car is an important stage in soundproofing the interior, because essentially the roof is a huge thin-walled membrane that vibrates under the influence of oncoming air flows and creates a low-frequency noise background in the cabin. In order to make the roof more rigid and “silent”, we carefully, working only in new and clean gloves, disassemble the upper part of the cabin, dismantle the passenger handles, sun visors, lighting lamps and free the roof lining. We then lower it as far as possible to gain full access to the outer metal. At the same time, we under no circumstances remove the headliner from inside the car. This is not only useless for our further work, but can also lead to creases and damage to the standard casing! We carry out all work as carefully as possible - after all, cleanliness and the absence of signs of disassembly are our priority. Before applying materials, we, of course, degrease the roof metal.
As the first layer of roof soundproofing, we use vibration-insulating material STP AERO, which does not require heating (the temperature in our studio does not drop below +18 C), and after careful rolling it will reliably protect the roof metal from vibrations!
As a second layer for soundproofing the roof, we use a relief sound absorber STP Biplast Premium with a thickness of 15 mm! According to the results of measurements, this material is much more effective than felt, and due to the relief front surface, direct reflection of sound waves from the material is eliminated.
After applying two full layers of the most effective materials, the sound insulation of the Toyota Camry roof is completed and we can carefully assemble the upper part of the interior. At the same time, we naturally work only with clean gloves, so that not a single trace remains after our work!
SOUND INSULATION OF THE BOTTOM OF A TOYOTA CAMRY CAR ACCORDING TO THE “PREMIUM” OPTION
Sound insulation of the lower part begins with complete disassembly and sound insulation of the bottom of the Toyota Camry sedan. Carefully remove all the seats, center console and standard carpet. After this, we check the condition of the standard vibration isolation: we open any existing bubbles and cracks. Now we vacuum, wipe and degrease the bottom before soundproofing.
As the first layer we use the most effective vibration insulator STP AERO+. It has high levels of vibration isolation, but at the same time it is very plastic and, after careful rolling, perfectly replicates even complex relief surfaces! This means that there will be no bubbles or cavities with air under the material, reducing the efficiency of its operation.
The second layer on the bottom is the sound and heat insulator STP Barrier. In different places of the bottom, the thickness of the material varies from 4 to 8 mm, depending on the criticality of the subsequent assembly. This material does not absorb moisture at all, does not rot or decompose. This is very important on the bottom!
As the final layer when soundproofing the underbody of a Toyota Camry, we use a unique heavy sound insulator STP NoiseBlock with a thickness of 2 mm. This thin, but very dense material effectively dampens low-frequency hum, which no “soft” material can do!
After applying three layers to the underbody, the sound insulation of the underbody of the Toyota Camry is completed and we can proceed to assembly. We reinstall the stock carpet, center console and all seats. During the assembly process, we vacuum the carpet again and wipe the plastic, so that after our work the interior of your car becomes cleaner and fresher! Now let's move on to soundproofing the trunk of your Toyota Camry.
SOUND INSULATION OF THE TRUNK TRUNK OF A TOYOTA CAMRY ACCORDING TO THE “PREMIUM” OPTION
Sound insulation of the rear part of the cabin is important to reduce the level of noise from the rear wheels, which often prevails in modern cars. And although this procedure is more relevant for cars in hatchback and station wagon bodies, with the Toyota Camry sedan fully soundproofed, leaving the trunk untouched is unacceptable! After all, the metal here is thin and loud, which means the noise from the rear wheels will easily get inside the car.
The rear wing of the Toyota Camry sedan has a significant area, and only a small strip of standard vibration isolator is applied to this entire area. This means that the wing resonates at the slightest vibration, increasing the rumble of the arches.
The situation is similar on the opposite side. As you can see, there is room for vibration and noise insulation in the trunk of a Toyota Camry!
We apply the first layer to the degreased and dried metal - vibration isolators STP AERO+ and STP Bimast Bomb Premium. We apply the heaviest, toughest and most effective Bomb or a more modern analogue of STP Profi+ on the flat surfaces of the rear arches, and on the curved surfaces of the spare wheel niche we use the soft and plastic STP AERO+!
Soundproofing the trunk of a Toyota Camry takes us about 1.5 hours, and the bulk of this time is spent on high-quality rolling of the first layer! Many inexperienced installers spend a lot of time disassembling and assembling, but do not carefully roll in the materials, as a result of which the sound insulation effect suffers. In ANTI-NOISE studios, all work is carried out in full accordance with the recommendations of the manufacturer of materials StP!
We do not try to cover absolutely the entire surface of the trunk with our materials, because we understand where and how each of them works. To achieve maximum effect, it is necessary to cover about 70% of the area of the thin-walled part with a vibration isolator. At the same time, rigid body elements, amplifiers, relief stampings and junctions of several metal parts do not need vibration isolation at all, since their resonance frequency is already quite low.
After vibration isolation of the metal, we move on to the actual soundproofing of the Toyota Camry trunk. To do this, we use the sound and heat insulator STP Barrier, as well as the sound absorber STP Biplast. The first material is applied to the lower part of the trunk, and the second to the rear arches.
Similarly, we soundproof the opposite arch and wing of the Toyota Camry. We insert the sound absorber with a relief front surface into the rear wing as far as possible.
After applying two full layers of our materials, the soundproofing of the Toyota Camry trunk is completed, and we move on to carefully assembling the rear of the car. We put the rear arch trims in place, put the spare tires, jack and all accessories in place. After this, we move on to soundproofing the doors of a Toyota Camry.
SOUND INSULATION OF TOYOTA CAMRY CAR DOORS ACCORDING TO THE “PREMIUM” OPTION
Soundproofing car doors is an important stage of our work! After all, the total surface of all car doors is perhaps the largest area among its elements. In addition, taping Toyota Camry doors will affect not only sound insulation, but also sound quality, and even the sensations when opening and closing doors. That's why we pay special attention to soundproofing doors! Before applying our materials, we carefully disassemble the door, remove the plastic trim, remove the standard vapor barrier film and degrease the outer metal of the doors. After drying, we apply the first layer to the outer metal - vibration isolator STP AERO. This lightweight but effective vibration damper will allow us to significantly reduce the resonant frequency of the metal without overloading the loops with excess weight!
After carefully rolling the first layer, we proceed to applying the second. Its task is to minimize the amount of noise entering the car interior from the outside, that is, to reflect the noise of the street and nearby passing cars, without absorbing moisture, which is often quite a lot in the doors. And the STP Accent Premium material is perfect for this! It has a moisture-resistant adhesive layer and also does not absorb moisture at all, which is very important for the internal volume of the door! Finally, we close all the holes in the internal metal with the STP AERO vibration isolator, replacing the standard polyethylene film with it.
After completing the soundproofing of the doors, we move on to their plastic trim. We apply a relief sound absorber STP Biplast Premium to them. This soft and viscous material will reliably press all the wires and cables located under the casing, preventing them from rattling and squeaking. It will also effectively absorb sound waves wandering around the interior of your car.
After installing the door trims and fixing them, we wipe them down so that not a single trace of our work remains. At this point, the sound insulation of the Toyota Corolla doors is completed and we move on to the sound insulation of the hood and trunk lid.
SOUND INSULATION OF THE HOOD AND TRUNK LID OF A TOYOTA CAMRY CAR ACCORDING TO THE “PREMIUM” OPTION
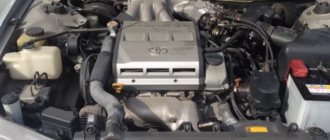
Sound insulation of the hood can significantly reduce the engine noise level, because a considerable part of it enters the cabin through the thin metal of the hood and the same thin windshield. And if it is technically difficult to increase the thickness of the windshield, then making the hood more massive is quite possible!
To do this, we will apply a layer of vibration isolator STP AERO to it. But first, of course, you need to clean and degrease the surface!
Then we apply a second layer to the hood - STP Accent Premium.
We don't forget about the trunk lid!
We apply STP AERO vibration isolator to the metal, and STP Biplast Premium sound absorber to the casing!
After completing work on the hood and trunk lid, we once again check the quality of the interior assembly: the position of trim parts, seals, controls, and the functionality of all electrical circuits that were turned off during the work. Now you can vacuum and wipe the interior again, and the soundproofing of the Toyota Camry is complete!
SOUND INSULATION OF THE TOYOTA CAMRY CAR INTERIOR IN THE “PREMIUM” OPTION IS COMPLETED
Since the start of work, about 7 hours of leisurely work by two or three of our specialists have passed, and the complete soundproofing of the interior has already been completed, and your Toyota Camry has become a much more comfortable car! After visiting us you will feel all the charm of real pleasure from long trips. Finally, the engine that bothers you with its noise will calm down. The doors close with a more dull and “noble” sound, the interior has become solid and collected, extraneous sounds have disappeared when tapping the door trims, and the standard acoustics have become much, much more interesting! Now long journeys will become much more enjoyable for both the driver and passengers. At speed, you can now calmly talk with the passengers in the back row, and you will now listen to the radio with pleasure at a much lower volume than before, because from now on it will not have to shout above the noise of cars passing nearby and the noise of the engine.
The thermal insulation of the interior of your car will also improve, and now the air conditioner will be able to cool the car interior that has become heated in the parking lot much faster in the summer, and the heater can warm it up in the winter.
The price of the specified work on soundproofing the interior of a Toyota Camry “PREMIUM” option was 45,000 rubles. This cost is complete and final and includes all the materials used and our work. ANTI-NOISE studios in Moscow, St. Petersburg, Novosibirsk, Yekaterinburg, Nizhny Novgorod, Chelyabinsk, Krasnodar, Rostov-on-Don, Tyumen and Sochi.
You can read a real review of the sound insulation of a Toyota Camry in the ANTI-NOISE
You can read hundreds of real reviews about soundproofing in ANTI-NOISE “REVIEWS” !
In addition to sound insulation of the interior, you can order sound insulation of the front panel with removal (15,000 rubles), sound insulation of wheel arches and fender liners (6,000 rubles per pair), modification of door seals (4,000 rubles), as well as replacement of acoustics (from 4,000 rub.).
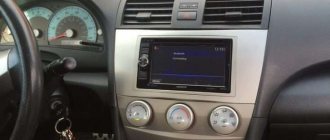
SOUND INSULATION OF THE FRONT PANEL OF A TOYOTA CAMRY CAR
Noise insulation of the front panel is carried out in order to eliminate any extraneous sounds (creaks, rattles, knocks, etc.) that appear in the front panel during vehicle operation. The car interior is constantly subject to vibration when driving. The heterogeneous plastic elements of the front panel, when the interior quickly warms up and cools down in winter, begin to expand and contract at different rates. Installation of various additional equipment located in the front panel (car alarms, immobilizers, non-standard head units, etc.) is usually carried out without the use of anti-creaking and noise-absorbing materials. All these factors eventually lead to the fact that the front panel of the car begins to emit a lot of extraneous and uncharacteristic sounds when driving. Soundproofing the front panel with removal allows you to completely and forever solve this problem! Soundproofing the front panel of a Toyota Camry begins with its careful dismantling, then vibration-insulating and sound-absorbing materials are applied to the panel and its seat, after which the panel is carefully installed and assembled to its original appearance.
The process of soundproofing the front panel of a Toyota Camry is described in detail in our video:
Price for soundproofing the front panel with removal: RUB 15,000.
TOYOTA CAMRY ARCHES USING VIBRATION INSULATION MASTIC STP NOISELIQUIDATOR
The process of soundproofing wheel arches using vibration-proof mastic STP NoiseLiquidator is described in detail in the video.
Price for soundproofing one pair of arches (front or rear): 6,000 rubles.
Working time: 3 hours
UPGRADES OF DOOR SEALS FOR SOUND INSULATION
On most cars (especially Japanese and Korean), door seals are a hollow, thin-walled rubber tube, which after some time of use wrinkles and can even “cake” under the constant pressure of the door.
Obviously, even if there is no headwind whistling through such a seal, it certainly will not ensure reliable fixation of the door in the doorway. And reliable fixation of the door in the doorway is necessary primarily to reduce vibrations of the door, its glass and metal parts. The stiffer the structure, the less vibration, the less vibration, the less noise. To implement our plan to increase the rigidity of the standard seal (replacing the seal with something else was not even considered for aesthetic reasons), we selected cords of various diameters. It is solid cords, not tubes, since tubes under variable loads quickly become unusable (sag or crack). And the rubber cord remains elastic. So, we pull the cord inside the hollow part of the seal.
We leave a small margin in length, since when pulled, the cords stretch, and after a while they return to their usual state, slightly decreasing in length. After installing the seal in the opening, we cut the cord in place or “loop” it if this allows us to create a gap between the opening and the door.
We have already implemented this solution on many cars, and owners respond very positively to this improvement. The doors close tighter, sit in the opening more rigidly, with a slight preload. The level of aerodynamic noise is reduced and extraneous sounds of seal friction disappear.
The cost of modifying the seals of 4 doors: 4,000 rubles.
Working time: 1 hour
If you have any questions, feel free to contact specialists from the nearest ANTI-NOISE , telephone numbers and addresses of all studios are listed in the “CONTACTS” . We will be happy to help you!
If you think that you have found a better offer for sound insulation of your car, check out the section of our website “Remaking sound insulation” , where you will find reports on our work with cars that have been in other sound insulation studios.
Sincerely, the team of the network of noise insulation studios ANTI-SHUM.RU
Sound insulation of the hood
Wash and degrease.
We install StP Aero Plus. Plus means stronger vibration damping properties, but also heavier weight. This weighting is not critical for the hood, but we will muffle the sound of the engine more.
Apply the final layer of Accent Premium.
Sound insulation of the trunk lid
Cleaning the trunk lid.
We glue StP Aero.
Apply Accent Premium as the second and final layer.
Vibration isolation of the floor of a Toyota Camry (photo)
All open floor planes of the Toyota Camry interior are treated with the “flagship” SGM vibration isolation. Part of the factory Shumka located on the tunnel and areas of the engine shield (shown in light in the photo) will later be “included in the overall picture.”
The vibration-isolating material is glued directly to the metal of the floor and placed under the factory car felt (it is clearly visible in the photo). We leave the technological hatch located on a raised platform under the rear row of seats in free access.
The main point that you should pay attention to at this stage of installing car sound insulation is the complete and absolute adherence of the first layer to the metal of the Toyota Camry body. The most important part of the work is to lay the pre-cut and heated sheets without a gap along the plane of the floor, wheel arches and trunk of the car.
Most often, to process complex details of the topography of a Toyota interior, it is necessary to glue vibroplast with an overlap. The plastic component in its composition is deformed from the pressure that is applied to it from above, and remains pliable for another five to ten seconds after heating - during this time you need to have time to form the desired floor fold or protrusion. If you miss this moment, you will have to warm up a separate area with a hairdryer.
Ceiling soundproofing
Cleaning the ceiling.
We roll up the Aero material.
To prevent the ceiling from loosening over time, we use the lightest vibration damper.
For noise absorption we use Biplast Premium.
Sound insulation of the rear shelf
The rear shelf has been washed and degreased, there are a lot of wires here, we work carefully.
We install Aero Plus as the first layer.
Over the entire possible surface of the rear shelf.
We use Biplast as the second layer.
Cost of installing sound insulation for Toyota Camry in Moscow
Installation of the basic “Silver” kit on a Toyota Camry car includes a two-layer finishing of the doors, roof, trunk, hood and rear arches with “vibration” and BB-tone. According to the individual order, it was supplemented with ViolonaVal Volna gasket on the floor, arches and doors. This meant additional costs, but since the work was carried out in two stages, the price of retrofitting the floor, wheel arches, trunk and doors did not go beyond the basic package.
The high noise-absorbing and vibration-isolating characteristics of the consumables used, the ability to select any combination of thickness and density, and their relatively low price allow you to choose from a large number of sound insulation options for Toyota Camry, as well as for other brands and models of cars.
Preliminary stage: surface preparation for vibration isolation (photo)
The sequence of applying a soundproofing coating traditionally begins with the careful removal of seats, floors, door panels, upholstery and other parts of the Camry interior, and dismantling. In the first photo you can clearly see its scanty stripes in the recess for the spare tire and in the corners of the trunk.
The process takes no more than an hour, and now we have a field of activity in front of us.
All nooks and crannies of the trunk are vacuumed and then wiped with a degreasing compound.
The metal surfaces of the Camry trunk, with a small number of stiffening ribs, transmit and amplify external vibrations well. It is these places that are covered with composite vibration-proofing material first.
The interior space of the Toyota Camry is freed from upholstery and remnants of factory car felt. Clean and tidy - everything happens quickly if there is no need to tear off the old felt sound insulation. Everything that can be removed will be removed: plastic thresholds, plugs for the floor and doors, fasteners for the wiring harness. All interior elements will be installed back after the vibroplast has hardened.
The car is practically new - the inside of the body looks like it just came off the assembly line. Working with “fresh” cars is pleasant - a minimum of cleaning products and passes with a vacuum cleaner in the corners is required. When installing sound insulation on used cars, you have to deal with a huge amount of dust and lint particles from the upholstery, as well as the inevitable rust. Rusted areas of the floor and sidewalls of the wheel arches must be scrubbed down to bare metal and covered with a protective compound. At the same time, the preparation process, which usually takes from an hour to an hour and a half, is indecently delayed.
The interior metal that receives the vibration-insulating layer (floor, doors, wheel arches) is thoroughly degreased and dried. We will not dismantle the torpedo now: we will simply cover it after we take a photo. In the basic “Silver” configuration, torpedo processing is not provided - this is a separately paid category, which we have excluded today to reduce the total cost of the order.
Soundproofing the floor
We use two materials as the first layer.
In the cardan area - Bimast Bomb Premium.
Most of the floor is Aero Plus.
Under the panel is Bimast Bomb Premium.
We install the material over the entire possible area under the panel.
For all wheel arches we install Bimast Bomb Premium as the first layer.
The excellent quality of the seaming can be seen from the reflections.
View from the rear seat area.
Maximum rolling area under the steering wheel.
The view is here, in the pedal area.
Second layer of floor.
Material Barrier.
Here, working with wires also requires great care.
For wheel arches we use Biplast Premium.
We supplement the space under the panel with Biplast Premium.
The final layer of the floor is Noise Block 2.
The material is not flexible enough for other parts of the body, but is perfect for the floor.
We have all the necessary experience and tools for installing sound insulation.
View of the final layer in the trunk area.
Place the Noise Block on the entire area under the panel on the left.
And on the right.
Preparatory work
Before you start work, you need to prepare all the necessary tools and purchase materials. It is recommended to consult with specialists and read real reviews from car owners about the best sound and vibration insulating materials, since there is a wide range on the market and choosing from them is quite problematic.
All work
must be carried out at a temperature from plus 15 o to 25 o . Slightly heated materials are easier to stick to the relief contours of the surfaces being treated.
The material can be cut in advance; for this purpose, special patterns are used that are suitable for Camry of any year of manufacture.
Metal surfaces are cleaned of dirt and dust. It is better to do this with a special brush or vacuum cleaner, then you need to degrease it. You will need to disassemble all storage areas: pockets, glove compartment, standard trim. When disassembling individual components of a Toyota car, you need to be extremely careful so as not to break, stain or scratch anything. This is especially true for electronics and upholstery.
It is recommended to first look online at photo reports of craftsmen with step-by-step instructions, which will allow you to avoid mistakes and omissions.
Noise insulation of wheel arches
We wash and degrease the outside of the wheel arches.
We glue Aero as the first layer.
The material can only be glued to smooth metal; there is no point in gluing it to the rest of the surface; it will fall off.
Dirty factory locker (fender liner).
We wash the locker.
We glue Aero weights onto the locker.
These are new lockers.
We also weigh them down. This is how we processed all the wheel arches. That is, they were vibration damped with Aero material, made the factory lockers heavier, installed them back and added one new weighted locker to them.
Soundproofing of the floor, wheel arches and luggage compartment of Toyota Camry V70 2021
Having exposed the entire floor of the car to the metal, we see only desperate attempts to organize noise and vibration insulation at the conveyor plant of the manufacturer of the Japanese brand. Let's start doing it right!
The first layer is to level out vibrations by applying G series material in the luggage compartment and on the floor, just as in the case of the ceiling.
Comfort Mat Gold series is a vibration-damping material made from a new-level mastic composition G-formula and aluminum foil using the unique and exclusive InFliz technology. Thanks to this, the manufacturer was able to achieve a significant increase in all indicators, especially adhesion. We use it as the first layer.
For the second layer in the luggage compartment we use the new royal material Integra. We cover the entire visible and invisible surface, including the wheel arches.
This is an exclusive material from Comfort Mat, which is the lightest of all existing membrane-based materials.
As for the floor, the onslaught of the most amazing BlockShot material is at the forefront.
Blockshot noise-absorbing sheets are a multilayer premium material that combines sound and heat insulating properties and has a new generation acoustic membrane. Ideal for floors.
Such a cohesive two-layer mix of modern technological materials allowed the unpleasant noise and vibrations from this element of the car to be multiplied to zero. Go ahead.
Sound insulation panel
Let's disassemble the panel.
We install Aero Plus.
We work with wires carefully.
We cover the wires with Modelin-N tapes.
We treat the panel area with zip ties so that the wires do not dangle.
Remove the plastic panel.
Degrease.
We weight StP Aero.
Finally we paste over Biplast Premium.
Soundproofing plastic
During work, plastic was processed wherever structurally possible. That is, the plastic is washed, degreased, weighted with a vibration damper and covered with Biplast noise absorber.
A lot of work has been done. In conclusion, we would like to say that the owner of the car was satisfied.