The heating system on a Toyota Camry 40 is considered to be the weak point among all units. Along with the human factor, there is also a factory factor - imperfect design of the radiator, antifreeze supply and return pipes. An air lock is arbitrarily created, preventing the natural circulation of liquid in the cooling system. Common reasons:
- low level of antifreeze in the system or its complete absence;
- mechanical damage to the housing, supply and return lines;
- clogging of the radiator of the stove heater due to which it does not heat well;
- formation of an air lock in the car's cooling system.
The above symptoms are the most common and characteristic of the Toyota Camry model, regardless of the year of manufacture and modification.
Characteristic signs of a heater malfunction:
- there is little air flow from the deflectors;
- the temperature does not correspond to the set mode on the center console of the car. A cold stream blows;
- The heater bearing squeals;
- the faucet - the regulator is cold, while the pipes and antifreeze are appropriately heated;
- the stove heater does not blow when activated;
- the “stove” fan operates at different speeds, with a virtually stable current supply;
- The heating unit does not work.
Regular location
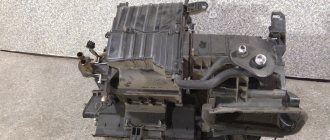
The interior heater is installed by default in the center of the dashboard, actually hidden under it. The main feature of the equipment is its design, which has wide branching air channels leading to the deflectors. This can be viewed from both a positive and negative side. For service station mechanics, this creates difficulties and obstacles to free access to “torpedo” mechanisms.
The design of the stove assembly is typical and characteristic of the Toyota automobile brand: a plastic case containing an aluminum radiator, a damper, pipes, and a circuit diagram of contact boards for electrical supply.
Why is this happening?
Undoubtedly, the most common reason for this is problems with the dampers. However, there are also problems with the radiator. As a rule, it is secured with several brackets, bolts and other fasteners in a free compartment. With frequent movement on poor road surfaces, the quality of the fastenings deteriorates, and accordingly, the components of the heating system begin to move in the pits in different directions.
As practice shows, these small movements are enough for a cold air flow to start flowing instead of the warm air supplied from the passenger seat (from the right air duct). This happens due to the formation of a gap between the casing wall and the end of the radiator. As a result, air enters the cabin, bypassing this component.
Catalog numbers and prices of original products
- heater fan for the Camry 40 model with pre-installed engines (2ARFE, 2ARFXE, 2GRFE, 6ARFSE, 1ARFE) - 87107-33120, STTYL53950 (analogue). Cost from 4000 rubles;
- drive motor (Servo sub-assy) - 33136, cost 2500 rubles;
- heater cooling system pump for the Toyota Camry SV40 hybrid version – 41746, price 5800 rubles;
- stove heater assembly - 22241, from 6200 rubles, and above;
- climate control unit - 22242, from 5300 rubles;
- engine modification for right-hand drive – 4113542, from 2700 rub.
How to solve a problem
In many cases, this problem is solved by replacing the radiator (it was clogged with sediment due to dilution of antifreeze with plain water - sometimes dealerships do this). If the problem lies in the radiator, you need to pull it out, then cover the area where it is located with foam rubber so that in the future it does not move in different directions.
Important! If you perform this operation (repair) yourself, be careful with the tubes of this component (do not bend them too much, otherwise you will have to replace the radiator completely).
Replacement and partial repair of the stove on Camry 40
Regardless of the type of breakdown, comprehensive diagnostics are always carried out in a service station. The issue is especially relevant for those owners whose car is under warranty service. Those whose warranty period has expired must individually agree on a new schedule for visiting the service station, since the technical equipment should not be used for a long time without a technical inspection.
To decide on the repair method, the technician needs to conduct an initial diagnosis. The main attention should be paid to checking the integrity of the antifreeze supply-return line and the absence of mechanical damage. Additionally, check (ring) the electrical wiring and fuse box.
The stove blows cold!!! Won!!! (Page 1 of 3)
There was a problem, which unfortunately remains. The stove blows cold!!!! Crown st-190 4s-fe
You start the car, it warms up to operating speed, but barely warm air blows! While driving, when I turn on the heater to supply air from the street (otherwise the windows freeze or fog up), generally cold air blows, and steam comes out of my mouth. So then, I stop, switch the stove to heating inside the cabin, after ten minutes warm air starts blowing and then it gets warmer and warmer (at the same time the windows fog up)!!
I decided that hardware replacement of antifreeze would help. Yesterday I changed it, no result!!! The frost is already quite annoying.
Tell me something? Or should I go to the service center and pay four rubles for cleaning the stove????
1) hardware replacement of antifreeze - did not help. 2) I drove out the air lock on the slide - it didn’t help.
Today I dug around and removed the panel with the armrest! I discovered that antifreeze was leaking in the area where the pipes and the heater radiator connected. haven't done anything else yet
Yesterday I went to a repairman and said the heater radiator needs to be cleaned! Well, since I already had everything taken apart, I decided to do everything myself.
I'll start from the very beginning. 1) Remove the plastic foot rest; mine was held in place with clasps. 2) We remove the plastic protection and fold back the binding, in the end we get the photo that I left above. 3) I have a copper radiator, we twist two metal holders, the joint of the tubes and the radiator is held on by metal rings. 4) carefully separate these rings 5) now place the container at the joint (everyone said that 300 grams of antifreeze would pour out, I had a whole LITER spill out!!!) 6) separate the tubes (I managed to do this very easily, many have difficulties with this, one piece of advice don’t pick at the joint with a screwdriver, because you won’t be able to fasten the rings and it will LEAK), try loosening it a little! 7) After I removed the heater radiator, I took it to a friend for unsoldering, unfortunately there are no photographs, but after we unsoldered it, I was horrified, it was completely clogged with dirt (which, by the way, is not surprising, what’s surprising is how much of it there was) cleaned, washed, sealed. I installed everything in the reverse order 9) filled it with antifreeze, let it run, and checked for any leaks. 10) then the proven advice that I was told a thousand times, I found a slide and stood with my face up, kicked out the air lock and added antifreeze
As a result, the stove just started FRYING, and back to the car, out of spite, which had been freezing me all week, I was driving in a T-shirt and was happy))) well, that’s all, as they say in the car TASHKENT
Cost: a bottle of beer for soldering and soldering. The approximate price for services if you bring a radiator is 600-800 rubles.
Edited by kwazar32 (29.01.2014 20:02:30, 7 years 9 months ago)
Park Hotel Chaika +79619969600
Other Possible Causes
It is possible that the system is sucking in air, which causes an air lock to form in the heating radiator after a certain time. This can also cause cold air to come in from the passenger side. Sedimentation (after mixing different types of coolants). Note that sediment remains even after purging the system. In this case, there are two ways out of this situation: remove and rinse the radiator thoroughly or replace it completely.
Well, now you know why the passenger side heater can blow cold. And only you can decide whether to fix this problem yourself (after spending time searching for its occurrence), or whether to put your car in the hands of professionals. In any case, we wish you good luck!
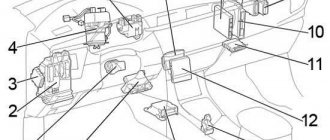
Block in the cabin
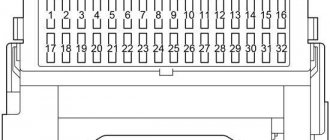
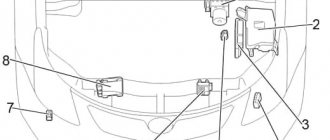
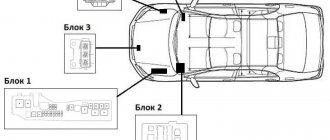
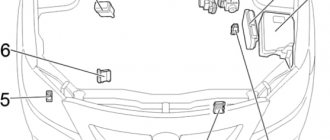
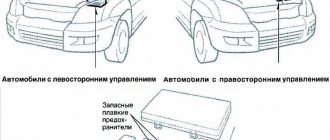
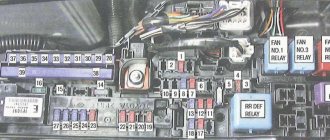
The fuse box is located at the bottom of the instrument panel, on the driver's side, behind the protective cover.
The direction indicator relay is mounted separately on the left pillar.
Example of a circuit from a block cover
Scheme
Description of fuses
| 1 | 10A ECU−B - Anti-lock braking system, air conditioning, clock, instrument cluster, cruise control, transmission control unit, automatic transmission indicator, engine control unit, immobilizer, headlights, interior lighting, ignition key buzzer, automatic turn signal deactivation , sunroof, body electrical control unit, audio system, navigation, power windows, seat belt buzzer, anti-theft system, central locking, central locking control unit, vehicle stabilization system |
| 2 | 7.5A DOME - Ignition switch illumination, interior lighting, personal lighting, vanity mirror illumination, garage door control unit, clock, outside temperature display, multi-information display |
| 3 | 15A CIG - Cigarette lighter |
| 4 | 5A ECU-ACC - Clock, instrument cluster, body electrical control unit, mirror control unit |
| 5 | 10A RAD NO.2 - Audio system, navigation |
| 6 | 15A POWER POINT – Socket |
| 7 | 20A RAD NO.1 - Audio system, navigation |
| 8 | 10A GAUGE1 - Instrument cluster, clock, outside temperature sensor, multi-information display, gear selector lock, seat belt buzzer (indicator) |
| 9 | 10A ECU−IG - Anti-lock brake system, automatic lighting control, headlights, interior lighting, ignition key buzzer, sunroof, body electrical control unit, window lifts, anti-theft system, central locking, |
| 10 | 25A WIPER - Windshield wiper |
| 11 | 10A HTR – Air conditioning |
| 12 | 10A MIR HTR — Heated mirrors |
| 13 | 5A AM1 - Starting system |
| 14 | 15A FOG - Front fog light |
| 15 | 15A SUN-SHADE - Rear curtain |
| 16 | 10A GAUGE2 - Auto-dimming interior mirror, compass, sunroof, reverse lamps, automatic transmission indicator, cruise control |
| 17 | 10A PANEL - Glove box lighting, clock, outside temperature display, multi-information display, instrument cluster illumination, overdrive indicator |
| 18 | 10A TAIL - Side light, license plate light |
| 19 | 20A PWR NO.4 - Rear left window regulator |
| 20 | 20A PWR NO.2 - Driver's side power window, passenger door lock |
| 21 | 7.5A OBD - Diagnostic connector |
| 22 | 20A SEAT HTR - Heated seats |
| 23 | 15A WASHER - Windshield washer |
| 24 | 10A FAN RLY - Cooling fan |
| 25 | 15A STOP - Stop lamps, auxiliary brake light, anti-lock brake system, cruise control |
| 26 | 5A FUEL OPEN - Fuel filler flap |
| 27 | 25A DOOR NO.2 — Body electrical equipment control unit (central locking, wireless remote control system, automatic door locking) |
| 28 | 25A AMP - Amplifier |
| 29 | 20A PWR NO.3 - Rear right window lift |
| 30 | 30A PWR SEAT - Electric seats |
| 31 | 30A PWR NO.1 - Driver's side window lift, driver's door lock, sunroof |
| 32 | 40A DEF - Heated rear window |
Fuse number 3 at 15A is responsible for the operation of the cigarette lighter.
Some relays can be attached to the back of the block.
Relay decoding
| R1 | Fog light |
| R2 | Side light |
| R3 | Auxiliary relay |
| R4 | Heated rear window |
| R5 | Ignition |
| R6 | Glass lifts |
