Owners of Japanese cars with robotic gearboxes are familiar with twitching, jumping from gear to gear and thoughtfulness when switching. You don’t have to put up with this behavior; do chip tuning.
In addition to improving elasticity, firmware has other advantages:
- Power and torque increase;
- The thoughtfulness of the gas pedal disappears;
- Smoothes out failure during acceleration;
- The gearbox shifts smoothly and without jerking;
- Fuel consumption is reduced, provided that you maintain your driving style;
- The overall dynamics of the vehicle is optimized;
- Increases traction at low speeds;
- Engine performance improves with the air conditioning on.
Before the procedure, initialize or adapt the clutch of the Toyota robot under service conditions. Typically, Corolla, Yaris and Auris models have problems with the gearbox.
By approximately 35,000–54,000 km, the robot’s clutch wears out, which manifests itself in the characteristic behavior of the gearbox. Initialization can fix this.
Initialization of ECU-Transmission-Clutch. Toyota Yaris
• Stop the car.
• Move the gear shift lever to position N. • Turn off the ignition. b. Using SST, connect the TC and CG pins of the DLC3 connector. SST 09843-18040 c. Wait at least 10 seconds. d. Turn on the ignition (IG).
e. Press the brake pedal at least 7 times within 3 seconds. i. The buzzer emits 2 beeps at 0.25 second intervals. f. Press the brake pedal.
g. While holding down the brake pedal, move the gearshift lever in the following sequence. • When initializing the ECU: N → E → M → — → M → — → M → — → M → — → E → N. • When initializing the clutch: N → E → M → + → M → — → M → + → M → — → E → N. • When initializing the transmission: N → E → M → — → M → — → M → + → M → + → E → N.
i. Press the brake pedal again. i The buzzer will beep at 0.5 second intervals for the number of times indicated below (the interval between cycles is 2.5 seconds). • Twice when initializing the ECU (1 cycle) • Three times when initializing the clutch (1 cycle) • Four times when initializing the transmission (1 cycle) HINT: • If the buzzer does not beep as described above, turn off the ignition and wait at least 15 With. Then repeat from step (a'). • If the buzzer beeps at 1 second intervals (not 0.5 seconds), turn off the ignition and wait at least 15 seconds. Then repeat from step (a'). j. Press the brake pedal at least 3 times within 2 seconds. i The buzzer will emit 2 beeps at 0.25 second intervals. k. Turn off the ignition and wait at least 10 seconds. l. Initialization complete. m. Disconnect SST from pins TC and CG of DLC3 connector.
Source
Problems with a robotic gearbox
The Auris robotic gearbox often gives its owner the following problems:
- Toyota Auris clutch fork vibration;
- malfunctions in the operation of the Toyota Auris actuator motor;
- the need to replace the Toyota Auris clutch actuator bushings.
Repairing the Toyota Auris robot becomes an obvious solution when the following signs of breakdown occur:
- uneven work;
- independent increase in engine speed;
- deterioration of dynamics indicators;
- Difficulty engaging any of the gears.
Clutch adaptation on a Toyota robot
Date: February 13, 2021 3:31 am
Find a chip tuning specialist
Get chip tuning done by a trusted specialist with a certificate and the possibility of moneyback.
ADACT against removing a correctly functioning catalyst. Find out about the possible consequences for the car.
Owners of Japanese cars with robotic gearboxes are familiar with twitching, jumping from gear to gear and thoughtfulness when switching. You don’t have to put up with this behavior; do chip tuning.
In addition to improving elasticity, firmware has other advantages:
- Power and torque increase;
- The thoughtfulness of the gas pedal disappears;
- Smoothes out failure during acceleration;
- The gearbox shifts smoothly and without jerking;
- Fuel consumption is reduced, provided that you maintain your driving style;
- The overall dynamics of the vehicle is optimized;
- Increases traction at low speeds;
- Engine performance improves with the air conditioning on.
Before the procedure, initialize or adapt the clutch of the Toyota robot under service conditions. Typically, Corolla, Yaris and Auris models have problems with the gearbox.
By approximately 35,000–54,000 km, the robot’s clutch wears out, which manifests itself in the characteristic behavior of the gearbox. Initialization can fix this.
What is a box robot?
At service stations, one of the frequently required services is the initialization of the robotic gearbox for some Toyota models, in particular for the Corolla.
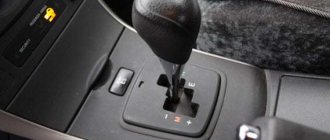
Robotic transmissions are conventional manual transmissions with several additional features that make driving a car much easier. Shifting gears and clutches of the robot box occurs automatically: the gearbox reads the information transmitted by the driver, takes into account the driving conditions of the vehicle, after which the electronic control unit (ECU) processes this information and itself controls the operation of the box with a certain algorithm.
Modern robotic gearboxes are distinguished by the comfort characteristic of automatic transmissions, but at the same time, the fuel efficiency and reliability of operation remain the same as that of conventional mechanics. The robot also has a significant price advantage compared to classic automatic transmissions.
When is initialization necessary and what is it?
Adaptation or initialization is the coordination of components and mechanisms of a manual transmission, taking into account the degree of wear; this procedure is necessary for each maintenance of a manual transmission. At the same time, there are a number of signs that indicate incorrect operation of the gearbox:
- Howling, buzzing, increased noise;
- The box is slipping;
- Gear shifts with jerks, jumps and shocks; “Check Engine” lights up. Diagnostics display errors P0919, P0810, P0949;
- Zero response to pressing the gas pedal: the revolutions are higher, but the speed is at the same level;
- The transmission turns off randomly.
If before chip tuning there are no problems in the operation of the manual transmission, except for twitching, hesitation and failures when shifting gears, we still recommend adapting the robot. After flashing, the box will adjust itself and the thoughtful bugs will disappear.
How to work with the ECU?
If the control unit is not functioning correctly, it is advisable not to try to correct the errors yourself. The intervention of a specialist is required; if configured incorrectly, the system may begin to shut down or cause other failures.
Configuring the ECU should occur only after debugging the operation of the manual transmission and all its control units has been completed.
Initialization of the Toyota Corolla robot
Malfunctions of the box are corrected in different ways:
- The gearbox shift and clutch drive mechanisms are repaired;
- The clutch is pumped or adapted by learning the starting point;
- Using special equipment, manual transmission drives are configured and the Toyota Corolla clutch is adapted;
- The clutch pack is being replaced with mandatory initialization of the Toyota Corolla robot gearbox;
- The wiring is changed if the reason is loss of contact.
Get a free consultation
from a professional auto diagnostician with 14 years of experience!
When should you not initialize?
Initialization should not be carried out without any compelling reasons or complaints. Carrying out initialization on a faulty vehicle can lead to failure of the initialized mechanism.
Undesirable parameter settings lead to increased wear of all elements of the vehicle system. All procedures related to initialization should be carried out with the advice of professionals or obvious reasons.
The surest way out in this situation is to turn to specialists who have been specializing in the initialization of Toyota and Lexus cars for 11 years and confidently give a 180-day guarantee on the work they perform.
Do-it-yourself Toyota Yaris clutch adaptation
Manual adaptation of the Freetronic MMT robotic gearbox of Toyota cars is needed in cases where you do not have the opportunity to visit a car service center, where they can carry out adaptation (initialization) using a computer, or in cases where adaptation does not take place through the computer (for example, due to clutch wear, when If the thickness of the clutch disc is too low, adaptation often fails and the car no longer drives). In other cases, whether or not to use the method indicated below is at your own peril and risk, because with multiple attempts at adaptation, severe wear occurs on all gearbox mechanisms (especially clutch actuators and gear selection actuators).
1. Before all the procedures described below, you need to warm up the car to operating temperature (15 - 20 minutes) and place it on a horizontal surface.
2. Put the car in neutral gear. Turn off the ignition (the key can be left in the lock, but always in the zero position).
3. Then, using a paper clip (or something similar, always metal), we bridge 2 contacts (4 on the left in the top row and 5 on the left in the bottom row of contacts) in the diagnostic connector of your car (for all models with a robotic gearbox, the diagnostic connector is located on the bottom left of the steering column ).
4. Wait at least 10 seconds.
5. Turn on the ignition without touching the pedals (!)
6. Within 3 seconds, press the brake pedal 7 times. If everything is done correctly, you will hear 2 beeps from the interior buzzer with an interval of approximately 0.25 seconds.
7. Press and hold the brake pedal.
8. Without releasing the brake pedal, move the gearshift lever in the following sequence:
N – E – M – plus – M – plus – M – plus – M – plus – M – E – N.
9. Release and immediately press the brake pedal again. If everything is done correctly, the buzzer will emit several signals with an interval of approximately 0.5 seconds. (if the buzzer does not sound or the interval between signals is more than 1 second, the procedure should be repeated by turning off the ignition and after 15 seconds removing the wire (clip) from the connector).
10. Press the brake 3 times within 2 seconds, the buzzer should emit 2 beeps with an interval of approximately 0.25 seconds.
11. Press the brake pedal again and move the gearshift lever to the minus position: N - E - M - “-“.
13. Turn off the ignition and wait at least 10 seconds.
14. Remove the jumper from the diagnostic connector.
The further procedure adapts (initializes) the clutch drive (clutch actuator position) and the clutch travel sensor:
15. Put the car in neutral gear. Turn off the ignition (the key can be left in the lock, but always in the zero position).
16. Then we bridge with a paper clip (or something similar, always metal) 2 contacts (4 on the left in the top row and 5 on the left in the bottom row of contacts) in the diagnostic connector of your car (for all models with a robotic gearbox, the diagnostic connector is located on the lower left of the steering column ).
17. Wait at least 10 seconds.
18. Within 3 seconds, press the brake pedal 7 times. If everything is done correctly, you will hear 2 beeps from the interior buzzer with an interval of approximately 0.25 seconds.
19. Press and hold the brake pedal.
20. Without releasing the brake pedal, move the gearshift lever in the following sequence:
N – E – M – plus – minus – plus – minus – M – E – N.
21. Release the brake and press again. If everything is done correctly, the buzzer will emit 3 cycles of 2 beeps with an interval of approximately 0.5 seconds. (if the buzzer does not sound or the interval between signals is more than 1 second, the procedure should be repeated by turning off the ignition and after 15 seconds removing the wire (clip) from the connector).
Repair and restoration work
The cost of repairing the robot remains reasonable. Extraneous noise from the gearbox can be eliminated by replacing the release bearings. This procedure can be carried out in a garage.
As a rule, during maintenance of a Toyota Corolla with a manual transmission, initialization is required. This will help identify existing problems. Initializing the box is the process of resetting the previous settings of the transmission ECU. It should be noted that frequent initialization has a negative effect on the clutch. This will lead to accelerated wear of its component auto parts. In winter, the owner of a foreign car may encounter a problem such as loss of functionality of the sensor, which is responsible for changing speed modes.
Each individual version of the car requires a certain amount of transmission fluid (approximately 2-2.5 liters). For Toyota Corolla with robot, add oil that must meet SAE 75W viscosity (GL-4 class). Replacing the robotic gearbox on a Corolla 2007 is possible either partially or completely.
Recommendations for operating the machine. When operating a Corolla car with a manual transmission, you should adhere to a number of rules, for example, it is not recommended to press the gas pedal sharply. It is not recommended to skid.
Robot "Multimode" - functions and purposes
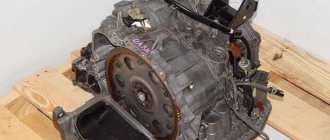
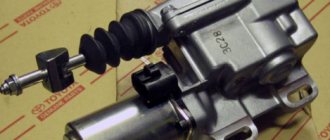
As mentioned earlier, the Toyota Corolla Multimode CVT is an excellent option for those drivers who are tired of thinking about manual gear shifting. The MMT consists of automatic and electric clutch control elements. The main component that performs the specified functions by the system is the actuator. This is one of the few elements that experiences wear and tear on its components (brushes, bushings and the drive motor itself).
MMT Toyota Corolla
“Multimode” is an improved variator created by Toyota for even smoother torque shifts. The new variator “Multidrive S” released by the Japanese has become even more productive. Now fuel consumption is reduced by 10-15%, and gear smoothness is reduced to a minimum.
More on the topic:
The advantageous characteristic of the Multimode variator is the ability to travel in emergency mode. After any malfunction, the sensor transmits a signal to the TCM, which turns on the emergency lamp. In such situations, autonomous driving mode is activated.
Video: Toyota Corolla 300N/MC 1.6 robot, acceleration to 100 km/h
Owners of Toyota Corolla cars produced between 2006 and 2008 often encounter problems with the operation of a robotic gearbox.
The manufacturer admitted a flaw in the creation of the MMT, which entails the initialization of all parameters and subsequent premature repairs.
To successfully initialize the robot box on a Toyota Corolla, it is necessary to perform certain sequential actions; this is the only way to correctly configure the operation of the entire transmission.
What is this procedure?
This procedure configures or resets all ECU parameters. As a rule, it is done during the replacement of any repair work when the elements of a given transmission were replaced, for example:
- The MMT kit is completely changed, or parts of the box or clutch are partially updated (in this case, the transmission itself is initialized);
- Sensors, electrical unit or electric drive are changed (in this case the unit is initialized)
Calibration or adjustment is done in case of failures or in case of unknown errors.
It is important to know that it is not recommended to carry out the ECU initialization procedure without compelling reasons. If you do it often, it will lead to the fact that the clutch and its parts will quickly wear out. And its effect will be short-lived.
There are a number of common opinions regarding this procedure that are erroneous, for example:
- After it, the car begins to move off easier;
- It is carried out in order to eliminate jerks that occur at low speeds;
- If the clutch supply drive rack is not positioned correctly, you need to reset the system.
Therefore, all work related to this procedure should be carried out only if there are compelling reasons for this, with the agreement (consultation) of a specialist.
Reset
The reset procedure is as follows:
- The car is installed on the handbrake;
- Using a paper clip in the block, contacts 13 and 4 are closed between TC, CG and DLC3;
- Turn on the ignition and press the brake pedal seven times, after which short signals will sound, which notify that the diagnosis has begun;
- The brake pedal is pressed again and the gearshift knob changes gears in the following order:
- The brake pedal is released and pressed again until a series of signals appears (notifying that adjustment is in progress)
- If all work is done correctly, the following sound signals will sound:
If long beeps are heard during or after setup, this indicates that the setup was not performed correctly. To solve the problem, you need to reboot the system; to do this, pull out the key and insert it back after about twenty seconds, then do all the steps again.
- The ignition is turned off and the closed contacts are disconnected.
Transmission setup
After initialization on the Toyota Corolla is completed, it is necessary to configure the system that controls the robot, for this:
- The car stops;
- The gearshift knob is moved to the neutral position “N”;
- The ignition is turned off, after which it turns on for about forty seconds;
- The ignition turns off again for about fifteen seconds;
- The ignition is turned on, the engine starts and the foot brake is applied.
If everything is done correctly, the indicator showing the neutral position “N” will blink, and after ten seconds it will stop blinking and just start to light up, this is a signal that the setup is complete.