Techstream is a special-purpose program that checks car ECUs and diagnoses them. In the software you will test Toyota, Lexus and Scion cars using the OBD-II protocol. Techstream is a multifunctional tool that checks the technical condition of vehicles. The program contains many tools that allow you to find faults in cars of different brands.
The software is universal and allows you to scan cars, finding most faults and errors through codes of electronic control units. All data can be saved into a separate file, and during the scanning process you view the current state of the car.
According to the creators, this software is more functional and shows more technical parameters than the universal utilities CarProg or ScanMaster ELM.
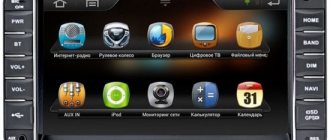
Interface
The Techstream graphical interface is created in a modern design and does not contain unnecessary elements.
In the thematic sections of the program, you will use tools that are responsible for tests with the ECU, as well as their “firmware”. Using these sections, you work with the CAN bus. The program is also equipped with sections that work with maintenance functions, as well as reference documents for operating the vehicle's ECU. The software has a simple shell that is suitable for inexperienced users.
There is a minus in Techstream - the lack of Russian localization on the new version of the software. The old version of the program is available in Russian, and the new one in English.
Diagnostics. Working with Toyota TechStream, part 1.
Modern cars are stuffed with electronics, but unlike a regular car, a hybrid inherently has even more complex electronic components.
A few years ago, diagnostics of hybrids seemed to be a complex and very expensive commercial issue (diagnostic equipment is expensive). And to this day, for example, in Khabarovsk only a few services are ready to undertake hybrid diagnostics.
Thanks to our neighbors from the Middle Kingdom, who have learned to clone expensive diagnostic scanners that do not differ in functionality from the original ones, they have become available. This allows you to independently diagnose the car, which significantly reduces the risk of fraud on the part of sellers. Also, diagnostics carried out independently help to save on such things as resetting dynamic errors, resetting service intervals, etc.
What we have: https://www.aliexpress.com/item/Newest-Professional-Scanner-MVCI-Interface-For-Toyota-TIS-Volvo-Dice-Lexus-Super-M-VCI/608217905.html
Diagnostic scanner M-VCI 3 in 1 for dealer diagnostics: Toyota, Honda, Volvo, Acura, Lexus, Scion.
For Toyota - Toyota Techstream.
For Honda - Honda HDS.
For Volvo - Volvo Vida Dice.
The Toyota TechStream complex, which replaced the Toyota Intelligent Tester II, is its complete replacement and allows for complete diagnostics at the Toyota/Lexus/Scion dealer level for all markets USA, Europe, Japan. The TOYOTA TechStream complex consists of a laptop, a diagnostic interface and a Toyota TechStream diagnostic program.
The difference between the X-Horse M-VCI clone and the original scanner is the reduced interface speed, but in terms of functionality they are completely identical.
The clone cannot be updated with new firmware, for it it is death.
Working in Win 7 is fraught with minor difficulties, namely incorrect operation of the drivers. Therefore, I installed Win XP using a virtual machine, where I conduct all the experiments.
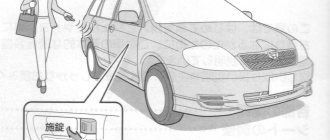
Using TechStream is visually simple.
As a result of the diagnostics, several (current) current fault codes were identified:
C1300/62 Internal malfunction of the skid control ECU;
B1421/21 Open or short circuit in the solar radiation sensor circuit on the passenger side;
B1275 There is no communication between the data bus buffer and the body ECU.
These hang in history:
P3193 fuel run out - ran out of fuel 
B1411/11 Interior temperature sensor circuit (open or short circuit).
After resetting the errors, only one remained hanging:
B1275 There is no communication between the data bus buffer and the body ECU.
Using TechStream, you can monitor many parameters of the system, both internal combustion engines and hybrid. Maintain charts and record logs.
You can see a bunch of high-voltage battery parameters. The main ones worth paying attention to are: the resistance of pairs of elements (blocks), the voltage of the blocks.
The resistance should not vary by more than 0.02 Ohm, and the voltage under load should not be by 0.2 Volts.
Toyota TechStream key generator
Rubbing my sweaty palms, I turned to Techstream. I need it on my laptop to poke wires into a soulless piece of hardware.
I installed Techstream 11.xxxx, but it no longer allows me to work in “demo” mode, as it allowed me to work in all versions, it seems, up to 10 inclusive. A couple of people are giving out keys to the software for free, but to get them you need to fight on car-related forums and beg for them on your knees, and showing a strictly measured amount of pathos in your messages. Otherwise it won't come down.
In general, if you look at the Techstream binaries of versions up to 10 inclusive (everything interesting with the keys happens inside MainMenu.exe ) through the cloudy lenses of a disassembler, then everything is obvious there. The code is easy to read, but very smudged. In the 11th version, Toyota and the owner of a brand new Avensis (password for some lines inside the techstream itself, which are decrypted on the fly - MyNewAvensisIsWonderful
) decided to protect the binaries with some clever (maybe even home-made) protector. The protector protects against sudden attachment by a debugger, against the creation of remote threads, and against dumping using some utilities. Moreover, the techstream starts itself, then launches another one, this second techstream acts as a debugger and probably makes some kind of trace for the outcome of the process. I didn’t delve into the details, it’s not particularly interesting. By discarding the debugger with a process hacker, you can safely remove the dump, although having attached it with your debugger, I still watch the process end in a panic. Having taken the dump, I saw that, by and large, the key check functions, if at all, had been changed only slightly. This means that having created a code generator for the 10th version, in theory I will also have the 11th one. The reverse engineering was short-lived, thanks to Ilfak.
The key itself must certainly consist of 46 characters, and this is hard-wired into its verification functionality.
From the symbol 0 - 32 there are key bytes (I didn’t really understand, maybe it’s just MD5 from a salty line of the machine’s hardware ID). Next are 4 characters for the number of days that limit the validity of the key. On forums everywhere they offer a maximum of 5000 days, but Techstream even says 9999 days, but after a reboot it still shows 5000 days :). Next is the date in the year\month\date format when the key was generated. All this is checked to ensure that the key is not rotten, that there are always numerical values everywhere, and so on:
Where it says “interesting here,” there is interesting. :)) The function generates a key ID and compares it with what the user entered in the registration form. Matches - ok. Doesn't match - not ok. Everything, as you can see, is ilimentary. What are we doing? We search for this call in memory with a signature, after it we put a jump in our code, where we extract the generated key from the stack and show it to the user so that he can copy it and... enter it!
DWORD dwOldFunctionAddress = 0;
VOID WINAPI DisplayNaturalKey(PCHAR EnteredKey, PCHAR GeneratedKey){ CHAR NaturalKey[MAX_PATH] = { 0 }; StrCpyA(NaturalKey, GeneratedKey); StrCatA(NaturalKey, "50001511030836"); if (StrCmpIA(EnteredKey, GeneratedKey)){ DisplayMyMessage(0, 0, NaturalKey); } } __declspec(naked) VOID HwGeneratorHook(){ _asm{ lea eax, dword ptr mov ecx, dword ptr pusha push eax push ecx call DisplayNaturalKey popa mov ecx, dword ptr lea eax, dword ptr mov esi, dwOldFunctionAddress jmp esi } }
Yes, crutches, assembler, shit code, all this. To do this, I coded a small dll, which is injected into MainMenu.exe by the starter (our small exe) and that’s it. EXE simply injects the dll into the techstream, except that for the 11th version you need to disable the “debugger”; for this I took the function from the process hacker .
FORCEINLINE ULONG PhGetProcessDebugObject( HANDLE ProcessHandle, PHANDLE DebugObjectHandle ) { _NtQueryInformationProcess NtQueryInformationProcess = (_NtQueryInformationProcess)GetProcAddress( GetModuleHandleA("ntdll.dll"), "NtQueryInformationProcess"); #define ProcessDebugObjectHandle (30) return NtQueryInformationProcess( ProcessHandle, ProcessDebugObjectHandle, DebugObjectHandle, sizeof(HANDLE), NULL ); } BOOLEAN WINAPI PhUiDetachFromDebuggerProcess( HANDLE hProcess ) { HANDLE debugObjectHandle; _NtSetInformationDebugObject NtSetInformationDebugObject = (_NtSetInformationDebugObject)GetProcAddress( GetModuleHandleA("ntdll.dll"), "NtSetInformationDebugObject"); _NtRemoveProcessDebug NtRemoveProcessDebug = (_NtRemoveProcessDebug)GetProcAddress( GetModuleHandleA("ntdll.dll"), "NtRemoveProcessDebug"); if (PhGetProcessDebugObject( hProcess, &debugObjectHandle ) == ERROR_SUCCESS) { ULONG flags; flags = 0; NtSetInformationDebugObject( debugObjectHandle, DebugObjectFlags, &flags, sizeof(ULONG), NULL ); NtRemoveProcessDebug(hProcess, debugObjectHandle); CloseHandle(debugObjectHandle); } return TRUE; } /* copyrights are observed in all matters, the soul is calm */
How to use. Quite simple. Copy the dll and exe to the folder with MainMenu.exe, run Starter.exe and if you see a message that everything is ok (“Code patched, try register”), try to register. Techstream will ask you to enter a key, enter the one you know is correct, for example
0000000000000000000000000000000050001511030836
and click OK. At this moment, Techstream generates the correct key, my code intercepts it and shows you so that you copy and paste it and Techstream will give the go-ahead for it. After successful registration, you can start techstream as usual, without using the starter.
My method is good because I don’t damage the original techstream files, the firmware update software works the same way, and the key is legal.
Compiled files (RAR, password is the same as the guy with Avensis) and source codes here: https://drive.google.com/folderview?id=0BwEpHfeP-hWDbGo4Q3BTYnR3WE0&usp=drive_web Runtime is required to work https://www.microsoft.com /ru-RU/download/details.aspx?id=40784
Demo:
Tags
- denso
- keygen
- techstream
How to install and activate Techstream for Toyota Corolla e180?
To independently diagnose a Toyota Corolla E180, you need the Techstream diagnostic program. This is a special program for diagnosing exclusively Toyota cars, but in our case - without connecting to databases and without technical support. But for personal use this is more than enough, especially for novice diagnosticians. )))
In this article I will give an example of how to install Techstream version 10 on your computer, and completely free of charge. Why exactly 10?
It's simple, in version 10 you can still do activation in a simpler way than with later programs.
As an option, first install the top ten, work with it, study it, and only then install the more recent 12th version. Or you can even start with the Russified Techstream v7.12, but the translation is so crooked that it’s better to start studying the program in English.
The Techstream 10 diagnostic program will work with the Nissan3Line scanner. Before installing the program, you must first install drivers for the scanner, see how to do this in the article: installing drivers
You can download Techstream without money on the website of the nissan3line scanner developer, link: https://vdiag.net/
Go to the website, select Programs ->> further in the left menu ->> Toyota Techstream. And at the end of the page you will find links to download the program of different versions.
Program installation
From the downloaded folder, run the installation file: Techstream_Setup_V10.10.018.
In the first dialog box, select English, and then click: Next. As pictured:
We agree with the license and check the box.
In the window that appears, enter: user: 123 and company: 12345, then click NeXT, as in the picture:
Click: Install and the installation begins:
The program is installed!
Activation
We are not launching the program yet!
To activate - file:
C:\Program Files\Toyota Diagnostics\Techstream\Env\IT3System.ini
open NOTEBOOK, scroll the file to the bottom and change the value: TISFunction=1 to TISFunction=0. And save it as shown in the picture:
The program is activated!
Launch of Techstream
From the desktop, launch the shortcut: Techstream.
In the window that opens, select: OTHER, then English and click NEXT, as in the photo:
In the dialog box, fill in the fields and click OK, as shown in the picture:
The program has launched and is ready to work.
To continue working with the program, you need to pair the scanner with the program and connect to the car. How to do this, see the Techstream launch article
Article rating:
Published: 2018-02-27