02 Apr 20
The robotic gearbox provides the car with a dynamic and at the same time smooth ride. However, the disadvantages of such a mechanism are: unstable operation (the gearbox can arbitrarily switch to the neutral position, increase engine speed at a speed of 130–140 km/h, and also switch to uphill mode when driving on the highway). This instability is caused by the fact that the “robot” mechanism simply freezes. Also, the reason may be the insufficient operating life of such a mechanism. Therefore, the question arises of how to convert a robot into an automatic or manual one with your own hands.
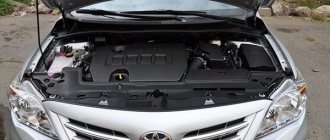
What causes the Corolla's manual transmission to go into neutral?
Operation of a robotic gearbox implies the presence of a malfunction such as engaging neutral gear. Often on a Corolla robot this happens as follows: the car is quite well warmed up, moves along the highway smoothly and without any obvious deviations, the check light suddenly lights up, neutral is switched on, and the car loses speed until it comes to a complete stop.
In order to fix the problem, you need to turn off the engine, wait a certain time and turn it on again. However, this move does not completely eliminate the problem.
Often, failure occurs due to wear of a pair of release bearings, as well as the guide. If you replace these components, then diagnostics will not be required, and the replacement process can be carried out at home.
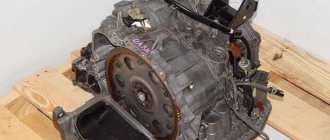
The design of the robotic gearbox is not the same on different Toyota models, only the principle is the same - its design contains a manual gearbox with a gear control system and a clutch. The clutch in the Toyota Corolla gearbox is of a friction type. An important innovation here is the double-clutch device, thanks to which torque is transmitted continuously and there is no power gap in this scheme.
Usually, when designing a robot box, gearboxes that already exist for this Toyota Corolla model are used. Only control units are replaced. The robotic gearbox has an electric drive with a servo mechanism, which includes an electric motor with a mechanical transmission. The electric drive is characterized by a low operating speed of the control mechanism (0.3 - 0.5 seconds), which is why such units are installed on budget models. Sports robotic boxes have a hydraulic drive, which has a very high switching speed - 0.05 seconds.
There are two modes of operation of the Toyota Corolla robotic box:
- semi-automatic;
- auto.
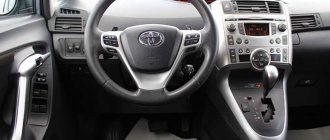
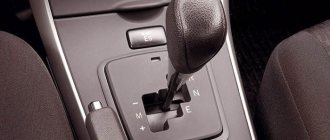
When operating in the automatic version, the box control algorithm is implemented by an electronic unit based on signals from input sensors. This happens through the execution mechanism. But in semi-automatic mode, the robotic gearbox allows you to switch from low to high gear using the gear selector lever and switches located under the steering wheel.
For this reason, in various literature, a robotic gearbox is often called a sequential gearbox (sequential).
This is interesting: Toyota Corolla washer tee repair
Repairing a robot in a service center
Not only the lack of speeds, but also the robot’s constant transitions into neutral gear annoyed and gave Toyota owners headaches. In workshops with such a symptom of a breakdown, they usually replaced the release bearing, and sometimes the clutch assembly - this often solved the problem. Jerking when the car starts moving - the clutch actuator has probably failed. In the centers, as a rule, they made do with changing the actuator.
Other breakdowns and solutions:
- Faulty electrical part. The repair involved changing the firmware of the control unit, changing the electric motor brushes, and replacing the circuit boards.
- Worn hydraulic and mechanical components. Bearings, gears and hydraulic cylinder were also regularly replaced.
- Failure of the system associated with the gear selection mechanism. In the event of such a malfunction, the motor winding, sensors and bearings were replaced.
You can avoid many troubles by adhering to the basic rules of operating a car with a robotic gearbox. Experts recommend not driving too slowly uphill, switching to manual mode and to a “lower” gear, warming up the manual transmission in winter before driving, and also changing the oil and filters in a timely manner. But even if all recommendations are followed, Multimode is not capable of traveling more than 150-180 thousand km. All these shortcomings led to the fact that the robot began to be replaced by a hydraulic automatic transmission, and then by a variator.
Toyota robotic transmission shift selector
Robotic box – Freetronic
Robot control unit
Clutch Actuator
Robotic box – Multimode
edit this post
The transmission does not start
The most common malfunction when operating a 2007, 2008 Toyota Corolla is that the manual transmission does not engage gears. The reasons for such a breakdown may be the following factors:
- Long-term use of the car in winter. The sensor responsible for gear shifting “freezes”, because of this, when you try to change gear, the box is knocked into neutral.
- Gear shifting problems also occur due to a faulty actuator. If this mechanism breaks down, it must be replaced immediately.
- A similar problem can occur when operating a car in the summer. However, in this case, the robot on the Toyota Corolla 2008 simply overheats.
- The problem may occur if the clutch overheats.
See about copters: Robot Games - Play for Free
Robot box control
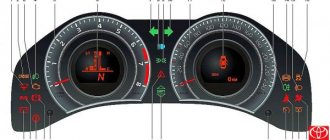
The electronic control system of the robot box is based on sensors and actuators. Input sensors control:
- shaft rotation speed at the entrance to the gearbox and at the exit from it;
- gear selector position;
- shift fork position;
- oil temperature in the box.
All collected information is transmitted to the control unit, where, based on sensor readings, control signals are created for the operation of execution mechanisms. All this is managed by a special program. The ABS system and the engine management system are also connected to the electronic unit. For proper operation in winter, pre-heating of the gearbox is necessary.
Using a car with a manual transmission in winter
As mentioned earlier, the main reason for the unstable operation of manual transmissions is low and high temperatures. And if in the summer everything is clear, in order to ensure normal functioning it is necessary to ensure stable cooling of all manual transmission systems, then in the winter a number of recommendations must be followed.
Before you drive your car, you need to warm it up (warm-up time depends on the thermometer reading: the lower the outside temperature, the longer it takes to warm up the car).
The vehicle should be stored in a well-heated room (at a temperature of 5 to 15 degrees).
Thanks to the above recommendations, you can ensure more stable operation of the box in winter.
Operating principle of the robot box
Before doing any work with a robotic gearbox, you need to understand what it is. This transmission greatly simplifies driving due to the automatic operation of the clutch and gear shifting. The box reads the information that is transmitted by the driver, while taking into account how the car is moving, then the information is processed in the ECU, after which the box operates according to a certain algorithm.
When buying a car, the main factor is its transmission. Namely - automatic, variator or robot. And here the buyer begins to be overcome by doubts - which is better? After all, robots and CVTs began to appear relatively not very long ago, following automatic machines. And, although the main characteristics of these devices are already known, car enthusiasts are afraid of any surprises.
Watch about copters: How to avoid crashes (falls) and increase the flight stability of a quadcopter - Hellhog - blog
The most common opinion is that an automatic transmission is much better. And this is the most common opinion about the machine.
Let's try to understand the disadvantages and advantages of these types of transmissions.
Advantages of robotic gearboxes over automatic transmissions:
- low fuel consumption when driving;
- low price of the box and its maintenance.
Disadvantages of robotic boxes:
- low gear shift speed compared to an automatic;
- not always satisfactory smoothness of movement when switching;
- the need to warm up before driving in winter.
Toyota Corolla cars can be equipped with a gearbox – a MULTI-MODE robot. Most often, during repairs, owners of such models complain that neutral is switched on while driving, and at the same time the malfunction indicator begins to signal. And until you turn off the ignition and start the engine again, the car does not move either back or forward.
Another malfunction and reason for repair is that the Toyota Corolla car moves jerkily when starting off. Most often this is due to failure of the clutch actuator. For repairs, a standard actuator repair kit is sufficient.
To prevent the failure of robotic boxes, the literature advises in the winter before starting to drive to warm up the oil in the box, leaving the car to idle for some time. The habit of warming up the box before driving helps to extend its service life and avoid repairs.
Warming up the robot in winter is possible while parked, because in neutral gear the input shaft rotates and the oil in the gearbox gradually warms up. But it warms up even faster (reheating) even while moving. Just drive for the first hundred meters without accelerating. Warming up occurs very quickly even in winter in severe frosts.
Repair work related to the electrical part of the Toyota Corolla robot box first begins with testing it using special Toyota Techstream diagnostic equipment. It works great with Toyota Corolla boxes.
This is interesting: Removing and installing the Toyota Camry lower arm
Advantages of replacing MMT with automatic transmission
Some versions of the Toyota Corolla are equipped not with a standard automatic transmission, but with gearboxes based on a robotic selector or CVT. This is done in order to reduce production costs and comply with environmental standards. Such “automatic” transmissions have their drawbacks.
CVT Robotic gearboxes have the following disadvantages:
- Incorrect functioning of the selector;
- Freezing of servos;
- Clutch wear in the cold season;
- Failure of actuators;
- Inability of a vehicle to smoothly negotiate an obstacle.
The variator also has its disadvantages:
- Almost complete impossibility of repair;
- In case of slipping, the resource is quickly lost;
- Also cannot smoothly overcome an obstacle;
- There is a high level of wear when towing.
In most cases, all such shortcomings are eliminated by replacing the MMT with an automatic transmission. Such a transition from one type of transmission to another has certain advantages:
- High level of maintainability, reliability;
- Correct functioning, smooth gear shifting;
- Increased service life, low cost of repair work;
- Gears do not shift to neutral.
The only negative is the termination of the car's warranty service.
So, in order to install an automatic transmission instead of a robot, you must first stock up on a ready-made kit; the U340E automatic transmission is ideal. This type of transmission is characterized by high performance, reliability and unpretentiousness.
Redesigning a robot is a completely doable process, and you can do it yourself. After an automatic transmission has been purchased instead of a robot, a “fitting” should be carried out to ensure that the mounts for the gearbox match. If necessary, an additional bracket should be made.
Next, an automatic transmission is installed. In addition, you should connect the wires to the simulator and the rocker. The final stage of this type of repair is fixing the machine's backstage and assembling the interior of the Toyota Corolla E150, 2008, 2007.
It is important to note that the process of converting a manual transmission to an automatic transmission is almost the same for all Toyota Corolla cars, with the exception of the latest models. The automatic transmission kit can be removed from Corolla to Corolla to replace the MMT.
How to operate manual transmission correctly?
In order for the operation of an automated gearbox to be comfortable and reliable for as long as possible, it is necessary to follow a number of rules. Briefly about how to use manual transmission correctly:
- The robot does not tolerate sudden pressure on the gas pedal. The best option is when the driver chooses a calm driving mode. If you need to accelerate, it is also best to press smoothly. And, most importantly, remember a simple rule: PPTA - acceleration in manual mode, braking in automatic mode.
- One of the features of the robot is that during operation there are shocks when changing gears. In order to eliminate this factor, you can reduce the speed of the power unit.
- Thanks to the manual mode, you can easily get out of a snowdrift using the “swing” method. However, it is not at all recommended to skid on a robot, since the service life of the manual transmission is significantly reduced.
- During vehicle maintenance, it is necessary to initialize the manual transmission, as well as complete diagnostics. This is necessary in order to identify any problems at the stage of their occurrence.
See about copters: Which robot vacuum cleaner to choose: TOP 7 best models, reviews, tips before purchasing
Gearbox robot Toyota Auris
The comfort of driving this car was made possible thanks to the adaptation of the Toyota Auris robot. Unfortunately, problems often arise with the gearbox here, so replacing the Toyota Auris clutch with a robot is not uncommon.
The clutch is the most frequently encountered problem in Toyota. After about 90 thousand mileage, the clutch fails. Of course, the specific period depends on the conditions in which the car is used and how intensively it is driven. For example, when driving exclusively in the city, over short distances, the clutch holds longer than when used in suburban mode.
To increase clutch life, you can:
- when in traffic jams, during long stops at traffic lights, turn on the neutral position of the gearbox (if you ignore this advice, you may soon need to replace the Toyota Auris actuator);
- abandon an aggressive driving style to reduce the load on the clutch;
- periodically use the manual control mode of the gearbox, then the control unit will remember the driver’s driving style and will repeat it while driving in automatic mode;
- change the oil after 60 thousand km of distance traveled (in MMT), if this is not done (by the way, this is what the manufacturer recommends), then problems will inevitably arise.
What is the real fuel consumption for a Toyota Corolla with automatic / manual transmission
- Toyota Corolla, engine capacity: 1.33 – 5.8 l. — AI-95;
- 6 l. – 6.9 – 7.2 l. - AI-95. Depending on the configuration of the technical device;
- 6 MultiMode – 6.7 l – AI-95;
- 6 AT Comfort Plus – 7.2 l. - AI-95.
The data are averaged. It should be taken into account that in the urban cycle and on the highway, fuel consumption will differ significantly from the above figures. In general, fuel consumption with a manual transmission is half a liter lower.
When systematically using a Toyota Corolla in densely populated cities, there is no significant difference in consumption. The savings will only be “felt” outside the city, on long trips. Fuel consumption can also be adjusted by using a moderate driving style of the vehicle. On the contrary, an aggressive style helps to increase consumption.
What is better: repair or replacement (cost of a new and used box)
Service station mechanics recommend in this case to be guided by the size of the budget. Obviously, it is better and more reliable to purchase a new transmission, but this is not possible due to the high cost. Another thing is contract, the price of which is half cheaper, but the quality does not always meet factory standards.
An automatic transmission after a major overhaul will cost 15–16 thousand rubles, depending on the place of order. The price for a new original automatic transmission is 2 – 2.5 times higher. New manual transmission (manual transmission) is 15% cheaper than an automatic transmission.
Repair or replacement... For minor damage, without deformation of the case - repair. In all other cases, only a complete replacement. All actions are carried out after a comprehensive diagnosis by service station specialists.
Stage I. We remove the subframe.
1. We hang the car. I won’t describe the process, there’s a lot to do here. It turned out like this for me.
2. Remove the wheels. 3. Unscrew the ball joints where they fit on the lever.
4. Remove the plates that secure the subframe to the body.
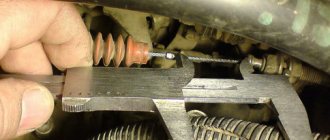
5. Unscrew the steering rack. It is held on by studs; the bolt on top must be held with a 14 key. 6. Unscrew the subframe from the rear cushion. 8. We deal with the rods from the gearshift lever. It is necessary to disconnect the connection (bolt with cotter pin x 2) and remove their fastening from the gearbox housing. 7. Now remove the CV joint boot (wide side) and pull it off. Carefully remove the CV joint and immediately pull the bag over it to prevent dust and dirt from getting inside. Same thing on the other side.
8. Now you need to deal with the stabilizer. You can pull out its struts, you can unscrew it from the subframe at the bushings. I couldn’t cope with the racks, everything was very cleverly arranged there, there was no WD to unwind it. So I pulled it away from the bushings and it was done.
9. There are 2 studs left on which the subframe hangs. This is where the long 19mm socket comes in handy. Jack up the subframe. We unscrew the nuts (I was only able to unscrew them with a 2-meter amplifier). We call an assistant and carefully remove the subframe. Ready.
10. Remove the longitudinal beam.
Changing the oil in a Toyota Corolla automatic transmission
Changing the fluid in a Toyota Corolla automatic transmission must be done on a regular basis. Some car owners mistakenly believe that the service life of the lubricant is long, so they are in no hurry to change it. And some people simply forget about this procedure. Statistics show that in both the first and second cases, the probability of transmission failure increases many times over.
This is especially offensive, considering that in order to avoid repair or replacement of the Toyota Corolla automatic transmission, it was enough to simply replace the used oil in a timely manner.
To change the oil in a Toyota Corolla automatic transmission, you cannot do without:
- funnels with a thin neck;
- gloves;
- set of keys and sockets;
- selected ATF fluid for the automatic transmission (it is better to use “Toyota ATF Type T-IV” or “Toyota WS”);
- filter and sealing ring;
- gasoline or kerosene;
- wooden spatula.
Changing the oil in a Toyota Corolla automatic transmission is performed in the following sequence:
- It is necessary to warm up the car engine, and then place the vehicle on a lift or inspection pit (a lift is preferable).
- Open the drain plug of the Toyota Corolla automatic transmission pan.
- Using wrenches, unscrew the pallet bolts, the first two need to be unscrewed completely, and the remaining ones - not completely.
- Remove the pallet using a wooden spatula, which will not damage either the gasket or the pallet itself. After the bottom is held in place by two not completely unscrewed bolts, you need to make sure that the gasket is held on it or on the transmission housing. Please note that the pan will be hot due to the engine warming up, so you need to remove it carefully, using gloves and first unscrewing the bolts. Be aware that it contains hot oil. You need to remove the pan, unscrew the differential plug, and then drain the fluid.
- Using kerosene or gasoline, you need to rinse and clean the magnetic plug, magnets and the inner surface of the pan, and then wipe dry, removing any remaining fuel.
- Wipe the gasket and the place where it is installed with gasoline (kerosene). If necessary, replace the seal.
- Replace the filter and sealing ring.
- Reinstall the magnets.
- After replacing the components, you need to assemble all the parts in the reverse order: tighten the magnetic plug, put the pan in place, tighten the bolts.
We recommend
“How to change the oil in an automatic transmission: advice from professionals” Read more
- Replace the drain plug.
- Pour lubricant through the filler hole in an amount slightly less than was drained. Check the level with a dipstick and add oil if necessary.
- Start the Toyota Corolla and let the engine warm up to operating temperature.
- While the power unit is operating, you should switch the automatic transmission modes (R–N–D–2–L, repeat in reverse order). The interval between switching should be approximately 10 seconds. This must be done 3 times.
- Check the oil level with a dipstick - the liquid should reach the upper limit.
Keep in mind that when filling and checking the lubricant level, the vehicle must be positioned on a flat, horizontal surface. Too much oil is also harmful to the engine, so it must be pumped out, for example, using a syringe and a dropper tube sold in pharmacies.
When changing the oil in a Toyota Corolla automatic transmission, make sure not to exceed its level, since otherwise there is a high probability of incorrect functioning of the automatic transmission components, foaming of the lubricant, and slipping of the vehicle.
We talked about how to independently perform a partial oil change in a Toyota Corolla automatic transmission. The first time you will have to spend about 2 hours, while stocking up on attention, patience and confidence in successful work.
Please note that completely changing the oil in the gearbox is a rather difficult task, which should be entrusted to specialists.
The video below shows how to replace the robot with a Toyota Corolla automatic transmission:
Toyota Corolla actuator repair
Toyota Corolla actuator disassembled
Complete replacement of the clutch actuator is a very expensive proposition. Therefore, it is recommended to repair the Toyota Corolla actuator yourself.
The first stage of preparation is checking the clutch. We accelerate the car to 50-60 kilometers/hour, switch to manual mode and turn on fifth speed. At the same time, we press the gas to the floor; if the movement of the tachometer needle coincides with the speedometer needle, then the clutch is most likely in perfect order. After this check we proceed directly to the repair.
Determining the MMT error Toyota Corolla
DLC3 block with CG and TC contacts
We stop the car, put it in position “N”, then turn off the ignition and parking brake. Using the SST “paperclip” we connect the TC and CG contacts of the DLC3 block (as in the photo). When turning on the ignition, take your foot off the brake pedal. The diagnostic system will start (all lights on the panel will start blinking). If any errors occur, the “red gear” will blink at intervals. If there are no problems, then it will blink without long intervals.
How to remove a Toyota Corolla actuator?
In order to get to the actuator, we need to remove the battery and the platform under it. Then we disconnect the chips from the sensor and the actuator motor. We directly remove the actuator itself (you need to unscrew 3 bolts).
The first thing to do is to disconnect the motor from the mechanism. Most often there is a lot of dust and dirt inside that needs to be cleaned. We check the brushes and replace them if necessary (if the length is less than three millimeters). To determine whether it is time to change the motor or not, inspect all the wiring (it should be fresh, without plaque or unpleasant burning smell).
Toyota Corolla actuator disassembly
When we have the drive in our hands, we begin disassembling its elements. Unscrew the sensor fasteners with a Phillips screwdriver (be sure to remember the position in which it is placed). Under the sensor there is a plate with antennae (six nuts) that need to be unscrewed. Then, in order for our process to go in the right direction, we need to set the position of the rod. To do this, take a screwdriver and twist the rotating element in the groove where the drive motor is located. This will begin to adjust the stem. We set it to the maximum compressed position.
Actuator spring Toyota Corolla
Now you can unscrew all the bolts in a circle and open the cover. To pull out the drive rod, unscrew it and take it out. We remove the lubricant and clean the entire block. We diagnose all elements and identify problems. The easiest way is to pull out the spring and assemble (for testing) the entire test kit. Most often this is wear on the bushings or a problem with the drive itself. But it’s different for everyone, and you need to identify the causes of the malfunction individually.
During assembly, we replace the lubricant (temperature characteristics of the oil -40°C to +250°C). We perform the reverse procedure to collect all the elements of the actuator.
When the actuator is fully assembled, set the rod to its maximum outward position and turn it half a turn. We install the sensor on the antennae and turn it clockwise so that the holes of the element bolts coincide with the body. We treat the clutch fork well with universal grease and install the drive with a gap of 5 - 9 millimeters. Next, we install the chips on the engine and drive sensor, then install the cover and the battery itself.
At first glance, performing this procedure may not seem like an easy process. Perhaps the first time will be difficult and unclear. But you will gain experience and know your car better. Moreover, when you install a repair kit for the Toyota Corolla clutch actuator yourself, this will save money and bring you a little closer to understanding the car.
Recommendations for increasing the service life of automatic transmissions
- systematically warm up the car before each time you leave the garage;
- undergo technical inspection strictly according to the approved schedule. An increase in interval is allowed, but not more than 500 km;
- fill the transmission fluid strictly in accordance with temperature indicators, observing the viscosity coefficient;
- do not exceed the permitted speed limit;
- Avoid slipping and over-gearing. If necessary, keep the tachometer needle in the green - yellow zone, balance the load with rest for the automatic transmission.
Replacing manual transmission with manual transmission
If changing an isitronic to an automatic transmission is a completely feasible task (the only thing that is important is to also change the electronic control unit of the car), then such a conversion to a manual transmission is quite a troublesome and expensive pleasure.
Changing the transmission from a robot to a manual one is difficult. After all, in addition to the box itself, you should stock up on a new clutch kit, an actuator, an electronic control unit, and you will also have to “reflash” the intelligent system of the Toyota Corolla car. All these operations require the motorist to have certain knowledge, skills and abilities. In addition, certain cash injections will be required.
Replacing a robot with a mechanic in a Toyota Corolla with your own hands is carried out as follows. Initially, the clutch, manual transmission, rocker and brake pipes are dismantled. A manual gearbox is “fitted” in place of the removed parts.
Important! For stable operation in the future, it is necessary to use the manual transmission assembly from the Corolla. You should also avoid purchasing a used manual transmission.
If necessary, additional mounts for the gearbox should be made. Next, the rocker is connected with cables to the box, and a clutch pedal is equipped in the cabin. “Brains” should also be separated from “mechanics”.
This work has a number of difficulties. First, you need to make a hole for the rocker and clutch pedal. Secondly, even despite the high-quality work done, as well as the novelty of the manual transmission and all the “related” parts, serious design changes can affect the stability of the car. Therefore, independently replacing a manual transmission with a manual transmission is a very big risk. Ultimately, you can end up with expensive repairs.
Well, thirdly, this is cost and time. A new manual transmission assembly costs about 50–60 thousand rubles, and you also need to add 10–15 thousand for related parts. And the replacement process itself can leave the car owner without a vehicle: installing a new box will take about 3-4 weeks.
Corolla 2007
Tell me, is it possible to install a manual transmission instead of a robot on a Corolla 2007
- 06.04.2015 00:04#2
I'll tell you a story about the little engine that could ©
- 06.04.2015 02:19#3
Anything can be done! The question is - what will it cost? yes, what did you like about the robot?
It's better to get a tit in the hand than a smack in the face...
- 06.04.2015 03:01#4
Message from Virius
Anything can be done! The question is - what will it cost? yes, what did you like about the robot?
the robot is buggy...the actuator needs to be constantly trained...robots are no longer installed on Corollas
and Corollas with robots were subject to a recall program...they either had the robot treated or had the mechanics stuck
One fool can ask so many questions that 100 wise men cannot answer. (With)
- 06.04.2015 05:07#5
- 06.04.2015 05:39#6
- 06.04.2015 07:57#7
I wonder if this is a hassle and the price of the issue (at least approximately)
- 06.04.2015 08:05#8
Posted by zemaaaaa
I wonder if this is a hassle and the price of the issue (at least approximately)
50 thousand if cheap
- 06.04.2015 08:46#9
Message from Sergey Bely
the robot is buggy...the actuator needs to be constantly trained...robots are no longer installed on Corollas
and Corollas with robots were subject to a recall program...they either had the robot treated or had the mechanics stuck
TC may need to work on the issue with the recall program. My experience: Prius '07, imported from the United States, in 2013 I wrote a letter to Toyota asking if my car was subject to recall. After 2 months I received a positive response and free replacement of problem units.
- 06.04.2015 08:49#10
Posted by Ajhvjpf
TC may need to work on the issue with the recall program. My experience: Prius '07, imported from the United States, in 2013 I wrote a letter to Toyota asking if my car was subject to recall. After 2 months I received a positive response and free replacement of problem units.
Where is UWB?
I'll tell you a story about the little engine that could ©
- 06.04.2015 09:29#11
Message from Samodelkin
Where is UWB?
In North America.
- 06.04.2015 15:40#12
Posted by Ajhvjpf
TC may need to work on the issue with the recall program. My experience: Prius '07, imported from the United States, in 2013 I wrote a letter to Toyota asking if my car was subject to recall. After 2 months I received a positive response and free replacement of problem units.
2013 is not 2015 and I'm the 3rd owner
- 06.04.2015 15:57#13
What, the box is already dead? If not, then maybe it would be better to sell the car?
We have no middle We either have a snout or a pen please ©
- 06.04.2015 16:20#14
In the profile thread, ask the author a question.
Accounting services, opening of LLC, IP, management. 8 961 871 99 91
- 06.04.2015 20:12#15
Message from Samodelkin
Where is UWB?
United States of Pindosia.
- 06.04.2015 20:19#16
Posted by zemaaaaa
2013 is not 2015 and I'm the 3rd owner
What difference does it make which owner??? I was far from the first in Russia. And most importantly, the Toyota Prius in my body was not officially sold in Russia at all! And at the time of my application the car was already 6 years old. In general, do as you please, I don’t give a fuck.
- 07.04.2015 09:13#17
In terms of money, it will be cheaper to sell the car as is and buy it with a manual transmission.
- 07.04.2015 13:28#18
You have to buy a Corolla from the end of 9th, it has an automatic transmission.
The brave person is not the one who is not afraid of anything (everyone has a point), but the one who knows how to overcome this fear in himself.
This is interesting: Automatic and manual transmission Toyota Corolla 150: replacing a robot with a manual one
Stage III. Checkpoint.
1. Drain the transmission oil. 2. Unscrew the bolts that hold the gearbox to the engine. At this moment, the gearbox has not yet been unscrewed from the upper cushion. We also unscrew the bolts that hold the starter. Next, we carefully move the gearbox away from the engine with a balloon (a little bit to make sure it goes) 3. Unscrew the gearbox from the pillow. After this, your friend should insure you and hold the box just in case. 4. Remove the box. She stands on the guides. So it comes off quite easily. The shaft from the differential (which goes to the right wheel) is also splined. I used the spray gun a little from below, a little from above, evenly shorter. 5. We catch the checkpoint, carefully so as not to crush it. It weighs pretty decently, about 40kg I think. Ready.
Next we make the necessary repairs. Along the way, you can easily replace balls, tie rods and ends, and much more.
Installation is the same, in reverse order.
Similar materials
- Fuse block diagram for Toyota Corolla 7th generation (E100 body)
It happens that some part of the electrical system stops working and you start going through the whole crowd of fuses. To make troubleshooting easier, I will try to describe them...
Fuse block diagram for Toyota Corolla 8th generation (E110 body)
The main locations of the fuse and relay blocks are indicated by numbers in the figure from the manual. Fuses and relays located in the passenger compartment The main unit…
Installation of fog lights on Toyota Corolla 9th generation (E120 body)
All of the following applies to RESTYLED HATCHBACKS ALREADY equipped with standard wiring for fog lights! It’s easy to check - just pull the plug out of the bumper...
Cleaning the 1ZZ-FE throttle on Toyota: photo report
I think someone will find the report on cleaning the throttle useful. I decided to clean it because at warm-up speeds the car behaved strangely: the speeds fluctuated and after some time the car...
Add a comment
Click to cancel reply.
Replacing a robot with an automatic transmission
When replacing a robot with an automatic one, as a rule, a Toyota U340 system is installed; the car’s computer software must be reconfigured to work with the automatic one.
This gearbox has four stages, electronic diagnostic capabilities, and is characterized by a high level of reliability.
By replacing the robot with an automatic machine, the car owner receives:
- The appearance of signals about the selected mode on the control panel.
- Preservation of full operation of the climate control system, if it was available.
- A selector that fits easily into the interior of the car.
- Comfortable, reliable, long-term operation.
Replacing a robot with an automatic transmission for Toyota Corolla, Auris, Yaris, Verso in Krasnodar
Toyota owners with a robot want to know how to replace the robot with an automatic one? What is the cost of work when replacing a robot with an automatic machine?
Price list of service station services for replacing a robotic gearbox with an automatic gearbox. All work to replace the robot on Toyotas is carried out within three working days. Automotive service mechanics perform the work skillfully, efficiently and on time.
Replacing a robot with an automatic Toyota Corolla Krasnodar
We will quickly and efficiently replace the Robot with an automatic transmission in a car - price:
- Toyota Corolla — 65,000 rub. “KIT” - 45,000 rubles;
- Toyota Verso (2005-2009) - 75,000 rubles. “KIT” - 55,000 rubles;
- Toyota Auris — 65,000 rub. “KIT” - 45,000 rubles;
- Toyota Yaris — 60,000 rub. "KIT" - 40,000 rubles.
For residents of other cities and regions, we also send kits for self-installation of “KIT” to the regions. If you have 3 or more cars, our specialists travel to the cities of the Krasnodar Territory and the Russian Federation to install automatic transmissions in your city.
We produce kits for self-replacement of a robot with an automatic machine. Production time is from 2 to 4 days.
KIT kits for installing automatic transmissions on the following cars:
- Toyota Corolla, Auris, Verso, Yaris;
- Nissan Qashqai, X-Trail, Tiida, Teana, Murano, Juke;
- Citroen C1, C2, C3, C4 Picasso;
- Peugeot 108, 206, 207;
- Ford Fiesta, Fusion;
- Opel Corsa, Astra, Vectra.
Basic faults
There can be many variations of clutch failures, because it is a rather complex mechanism. Next, we will consider all the typical “symptoms” of troubles and the reasons for their occurrence. This information will allow you to reliably diagnose the condition of the clutch and the entire gearbox.
Increased noise in the clutch area
The noise is most noticeable when you press the pedal towards the end of its stroke. The reasons may be the following:
- Deformation or incorrect position of the pressure plate.
- Lack (or insufficient amount) of lubricant in the bearing.
The noise may also occur when the clutch is disengaged. This is usually due to the following reasons:
- Excessive wear on the release clutch.
- Front bearing deformation.
- There is too much clearance in the connection between the shaft hub and the driven disk.
Clutch slipping
This symptom manifests itself in very weak acceleration when the clutch is activated. This is especially noticeable when starting from a standstill. In order to check for this problem, it is necessary, with the Corolla engine turned on, to press the brake pedal, depress the clutch, activate 2nd or 3rd gear, and then smoothly release the clutch pedal. If slipping occurs, the engine will stall immediately. This is due to the following malfunctions:
- Pedal travel is too weak.
- There is excess oil inside the friction disc.
- The pressure or friction disc is excessively worn.
- The main cylinder compensation hole is dirty or blocked by the O-ring.
- The brake fluid has been filled in and does not meet the specified requirements for the specific clutch model. To avoid such problems, you must use only those consumables recommended by the manufacturer.
- The clutch drive is severely damaged.
- The release spring has lost its original elasticity, and therefore the pedal does not fully return to its original position after pressing. In such situations, the only solution is to replace the spring.
- The friction linings (located on the driven disk) are installed incorrectly or are severely deformed. For diagnostic purposes, in this case, the end runout of the linings is checked.
- The compression springs have lost their original elasticity.
- The cuff of one of the cylinders is excessively swollen. Most often this happens due to the use of brake fluid of inadequate quality, or when gasoline gets into it. Replacing consumables usually eliminates problems. Otherwise, replacement of deformed cuffs is required.
Noticeable jerking when operating the clutch
When changing gears (even smoothly), it changes position too abruptly. It is especially noticeable when driving aggressively. Possible reasons:
- The leaf springs of the driven disk have lost their elasticity.
- Toyota Corolla clutch actuator is faulty. Replacement is the only solution to the problem.
- The friction linings have been exposed to excess oil or other consumable fluids, or excessive wear of these elements.
Incomplete clutch disengagement
In other words, when the clutch is disengaged, the gearbox disc and gears continue to rotate for a short time (2-3 seconds). This problem is due to the following reasons:
- The gearbox uses oil with inappropriate viscosity.
- The clutch release elements are not adjusted correctly.
- The flywheel or clutch discs have significant surface irregularities.
to prepare Click here
| 1. WHEN USING A HAND-HELD TEST: ADJUSTING THE CLAMP POSITION (CLUTCH POSITION ADJUSTMENT) |
NOTE:
- The multimode manual transmission uses a clutch housing (adjustment system) that is controlled by the load. The clutch pressure plate moves depending on the wear state of the friction lining of the driven disc.
- When removing and installing parts related to the multimode manual transmission, move the clutch actuator to the clutch clamp position. This is necessary for the normal operation of the load-controlled clutch housing (adjustment system).
- If the clutch position adjustment command is not executed, repeat from step (a) more than 15 seconds after disengagement.
NOTE: When adjusting the clamp position using the handheld scan tool, do not depress the brake pedal.
Prepare the vehicle(a):
- Stop the car.
- Move the shift lever to position N.
- Turn off the ignition.
- Apply the parking brake.
Connect the handheld diagnostic tool to the DLC3.
Turn on the ignition (IG).
Turn on the portable diagnostic tool.
Select the following menu items: Powertrain / Multi-Mode M/T / Utility / Parts Exchange.
Click the "Next" key.
After checking the vehicle's condition, press the "Next" button.
From the Multi-Mode M/T / Utility screen, select Step 1 Clutch Position Adjustment.
Click the "Next" key.
Complete the clutch position adjustment.
Turn off the portable diagnostic tool.
Replace faulty parts.
HINT: After repairing a multimode manual transmission, follow the procedure (Click here).
| 2. WITHOUT USING A PORTABLE TEST: ADJUSTING THE CLAMP POSITION (CLUTCH POSITION ADJUSTMENT) |
NOTE:
- The multimode manual transmission uses a clutch housing (adjustment system) that is controlled by the load. The clutch pressure plate moves depending on the wear state of the friction lining of the driven disc.
- When removing and installing parts related to the multimode manual transmission, move the clutch actuator to the clutch clamp position. This is necessary for the normal operation of the load-controlled clutch housing (adjustment system).
- If the clutch position adjustment command is not executed, repeat from step (a) more than 15 seconds after disengagement.
Prepare the car (a).
- Stop the car.
- Move the shift lever to position N.
- Turn off the ignition.
- Apply the parking brake.
Using SST, connect the TC and CG pins of the DLC3 connector. SST 09843-18040
Turn on the ignition (IG) with the brake pedal released.
Press the brake pedal at least 7 times within 3 seconds.
The buzzer will emit 2 beeps at 0.25 second intervals.
Press the brake pedal.
While holding down the brake pedal, move the gear shift lever in the following sequence: N→E→M→+→M→+→M→+→M→+→M→E→N.
Release the brake pedal.
Press the brake pedal again.
The buzzer will beep at 0.5 second intervals for the number of times indicated below (the interval between cycles is 2.5 seconds).
- 1 time when adjusting the clutch clamp position (1 period)
HINT: If the buzzer does not sound, or the buzzer sounds at intervals of 1 second (not 0.5 seconds), turn off the ignition and wait at least 15 seconds. Then repeat from step (a).
Press the brake pedal at least 3 times within 2 seconds.
The buzzer will emit 2 beeps at 0.25 second intervals.
Press the brake pedal.
While holding down the brake pedal, move the gear shift lever to position.
Release the brake pedal.
Complete the clutch position adjustment.
Turn off the ignition and wait at least 10 seconds.
Disconnect SST from pins TC and CG of DLC3 connector.
Repair faulty parts.
HINT: After repairing a multimode manual transmission, follow the procedure (Click here).
Source
What is the real fuel consumption for a Toyota Corolla with automatic / manual transmission
- Toyota Corolla, engine capacity: 1.33 – 5.8 l. AI-95,
- 6 l. – 6.9 – 7.2 l. AI-95. Depending on the equipment configuration,
- 6 MultiMode – 6.7 l AI-95,
- 6 AT Comfort Plus – 7.2 l. AI-95.
The data are averaged. It should be taken into account that in the urban cycle and on the highway, fuel consumption will differ significantly from the above figures. In general, fuel consumption with a manual transmission is half a liter lower.
When systematically using a Toyota Corolla in densely populated cities, there is no significant difference in consumption. The savings will only be “felt” outside the city, on long trips. Fuel consumption can also be adjusted by using a moderate driving style of the vehicle. On the contrary, an aggressive style helps to increase consumption.
Level control and required volume
Toyota Corolla 1994
While operating a Toyota Corolla, you should regularly monitor the oil level in the box.
The oil level in the Corolla automatic transmission can be checked using a special dipstick installed in the transmission housing. With a cold engine, the volume of lubricant should be no less than about on the dipstick rod. After the box has completely warmed up, without turning off the engine, you need to make sure that the amount of fluid is at the o level. If the oil volume is insufficient, it is necessary to add it and find out the reason for the decrease.
The full filling capacity of a Toyota car box depends on the country where the cars are delivered. Four-speed automatic transmissions Corolla 120 and 150 for European regions hold 3.8–4.0 liters of lubricant. Cars for the Japanese domestic market - Spasio and Fielder are equipped with all-wheel drive, so their gearbox crankcases are more capacious and hold about 8 liters of fluid.
Recommendations for increasing the service life of automatic transmissions
- systematically warm up the car before each time you leave the garage,
- undergo technical inspection strictly according to the approved schedule. It is allowed to increase the interval, but not more than 500 km,
- fill the transmission fluid strictly in accordance with temperature indicators, observing the viscosity coefficient,
- do not exceed the permitted speed limit,
- Avoid slipping and over-gearing. If necessary, keep the tachometer needle in the green - yellow zone, balance the load with rest for the automatic transmission.