06/16/2021 53,169 Toyota
Author: Ivan Baranov
Sooner or later, malfunctions appear in the operation of any vehicle. If the car is equipped with an on-board computer, then the breakdown will be much easier to identify. Today we will tell you what Toyota error codes are, how to diagnose the car and how to eliminate the malfunction.
[Hide]
Engine self-diagnosis
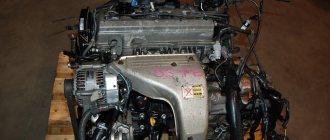
When operating Toyota cars in Russia in difficult climatic conditions, various engine problems often arise. These could be either serious breakdowns, which will be quite difficult to fix and it will be easier to install a contract engine, or failure of any sensors. If your “Check Engine” light comes on, don’t rush to get upset right away. First you need to carry out a simple self-diagnosis of the Toyota engine. This procedure will not take much time and will help you identify problems in the engine.
Why perform engine self-diagnosis?
When buying a used car you need to be very careful. Often, unscrupulous sellers hide from you problems in the engine, which will later have to be fixed, sometimes spending a lot of money on it. An excellent solution when inspecting such a car would be to diagnose the engine yourself, so as not to buy a “pig in a poke.”
Self-diagnosis must also be carried out for vehicle prevention. With some errors, the Check Engine light may not light up, although the fault will be present. This may result in increased gas mileage or other problems.
What needs to be done before diagnosis
Before performing an engine self-diagnosis, you must ensure that all indicators on the instrument panel are working correctly. The light bulbs may not light up or be powered by others, which creates the appearance of their operation. To save yourself from unnecessary steps and not have to disassemble anything, you can perform a visual inspection.
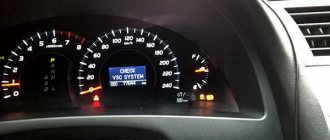
Fasten your seat belt, close the doors (to avoid unnecessary lights), insert the key into the lock and turn on the ignition (DO NOT start the engine). The “Check Engine”, “ABS”, “AirBag”, “battery charge”, “oil pressure”, “O/D Off” indicators will light up (If the button on the automatic transmission selector is depressed).
Important: if you turn the ignition off and on without removing the key from the lock, the “AirBag” lamp will not light up again! Re-diagnosis of the system will occur only if the key is removed and reinserted.
Next, start the engine:
If all of the indicated indicators behave as described above, then the instrument panel is in perfect order and you can perform engine self-diagnosis. Otherwise, you will need to fix any problems with the indicators first.
Error codes for Toyota cars - engine, automatic transmission, SRS, ABS and 4WS
A modern car is equipped with a large number of electronic sensors that monitor the correct operation of various systems. If a malfunction is detected, they send relevant information to the electronic engine control unit. It stores a specific error or fault code, which can be read during diagnostics. If the breakdown is serious, the Check Engine indicator lights up on the instrument panel. Thanks to this, the driver can correct the problem in a timely manner. In this article we will look at the most common error codes for Toyota cars. You will also learn how to perform diagnostics yourself.
SRS Trouble Codes
Self-diagnosis codes are read similarly to others, by the number of flashes of the “SRS” indicator when the “TC”-“E1” terminals of the DLC1 connector under the hood or “TC”-“CG” of the DLC3 connector under the dashboard are closed and the ignition is on.
Codes should be erased when the ignition is turned off. If codes are stored, a clearing procedure must be performed:
| Code | Description |
| 11 | Driver's igniter (short to ground) |
| 12 | Driver igniter (short to power) |
| 13 | Driver's igniter (short circuit) |
| 14 | Driver's igniter (open circuit) |
| 15 | Front right SRS sensor (short or open circuit) |
| 15 | Front right SRS sensor (short to ground or power) |
| 16 | Front left SRS sensor (short or open circuit) |
| 16 | Front left SRS sensor (short to ground or power) |
| 31 | SRS control unit malfunction |
| 51 | Passenger igniter (short to ground) |
| 52 | Passenger igniter (short to power) |
| 53 | Passenger's igniter (short circuit) |
| 54 | Passenger igniter (open circuit) |
| 61 | Driver belt pretensioner igniter (short to ground) |
| 62 | Driver belt pretensioner igniter (short to power) |
| 63 | Driver belt pretensioner igniter (short circuit) |
| 64 | Driver's belt pretensioner igniter (open circuit) |
| 71 | Passenger belt pretensioner igniter (short to ground) |
| 72 | Passenger belt pretensioner igniter (short to power) |
| 73 | Passenger belt pretensioner igniter (short circuit) |
| 74 | Passenger belt pretensioner igniter (open circuit) |
Location and types of diagnostic connectors
Cars of the Japanese manufacturer Toyota were equipped with two types of connectors that allow diagnostics - DLC1 and DLC2. More modern models use a DLC3 connector (standard OBD-II).
DLC1 is made in the form of a rectangle located on the left side of the engine compartment (in most cars of this brand). The plastic cover of this connector is marked Diagnostic.
Toyota errors can manifest themselves as follows:
The DLC2 diagnostic connector in almost all cars of this manufacturer is located under the dashboard on the driver's side. Outwardly it differs from the first one. One of the features of this connector is the ability to diagnose a car on the go.
In earlier Toyota models, the diagnostic connector is located in the engine compartment. Typically, it is round in shape and yellow in color. It can often be found near the battery.
Toyota ABS error codes
Read codes (models with DLC1 connector)
Reset codes (models with DLC1 connector)
Read codes (models with DLC3 connector)
Reset codes (models with DLC3 connector)
| Code | Description |
| 11 | Solenoid valve relay circuit open |
| 12 | Short circuit in the solenoid valve relay circuit |
| 13 | Open circuit in the electric pump relay circuit |
| 14 | Short circuit in the electric pump relay circuit |
| 21 | Open or short circuit in the solenoid valve of the front right wheel |
| 22 | Open or short circuit in the front left wheel solenoid valve |
| 23 | Open or short circuit in the solenoid valve of the rear right (left) wheel |
| 24 | Open or short circuit in the solenoid valve of the rear left (right) wheel |
| 31 | Front right wheel speed sensor malfunction |
| 32 | Front left wheel speed sensor malfunction |
| 33 | Malfunction of the rear right wheel speed sensor |
| 34 | Malfunction of the rear left wheel speed sensor |
| 41 | Battery voltage is too high or too low |
| 43 | Malfunction in the deceleration sensor circuit |
| 44 | Open or short circuit in the deceleration sensor circuit |
| 49 | Open in the brake light switch circuit |
| 51 | Short circuit or open circuit in the electric pump power supply |
| 71 | Low signal level from the front right wheel speed sensor |
| 72 | Low signal level from the front left wheel speed sensor |
| 73 | Low signal level from the rear right wheel speed sensor |
| 74 | Low signal level from the rear left wheel speed sensor |
| 75 | Incorrect signal change from the front right wheel speed sensor |
| 76 | Incorrect signal change from the front left wheel speed sensor |
| 77 | Incorrect signal change from the rear right wheel speed sensor |
| 78 | Incorrect signal change from the rear left wheel speed sensor |
| 79 | Deceleration sensor malfunction |
| 98 | Brake booster vacuum sensor (C1200) |
Self-diagnosis - step-by-step instructions
Professional car diagnostics at a specialized service center is not cheap. In addition, many car owners simply do not have the opportunity to use such services, since they live far outside large cities, and they have no desire to turn to “garage” specialists.
In such cases, self-diagnosis methods come to the rescue. Only basic skills are needed, so even beginners can figure it out. For example, to check engine operation, the procedure is performed in the following order:
If your car uses a DLC3 connector, you need to close contacts TC and CG.
Error 12
I was driving along and suddenly stalled. What's the matter? We have the manual from the autodata handy, take a jumper, close connectors E1-TE1, turn the key to start and read: ...ONCE. TWO... ONE. TWO... Clearly, that means code 12. We are looking for our 3S-FE manual transmission engine, and we see the reasons: 1). wiring, 2). distributor, 2). electronic control unit. We remove the distributor and see: there is no “droplet” on the coal that rests on the coil. Okay, I think, file in hand and everything is in order. Not so. Still won't start. There is no spark. Remove the distributor cover again and remove the slider. And then I notice that a thin plate on some woman’s inside has come off and the copper wire has spread all over the inside. E-my, where can I find such a woman? Let's go online, my distributor is 19050-74040 with two chips, one for 4, the other for 2 contacts. I texted a colleague, he texted his friend in a showdown - no such thing. No! We looked at the advertisements and found it in another city. The owner took a photo, yes he did. Luckily it's a 30 minute drive. Bought with GDP for 2000 re. Plus an O-ring. Upon arrival, I immediately took it to the car and took it apart. 1). There is no coal for the coil, instead there is a spring. 2). The coil is coated with red silicone. 3). In the process of dismantling, the slider and the cover on the entire interior were trashed. Come on, thank God I'm alive. 4). Where my hair had grown thin, the plate had just started to come off. Lucky. What to seal it with? 401 glue and soda to help. It's gone through the channel. It stuck tightly. We put everything back. We just have: two distributor caps: one live coal for the slider, one gnawed off by me with a file, and a spring from a donor. First I tried it with coals - there was no spark. I used the tester in the GDP-donors, there was no resistance. Well, I'll put mine in. There is no spark. Well, I think then the spring from the donor will live. And yes, the car started. Second day, no problems. All the best and peace.
Costs: 2800 rub. donor 19050-74040 with GDP, new sealing ring, 600 rub. 4 candles. The spark plugs were the very first thing I bought, even before the diagnosis.
