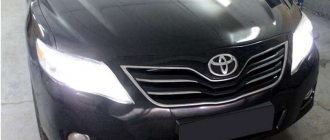
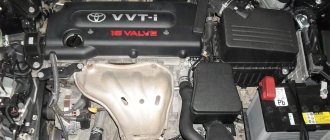
Toyota Camry 40 has a large number of lamps installed. Some of them are designed to improve road safety at night, some are for driver comfort, and some are assigned the function of signaling certain information. Failure of lamps does not lead to disruptions in the operation of the main components, but it is still advisable to install a new lamp as soon as possible. If the turn indicator fails, it is recommended to generally limit the use of the car until the problem is resolved.
List of light bulbs installed on Camry 40
Conventionally, light bulbs can be divided into those that are located in the cabin and outside it. The first provide illumination for the driver and passengers. Some of the interior lamps serve to signal various driver actions.
There are separate dashboard lamps that serve to inform the driver about the condition of the car. Light bulbs outside the cabin provide illumination of the road at night, and also inform other road users about the driver’s actions.
None Table - List of main lamps.
| Number | Bulb type | Purpose |
| HB3 | High beam | |
| W5W | Front marker lamp State sign lamp | |
| gas discharge – D4S halogen – H11 | Low beam | |
| WY21W | Direction indicators. Similar in both the front and rear headlights. | |
| H11 | Fog | |
| W21/5W | Rear brake light Side lighting | |
| W16W | Reverse | |
| W21W | Rear PTF | |
| WY5W | Side turn signal |
Location of lamps in the interior The list of lamps used in the interior of the Toyota Camry 40 is given in the table below.
| Number | Bulb type | Purpose |
| C5W | Central lamp. Serves to illuminate the car interior. | |
| W5W | Front lamp. Illuminates the front passenger and driver's seats. | |
| W5W | Individual lighting | |
| T5 | Glove compartment lighting | |
| T5 | Cigarette lighter illumination | |
| T5 | Automatic gear selector illumination | |
| W5W | Doorway lighting | |
| W5W | trunk light |
Replacing low beam, high beam and headlight bulbs in Camry 40
If the lights on the Camry 40 stop lighting, the instructions below will help correct the situation. Restyling and pre-restyling lamps change in the same way. Open the hood. When working with electrical equipment, the manufacturer recommends removing the negative terminal of the battery.
The following are instructions for replacing the low beam light bulb.
- Hold the lamp by the base that supplies power to it.
Power supply for low beam lamp.
- Turn a quarter turn counterclockwise.
- Disconnect the lamp from the terminal block.
- Connect the new lamp, checking the secure fit.
- Insert the lamp into the socket.
- Fix the lamp. For these purposes, you need to turn it a quarter turn clockwise.
You can change the high beam bulb according to the instructions below.
- Turn the lamp by the base and terminal a quarter turn counterclockwise.
Rotating the high beam lamp.
- Disconnect the light bulb from the terminal.
Disconnected lamp with terminal block.
- Install the new lamp into the socket.
Installation of a new high beam lamp.
- Secure by turning it a quarter turn clockwise.
Changing the size lamp will require a screwdriver.
- Dismantling the light bulb responsible for the side lights must begin by turning the wheel to the side.
- Remove one fastener first, then the second.
Gaining access to the light bulb.
- Remove the size lamp in the same way as the high and low beam lamps.
- Install a new lamp.
- Check how the dimensions work.
Adjustment holes for Camry 70 optics
(Link to photo source)
To access the technological hole for adjusting the height of the luminous flux of the Camry 70 headlights, the hood is first opened. It is located on top of the headlight, closer to the front fender of the Camry 70.
To adjust the height of the light flux, you will need a long Phillips screwdriver that is inserted into the hole. It contains a threaded screw, its rotation is accompanied by a change in height.
To adjust the Camry 70 PTF, you should use the technological hole under the fog light in the plastic protection. There are two holes, the adjustment one is located closer to the central part. To carry out operations you will need a seven hexagon.
Recommendations
If the standard light does not sufficiently satisfy the car owner, then, if desired, you can install:
- xenon;
- bi-xenon;
- ice in the fog;
- LED lamps for low and high beam.
Xenon lamps are the brightest. They create a sporty image for the car. Their disadvantage is the need to install an expensive ignition unit. mtf products performed best.
The Camry XV 40 is an excellent reliable car, but, like any car, it is not without its shortcomings and disadvantages. A well-known drawback of the Camry is poor sound insulation, which creates inconvenience for the owner and passengers. Poor low beam is another disadvantage on which traffic safety directly depends.
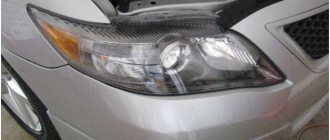
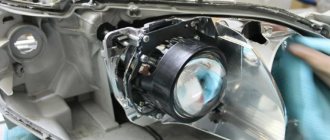
Partially disassembled Camry 40 headlight.
Quick light adjustment on Camry 50
You can adjust the light of the Camry 50 in the same way as the Camry 30. The process will differ only in the location of the adjustment bolts. We will describe a simpler and faster, but less accurate method.
Location of adjusting bolts in Toyota Camry 50
To improve the performance of Camry 50 headlights, in addition to adjustments, you will need to replace the bulbs. For example, on Osmar H11, which are suitable for low beam and fog lights. Adjusting the Toyota Camry 50 headlights is performed in the following order:
- Toyota Camry 50 is installed on a flat, horizontal surface at a distance of 5 to 7.5 m from the wall.
- The optics are turned on, then the corrector wheel is alternately set to positions 0 and 1, measuring the difference in centimeters between the upper boundaries of the light spots.
- The corrector wheel returns to the zero position. The resulting difference doubles. Mark over the upper border of the spot and draw a horizontal line.
- Next, you need to raise the upper limit of the light flux level with the drawn line. The operation is performed by rotating the adjusting screw on the back of the headlight. It can be rotated with a screwdriver, but it is more convenient to use an eight-inch socket with an adapter.
The process of adjusting foglights also involves raising the light output. We adjust the fog lights of the Toyota Camry 50 using one of the following methods. You can raise the spot by 25 cm. It is also possible to focus on the rays of the near light stream. In this case, the upper edge of the rays of the Toyota Camry 50 PTF should shine along the lower edge of the spot from the headlight to eliminate the presence of a dead zone.
Lamps used in Toyota Camry xv40
Click to make the image larger Owners of the magpie often complain about poor low beam. You can solve this problem by adjusting the headlights or replacing the light bulbs. We talked about how to adjust the optics and fog lights of the Camry 40 in this material.
In the manual for Toyota Camry 2006 - 2011 there is a table containing information about electric lamps. Detailed information about light bulbs used in optics and flashlights of Toyota Camry XV40:
- high beam - HB3,
- side lighting and license plate illumination – W5W,
- low beam - halogen H11, gas discharge D4S (xenon),
- front and rear turn signals – WY21W,
- fog light – H11,
- rear brake light and dimensions – W21/5W,
- reverse gear – W16W,
- rear fog lamp – W21W,
- side turn signal (on the body) – WY5W.
The letter “Y” in the lamp labeling indicates that the lamp color is yellow. The manufacturer does not provide for replacing the bulbs in the side direction indicators; the lamp is replaced as an assembly. Bulbs used in Camry 2009 interior lighting:
- general lighting, central lamp – C5W,
- light for driver and front passenger - W5W,
- lamp in the sun visor – W5W,
- glove compartment lighting – T5,
- cigarette lighter bulb – T5 (with green filter),
- automatic transmission selector travel light – T5 (with filter),
- front door opening lighting – W5W,
- trunk lamp - W5W.
Light bulbs for Camry 40 interior.
Color spectrum
The color range of Toyota Camry is quite rich. The concern offers its fans a varied palette. You can choose a suitable car in the showroom by ordering the color and equipment you are interested in, or you can find what you need on the secondary market if you are buying a used car. Some color characteristics depend on the year of manufacture, as different colors were offered in different years.
We decided to review new cars of 2021 and introduce the reader to the possible color options. Perhaps this article will help solve the problem of choosing a color.
Halogen, xenon (gas discharge) and LED bulbs
The 2007 Camry was equipped with halogen lamps from the factory. Advantages of this type of bulbs: accessibility compared to other automotive light sources. Halogen lamps do not require the installation of additional equipment (ignition units, headlight washers). Variety, this type of lighting has been used for decades, so there are a large number of reliable manufacturers producing high-quality products. The light is not of poor quality; in terms of luminous flux characteristics, halogens are inferior to xenon and diodes, but provide acceptable road illumination.
Disadvantages of halogen lamps: low brightness compared to xenon and LEDs, which provide better visibility at night. Low efficiency, consume a large amount of energy without producing a bright luminous flux. Short service life; on average, xenon lamps will last 2 times longer, and diode lamps 5 times longer. Reliability is not high; halogen lamps use an incandescent filament, which can break if the car is shaken.
When choosing halogen bulbs for the Camry XV40 2008, following a few rules will allow you to buy a quality product that will ensure driving safety in the dark:
- choose trusted manufacturers,
- use high-brightness lamps from 30 to 60 percent,
- pay attention to the service life specified by the manufacturer,
- do not buy lamps with a power higher than 55 W,
- Before purchasing, check the light bulb for visible damage.
Xenon lamps
In rich configurations of the Toyota Camry 40, the dipped beam is xenon; many owners of a magpie with conventional optics install xenon. One of the options for how to do this is described here.
The advantages of xenon over halogen are that the light is “stronger”. The luminous flux of a gas-discharge lamp is 1800 - 3200 Lm, for a halogen lamp it is 1550 Lm. The xenon spectrum is closer to the daylight spectrum, more familiar to humans. Such lamps last several times longer, consuming less energy.
The disadvantages of xenon include its high price relative to halogen optics; if configured incorrectly, the gas-discharge light creates much more trouble for oncoming motorists; the light may fade over time and will have to be changed.
When to adjust the light
(Link to photo source)
There are no strict mileage regulations regarding the frequency of adjusting the luminous flux of the front optics of a Toyota Camry. It is necessary to focus on the received signals from oncoming drivers, which were received without obvious problems. You should also start adjusting the functioning of the headlights at the front if the distribution of the light spot is clearly incorrect. It illuminates not the road surface in front of the car, but the side of the road.
It is recommended to adjust the Toyota Camry light in the following cases:
- change of seasonality - at the beginning of winter and summer;
- carrying out repair work or complete replacement of optics;
- replacement or revision of Toyota Camry front suspension parts;
- installation of fog lights on the car.
If you constantly use the Toyota Camry on poor quality roads or in rural areas, you should increase the frequency of adjustments in relation to seasonality. Excessive vibration and impact impacts on the suspension when overcoming bumps contribute to premature disruption of the front optics settings.
LED light bulbs advantages and disadvantages
The advantage of LED bulbs is that they last an order of magnitude longer. They are also more economical than halogen ones, but do not think that their use will significantly affect fuel consumption. Properly mounted LEDs are better able to withstand shaking and vibration.
The performance of diodes is higher, i.e. their use in the rear lights will allow the car following you to see that you are braking earlier.
Diode car lamps have few disadvantages, but they are all significant. High cost - compared to conventional lamps, diode lamps will cost tens of times more. It is difficult to create a directed flow of glow.
Price is one of the indicators of a high-quality LED light bulb; good LEDs cannot be cheap. Their production is a technologically complex process.
Replacing lamps on Toyota Camry 40
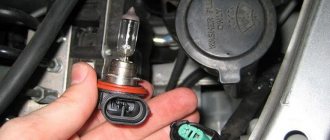
You don't need any tools to replace the low and high beam bulbs on your 2009 Camry. Let's start talking about changing lamps from low beam. The low beam lamp is located in the center of the headlight unit. We turn the base counterclockwise and remove the light source from the headlight, disconnect the power by pressing the latch. We install the new lamp and perform the assembly in reverse order.
Replacing the low beam lamp.
Do not touch the halogen lamp with bare hands, the remaining traces will lead to rapid burnout. You can erase prints with alcohol.
The high beam lamp is located on the inside of the headlight unit. Replacement occurs according to the same algorithm as for changing the low beam lamp. We unscrew it counterclockwise by pressing the lock, disconnect the lamp, install a new one and assemble it in reverse order.
Replacement of the parking light bulbs and turn signal of the Camry 2010 is carried out from the side of the wheel arch. To gain access to the light fixtures, turn the wheels away from the headlight, use a flat screwdriver to remove a couple of clips and bend the arch protection. We have two connectors in front of us: the top black one is the marker, the bottom gray one is the turn signal. Replacing these lamps is not much different from the previous ones.
The marker is on the top, the turn signal is on the bottom.
Adjusting headlights Camry 30
Let's consider all the stages of work performed when independently adjusting the headlights of a Toyota Camry 30.
Preparation
Before you start setting up the Toyota Camry 30 headlights yourself, you will need to perform the following operations:
- check for damage or deformation of the body in the area of the front optics;
- the fuel tank is fully refilled;
- the compliance of the required level of engine oil and coolant of the Toyota Camry 30 internal combustion engine is monitored;
- checking the air pressure in the tires;
- foreign objects are removed from the luggage space, with the exception of a jack, a set of tools and a spare wheel;
- It is necessary to seat a person of average build in the driver's seat or place a load weighing 75 kg.
Adjustment of Toyota Camry 30 headlights is carried out using a self-formed screen. To do this, you will need to perform the following preparatory work:
- To adjust the luminous flux of the head optics, you should place the car in a dark place. This is necessary to clearly view the upper boundaries of the light from the headlights. Light spots will be located below.
- The Camry 30 must be placed on a flat, horizontal area at a right angle to the plane of the wall (screen, garage door), maintaining a distance of twenty-five meters from the center of the light source to the wall. If it is not possible to ensure a distance of 25 m, three meters should be maintained. But in this case, the distribution of light spots will change.
- The body is rocked several times in a vertical direction to install all the suspension elements.
- To make a screen you will need a thick, white sheet of paper 2 m wide and 4 m long.
- A vertical line (V) .
Click to enlarge
- Then the screen is fixed to the wall surface, keeping the V line aligned with the center of the car.
- The remaining lines are drawn for adjusting the Camry 30 headlights: line H , V left (LH) and right (RH). They are different for low and high beam sources.
- Initially, you will need to transfer the centers of the light bulbs to the screen.
- line H is drawn in the horizontal direction, connecting the displaced centers of the lamps on the screen. It indicates the height of the headlights;
- lines V LH and RH are drawn in the vertical direction, intersecting line H in the places where the centers of the low-beam light bulbs are indicated.
Checking the light
Checking the settings of the Toyota Camry 30 headlights is performed as follows:
Initially, the power connector is disconnected or the headlight that is not currently being checked is covered. This is necessary to exclude the influence of light on the headlight being tested. If you use the option of covering the optics, you should keep it closed for no more than three minutes. Otherwise, there is a high probability of the lens melting or getting burned as a result of overheating.
The Camry 30 power unit starts up and the speed is maintained at at least 1500 rpm.
The headlight beam corrector wheel is set to the zero position (0).
Click to enlarge
The headlight turns on and the distribution of the light spot is controlled. It will be necessary to regulate the near light flux by maintaining the following values at a distance of 25 meters from the wall surface:
- 48 and 696 mm – respectively, the distance from the top edge of the spot to the line H below and from the floor to H;
- 249 mm – length from the center of the light bulb on the screen to line H.
- If the screen from the Camry 30 is located at a distance of three meters:
- 6 and 84 mm – respectively, the distance from the top edge of the spot to the line H below and from the floor to H;
- 30 mm – length from the center of the light bulb on the screen to line H.
The low and high beam bulbs of the Toyota Camry 30 are combined, so after setting the low beam, the high beam should be set correctly. But it is recommended to check.
Adjusting the headlights of Camry 30
The front optics light is adjusted using two adjustment screws located on the back. Adjustment of the luminous flux of Toyota Camry 30 headlights in the vertical direction is carried out using a regulator in the lower part, and in the horizontal direction - in the upper part. The adjustment is made by rotating the screw with a screwdriver. Avoid over-tightening the screw. In this case, the final adjustment operation should end with clockwise rotation of the screw.
Position of the headlight leveling wheel
Depending on the load of the Toyota Camry 30, in the process of adjusting the headlights, the corrector wheel should be set to the following position:
- 0 – driver only;
- 1 – driver and front passenger;
- 2 – driver with all passengers;
- 3 – driver with all passengers and the luggage compartment is fully loaded;
- 4 – driver and fully loaded luggage compartment.
Replacing lenses on Camry 2011
To replace a faded lens on a Camry 40, you need to disassemble the headlight. You can open the optics by heating the junction of the body and the lens in a circle with a hair dryer; be careful not to melt any element. The second method is to unscrew all the screws, remove the anthers and plugs, metal parts from the headlight, and place it wrapped in a towel in an oven preheated to 100 degrees.
After warming up the optics, begin to carefully remove the housing from the lens using a flat-head screwdriver. Take your time and gradually open the headlight. If necessary, warm up the optics again.
The sealant will form fibers that should not get into the inside of the optics. After opening the headlight, while it is hot, glue all the threads of sealant onto the headlight housing or lens.
The lens is attached to the body with three clamps, open one of them and carefully squeeze out the lens. Buy lenses with transition frames, which will greatly simplify your work. We replace the lens with a new one and wipe it with a 70% alcohol solution. You can remove dust and debris from the internal parts of the headlight with a dry, lint-free cloth.
Acetone should not be used! May damage surfaces of parts. You cannot change the lower edge (cut line) of the shield slot; you will blind oncoming people.
The lens is in place, preheat the oven and place the headlight, wrapped in a towel, in there for 10 minutes. We remove and press the glass against the body, do not overdo it, the glass may crack, it is better to repeat the procedure 3 times. The glass is in place, screw in the screws and continue in the oven for 5 minutes.
Adapter frames for Camry 40 lenses.
How to improve the headlights of a Toyota Camry V40 - Replacing xenon lenses
At our car service center at Melnikova 5, we met a Toyota Camry V40 with burnt-out xenon lenses and lamps - they needed to be replaced, thereby increasing the quality of the headlights to the absolute maximum. Factory optics burn out - this must be taken as a given, that is, the standard modules in the headlights will have to be changed in any case, and we absolutely do not recommend restoring factory lenses by applying aluminum coating to the reflectors.
Initial cut-off line and headlight beam before lens replacement.
Type of car at the time of treatment.
Lens restoration as a service is often asked by our clients - we do not specifically do this for two reasons. Firstly, the restoration of lens reflectors provides a short-term effect, so that after six months or a year the quality of light will decrease again. Secondly, the vast majority of cars come from the factory with lenses made of composite materials (that is, plastic); you must agree that there is no point in repairing a plastic part while disassembling the car and headlights - it is much more effective to immediately install new xenon lenses with new lamps.
Removing headlights from a car.Specifically, in the case of the Toyota Camry car, we will install Hella F1 bi-xenon lenses together with Osram Cool Blue Boost D4 S xenon lamps , thereby achieving bright white headlight light without stray light, therefore, the new light will not blind oncoming motorists .
New lenses, headlight lenses and xenon lamps.
The body of the installed Hella F1 xenon lenses is made of metal, so carbon deposits form on the reflectors much longer when compared with standard lenses, which burn out approximately when reaching from 70 thousand to 100 thousand kilometers, reducing the level of scattering of light emitted by the lamps - with ours This will not happen with lenses, which is confirmed by the five-year warranty on them.
Let's disassemble the headlight.Let’s tell you about Osram Cool Blue Boost D4S xenon lamps that this is currently the brightest standard xenon - we conducted our own tests, which showed the absolute advantage of the Cool Blue Boost series over other lines. These lamps shine with cool white light, the actual temperature is at the level of 6000K; The marking on the package “UP TO 7000K” means that the manufacturer only assumes its achievement, which does not happen in practice.
We install the headlight until sealed to adjust the light.
So, to replace lenses on a Toyota Camry B40, we first remove the car’s bumper, then remove the headlights and place them in an industrial oven for depressurization, where under the influence of high temperatures the sealant melts, allowing us to disassemble the headlights, remove burnt-out optics from them and install new bi-xenon ones Hella F1 lenses using adapter frames.
We try on headlights with new lenses on a car.Having installed new lenses in the headlights of the Toyota Camry V40, we return the headlights to the car before sealing - now we need to set the new optics in the correct position, using a special device (farascope) for maximum accuracy, thus achieving a perfectly even cut-off line. Having adjusted the light, we remove the headlights and seal them using butyl sealant with new glasses.
The final cut-off line, headlights and the appearance of the car after work.Finally, the most interesting thing is the result of the work on replacing lenses on a Toyota Camry V40. Of course, there is little point in comparing burnt-out lenses and lamps with new ones, but, nevertheless, in the final photographs it is clearly visible that the new cut-off line is bright, with a dense fill of light, but with low side illumination. The more powerful the light, the more comfortable and safe the driver and his passengers feel, so you need to keep an eye on the issue of car lighting, promptly replacing factory lenses and lamps with new ones.
List of light bulbs installed on Camry 40
Conventionally, light bulbs can be divided into those that are located in the cabin and outside it. The first provide illumination for the driver and passengers. Some of the interior lamps serve to signal various driver actions.
There are separate dashboard lamps that serve to inform the driver about the condition of the car. Light bulbs outside the cabin provide illumination of the road at night, and also inform other road users about the driver’s actions.
Location and type of lampsThe purpose and type of lamps used, shown in the figure above, is shown in the table below.
Table List of main lamps.
| Number | Bulb type | Purpose |
| HB3 | High beam | |
| W5W | Front marker lamp State sign lamp | |
| gas discharge - D4S halogen - H11 | Low beam | |
| WY21W | Direction indicators. Similar in both the front and rear headlights. | |
| H11 | Fog | |
| W21/5W | Rear brake light Side lighting | |
| W16W | Reverse | |
| W21W | Rear PTF | |
| WY5W | Side turn signal |
Location of lamps in the interior The list of lamps used in the interior of the Toyota Camry 40 is given in the table below.
| Number | Bulb type | Purpose |
| C5W | Central lamp. Serves to illuminate the car interior. | |
| W5W | Front lamp. Illuminates the front passenger and driver's seats. | |
| W5W | Individual lighting | |
| T5 | Glove compartment lighting | |
| T5 | Cigarette lighter illumination | |
| T5 | Automatic gear selector illumination | |
| W5W | Doorway lighting | |
| W5W | trunk light |
Replacing low beam, high beam and headlight bulbs in Camry 40
If the lights on the Camry 40 stop lighting, the instructions below will help correct the situation. Restyling and pre-restyling lamps change in the same way. Open the hood. When working with electrical equipment, the manufacturer recommends removing the negative terminal of the battery.
Left headlightThe following are instructions for replacing the low beam light bulb.
Low beam
- Hold the lamp by the base that supplies power to it.
Power supply for low beam lamp
- Turn a quarter turn counterclockwise.
Removal process Lamp removed Process of clamp compression
- Disconnect the lamp from the terminal block.
Disconnected lamp
- Connect the new lamp, checking the secure fit.
Connecting the lamp
- Insert the lamp into the socket.
Lamp installation process
- Fix the lamp. For these purposes, you need to turn it a quarter turn clockwise.
Fixing the lamp You can change the high beam bulb according to the instructions below.
High beam
- Turn the lamp by the base and terminal a quarter turn counterclockwise.
Turning the high beam lamp High beam lamp
- Disconnect the light bulb from the terminal.
Disconnected lamp with terminal block
- Install the new lamp into the socket.
Installation of a new high beam lamp
- Secure by turning it a quarter turn clockwise.
Fixed bulb Changing the size bulb will require a screwdriver.
Dimensions
- Dismantling the light bulb responsible for the side lights must begin by turning the wheel to the side.
Turning the wheel Prying up the clip
- Remove one fastener first, then the second.
Removing the mount Gaining access to the light bulb
- Remove the size lamp in the same way as the high and low beam lamps.
Dimension lamp connector
- Install a new lamp.
- Check how the dimensions work.
