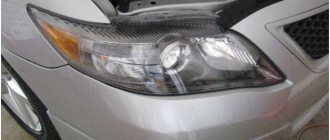
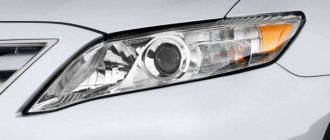
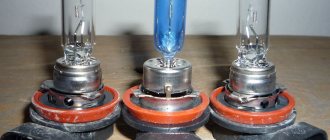
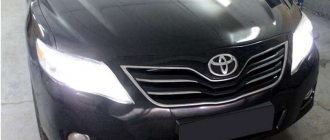
All Camry 40 lamps differ from each other and their analogues in basic parameters, including power, energy consumption, and brightness. For low beam, halogen or xenon elements are installed at the factory. Some craftsmen install LEDs themselves. Each type of light bulb has its own advantages and disadvantages.
Basic designations
The light elements of the Toyota Camry car are conventionally divided into external and internal sources. For ease of perception, information about them is presented in table form.
| Outdoor Lighting | Interior lighting | ||
| HB3 | Driving lights | C5W | Central and general lighting |
| H11 (D4S) | Low beam, fog lights (xenon) | W5W | Light for the driver and passengers, illumination of the sun visor, trunk lamps, door openings |
| W16W | Reversing lights | T5 | Glove compartment lighting |
| W21W (5W) W5W | Rear - fog lights, stops, dimensions | T5 with green and simple filter | Illumination of the cigarette lighter and automatic transmission selector travel |
| WY21W | Turn signals | ||
| WY5W | Body direction indicators | ||
The side direction indicators are replaced only as an assembly; the letter Y means a yellow glow.
Choosing the right lighting equipment
Toyota claims that full xenon can meet a high level of quality, but at the same time, even its operating time is significantly limited. Sooner or later there will be a need to install new lighting equipment.
The main task of choosing lighting equipment. Priority lighting that meets quality standards.
Be sure to use original products as they are highly functional and reliable.
The choice of high-quality xenon and its successful installation guarantees that the selected lighting equipment will certainly serve for a long time and at a pleasantly high level
quality and maintenance of uniform luminous flux. In this regard, tuning a car for full coverage begins with the selection of xenon headlights designed specifically for the Toyota Camry.
Low beam lamps used on Camry V40
The Camry V40 comes standard with halogens. They are cheaper than analogues and do not require an ignition unit. This type of lamp has been produced for several decades; there is no shortage of them on the market, since all leading manufacturers are engaged in production. The elements provide a soft luminous flux, providing normal illumination of the road.
In luxury trim levels, xenon low beam lamps are installed on the car. They provide a brighter beam compared to halogen optics (up to 3200 lm versus 1550). Xenon provides a glow that does not irritate human eyes, lasts several times longer, and consumes less energy.
Many Camry 40 owners install LEDs.
Properly installed elements withstand vibration and shaking better, consume energy economically, respond faster when turned on, and do not heat up.
Original spare parts
Low beam lamps for Camry V30 and 40 were produced from 2003 to 2006 with an H7 socket. Until 2011, the car was equipped with V40 models with an H11 or D4S base (for halogen and xenon bulbs). Similar elements are now being produced that have the same basis and an extended service life.
Original xenon lamps are distinguished from low-quality fakes by several criteria:
- the base tip is not sawed off, but chipped;
- glass without defects, with a mark in the form of extruded squares;
- there are only 2 slots in the plastic part;
- The packaging contains a laser-engraved corporate logo;
- strictly perpendicular position of the flask in relation to the base;
- no traces of soldering on the electrodes;
- inside there is a ball with yellowish spots;
- product parameters are applied to the base;
- the presence of a stepped indentation on the ring.
Analogues from the market
After the advent of LEDs, many motorists began to install them on their head optics themselves. These bulbs increase the brightness of the light compared to xenon and halogen bulbs.
Among market analogues, baseless lighting elements are noted. Their popularity is due to their long service life, structural reliability, and color.
To choose high-quality halogen bulbs for Camry 40, pay attention to a number of points:
- Reputation of manufacturers and provision of guarantees.
- Brightness setting (at least 30%).
- Service life specified by the manufacturer.
- Power (more than 55 W is not recommended).
- The presence of visible defects and damage.
What type of lamp to choose
Each Toyota Camry car owner chooses the types of light elements at his own discretion. The main thing is to know the correct labeling, since even the most similar analogues will not work.
In addition to the advantages of all types of lamps, their disadvantages should be taken into account:
- Compared to xenon and LEDs, halogen lamps are not as bright and have low efficiency. The optics are not reliable and have a long service life. The filament may break during vibration and shaking.
- Among the disadvantages of xenon is its high price compared to halogens. Over time, the brightness of the stream dims, and incorrect adjustment of the gas-discharge beam can cause “blinding” of oncoming vehicles.
- LEDs are the most expensive optics. Creating a directed workflow is a common problem.
The best companies
The market offers light bulbs of all types from popular manufacturers and budget analogues made in China. They differ from each other in design, price, and characteristics. Information about the best products is presented in the table.
| Category | Brand and brand | Description |
| Halogens | MTF Light Vanadium 5000K (H11) | The milky white glow emphasizes the overall style of the car, temperature - 5000 K |
| Osram Breaker Night | A modern coating of the flask is used, which provides additional protection from vibration and mechanical stress. Includes 2 pcs. Temperature - 3312 K | |
| Philips Vision White | The effect of a bright white light beam at 3700 K | |
| Xenon | Osram Xenarc D4S | White-yellow glow, European quality. Service period - 3.5-4.0 thousand hours, brightness - 3200 lm |
| Philips Extreme Gen2 | Increased flux (4800 K), no yellow tint. Power - 35 W, voltage - 42 V | |
| Neolux Standard | The optimal combination of quality and price. Marking - D4S (85V, 35 W) | |
| LEDs | Philips Luxeon Z ES | Branded optics of 6 diodes in 1 part. At a power of 20 W, the working beam produces 2200 lm. A flexible radiator acts as a cooling system |
| Honglitronic | One element of the 6HL series produces a beam of 2000 lumens, forming a cut-off line without the need for adjustment. At the same time, the power is only 18 W (a halogen analogue with the same parameters consumes 55 W) | |
| Neyuning A1 | Universal size, no massive radiator, flow - 1800 lm. Service life - up to 30,000 hours |
TECHCHARACTERISTICS
Install the new bulb into the holder assembly, rotate it, and then press the holder assembly until the mount lock locks. After opening the trunk, use a screwdriver to turn the fastening stopper and remove the rear light housing.
What to do if the main beam goes out
Move aside the mounting plates of holder assembly A and remove it. There are five light bulbs in each holder assembly: Install the new light bulb in the holder assembly, rotate it, and then secure the holder assembly
Using a thin screwdriver, carefully remove the license plate light assembly from its socket in the rear bumper.
These lamps are able to distinguish you from a gray and dull row of cars, in addition, these lamps are as powerful as possible and are suitable for long night trips, and even trips in the fog. Be confident in the quality of these marker lamps, you won’t find a better range lamp!
Multicolor marker lamps for cars are capable of producing up to 16 different color variations, and are controlled very conveniently using a remote control from the car’s cabin. Reviews Replacing side light bulbs in Toyota Camry v40 Antonina Kusova True, when installing them you always have to take into account the existing polarity, otherwise such lamps simply will not light, but this is also not such a big problem.
For example, it took me literally minutes to remove a lamp and reinsert it. In addition, if connected incorrectly, they will not burn out, so there is no need to worry about this.
And their overall service life is very long.
Although I took them with a reserve just in case, which I don’t regret, since the price for them is not so high, I would say that it is now quite affordable. A simple, fast and budget-friendly way to give your car a personal touch. But to gain access to the front marker and turn signal lamps, you will need a small flat-head screwdriver.
It will be much easier to change the turn and clearance lamps from the wheel arch. To do this, you need to turn the steering wheel and wheel accordingly: Then you need to remove at least two fastenings of the protection in the wheel arch, and unscrew the protection, gaining access to the lamps.
Toyota Camry V40 lamp replacement procedure
You can change low beam lamps yourself, even without the relevant experience.
To reduce the likelihood of failure of xenon elements, experts recommend the following:
- regularly check the electrical contacts of the vehicle network, avoiding loosening at the fixation points;
- monitor the state of the moisture protection of the ignition unit;
- To avoid burnout of the gas mixture, do not turn on or turn on the headlights too often;
- do not “wink” with flashlights;
- turn on xenon optics no earlier than a few minutes after starting the engine.
Tools and consumables
To replace low beam elements on a Camry B40, you do not need a tool. If you plan to install lamps on side lights at the same time, you will need a small screwdriver. New lamps and gloves are prepared as consumables. It is not recommended to touch the glass with bare hands, as sweat secretions will shorten the life of the part.
First wipe the light bulb with a clean rag soaked in alcohol (do not use solvent). If elements of different types are removed and installed, it is better to carry out the operation in pairs. Otherwise, there will be a noticeable difference in the light beam and brightness between the right and left headlights.
Replacement instructions
The process consists of several simple steps:
- Make sure that the markings on the lamp correspond to the desired indicator.
- Raise the hood of the car and disconnect the negative terminal of the battery.
- Disconnect the electrical connector.
- Dismantle the old element by turning it counterclockwise by 45°.
- Insert the new electrical device into the socket, turn it a quarter turn to the right until a characteristic click is heard.
- Check the reliability of fixation.
- The electrical connector is put in place, the battery is connected, and the functionality of the optics is checked.
After replacing lamps, they may need to be adjusted. If the automatic corrector does not work or does not cope with its duties, the adjustment is carried out manually. The car is placed on a flat area in front of a wall or other flat obstacle.
Equalize the tire pressure (2.0-2.3 bar), fill a full tank of fuel, set the corrector to position 0.
The adjustment procedure is as follows:
- Measure the operating range of the autocorrector.
- Determine a setting level that is 2 times the maximum.
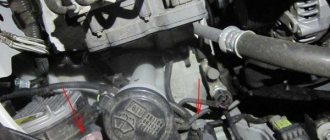
- Under the plugs on the back side of the light elements there are adjusting screws.
- Apply markings to a wall or other suitable vertical surface.
- The car is installed at a distance of 5 m, the light flux is directed strictly to the center.
- Turn on the low beam, draw a vertical line from each beam.
- Apply 2 horizontal lines (along the height of the optics and 5 cm below).
Each headlight is adjusted separately, covering the element one by one with an opaque material. Both lights should shine identically. The result is considered good if the beam of light from each element is within the lower horizontal line, without going beyond the boundaries of the central strip from the adjacent headlight. To raise and lower the lamp, turn the screws to the right or left, respectively.
Reasons for frequent burnout
Another problem with Toyota Camry lighting devices is the frequent burnout of lamps. There can be many reasons and prerequisites for this:
- The lamps themselves are of poor quality;
- Poor quality headlights (poorly ventilated, moisture ingress);
- Starting the engine with low beams on;
- The headlight is poorly secured;
- The lamp in the headlight is poorly secured, poor contact with live parts;
- Malfunctions of the vehicle's on-board electrical network.
If everything is more or less clear with the first five reasons: choose a high-quality lamp, headlight, do not start the car with the headlights on, securely fasten the headlights and lamps, check and tighten the contacts, then it will be quite difficult to figure out the electrical wiring yourself.
Why the low beam on a Toyota Camry does not turn on - there may be several main reasons:
- Burnt out light bulb
- Lost ground from headlight
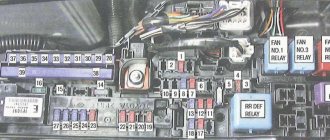
- Fuse and relay failure
- Short circuit or break in the wires going to the headlights
- Interior switch malfunction
If problems arise with the vehicle's lighting equipment, the cause of the problem should be identified as quickly as possible and eliminated.
Toyota Camry headlight - the light does not light
The search should begin with the simplest and at the same time the most common causes. So, if one headlight of your Toyota Camry does not light up, then most likely the reason is that the bulb of this headlight has burned out.
- How to independently improve the headlights on a VAZ-2114
The simultaneous burnout of two light bulbs in both headlights also happens, but is extremely rare. As a rule, this occurs during sudden changes in voltage in the network and is accompanied by serious damage to other electronic equipment. Checking the serviceability of the light bulbs is very simple - you just need to replace them with new ones.
Recommendations
If the standard light does not sufficiently satisfy the car owner, then, if desired, you can install:
- xenon;
- bi-xenon;
- ice in the fog;
- LED lamps for low and high beam.
Xenon lamps are the brightest. They create a sporty image for the car. Their disadvantage is the need to install an expensive ignition unit. mtf products performed best.
The Camry XV 40 is an excellent reliable car, but, like any car, it is not without its shortcomings and disadvantages. A well-known drawback of the Camry is poor sound insulation, which creates inconvenience for the owner and passengers. Poor low beam is another disadvantage on which traffic safety directly depends.
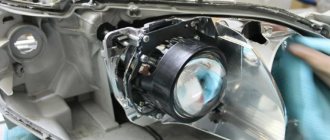
Partially disassembled Camry 40 headlight.
Replacing the brake light bulb. Do I need to remove the headlight?
After this, the new light bulb is inserted into the socket, then the entire structure is placed in the headlight and rotated 90 degrees clockwise. How to change license plate light bulbs on a Camry The car license plate must be visible at any time of the day, including at night.
Therefore, when darkness sets in, it is necessary to illuminate it. If the license plate light bulb has burned out, it must be urgently replaced.
How to Replace the Headlight Bulb on a Toyota Camry
On Camry 40 and 50 it is carried out. In order to get to the bulb that came out of the bulb, you need to move the trunk trim a little.
After this, use a flat screwdriver to remove the clips of the protective upholstery. Its edge should be slightly bent, after which we gain access to the lamp socket.
We remove the battery, unscrew the burnt-out lamp, and also insert a new lamp into the socket counterclockwise 90 degrees.
Next, perform all the described steps in reverse order. As you can see, there is nothing much like removing a Toyota Camry light bulb in these operations. However, in order not to damage the fasteners, sockets, the lamps themselves, the parts and mechanisms located next to them, it is necessary to have a certain skill and accuracy. Variety, this type of lighting has been used for decades, so there are a large number of reliable manufacturers producing high-quality products.
Replacing lenses on Camry 2011
To replace a faded lens on a Camry 40, you need to disassemble the headlight. You can open the optics by heating the junction of the body and the lens in a circle with a hair dryer; be careful not to melt any element. The second method is to unscrew all the screws, remove the anthers and plugs, metal parts from the headlight, and place it wrapped in a towel in an oven preheated to 100 degrees.
After warming up the optics, begin to carefully remove the housing from the lens using a flat-head screwdriver. Take your time and gradually open the headlight. If necessary, warm up the optics again.
The sealant will form fibers that should not get into the inside of the optics. After opening the headlight, while it is hot, glue all the threads of sealant onto the headlight housing or lens.
Camry 40 lenses
The lens is attached to the body with three clamps, open one of them and carefully squeeze out the lens. Buy lenses with transition frames, which will greatly simplify your work. We replace the lens with a new one and wipe it with a 70% alcohol solution. You can remove dust and debris from the internal parts of the headlight with a dry, lint-free cloth.
Acetone should not be used! May damage surfaces of parts.
You cannot change the lower edge (cut line) of the shield slot; you will blind oncoming people.
The lens is in place, preheat the oven and place the headlight, wrapped in a towel, in there for 10 minutes. We remove and press the glass against the body, do not overdo it, the glass may crack, it is better to repeat the procedure 3 times. The glass is in place, screw in the screws and continue in the oven for 5 minutes.
Adapter frames for Camry 40 lenses
There are options to fix the poor low beam of the Camry 40: install xenon, replace halogen lamps with diode lamps, change the low beam lenses. When changing bulbs, lenses, headlights on the Camry 40, remember that light directly affects the safety of road users.
How to independently adjust the headlights on a Camry 40
If you are faced with the problem of bad light, do not rush to buy new optics. In the case of the Camry 40, insufficient road lighting may be due to unadjusted light elements. Incorrectly adjusted optics can lead to undesirable effects: dazzling oncoming and passing traffic, in fog a wide light beam creates a curtain in front of the driver, too low a light beam poorly illuminates the road even in good weather.
Preparation
The Camry XV40 is equipped with an electric headlight leveler, but it is often not possible to adjust the light using it. The low beam is considered problematic for the Camry 40; car owners do not often complain about the high beam.
The first step is to check the settings of the standard corrector and the adequacy of its operation. If you find that this unit is out of order, replace it and then proceed to adjust the Camry 40 light.
To independently adjust the headlights on Camry 40 you will need:
- horizontally flat area at least 10 meters long (garage, parking lot, etc.),
- on one side the site must be adjacent to a perpendicular, flat plane (parking wall, garage door, etc.),
- hexagon with which adjustment will be made,
- the same tire pressure, it should be 2 - 2.2 bar,
- fill a full tank of gasoline,
- set the headlight range control to position 0.
How to set up Camry XV40 headlights
To configure the light elements of the Camry 40, you need to mark the screen or wall. To do this, drive the car five meters away from the surface on which the marking will be made. The first vertical straight line completely coincides with the longitudinal axis of the car (O in the diagram). Then the distance between the centers of the headlights is measured and marked on the marked surface with vertical lines (A and B of the right and left headlights, respectively).
Headlight adjustment diagram
Next, a horizontal line is drawn, which is drawn parallel to the floor plane at a height equal to the distance from the center of the headlights to the surface on which the car stands (the height is indicated by the letter h, and the line is located above the straight line E). The second horizontal line is drawn 5 cm below the first (line E in the diagram).
After applying these lines to a flat and smooth surface, you can begin adjusting the headlights of the Camry 40. Turn on the low beam and start adjusting one of the headlights, covering the second with some thick material (a thick rag will do, of which there are quite a few in the garage). The light from each optical element should be located along a horizontal straight line, which is closer to the floor surface (line E in the diagram) and end near the vertical line marked opposite the opposite headlight (line A for the left, straight line B for the right).
If you find that the optics of your car do not shine correctly, then adjustment is made using special bolts. Different bolts are responsible for adjustment in the horizontal and vertical planes.
Adjusting bolts Camry 40
The raising of the near beam of light occurs only after vertical adjustment. If you need to raise the low beam line, turn the adjusting screw until you reach the required level.
The low beam of the Camry 40 can be considered adjusted when the upper lines of the light spots coincide with the horizontal straight line E (the straight line marked 5 cm below the height of the center of the optics).
Necessary tools and preliminary preparation
First, you should check the functionality and settings of the above-described electrical corrector. On new cars, as a rule, there are no problems with it, but in cars manufactured before 2008, such a breakdown is not uncommon. If you find that the corrector still does not work, all further actions are meaningless until you replace it.
If you are convinced that the corrector is in good condition, you can proceed to the next step - searching for a suitable site to set up. It must meet several conditions.
- The area must be level - all four wheels of the car must be at the same level.
- The length of the area from the location of the headlights to the wall must be at least 10 meters.
- The wall on which the headlights will shine must also be perfectly flat.
By adjusting the headlights we also mean checking the tail lights and fog lights. As a rule, their correct operation depends on correct placement. Their level above the ground should be within 25 centimeters. Moreover, they should not act as the main optics of the car.
The car is placed with its headlights against the wall at a distance of seven meters. Turn on the light and mark the centers of the light spot on the wall. You need to step back 10 cm from them and draw a horizontal line. After this, you need to drive the Toyota another 7 meters and turn on the headlights again. If the setting is correct, then the upper boundary of the light beam should pass exactly along the previously drawn strip.
