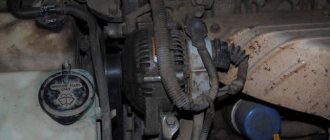
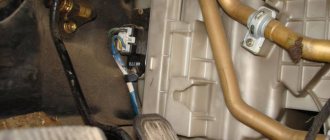
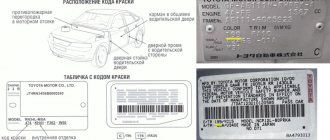
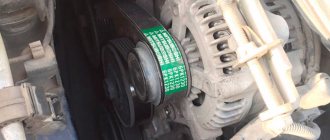
On most Toyota Camry cars, removing the alternator is not difficult. With the exception of versions with 3.5-liter engines, the placement of attachments in them is not convenient, and sometimes you have to work hard to access or remove them.
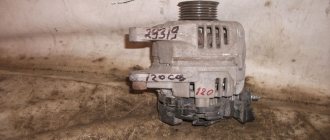
Generator from Toyota Camry
On “Sorokovka” and “Pentecostal” cars with 2.4 and 3.5 liter engines, equipment with a power of 150A is installed, the main malfunction of which is the failure of the overrunning clutch. The Camry 30 is equipped with less efficient equipment, and usually the reason for its failure is wear of the brushes.
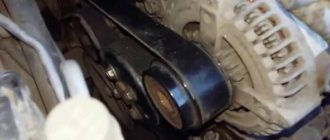
Alternator and belt on Camry 40
Toyota Camry 40 (generation) cars are good for everyone, but, unfortunately, they are not completely free of any shortcomings.
One of the weak points of the Camry 40 (generation) is the attachment, namely the generator. In conditions of the harsh domestic climate, driving with sharp accelerations and decelerations, frequent downtime in traffic jams, etc., the generator does not always “maintain” its service life. Especially considering the fact that the Camry is very seriously equipped with electronic systems and components, and all this equipment requires a powerful and high-quality power source.
How to determine if a generator is broken
Most often, a malfunction of the generator and other elements associated with them can be determined without even looking under the hood. If there is insufficient charging from the generator, then with the engine running (at idle) when additional units are turned on, their operation will not be the same as it should be on a working car. So, when you turn on the headlights, the light from them will be dimmer than usual, and activating the air conditioner or heater can lead to a noticeable drop in engine speed (even stopping the engine).
Moreover, the above problems may disappear at high engine speeds (over 2000 rpm).
Another way to determine malfunctions associated with the generator is a control lamp and voltmeter needle/readings (on the Camry 40 model there is no analogue voltage monitoring device-arrow, but this information can be displayed on the display).
The warning light is a battery icon on the dashboard inside the car. Usually, when you turn on the engine, this lamp may remain on for a few seconds and then disappear - this is absolutely normal. If the warning lamp lights up for a long time and does not go out, or flashes while the engine is running, then this clearly indicates a malfunction associated with the generator or other electronic components of the car.
It is also worth emphasizing that the warning lamp should light up when starting the engine, and it should light up brightly, no dimmer than the other indicators on the dashboard.
A dim glow of the indicator may indicate problems associated with poor contact in the electrical wiring of the control lamp power circuit or a malfunction of the rectifier unit. If the indicator does not light up at all when the engine is turned on, this may indicate a breakdown of the generator, poor contact or faulty electrical wiring (fuses, switches). Often this may indicate a malfunction or the use of a low-quality (discharged) battery.
How to check the alternator overrunning clutch?
How to check the overrunning clutch, since the listed symptoms can also be caused by other units? Unfortunately, there is no tool for diagnosing this node. Also, checking the overrunning clutch is complicated by the fact that the most effective method is to check the dismantled part, and this can be difficult and time-consuming.
So how can you check the generator overrunning clutch without dismantling the generator or the part itself? Turn on the engine, spin it to at least 2000 rpm , or better yet more, and then turn off the ignition . If you hear the humming sound of the generator slowing down, then everything is in order. If you hear a whistling or buzzing noise, the clutch bearings are most likely worn out. If you hear a cracking sound, it is definitely jammed.
When the OAD type overrunning clutch is installed, then without removing it on the car, you can also check it using a special tool that will allow you to rotate the generator shaft. If you feel that when you turn in the direction of movement, the pulley rotates with the spring stretching - everything is in order. If you cannot turn it or the spring does not stretch , then the clutch is definitely unsuitable for use. The overrunning clutch must be replaced if it has to apply a force of more than 1-1.5 Nm or rotates jerkily .
If you do remove the clutch from the car, then checking is simple. Simply block the inside of the pulley with your fingers and twist the outside . With a working clutch, it will spin in one direction and be blocked when moving in the other direction. A non-working clutch will either spin in both directions or not spin at all.
To avoid such checks, it is best to change this part every 100,000 kilometers, unless otherwise prescribed by the car manufacturer. The average resource of this spare part is exactly this, and if it has not failed before, then it is better not to risk it. At the same time, along with the clutch, it is worth changing the tensioner and belt, as well as other associated parts, if any. Moreover, if the clutch failed earlier, then the belt still needs to be replaced. Because when a pulley with a non-working clutch managed to work for some time, it definitely damaged the belt and it will soon break. You don't want this risk, do you?
Generators for Camry
Toyota Camry 40 (generation) cars are equipped with a certain type of engine. Accordingly, depending on which engine is installed on the machine, the choice of generator will vary. Camrys that travel the expanses of domestic roads are usually equipped with two types of engines, these are:
- 2.4 liter engine, model (2AZ-FE);
- 3.5 liter engine (V6), model (2GR-FE).
Other modifications are not so often found on the domestic market and are not in great demand among car enthusiasts. Therefore, we will focus on the above common models.
The following generators are designed for engines with a volume of 2.4 liters:
- original Toyota generator (article - 2706028321), price of a new part - from 28 thousand rubles; used parts - from 5-8 thousand rubles, depending on condition;
- Denso generator (article - DAN952), price of a new part - from 10.5 thousand rubles, used parts - from 3-4 thousand rubles, depending on condition;
- generator Nipparts (article - N5112116), part price - from 8t.r.;
- generator JapanParts (article - ALT917), part price - from 8t.r.
The following generators are designed for engines with a volume of 3.5 liters:
- original Toyota generator (article - 270600P141), price of a new part - from 30 thousand rubles; used parts - from 6 thousand rubles, depending on condition;
- BOSCH generator (article - 0986UR0401), price of a new part - from 18 thousand rubles; used parts - from 4-6 thousand rubles, depending on condition;
- generator ASHUKI (article - T400-25), part price - from 8-9t.r.
Manufacturers of inertial pulleys
In addition to original spare parts, the most common are INA and Ruville couplings; the quality of parts from these companies is quite acceptable. in the creation of overrunning clutches, she first presented an innovative solution to the world in 1995. In addition to these manufacturers, spare parts are also produced by:
- Febi;
- LUK;
- Valeo;
- Cargo;
- LYNX;
- Bosch;
- TIMMEN;
- SKF.
Depending on the manufacturer and model of the car, the cost of an inertial pulley can range from 1,300 to 9,000 rubles. By the way, OMGs are also developed for AvtoVAZ cars - clutches for the VAZ-2110 are produced under the Eldix brand, the price of the spare part in 2017 is approximately 1,700 rubles, and a plug is supplied with the overrunning mechanism.
Alternator belt, possible problems and its replacement
Very often, problems with the generator are caused by malfunctions of related elements, such as the overrunning clutch, the intermediate tensioner pulley, the generator pulley bearings and, directly, the generator drive belt. Most often, typical problems (poor charging, etc.) arise due to wear of the bearings and alternator belt.
Let's look at how to replace the alternator belt, and also choose a good and high-quality belt from those available on the market. Let's start with the choice. There are a large number of belts on the market, let’s take a look at the most popular and reliable ones:
For engines with a displacement of 2.4:
- original Toyota belt (article - 90916-A2011), price - from 3500 rubles;
- Contitech belt (article - 7PK1910), price - from 1000 rubles;
- Gates belt (article - 7PK1905), price - from 800 rubles;
- Nipparts belt (article - J1040875), price - from 800 rub.
For engines with a displacement of 3.5:
- Gates belt (article - 7PK2090), price - from 1200 rubles;
- Nipparts belt (article - N1071930), price - from 1600 rub.
The alternator belt is replaced as follows:
The following tools are required to complete the work:
- jack;
- Screwdriver Set;
- set of keys (10 and 14);
- head “17”;
- pliers;
- new belt,
- new tension roller
Using a jack, jack up the car beyond the right threshold. Then, using a wheel wrench, unscrew the right front wheel.
How to check the clutch?
To determine if a part is faulty, check the belt tensioner while the engine is idling. If the tensioner moves too much, this is a clear sign of a bad clutch.
We accelerate the motor so that its torque is 2000 rpm, and then turn it off. You need to listen to see if the generator is humming. If there is a buzzing noise, the pulley bearings are most likely worn out. In this case, it is also better to replace the pulley.
A short crackling sound when the engine is turned off may also indicate wear on the overrunning clutch. The part that has exhausted its service life is locked, after which it begins to work as a solid pulley.
Replacement is necessary if there is at least one of the symptoms described above. And now about the ways in which you can check the overrunning clutch.
Method one
In order for the coupling to be checked properly, it must be dismantled. Then we take the knot in our hands and block the inner ring with our fingers. We try to rotate the outer ring in the direction in which it would rotate under the influence of the belt drive.
Method two
The inner ring is also locked using fingers. In this case, we try to twist the outer ring in the direction opposite to the movement of the belt. The outer ring should easily yield to hand force and move in a given direction. If this does not happen, the part is faulty.
The inner race is equipped with a powerful spring, so during testing it is better to use a special device, since the mechanism may not yield to hand force.
Generator replacement
If the problem turns out to be more serious and simply replacing the tension roller and drive belt is not enough, you have to remove the generator and look into possible problems. Replacing a generator is not a very complicated procedure, however, it requires certain skills and a basic set of tools.
Typically, possible generator malfunctions are associated with the following problems:
- breakdown, more often premature wear of the brush (one or more brushes) of the generator;
- breakdown of the charging relay; with such a problem, the generator may either not work at all or not regulate the output voltage, and this can have a very negative impact on the condition of other electrical wiring components.
To replace the generator you need a basic set of tools:
- jack;
- Screwdriver Set;
- a set of keys;
- set of socket heads with extension;
- pliers.
The process of replacing the generator is carried out in the same way as replacing the drive belt, or rather, everything starts from the first few points.
Using a jack, jack up the car beyond the right threshold. Then, using a wheel wrench, unscrew the right front wheel. Now that nothing unnecessary is in the way, we remove the car fender liner. Then you need to remove the terminals from the battery and the plastic protection of the rollers of the mounted units.
Then unscrew the mounting bracket for the cooling radiator. And remove the connector (plastic chip) for the generator control. We also unscrew the red (positive) wire from the terminal on the generator.
Now remove the generator drive belt.
All that remains is to unscrew the generator mounting bolts (1 on top, 2 on the front side, 1 on the back, to unscrew the bolts we use a socket with an extension). It is advisable to unscrew the bolts in the following order: first from the rear, then 1 bolt from the front, then 1 bolt from the top and the last bolt from the front again.
Now, the cooling radiator is moved slightly to the side and the generator is removed.
Next, depending on your skills and abilities, you can diagnose the nature of the generator breakdown yourself or entrust it to repair professionals.
Install the generator on the car in the reverse order. Mounting bolts should be tightened firmly
Source
Replacing the overrunning clutch
You can do the replacement yourself, but only if you have a special key that can be used to unscrew it from the generator pulley. You should prepare for the fact that you will also need to replace the air conditioning compressor, but only a specialist can make such a decision.
The clutch must be changed when any signs of wear are detected - as well as along with the generator armature and consumables.
What tools will be useful?
Requires special tools. The coupling fastening element is difficult to see, since it has a countersunk head and is protected by a cap. Only after dismantling the protection can you find the internal slots into which the key is inserted.
But it is not always possible to remove OMG even with a special tool. In some cars there is so little space between the alternator and the body that the key cannot fit. In this case, it is recommended to remove the generator first. Sometimes it is difficult to unscrew a fastener because the nut is screwed too tightly. If you can’t unscrew it in any way, use a pneumatic wrench.
Components of a special key with which you can remove the OMG:
- Double sided bat. At one end there is a hexagon, at the other there is a head with an adapter for a wrench. This device is designed to keep the pulley from turning.
- Nozzle with a polyhedron on the outside. The other side of the nozzle is equipped with a hexagon for unscrewing the fasteners.
In addition, to remove OMG you may need the following tools:
- Torx 8 wrench;
- key to 17;
- head ATA-0415;
- key for 14.
How to remove?
The procedure must be performed in the following order:
- The negative terminal is disconnected from the battery.
- The pipe fitting is removed.
- The absorber barrel is dismantled and the hose is removed.
- After removing the barrel, the generator belt is dismantled. You will have to loosen the nut securing the tension roller.
- For removal it is better to use a hex bit. Use it to unscrew the coupling.
But how can you unscrew the OMG if it just won’t budge? To do this, you will have to dismantle and disassemble the generator, after holding it in a vice.
How to install a new one?
Installation is done in reverse. Don't screw it too tight. A protective cap and cover must be installed. If this is neglected, then over time dirt will get inside the mechanism, which will inevitably lead to failure of the assembly parts.
Can it be repaired?
As a rule, overrunning clutches are not repaired; they are simply replaced with new ones. And yet, repairing OMG is possible, but only professionals can do it.
The clutch begins to slip even with slight wear of the inner surface, which is ground during repairs. The liners are also ground or replaced with new ones - it all depends on the degree of wear. On small couplings that do not have liners, the roller is changed. The liners are ground on a machine using a special device. Grinding is done complete with sprockets.
During assembly, it is important to ensure clear jamming of the rollers. During installation, it is necessary to achieve alignment of the parts. The movement of the coupling after assembly should be smooth.
When symptoms of OMG failure appear, it is important to immediately diagnose the entire unit and then decide on the advisability of replacing it. Of course, you can carry out the replacement yourself, but if you lack the skills, then it is better to refuse independent intervention.
Source
Alternator and belt for Toyota Camry 40: how to remove, replace
On most Toyota Camry cars, removing the alternator is not difficult. With the exception of versions with 3.5-liter engines, the placement of attachments in them is not convenient, and sometimes you have to work hard to access or remove them.
Generator from Toyota Camry
On “Sorokovka” and “Pentecostal” cars with 2.4 and 3.5 liter engines, equipment with a power of 150A is installed, the main malfunction of which is the failure of the overrunning clutch. The Camry 30 is equipped with less efficient equipment, and usually the reason for its failure is wear of the brushes.
Camry acv40 generator repair — logbook Toyota Camry All so white on DRIVE2
Generator "Toyota Camry". Replacing brushes. Generator "Toyota" Replacing brushes.
With the engine running, disconnect the positive terminal from the battery. There should be a pulley there and a large nut inside. The iron bracket securing the cooling radiator is unscrewed.
Car portal Toyota Camry. Log in. Service. Repair. Generator from Toyota Camry. At the “Forties” and “Pentecostals”...
Check the condition of the carbon brushes in the following order: Failure of the carbon brushes can lead to either a complete failure of the electric generator or a change in the output current rating. If there is a systematic undercharging or overcharging of the battery and the regulated voltage does not fall within the specified limits, the voltage regulator must be replaced.
How to determine if a generator is broken
Most often, a malfunction of the generator and other elements associated with them can be determined without even looking under the hood. If there is insufficient charging from the generator, then with the engine running (at idle) when additional units are turned on, their operation will not be the same as it should be on a working car. So, when you turn on the headlights, the light from them will be dimmer than usual, and activating the air conditioner or heater can lead to a noticeable drop in engine speed (even stopping the engine).
Moreover, the above problems may disappear at high engine speeds (over 2000 rpm).
Another way to determine malfunctions associated with the generator is a control lamp and voltmeter needle/readings (on the Camry 40 model there is no analogue voltage monitoring device-arrow, but this information can be displayed on the display).
The warning light is a battery icon on the dashboard inside the car. Usually, when you turn on the engine, this lamp may remain on for a few seconds and then disappear - this is absolutely normal. If the warning lamp lights up for a long time and does not go out, or flashes while the engine is running, then this clearly indicates a malfunction associated with the generator or other electronic components of the car.
It is also worth emphasizing that the warning lamp should light up when starting the engine, and it should light up brightly, no dimmer than the other indicators on the dashboard.
How does a generator overrunning clutch work?
Main symptoms, causes of malfunction and life of the overrunning clutch
The job of the overrunning clutch , or rather the bearings in it, is to transfer the energy of the crankshaft to the generator shaft . To do this, during this period, the locking elements are engaged and both clips (internal and external) rotate together. But when the crankshaft begins to slow down, the locking elements stop working and seem to disconnect the inner and outer races. This allows the outer part of the pulley, connected through the belt to the crankshaft, to rotate slower than the inner part of the pulley, connected to the alternator shaft.
To make it clearer, remember how a bicycle works. While you are gaining momentum, that is, spinning the pedals, the wheel is also gaining momentum. But when you stop pedaling, the rapidly spinning wheel does not transfer the speed back. The wheel spins at one speed, the pedals at another, slower speed.
Repair and replacement of the generator, replacement of the Toyota Camry generator belt
The new carbon brush is 13mm long, so you can tell how badly the carbon brushes have worn out. Replacing old carbon brushes with new ones means replacing the entire voltage regulator assembly with brushes and brush holder, since the carbon brushes are soldered into the brush holder.
With the engine running, disconnect the positive terminal from the battery. If the electric generator is faulty, the engine will stall. But it is also recommended to check the integrity of the power fuse - it is located in the engine compartment.
Toyota Camry generator repair in Omsk - Aggregate Repair Center
If the fuse fails, the battery will also not be charged. How to properly remove a generator on a Camry with a 3.5-liter engine There are several main reasons for the failure of the electric generator on a Camry: Weak drive belt tension. This leads to its slipping on the pulleys, as a result of which the driven shaft does not gain sufficient speed for stable operation.
Special graphite brushes are responsible for transmitting voltage from the contact plates to the charging relay. Since graphite is a very soft, pliable material and wears away over time, this leads to equipment failure.
Toyota Camry 1997, 140 l. With. - other
Depending on the model of electrical equipment, the price of duplicates of such brushes starts from rubles. On almost all Camry models, replacing them is possible without removing the electric generator itself, with one exception - you still have to remove the generator on a Camry with a 3.5-liter engine.
First you need to open the hood and find the part you need. The nut needs to be twisted; it is hidden behind a plastic insert; the required wire is secured to a special clip.
Signs and causes of inertia pulley malfunction
A malfunction of the overrunning clutch can be determined by the following symptoms:
- a clicking sound appeared under the hood, which is especially audible at speeds below 2000;
- the belt began to fail more often, or the vibration of the tension belt increased;
- charging was lost.
Basically, in the OMG, the bearing jams, that is, the clutch becomes constantly on, the armature always spins, regardless of the engine speed. In this case, the generator works as with a regular pulley, so the belts, generator bearings, and tension rollers receive additional load and fail more often. Some car owners, not wanting to bother with replacing the clutch, weld the bearing, preferring to replace the belt once again rather than buy a new inertial pulley.
When the OMG rollers stop blocking, the generator rotor practically does not rotate, and charging is lost. At the same time, it is difficult to determine the malfunction by external inspection: if you take off the belt and rotate the shaft by the pulley by hand, the armature will spin, since it does not meet any resistance, the defect appears only under load. In any case, it is possible to detect a breakdown if the coupling completely falls apart, in some especially advanced cases it even flies off.
The inertial pulley fails for the following reasons:
- upon expiration of the resource (after 100-150 thousand kilometers);
- due to dirt getting into the mechanism in the absence of a protective cap;
- due to too much belt tension;
- as a result of mechanical damage (after an impact);
- if the generator is installed skewed.
With the belt removed, check the clutch as follows:
- we turn the pulley by hand and stop it abruptly; if the mechanism is working properly, it will be noticeable that the anchor moves for some time after stopping;
- Using a screwdriver, we firmly fix the impeller from turning, we try to turn the OMG: it should only rotate counterclockwise and stall if you try to direct it in the opposite direction.
You can also visually check how the inertial pulley behaves in operation - after stopping the engine, with a working clutch, the rotor blades should rotate for some time.
Equipment removal procedure
Before removing the generator from a Toyota Camry with a 3.5- liter engine, you will have to work hard. The sequence of actions is as follows:
- The right front side of the car is jacked up.
- The wheel is removed, then you need to remove the plastic fender liner (if equipped).
- Be sure to remove the terminals from the battery.
- Then the plastic boot covering the upper part of the motor is removed.
- The iron bracket securing the cooling radiator is unscrewed.
- Then you need to remove the control wire connector (plastic chip) and the main positive wire from the generator - it is pulled to a special contact pin on the generator with a nut.
- The generator itself is screwed on with 3 bolts: 2 of them are in the front part (top and bottom), and another one is in the rear.
- To unscrew the lower bolts, a thin extension for the ratchet is required, since getting to them is quite problematic.
- Then the radiator is pulled back a little, after which the generator is pulled out.
- Reinstalling the electric generator is carried out in the reverse order.
Mounting the generator on a Toyota Camry 40 and 50 body This instruction allows you to learn how to remove the generator from a Camry 40 or 50 body equipped with a 3.5-liter V-engine. On Camrys with other types of engines, removal is carried out in a simpler way, which does not require jacking up the car and unscrewing the radiator.
Replacing the generator and brushes
Removing the system is a matter that must be approached with caution so as not to damage the vehicle. The list of tools is small - the brush itself (new) and a full set of heads.
First you need to open the hood and find the part you need. Process:
- disconnect all wiring. The nut needs to be twisted; it is hidden behind a plastic insert;
- the required wire is secured to a special clip. It must be carefully detached from the main part;
- We also disconnect the connector for the valve;
- Next, you need to unscrew all the other nuts and fasteners that secure the installation. The fastening is a bolt, you can see it on the bar that is responsible for tensioning the battery, you need to unscrew it;
- the entire bar is also secured with a nut, unscrew it;
- Opposite the bolt, which is difficult to get to, there is an SRS sensor; it is better to disconnect it together with the clamp (2 bolts);
- All that remains is to remove the generator; now you can simply pull it up; there is nothing else holding it in place.
Camry V40 Wiper Blades
ACV40 GSV40 2006 2006 2008 2009 2010 2011
Hybrid brushes were installed at the factory. Driver's side: length 600 mm, catalog number 85222-33250; Passenger side: 50 cm long, catalog number 85212-53081. The fastening is the most common, a hook. Therefore, it can be replaced with cheaper products from a variety of manufacturers from different price segments. But you should keep in mind that some nuances may arise during installation. So, it would seem that the Hella 9XW 204 584-241, which is absolutely similar at first glance, is not quite suitable. Wider in the area where it is attached to the leash, it does not press evenly against the glass. You can get out of the situation by bending the leash. But it's better not to do this.
Parsing
Next, you need to disassemble the part itself to replace the generator brushes. Process:
- remove the cover. Unscrew the three top nuts and one side nut;
- the brush is now visible;
- unscrew the bolts marked with red lines;
- Those fasteners that also need to be unscrewed are marked in green. All of them are difficult to give in, so it is recommended to treat them a little with WD, and then start;
- turn the generator back around. There should be a pulley there and a large nut inside. It also needs to be unscrewed;
- carefully divide it into 2 parts (if you need to change the rollers on the axles or the generator bearing);
Brakes
Brake pads, Drum pads, Pad wear sensor, Pad repair kit, Pad spacer, Rear pads, Handbrake pads, Front pads, Brake linings, Brake discs, Rear brake discs, Front brake discs, Brake drum, Rear brake drum, Drum bearing, Brake hoses, Brake pipes, Brake caliper, Caliper repair kit, Rear caliper, Caliper guides, Front caliper, Caliper piston, Caliper boot, Caliper bracket, Hydraulic accumulator, Vacuum brake booster, ABS, ABS unit, ABS sensor, Vacuum pump, Brake pedal, Switch Brake Light, Air Brakes, Parking Brake, Handbrake Cable, Brake Cylinder, Master Cylinder, Brake Reservoir, Brake Service Cylinder, Rear Brake Cylinder, Front Brake Cylinder, Brake Cylinder Repair Kit
Assembly
Assembly is much easier, do everything in reverse order. The noise should disappear if its cause is eliminated.
It is important to ensure that the brushes purchased are suitable for the car. The standard configuration of the car and the extended one with a large number of additional equipment have different generator power.
Replacing the overrunning clutch
Replacing the alternator overrunning clutch is quite simple. The pulley should be disassembled by removing the part from the car. It is important to replace the clutch cover to avoid future breakdowns.
Overrunning clutch device
How the OAP overrunning clutch works
Interestingly, the generator pulley with and without an overrunning clutch looks almost the same. Because the overrunning clutch is a mechanism built into the pulley. And if a regular pulley is a piece of iron with grooves attached with a nut to the generator shaft, then the design of a pulley with an overrunning clutch is more complicated.
Imagine that an ordinary pulley was cut into two separate “donuts” - external and internal. And a special bearing was inserted between them. Because this is what a pulley with a generator overrunning clutch looks like. It has an outer ring that engages with the belt. And there is an internal race that is threaded onto the generator shaft. And between them there is a bearing with rotating and locking elements. There are seals at the ends of the overrunning clutch that prevent dust and dirt from getting inside.
Types of couplings
Types of generator overrunning clutches
To finally close the issue of the design of this part, we add that over time, manufacturers began to offer two different modifications of generator overrunning clutches. For example, the company that came up with this design, INA, produces OAP (Overrunning Alternator Pulley - generator pulley with overrunning clutch) OAD ((Overrunning Alternator Decoupler - generator breaker with overrunning clutch).
In an OAP clutch, an internal freewheel allows the alternator rotor to rotate freely when the rotor speed is higher than the engine crankshaft speed, and to be rotated by the belt when the crankshaft speed is higher than the alternator rotor speed.
OAD clutch has an almost identical device, only it also has a spring. Due to this modification, the reduction of belt runout is even more effective. Due to the springs, the generator starts up more smoothly.
Generator OAD overrunning clutch device
Gates offers Overrunning Alternator Clutches (OAD) and Overrunning Alternator Clutches (OWC). OWC stands for One Way Clutch. The point is that the former allow a slight reverse rotation, while the latter are blocked instantly. Which type of clutch is used depends on the vehicle and its drive design.
How can you tell if your car has an alternator pulley with an overrunning clutch? There are two main signs. The first is that more modern designs always have a dark cap, which serves as an anther. Second, if you see the lock nut that secures the pulley to the generator shaft, you definitely have a regular pulley. If there is no nut, it is an overrunning clutch. But since access to this part does not always allow one to discern all the nuances of the design, the presence of a cover is the most accessible identification option.
Principle of operation
The generator overrunning clutch is an element of the mechanical transmission of a car, which is mounted to prevent the transmission of torque between the shafts (main and driven) if, as a result of some malfunction, the driven shaft begins to gain more revolutions than the main one.
By design, the overrunning clutch does not require any control elements. It is important to highlight the structural features of the pulley - this is the presence of two parts: the outer one, which connects to the coupling, and the inner one, which communicates with the shaft. Another element is rollers. As a rule, they are installed in 2 rows. They are a specific stopping system. Essentially, the overrunning clutch alternator serves to extend the life of the overrunning belts.
Why do you need an overrunning clutch?
So where did this generator overrunning clutch come from and what is it for? Like many units that appeared in machine designs not so long ago, this part is a forced decision.
As it was before? The generator pulley was a single piece that was attached to the generator shaft with a nut, creating a direct, rigid connection. The generator drive belt transmitted revolutions from the crankshaft to its shaft. But two nuances arise. The first is that the engine operates unevenly, as if in jerks, which is due to the principle of internal combustion. Second, the generator shaft by default rotates several times faster than the crankshaft. That is, when the crankshaft slows down, the generator does not have time to slow down at the same pace - it has more inertia and rotation speed. As a result, the belt was constantly under strain to break due to jerking, and even slipped when the generator, which had not yet stopped, pulled it relative to the already stopped crankshaft pulley. Therefore, belts in old cars lasted no more than 30 thousand kilometers. And such hard work also reduced the service life of other associated parts.
You've probably already heard what happened next, because this applies to many units. The more modern cars became, the more additional functions and systems appeared in them that require generator energy. Initially, the consequence of this was an increase in the size and weight of the generators, and especially their heaviest part - the armature. Which led to even greater loads on the belt. But not only that, because many modern generators are even smaller and lighter than those that came before. Many high-speed engines have appeared, the requirements for engine comfort and noise have seriously increased, and in many cars the alternator drive belt has begun to be simultaneously used as a belt for air conditioning and/or other attachments. If such a belt continued to experience the same loads as before, it itself would fail faster and reduce the service life of other drive parts, which is too expensive.
