The Toyota Corolla comes with a pretty good heating system installed from the factory. But as the years go by, over time even the most reliable components fail. Before replacing the heating radiator, you can try flushing it. If this measure does not help, then proceed to replacing the device with a similar new one.
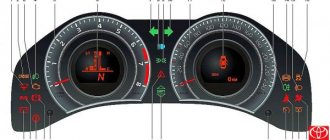
Removing glass fogging - replacing the heater radiator
So the question started with this post. The Drayvovites rendered a verdict - the heater radiator needs to be replaced. Just in case, I called the former owner of the Corolla. He said that he had such a problem, the stove had already been taken out and repaired. He gave advice to change it, and not to do all sorts of washings. SAT STTY473950
was ordered .
Day X arrived. Armed with a printout of the manual for disassembling the interior, I headed to the garage. I expected that this task would take me at least a day, but in the end I got away with 4 hours with a break for lunch. Apparently the “previous hands” who repaired the radiator made my work easier. The first step was to remove the center console with the armrest between the seats. To do this, take out an ashtray. We unscrew the knob of the gearshift knob and remove this part by removing the plugs of the cigarette lighter and its backlight. Under the ashtray we see two screws with a positive screwdriver - unscrew them. We also unscrew two more 10mm bolts in the armrest. Tighten the handbrake harder and remove the center console. Next I removed the climate control panel, although this is not necessary. It is simply held on by latches. Next it was necessary to remove the panel under the driver's feet. And then a big surprise awaited me in a good sense of the word =). Poking my head under the steering column, I saw that the heater radiator was opening up to my gaze and it seemed like there was nothing particularly stopping it from being removed. But according to the manual and advice from experienced people, it was necessary to disassemble the entire dashboard (upper and lower), remove the steering wheel and much more.
I don’t rule out that the masters made my task easier because they had climbed there before. After all, they sawed the aluminum tubes that go to the radiator from the engine compartment. This helped me pull out the heater radiator, giving elasticity to the tubes.
Having examined everything carefully, I realized what was stopping me from removing the radiator. It turned out that I needed to remove the driver's air cooler in the legs. But he rested against a vertical metal stand. To do this, you need to unscrew three bolts.
Next, I pushed the carpet to the side as far as possible and bent the vertical metal stand towards itself. After that, I removed the plastic airflow in the legs.
Next, I began to flare the lower pipe to the radiator. It's not a tricky thing, I slowly picked it out with a screwdriver. Antifreeze began to drip, placed a cut-off bottle, stirred the pipe even more and the liquid began to flow more vigorously. It took about 15 minutes and the glass ( ATTENTION!
) as much as 2 liters of antifreeze. Therefore, prepare in advance two cut bottles for change and a total container of at least two liters. Then I flared the upper pipe and pulled out the radiator, while bending the tubes to the side. There is still a little liquid on the glass, but I covered everything with a rag in advance.
It was time to install a new radiator and to my disappointment it turned out to be narrower than the original one. It turned out that I had a so-called “northern version” stove, although there was no airflow on the feet of the rear passengers. And this was almost the main factor in determining the type of radiator. Another surprise from the Japanese assembly and the first year of production =). But I did not despair and placed foam rubber in the gap. The hardest part was rolling the tubes, especially the top connection. It was difficult to reach from all sides with pliers and even miniature round-nose pliers. I spent about 1.5 hours on this, I took a lot of breath because you are constantly in the Zyu pose. At that moment I thought maybe it was necessary to remove the entire panel =). By the way, after putting the old original rings on the tubes, I coated the bell with sealant, just a little, for greater reliability. Next, reassemble in reverse order and bleed the system. We drive the car onto a decent slope and accelerate.
Bottom line. Everything turned out the way I wanted. The problem of glass fogging is gone. Moreover, the salon is now Tashkent. There is no desire to ride while wearing a jacket. The procedure is quite simple, don’t be afraid. Perhaps I missed something - ask questions.
Reasons for replacement
The most common breakdown of a car heater is when the device simply stops “blowing,” that is, supplying heated air and warming the interior. This can happen for various reasons, including a clogged radiator (especially important for those owners who use sealant). There may also be a situation when the stove is working, but it does not reach the required speed. The problem most often lies in the stove fan, which in such situations is either repaired or replaced with a new one.
The cause of poor operation of the Toyota Corolla 120 heater may be a leak in the radiator or pipes. During the process, antifreeze leaks out, which can lead to overheating of the engine. A sign of a radiator failure will be the release of cold air instead of heated air and, as a result, the lack of heating of the interior.
Also, a specific cause of a malfunction of the stove can be a mouse that has climbed into the system. You can find more than one similar story on the forums. In any case, when signs of malfunction appear and diagnostics are carried out, replacement of one or another spare part is often required.
Let's look at how to replace the radiator and other components of the system yourself.
Why is the Toyota Corolla 120 heater replaced?
The most common breakdown of a car heater is when the device simply stops “blowing,” that is, supplying heated air and warming the interior. This can happen for various reasons, including a clogged radiator (especially important for those owners who use sealant). There may also be a situation when the stove is working, but it does not reach the required speed. The problem most often lies in the stove fan, which in such situations is either repaired or replaced with a new one.
Replacing the heater radiator:
Work is carried out from inside the car.
- Remove the central panel.
- Remove the climate control and radio.
- Remove the driver's side glove compartment.
- Remove the plastic panels near the box.
- Unscrew the steering column mounting bolts (4 pcs.) and remove it.
- Remove the battery terminals and all wires.
- Remove the second glove box located near the passenger and the gearbox panel.
- Remove the radiator fan.
- Go to the hood of the car - the rest of the work will be carried out in it.
Release the freon and remove the air conditioning compressor.
- Remove the tubes leading from the faucet to the stove and place a container under them to drain the antifreeze.
- Remove the hoses from the air conditioner.
- Remove the heater on the Corolla and replace the radiator located in it with a new one.
- Reassemble the device in reverse order.
Replacing the stove on Corolla of later generations (130, 140, 150 and 160) is done in the same way.
A new radiator for a Corolla can also be installed at a service station, but due to the fact that in the process it is necessary to remove the torpedo, the price tag for this procedure is rather high - from 6 thousand rubles. If you change the radiator yourself, it is important to consider that the whole process takes from 1 to 2 days, so it is better to carry out the replacement in the garage.
You can use the above guide to learn how to remove the heater radiator on a Toyota Corolla 121 - the principle will be the same.
Replacing stove pipes
The occurrence of a breakdown in the pipe can be determined both by the cessation of the supply of hot air to the cabin and by the specific smell of antifreeze that appears in the cabin. To replace, you need to buy new pipes (preferably two at once).
- Remove the pipe located near the expansion tank.
- Put a new one in its place.
- The second pipe is located between the starter and the engine - once you feel it, you need to remove the starter.
Important! When removing the starter, you must disconnect the battery!
- Next, use thin-nose pliers to dismantle the clamp and remove the pipe.
- Add antifreeze to the system.
- Reassemble everything in reverse order.
Replacing the stove fan
Signs of a stove fan failure will be noise, chirping, weak or completely absent air flow when the stove is running. If after diagnostics it is confirmed that the stove fan is not working, it must be replaced.
- Move the seat and remove the leg protection located under the glove compartment (to do this, it will be more convenient to lie on the threshold with your back).
- The fan platform and wires going to the stove will be visible.
- Use a screwdriver to remove the screw securing the wires.
- Remove the wire chips from the thermistor and from the motor.
- Remove the fan platform by unscrewing the 3 screws.
- Remove the fan mount (screws) and dismantle the device.
- Replace the fan with a new one and reassemble in reverse order.
In order to better understand the fan replacement process, it is advisable to additionally watch the video. The Corolla Verso 2005 stove fan is changed in the same way as described above.
Replacing the heater fan light bulb:
The fan regulator can be easily removed; it is located in the center. Under the regulator there is a self-tapping screw that needs to be unscrewed and the part pulled towards you. To work, you will need a flathead and Phillips screwdriver.
Stages of work:
- Remove the handle in the center and unscrew the self-tapping screw (using a Phillips screwdriver).
- Place the gear lever in position “L”.
- Raise the radio frame.
- Use a flat-head screwdriver to pry off the left side of the frame around the transmission.
- Carefully remove the gearbox frame, while the climate controls should remain in the panel.
- Leave the frame hanging on the automatic transmission lever.
- In the recess of the plastic panel there are two light bulbs that can be removed with tweezers (you need to slightly turn the socket).
- Using the same tweezers, install a new light bulb in place of the burnt out one.
- Reassemble everything in reverse order.
Check the serviceability of the Toyota Corolla 120 heater and, if it does not work correctly, you need to replace it even in the warm season, when the heater is usually not used. Repairing or replacing a stove in winter is quite problematic, as is driving with a faulty heating system. Therefore, it is so important to find the cause of the malfunction in time and replace the heater components on the Toyota Corolla 120.
VESKO-TRANS.RU
AutoNews / Reviews / Tests
How to Disassemble Toyota Heater Motor
How to disassemble a Toyota heater motor
Cars and everything about them
As is often the case, problems with the cooktop (the fan inside the cabin heater) occur with the first cold weather. Although she started making strange noises a year ago, she finally refused to work now.
The symptoms were : first, the stove motor began to make strange sounds. Sometimes it didn't turn on right away. The relay was clearly audible, but the engine did not rotate. However, after hitting a pile or some other malfunction, the engine began to rotate and warm air entered the cabin.
One fine, almost frosty morning, the stove motor stopped working completely, hinting at the need for repairs . At the same time, it does not respond to high-speed shifts and rough roads.
It's winter, so we will continue to talk about the self-healing of the fan or, in other words, the cabin heater . And to be precise, instead of conductive graphite brushes .
Alternatively, if you don't want to waste time fussing with brushes, you can simply replace the motor assembly . Our instructions will be relevant in this case. Just skip unnecessary steps.
What to do if the oven doesn't blow?
The fact is that when the fan is running, the brushes rub against the anchor platform. Where there is friction, there is physical wear of parts. Wired brushes wear out. Although special springs tighten them, the brushes no longer reach the armature and, accordingly, transmit the necessary electrical energy . The motor does not work, the plate does not rotate.
In this case, simply replace the worn brushes with new ones . A similar procedure is performed using drills, grinders and even electric razors.
For repairs, you must first remove the heater motor . In our Toyota Corolla it was at the passenger's feet. Getting to it was just a matter of unscrewing a few screws and screws. The stove is in our hands.
Next we need to get to the brushes . To do this, remove the clamp and unscrew the two mounting screws, open the hatch using a large slotted screwdriver.
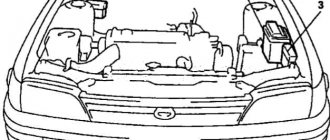
Now comes the fun part. You need to pull the engine out of the housing . To do this, heat the housing and impeller in the areas shown in the photo with hot air. This is done using a blower, temperature around 200°C.
Flushing
You can do the flushing of the heater radiator on a Toyota Corolla 120 with your own hands. Here it is important to decide on a mixture that will clean the internal space of the system.
There are many options: starting with peroxide and caustic soda, ending even with yogurt. Some craftsmen use products to clean sewer pipes, washing machines from scale, etc.
Let's give an example of flushing a stove radiator using a drain cleaner. They are widely available at hardware and home improvement stores. It is better to choose liquid formulations as they penetrate the system more easily.
Important! Before flushing, be sure to remove the standard pipes and replace them with temporary ones through which you will clean the radiator. Aggressive liquids can damage them.
- Choose any good drain cleaner. Too thick ones will be difficult to penetrate into the system, and various powders need to be diluted and poured. Simply put, liquid is more convenient to use.
- First drain all coolant from the system. This will be a good reason to change the coolant if it has been used in your Toyota Corolla for a long time.
- When the heater radiator is free of coolant, pour the selected cleaning agent inside. It is better to use a compressor pump so that the drug penetrates inside more efficiently.
- Pour in fluid until it comes out of the return hose. Wait a while. This is necessary so that the product has time to act and dissolve all kinds of dirt and sediment that interfere with the normal operation of the heater on the Toyota Corolla.
- Install a hose on the return line and turn on the hot water supply. Cold water will not be able to drive away all the dirt and remove it from the radiator as effectively. So it’s better to heat a lot of boiling water in advance.
- Hot water must be supplied under pressure. Having a pump will help you a lot with this.
- Run hot water on the heater core until all dirt and cleaning agent residue is removed. This can be determined by completely clean water.
- For prevention, blow out the heater radiator with just air. Large fractions of debris and dirt may come out that were not captured by the flow of hot water.
- Fill the heater core with coolant.
- Start the car, press the gas pedal, which will expel any remaining air from the heating system. Check how much better the heater works.
Important! If flushing does not work, check the radiator for leaks. If there are leaks, repairs will not help. The element needs to be completely replaced.
Replacement
If replacing your heater radiator is the only way to bring your heating system back to life, first find a suitable new radiator. After this, you can begin work on disassembling, replacing and reassembling the unit.
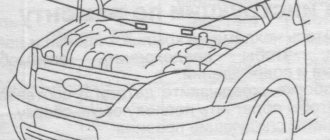
- Remove anything from the vehicle that may interfere with work. This is especially true for things from the front of the cabin.
- Remove the front panel. Without this, you won't be able to get to the radiator. First, the central panel and audio system are dismantled. On the driver's side, remove the panel located to the right of the steering wheel (if the Toyota Corolla is right-hand drive). It is removed after unscrewing the nut that holds the panel to the body.
- Take out the instrument panel and disconnect all the wires from it. It is better to pre-mark the wiring so that you can put it back together without any problems.
- Enter from the front passenger side. There is a glove compartment there that needs to be removed. And the panel from the gearbox is also removed. Otherwise, it will interfere with removing the torpedo.
- The fastening bolt is located here above the panel under the plastic flap. Open this element and unscrew the bolt.
- All wires must be disconnected from the connectors. The panel moves slightly to the side and the fan unscrews.
- In parallel with the dismantling work, we advise you to clean, wash and lubricate everything as necessary. This will make the interior cleaner, and extraneous noise will go away.
- When you have removed everything, all that remains is to dismantle the stove. To do this, lift the hood of the Toyota Corolla and find the hoses that go to the stove. They need to be disabled. Coolant will flow from the hoses, so be sure to place some container under them to drain the coolant.
- Now you can completely remove the stove from the interior. This is a good opportunity to assess its condition, check various components and elements of the stove. If all is well, cleaning and lubricating the elements will not hurt.
- Our old heater core is removed from the stove. A new heater radiator is installed in its place.
All that remains is to assemble the assembly in reverse order. Be careful when connecting wires. If you don't remember which one goes where, it's best to look at the instruction manual.
Important! Replacing a radiator on a Toyota Corolla is not an overly complicated or easy procedure. But independent repairs will only cost the cost of a new radiator, while service stations charge about 5–7 thousand rubles for a replacement.
Removing the front panel trim of TOYOTA Carina:
It is necessary to partially disassemble such elements, without which there is no further action. In this case, you will have to remove the decorative lining of the panel.
Dismantling the decorative trim of the front panel is not particularly difficult. All elements are attached with plastic clips. The main tool can be called a flat-head screwdriver. Disconnect the power terminals from the rear window heating button, in the same way from the emergency button. Perform the following action: disconnect the terminals from the clock and from the control rear view mirror panels.
Replacing the heater radiator on a Toyota Corolla
Sometimes it happens, especially in older cars, that the interior cannot be warmed up. It’s especially sad if this happened in winter, when the temperature outside is sub-zero and your car is unable to heat the interior. For what reasons could this happen? Most often this is due to a broken stove. In this article we will talk about the main type of heater breakdown on a Toyota King and figure out how to properly fix this breakdown.
So, let's find out what most often breaks down in the stoves on this car model. Typically, two things go wrong:
- The radiator becomes clogged or begins to leak;
- Fan blades break.
The first happens much more often, so we will primarily talk about how to replace the radiator on this car. Step-by-step instructions will help us figure this out. The example will be a 1994 Toyota Sorolla with right-hand drive; owners of other variations with left-hand drive should not be upset. All actions are performed exactly as indicated in these instructions, we just do everything in a mirror way.
Where to find and which heater to buy
So, as soon as the driver has established where the heater radiator is in the Toyota Carina E, he begins to rack his brains about how to remove it with minimal effort and time. This can be done without dismantling the instrument panel, but at a minimum, it will need to be unscrewed and moved to the side. Otherwise, the heater radiator will rest against the corner of the panel and may break it off. If you manage to remove the panel, then replacing this unit will not be difficult, and then install it back.
When trying to buy a new Toyota Carina E heater radiator, a car enthusiast may encounter difficulties. The fact is that finding an original part for a car model that is far from new is very difficult. Therefore, it is better to immediately focus on a duplicate analogue, but of high quality production. In addition, duplicates are made of aluminum, and therefore will cost significantly less.
Step-by-step instructions for replacing the heater radiator on a Toyota Corolla
First of all, you should find a radiator suitable for your model, which will replace the damaged part without any modifications. Having found and ordered a radiator, we wait for its delivery and upon arrival you can begin the replacement process. It is worth noting that to replace the radiator you will definitely need a garage, since the process will take approximately two days.
So let's get started. At the first stage, we drive the car into the garage and take out absolutely all personal belongings from the front of the cabin. Having freed up the workplace, we proceed to removing the front panel. No matter how much we would like it, the radiator cannot be replaced without removing it. We start by removing the central panel and radio.
Having removed the central panel, we need to pull out the panel located on the driver's side, and in the photo it is to the right of the steering wheel. Having done this, it is important to completely unscrew the nut there, which firmly holds the panel to the body. It looks something like this.
After this, we pull out the instrument panel and completely disconnect it from all wires. It is advisable to remember in advance which wire to connect where. Having done all this, we can consider that half the battle of disassembling the torpedo has practically already been done.
Next, we need to remove the glove compartment on the passenger side and remove the gearbox panel, which will also interfere with disconnecting the entire dashboard.
We also need to unscrew the bolt located on top of the panel under the hiding plastic. The photo clearly shows this place. Carefully open and unscrew the bolt.
Next, disconnect all the wires from the connectors, slightly move the panel and unscrew the fan. You don’t have to remove the pipe; it shouldn’t interfere with you too much. During the removal process, you can clean and wash everything. It will be more pleasant for you to sit in a cleaned interior.
After all this has been removed, you can proceed to the stove itself. Open the hood. We need to find the hoses going to the stove and disconnect them. It is very important to place the jar when removing, as some of the antifreeze will spill out.
Next, completely remove the stove from the interior. They may look like the one shown in the photo below.
Having removed the stove, we take out the old radiator from it and insert a new one in the same place. By the way, it’s worth cleaning and lubricating everything again for more smooth operation of the entire heating unit. The old radiator was ironed like this.
After the part has been replaced, you can begin the reassembly procedure. We put everything back in its place in the same order as we took it apart. In the end, everything should work out and look something like this.
Replacing the stove yourself is not very difficult, but it can take a lot of time and effort. However, you won't have to pay 6000-7000 thousand to replace a hundred percent radiator. And plus, you will do everything much better and cleaner than one hundred workers. At the end of the work, do not forget that it is necessary to add antifreeze to the system, since when you removed the hoses, it spilled out.
Fill in the antifreeze, start the car, warm it up, turn on the heater and rejoice.
Armrest removal procedure:
Next, you should remove the entire armrest glove compartment. To do this, unscrew the two bolts located at the very bottom of the glove compartment. We do the following by unscrewing two screws on the left and right sides of the automatic transmission lever. After this is done, we begin to shoot.
We managed to remove the armrest, let's see where the remaining antifreeze could have gone. Then it became clear that this was not all of it, the rest needed to be looked at in other places.
These antifreeze residues were under the rugs and carpet, I had to lift them up and thoroughly wipe them underneath. Cleaning also needed to be done on the passenger seat side.
How does the stove work?
In cars with body numbers E120 and E150 2012 and some other years of production, the heater is designed almost identically, so maintenance and care do not make any fundamental difference.
If the stove fan whistles, the heating system itself has stopped working, the air has stopped circulating properly, or, conversely, the device heats up when it is not required, it is worth checking the stove radiator.
For example, let's look at how the heater works on a 2003 Toyota Corolla E12. This model is quite old, so the arrangement of its elements is simple. It is worth noting that cars in the 100 and 110 bodies have the same heater design. Problems appear over time, most often these are the following problems:
- The heater fan does not work on the Toyota.
- In general, the stove does not work.
- Air enters only from one side.
- There is a coolant leak.
- The stove does not heat well, or not all of its modes work.
- The radiator supplies moist air.
- The motor has failed.
- An unpleasant odor appeared.
- The heater cannot turn on.
How to repair?
Only by disassembling the device can you determine exactly why it does not work. Before removing the radiator, check that the relay is working properly; The fuse is less likely to blow. If this is the cause, cleaning or repair may not be necessary.
For ease of work, it is advisable to remove all foreign objects from the interior. In order to remove the heater on the King, you will need to remove the dashboard, otherwise you will not be able to get the heater core. You need to start removing the center panel from the driver's side. Please note that for the 100th body this place is on the right side. The nuts are usually stuck and need to be treated with WD-40.
It is impossible to get to the stove fan without removing the drive rod. It is necessary to remove the rod from under the fixing brackets, disconnect all the cables, and turn off the crane control lever.
The design of the heater fan switch in Toyota Corolla 2008, 2012 is simple, but putting the device back together is quite difficult. It is recommended to take photographs of everything during disassembly.
In addition to the cable, all levers must be removed, otherwise they will interfere with disassembling the structure. A screwdriver will be useful for removing the spring latch, after which you can remove the radiator casing and pull the heater out of the casing. Once you can disassemble it, you can make the necessary repairs and flush the system. Quite often, the heating device does not heat up well or may stop blowing due to the fact that it is clogged with dirt.
Conclusion
The operation of a car heater can last quite a long time. But over time, some parts fail, which makes it difficult to turn on the heater motor and warm up the interior. Any Toyota car owner of 2003, 2008, 2012 and other cars can independently replace faulty components, spending a little time on it. If you still have questions about heating repair, there are many videos on the Internet that will help solve this technical problem in different types of models: Toyota station wagon, Ranx, Corolla Spasio, cars E120, E150, E12, 2012 and other years of production.