Causes and symptoms of malfunctions
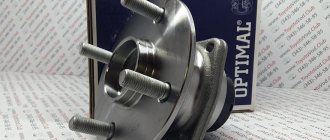
The hub bearing cannot be repaired and if it breaks, it must be completely replaced.
The main reasons why it fails can be:
- Aggressive driving on bad roads;
- Moisture has gotten under the special seal, causing the lubricant to be washed out;
- Large overloads;
The main sign indicating that there is a problem with the wheel bearing is the presence of extraneous noise in the area of the front wheel.
It is important to know that the front and rear hub on models with 120 and 150 body designs are exactly the same, and the part changes in exactly the same way.
This is interesting: Timing chain for Mazda cx-7: do-it-yourself replacement
Signs of wheel bearing failure
The main signs of a broken rear or front hub:
- the appearance of a hum from the wheels while driving;
- change in tire angle and uneven tread wear;
- the appearance of vibrations that are transmitted to the body or steering wheel;
- reduction of rolling distance due to increased friction in bearings;
- complete or partial jamming of the hub (the performance of the unit may depend on the degree of heating of the structural elements);
- an increase in the temperature of the unit while in motion (not to be confused with the natural heating of parts from the brake mechanisms);
- the car pulls to the side (with correct wheel alignment and no damage to the suspension);
- a decrease in dynamic characteristics with a simultaneous increase in fuel consumption and the appearance of the symptoms described above.
Replacement on 120 body
To change the wheel bearing on a Toyota Corolla 150 and 120 body, you need to dismantle the hub, which is the main component of the chassis and is responsible for performing such functions as:
- Reliable wheel retention;
- Turning and rotation of wheels;
- Thanks to the bearing, the movement is transmitted to the wheel;
The hub is a monolithic structure made of very durable material, due to which it has a long service life. Therefore, to replace the bearing you need to prepare a special tool , which will include:
- Hydraulic Press;
- Torque wrench;
- Puller;
It is worth remembering that all work must be carried out very carefully so as not to damage the sensors responsible for the anti-lock braking system.
When all the necessary tools are prepared, you can proceed to replacement:
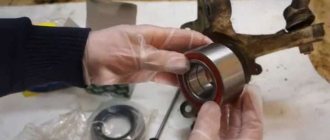
The wheel bearing is held in the hub thanks to a retaining ring, which can be knocked out of the support with a hammer. After this, the bearing is separated into two parts and checked for cracks; if there is no damage, a new element can be installed . The new element is installed on the outer part, but before installing it It is advisable to treat the surface with special lubricant VD-40.
After this, the part is pressed back using a hammer or a special hydraulic press, which will help reduce all risks associated with damage to the seat.
Practice tips
They are as follows:
— not every garage has a press. Use a service station to remove the bearing and press it into place. It's not expensive, but it will speed up the repair process. Perform the rest of the operations in your garage;
- if you have already dismantled the unit, look around it. Perhaps you will visually see parts that require repair at the same time;
- do not reuse the old retaining ring;
- If possible, replace the bearing on the other side at the same time. Since its service life has also come to an end, although it does not buzz;
— to protect yourself when purchasing a bearing, ask to see the certificate and dealer agreement at the car store;
— after replacing the part, check the wheel camber and toe.
- How to replace a wheel bearing on a rear wheel
If you have any questions during the work process, please contact me in the comments, I will always be happy to help with practical advice.
The process of replacing a wheel bearing on a Toyota Corolla 120
Replacement of the wheel bearing is carried out according to the instructions below.
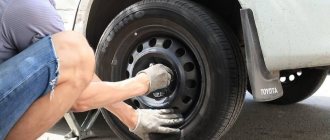
- Remove the wheel
Removing the wheel
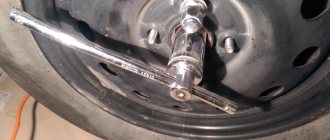
- Unscrew the hub nut.
Removing the hub nut
- Unscrew the two bolts that secure the caliper.
Removing the caliper
- Unscrew the steering rods.
Removing the levers
- Remove the ABS sensor.
Removing the ABS sensor
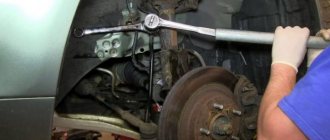
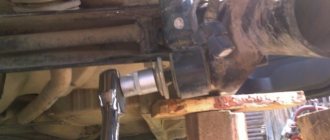
- Disconnect the steering knuckle.
Removing the steering knuckle
Dismantled fist with hub
- Use a hammer to separate the bearing.
Disconnected bearing
- Using improvised means, remove the remaining bearings.
Removing the ring using two pry bars
Removing the bearing rim using a jack
- Press in the new bearing.
Installing a new bearing
- Install the retaining ring
Installation of the retaining ring
- Reassemble everything in the reverse order of removal.
Toyota Corolla 2004 l. With. - with your own hands
Saint Petersburg
Toyota Corolla, 2005
349 000 ₽
Irkutsk
Toyota Corolla, 2005
530 000 ₽
Krasnodar
Toyota Corolla, 2003
350 000 ₽
Berezovsky
Toyota Corolla, 2006
430 000 ₽
See more cars on Drome
Participate in the discussion can only registered users.
Login Register
Replacement equipment
To replace a wheel bearing you will need:
- The socket is 30, with its help you can unscrew the hub nut; it is also difficult to do without a massive wrench.
- A 17mm wrench is required to unscrew the caliper bracket.
- The key is 10, it can be used to remove the anti-lock braking system sensor.
- The lever needed to break off the hub nut.
- Hammer for installing a new bearing.
This is interesting: Shock absorber struts for Nissan Qashqai: selection and replacement
Pros and cons of installing a part in a car service
So, replacing the wheel bearing on Toyota Corolla 120 and 150 body cars is a process that requires not only physical strength, but also accuracy. Otherwise, instead of fixing the problem, you can make the problem even worse. This process can also be performed in a service center, the advantage of this is a 100% guaranteed result, as well as the opportunity not to think about how to replace the wheel bearing on a Toyota Corolla.
The disadvantages include the high cost of the work carried out, as well as a fairly long time (the part is replaced within a few hours), a car with such a breakdown can sit in the service for several days. If the disadvantages still outweigh the advantages, then the spare part should be changed yourself.
It is also important to remember about the age of the car; for example, models produced in 2008 are primarily susceptible to wear of the wheel bearing (in fact, this part is a replaceable consumable).
Useful video
We advise you to visually familiarize yourself with the video about the replacement below:
Replacing a wheel bearing on a Toyota Corolla should be taken seriously, since how correctly all the work is done will determine how long this part will last. And when choosing, you should give preference to original spare parts, since, unlike analogues, they will last much longer.
Today, it is the car of the Japanese manufacturer that is the most common in the world. The merit of this is the excellent combination of price and quality. For example, a car can travel more than a million kilometers if original parts are installed. The same front wheel bearing of a Toyota Corolla 150 can travel about 100 thousand kilometers before it needs to be replaced.
The process of removing a unit for replacement
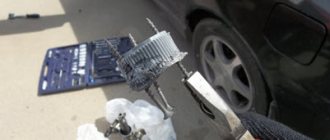
For the work we will need the following list of tools:
- standard set of keys;
- jack;
- minus screwdriver;
- hammer;
- lubricant;
- universal puller;
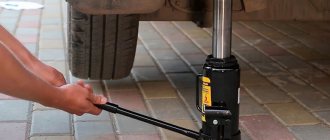
We fix the car on a lift or pit so as to hang the wheel we are interested in. Now you can get started:
- Remove the decorative cap;
- It is necessary to press the brake and tear off the central fastening; Now you need to unscrew the wheel mounts and tear it off;
- We fix the brake disc with a screwdriver and begin to unscrew the axle mounting nut using a 30 mm socket;
- Using a 17mm wrench, unscrew the two bolts holding the caliper;
- We remove it to the side and fix it. Now you can remove the brake disc;
- Using a 22mm socket, unscrew the steering rods. It is most convenient to squeeze out the steering tip using a special tool;
- We take out the special cotter pin;
- Using a 17mm wrench, unscrew the bolt;
- Remove the ABS sensor;
- Using a 19-mm socket and a wrench, disconnect the steering knuckle;
- We dismantle the front wheel bearing of the Toyota Corolla 120 along with the steering knuckle;
Rear wheel bearing
Note
: - Removal and installation of right side rear wheel bearing is described below. Removal and installation on the left side are carried out in the same way. — The hub, bearing and ABS speed sensor are a non-separable unit. If a bearing or other element of the assembly fails, the entire hub assembly must be replaced.
Removal
1. Loosen the wheel nuts. We lift the car on a lift or use a jack to lift the rear part of the car and place it on reliable supports (to do this, we first install wheel chocks under the front wheels).
2. Unscrew the wheel nuts and remove the rear wheel.
3. Release the parking brake.
4. Using a metal brush, clean all threaded connections that will be unscrewed below; if necessary, apply a penetrating liquid (such as WD-40) to them.
5. Using a 14-mm wrench, unscrew the two bolts securing the brake caliper bracket.
6. Next, slightly move the wheel cylinder piston inside the cylinder. To do this, insert a screwdriver with a wide blade through the hole in the caliper between the brake pad and the disc and, leaning it on the caliper, move it, thereby recessing the piston into the cylinder.
Note
: When pressing the piston, monitor the level of brake fluid in the reservoir; fluid flowing over the edge can damage the paintwork.
7. Remove the bracket-holder assembly with the brake caliper and pads from the brake disc.
8. We hang the bracket using a suitable thick wire from the suspension element.
Changing the wheel bearing of a VAZ 2110 with your own hands
Caution: The brake caliper bracket must be suspended from a strong metal wire or similar whenever it is removed from its mountings and the flexible brake hose remains connected to the brake caliper. Failure to do so will result in the weight of the caliper being applied to the flexible brake hose, which may result in damage to the hose and subsequent brake fluid leakage.
9. Use a flat-head screwdriver to pry and then remove the plug on the brake disc.