It should stick out mm when the gas is fully pressed or released, depending on the model of the box!
In the manual, everything about the adjustment is written clearly and clearly, but since the cable usually remains slightly weakened, this manifests itself, for example, like this: First, we adjust the throttle cable: The adjustment is done with the help.
Shifting the cable along the bracket to the right - how to adjust the Toyota automatic transmission cable, to the left - weakening. After that - the automatic transmission cable. Shifting the cable along the bracket to the left means tension, to the right means loosening.
It must be tightened so that the triangular throttle lever of the box begins to turn simultaneously with the beginning of rotation of the intake throttle lever. When you release the gas pedal, the throttle of the box should return all the way, there should be no free play “down”, and the exposed section of the cable near the lever should have slack.
When the gas pedal is pressed all the way, the automatic transmission throttle lever should have a small free play - that is, it is slightly underturned all the way when the gas pedal is pressed to the floor.
In this case, most often the driver may notice the appearance of jerks and jolts when changing gears; a car with an automatic transmission begins to consume more fuel and. In this case, there may be many reasons, but among them the automatic transmission cable should be singled out.
In this article we will talk about when and why the so-called automatic transmission tuning is needed, as well as how to check and adjust the automatic transmission cable. Also, on different cars, tuning is performed taking into account a number of features. Some other car enthusiasts adjust the cable to their own individual needs, doing it experimentally.
Let us immediately note that this article is for informational purposes only. For this reason, without proper experience, it is better to refuse attempts to adjust the automatic transmission with your own hands and entrust this how to adjust the Toyota automatic transmission cable to specialized specialists. So, for those who like to drive aggressively, the automatic transmission cable needs to be tightened. For a smooth and measured ride, loosening it slightly is more suitable.
One way or another, the main thing is to find the optimal balance. If the settings are made correctly, the result will be smoother gear shifts and the automatic transmission operates more smoothly.
What about your cables? Part 2: As it turned out, I misunderstood the book and did it my own way.
Adjusting the automatic transmission cable: subtleties and nuances
Here is a screenshot from the book showing how to do it. You can see how I did it above. The result surprised me. If you do it like in the book, the box is terribly stupid, it switches completely incomprehensibly and kicks so that it becomes scary.
But if you do it as I did, then everything becomes great. How to adjust the automatic transmission cable?
Setting up and adjusting the automatic transmission cable
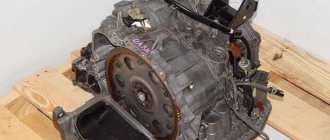
During the operation of the gearbox, it needs adjustments: adjusting the torsion of the automatic transmission, changing a group or one solenoid in the valve body, as well as adapting the automatic transmission after assembling the vehicle’s gearbox.
Then the car owner will be able to drive the car comfortably. He will not be disturbed by pushes and kicks if he changes the oil on time and does not starve the machine from lack of lubricating fluid.
- What kind of automatic transmission cable?
- Functions of the automatic transmission cable
- Where is the cable located?
- Symptoms when adjustment is necessary
- Adjusting the throttle valve control cable
- Checking the solenoid block
- How to check the operation of the box
- Conclusion
Adjusting the throttle valve control cable
There is a procedure for adjusting the cable on the transmission of Toyota and other cars, which is often carried out by experienced mechanics when the car owner complains of kicks and jerks while accelerating:
- automatic transmission adjustment using a throttle valve.
But before you adjust the automatic transmission cable, you need to make sure the following correct parameters. If any of the following signs of proper operation of the machine are not met, then you should not proceed with adjusting the cable.
- the oil level must correspond to the values specified in the machine’s operating manual;
- proper operation of the power unit, integrity of the cable connections and related units;
- the pressure in the car box must correspond to that specified in the operating book;
- checking the vehicle while moving and braking.
Now let's talk about how to adjust the cable.
- Apply lubricant to it.
- Check that the cable moves smoothly.
- Unscrew the nuts.
- Press down the gas pedal.
- Start adjusting the automatic transmission cable. Try to do this halfway down or up the key stroke, so as not to overtighten or loosen.
- Stop when the stop comes out one and a half millimeters from the rubber shell, if it was not visible at all. If the automatic transmission cable sticks out strongly, you need to tighten it back.
- Fix this stop at a position between 0.9 mm and 1.4 mm from the shell.
- Release the pedal.
Attention! It is better to do this procedure with a partner. One person must be behind the wheel and press the gas pedal at the command of the person who regulates the tension of the cable under the hood of the car.
Rigidity is adjusted by decreasing the length of the cable, while loosening, on the contrary, increases it. In addition, the car owner must remember that all settings and adjustments of the cable are carried out only in a long area that is free from vehicles and people.
Read
Features of operation and maintenance of automatic transmission
When setting up the device on an automatic transmission, you must carefully read the instructions for setting up the automatic transmission. Because usually everything is spelled out in detail.
If an experienced mechanic performs the procedure at a service station, then you need to be present during the setup. While one car owner presses the gas pedal lightly, another does it with force. That’s why it’s so important to customize the machine to your liking to make driving a car comfortable and convenient.
What kind of automatic transmission cable?
The automatic transmission cable regulates gear shifts in the automatic transmission. It is because of its stretching that the car appears thoughtful when switching from third to fourth gear. Sometimes the driver, on the contrary, feels a double jerk.
The automatic transmission cable needs to be tightened once a month for those cars whose car owners love aggressive driving. And it must be replaced twice as often, since the device wears out quickly. Sometimes you have to tighten not only the automatic transmission cable, but also the throttle valve, as well as the idle air valve.
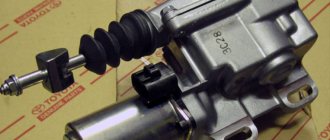
In almost all automatic transmissions of vehicles, the cable has a cover. Then there is a boss in the form of a metal thickening. The device ends with two adjusting nuts.
The automatic transmission cable is made of high-quality metal. Additionally covered with a rubber shell. Drivers may experience problems with it due to the drying out of the shell. Because of this, he is often out of place.
Attention! With the correct setting of the automatic transmission cable, the vehicle will receive smooth operation and gear shifting.
Similar products for HONDA CR-V, Civic, Orthia, S-MX, Stepwgn
If the cable was loosened before adjustment, the shocks when switching will be a little more noticeable on the adjusted cable - but this is the nature of the Honda gearbox. ABS, Posted on March 16 — In the manual everything is written clearly and clearly about the adjustment, but since as a rule the cable remains slightly weakened, this manifests itself, for example, like this: First, we adjust the throttle cable: The adjustment is done with the help.
Shifting the cable along the bracket to the right means tension, to the left means loosening. After that - the automatic transmission cable.
Shifting the cable along the bracket to the left means tension, to the right means loosening. It must be tightened so that the triangular throttle lever of the box begins to turn simultaneously with the beginning of rotation of the intake throttle lever. Bolts First, unscrew two 55mm bolts. Next, unscrew the 35mm bolt at the front of the block and the 30mm bolt at the back of the block.
In their place, screw in 55 mm bolts half the length of the thread. Now you can unscrew the remaining bolts. Please note that the length of the bolts is not quite correct in the murzilka; here I indicated the correct length.
Adjusting the automatic transmission cable
When I unscrewed it, I didn’t remember which bolt came from where, and then I couldn’t figure out where one 30mm bolt went and where the extra 55mm bolt came from. When the oil flows, wait until it drains completely and continue unscrewing the remaining bolts.
Honda CR-V — Throttle cable jammed, we fix it ourselves for free
As a result, the block will hang on two bolts and if we are not going to completely remove it for washing, then we will leave it like that. Now you can get to the spring-loaded sector and the kick-down cable.
Sector We bend a piece of wire into the letter “G” and, inserting it into the hole in the sector, push it away from us. When the sector turns, we grab the lower edge with a screwdriver and use it as a lever to lift and hold the edge. There is no need to be afraid - there is no gasket in this place.
Next, hooking the cable with a bent wire, pull out the loop and release the stopper from the sector. The cable sheath sector is attached to the housing using a plastic split “chip” with hooks.
Chip It is problematic to remove it in a civilized way, even with the block completely removed, so we take a screwdriver, insert the “chips” from the outside under the skirt and, like a lever, remove it.
Here the electrical connector gets in the way and it was better to remove it in advance, so I had to pull the cable sheath towards myself in order to pull it out at an angle.
The main thing is not to overdo it: After tightening, you need to drive on D4 and only on D4 this mode is most sensitive to the wrong cable - a test drive is the most important thing in the adjustment.
Each test drive includes 4 checks, each check is repeated 3 times in one test: Shifting during acceleration with the gas pedal very lightly pressed should occur WITH JOKES, but without pops, blows, the cable is pulled too tight or slipping, double tugging, the cable is loosened.
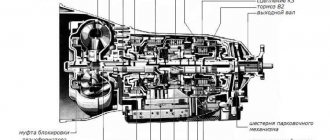
Functions of the automatic transmission cable
The automatic transmission cable performs the main task:
combining the damper of the power unit and the control mechanism of the machine.
He is responsible for timely gear changes. If this element malfunctions, the machine cannot correctly change gears on the vehicle.
If the automatic transmission cable is in the wrong position, it increases the vehicle's gluttony. The automatic transmission is also subject to heavy wear.
In addition, the friction discs and the entire planetary gear suffer. Hesitation when changing gears or a sharp jerk leads to overheating and wear of the teeth of steel discs, and incorrect operation of the torque converter.
Automatic transmission adjustment: general recommendations
An automatic transmission is one of the most complex components of a car, requiring special attention and timely adjustment. It would seem that driving a car with an automatic transmission is much easier, because there is no clutch and there are no difficulties with shifting gears. Whatever the case. This requires timely and precise adjustment of the mechanism. If you are not careful about the automatic transmission, you may miss the moment when the unit fails. As a result, the entire assembly will need to be replaced.
Main causes of failure
To extend the service life of the automatic transmission, you need to clearly know the main causes of unit malfunctions:
— incorrect adjustment of the control cable or its souring during long-term operation;
— malfunctions in the mechanical part of the automatic transmission;
— failure of the unit’s hydraulics;
— natural wear and tear of vehicle friction units;
— failure to adjust the automatic transmission;
— problems in electrical control circuits;
Subtleties of diagnosis
Let's highlight the main diagnostic subtleties that allow you to quickly identify an automatic transmission malfunction and eliminate the problem. Your task is to accurately collect data and interpret it correctly.
So, checking the automatic transmission is carried out in the following sequence:
— make sure that the oil level in the “box” is sufficient and the lubricating composition does not require urgent replacement;
— check the power unit when operating at idle, inspect the connections of the electrical part, make sure the integrity of the control cables and the range selection system;
— write down the fault codes that the ECU gives and decipher them;
— check the automatic transmission in a stopped car;
— check the “box” in motion (direct behavior on the road);
— measure the pressure in the system.
Let's look at the most important checks.
Adjusting and checking the throttle valve control cable
One of the main tasks in an automatic transmission is the throttle valve control cable. Its task is to combine the power unit damper and the automatic transmission control mechanism. The cable itself consists of high-quality metal covered with a special sheath. In case of natural wear and tear, the shell of the device dries out, which leads to the cable being “squeezed out” from its permanent fastening location.
A malfunction of this unit is often the reason for untimely gear shifting to higher or lower speeds. This, in turn, contributes to faster wear of the gearbox and increased power consumption of the car. To fix the problem, you need to adjust the cable using a throttle valve.
So, let's move directly to adjusting the cable. This is done as follows:
— make sure that the cable moves easily. If necessary, apply lubricant;
- Unscrew the nuts slightly to adjust the cable;
— press the accelerator pedal fully and adjust the cable until the stop comes out of the shell at a distance of up to one and a half millimeters. Please note that when installing a new cable, there may not be a stop. In such a situation, it is necessary to pull out the inner part of the cable until slight resistance appears. Now fix it in this position and place the stop at a distance of 0.9-1.5 mm;
— tighten the nuts well, release the gas pedal.
Adjusting and checking the automatic transmission with the car stopped
So, this type of check should be done at the maximum power of the car. The main task is to determine how well the torque converter works, whether the friction elements and the engine perform their functions correctly. During the diagnostic process, be very careful to prevent excessive overheating of the power unit. Otherwise, the transmission will experience overload, which will lead to its failure.
So, check as follows:
— make sure that the oil level in the transmission and power unit is at the proper level. If there is a shortage, top up;
- Start the car and wait until the engine and transmission warm up to operating temperature. Usually a 15-20 minute drive around the city is enough for this;
— stop and secure the machine, preventing any movement;
— put the automatic transmission lever in position “P”, engage the handbrake and place the wheel chocks;
— make sure that there are no people near the car;
— move the “box” handle to position “D”;
— press the gas all the way;
— fix the maximum engine speed;
— set the lever to the “N” position. Let the power unit run for a while at XX (usually 25-30 seconds is enough). In this case, it has time to cool down a little;
— put the handle in position “R” and carry out a similar procedure.
Each verification step should take no more than 5-6 seconds. If you break this rule, then serious overheating of the automatic transmission is possible. If the engine speed is higher than specified in the car's owner's manual, it is advisable to immediately release the gas. Also stop the test if you notice a lot of noise (minor torque converter sounds are normal).
Compare the obtained values with those given by the manufacturer:
— if the number of revolutions is 200-300 units higher than the permissible level, then the likely reason is the presence of slipping of the friction elements. A similar phenomenon often occurs when foam appears in the transmission oil or there is reduced pressure in the line.
— the number of revolutions is much higher than what is written in the manual. The reason may be cut splines located on the input shaft of the automatic transmission.
— the revolutions are lower by only 100-300 units. This indicates insufficient power of the power unit;
- revolutions are one third lower than normal - the problem is in the freewheel;
— if the speed corresponds to the norm, then this means that the power unit operates within its maximum power and the automatic transmission normally performs its functions. But even here there is no guarantee of serviceability, because the “box” may not be cut out. As a result, there will be no transition to the fluid coupling mode.
Clutch failure can be detected by several signs:
– reducing the minimum speed by about a third with the gas pedal fully pressed:
— revolutions below 3,000 when the automatic transmission knob is turned to position “N” and the gas pedal is fully depressed.
Conclusion
Thus, diagnosing faults and adjusting the automatic transmission does not cause any special problems. The main thing is to set aside a little time, follow the instructions and promptly troubleshoot problems. Good luck.
Where is the cable located?
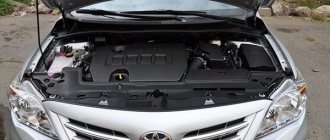
The automatic transmission cable is located under the hood of the vehicle on the transfer case housing. It is attached at three points:
- bracket above the throttle lever;
- bracket to the left of the lever;
- pipe branch.
The automatic transmission cable should not be stretched or tightly taut. And also each of the fasteners to which it is attached must not be cracked or broken. In this case, you need to contact a service center to replace the vehicle cable holder elements.
Automatic transmission control cable - Adjustment.
What and how to adjust the automatic transmission cable?
The main thing is that no symptoms arise in these 4 test modes.
Your freedom with Nissan Intelligent Mobility technologies.
After reading the murzilka and determining where to look, I reached under the hood and saw the following picture.
Next, unscrew the 35mm bolt at the front of the block and the 30mm bolt at the back of the block.
The adjustment is made with assistance.
Shifting the cable along the bracket to the right means tension, to the left means loosening. After that - the automatic transmission cable.
Shifting the cable along the bracket to the left means tension, to the right means loosening. It must be tightened so that the triangular throttle lever of the box begins to turn simultaneously with the beginning of rotation of the intake throttle lever.
When you release the gas pedal, the box throttle should return all the way and not have free play “down”, and the exposed section of the cable near the lever should not have any slack. When the gas pedal is pressed all the way, the automatic transmission throttle lever should have a small free play - that is, it is slightly underturned all the way when the gas pedal is pressed to the floor.
I became convinced that it is almost impossible to make the adjustment correctly the first time. The main thing is not to overdo it: After tightening, you need to drive on D4 and only on D4 this mode is most sensitive to the wrong cable - a test drive is the most important thing in the adjustment. Each test drive includes 4 checks, each test is repeated 3 times in one test: Shifting during acceleration with the gas pedal very lightly pressed should occur WITH SHOCKS, but without pops, blows, the cable will be pulled, or slipping, double tugging, the cable will be loosened.
Transition to kick-down from coasting, the pedal is released, the speed is constant, low, somewhere up to 70 - with a smooth jerk and a pause; if there is no pause, and the jerk is sharp, very short, or even with a sound, the cable will be pulled. Pay special attention to the end of acceleration - after gaining speed and smoothly and intensely when releasing the gas for the test, it is advisable to release the pedal completely after acceleration and abruptly switching to 4 should happen softly, WITHOUT A JERK, pause or sound.
Symptoms when adjustment is necessary
Adjusting the automatic transmission cable will be necessary in the following cases:
- excessive weakening;
- thoughtfulness when changing gears from third to fourth speed;
- jerks and kicks. Checking for wear of clutches, oil quality and its level in the machine showed a standard result;
- sudden starts from a standstill.
Adjustment is necessary if, while eliminating problems with relaxation of the device, on the contrary, symptoms of a tightened cable arise. This is also harmful to the vehicle's automatic transmission.
Attention! For those who like driving with sudden starts, a tight cable tension is allowed. The main thing here is not to overdo it.
And the symptoms themselves can appear, for example, only when changing gears. Therefore, the car owner can ignore the shocks and jerks for a long time. This happens to those who have cars with a French-made Al4 gearbox. Or in Russia this device is called DP0.
Initially, the manufacturer tells car owners that the first generation has an untreated childhood illness in the form of rarely appearing kicks or hesitation when switching. The driver does not pay attention to these symptoms, the cause of which gradually leads to automatic transmission failure.
Other boxes are more advanced and do not have such serious features.
TPS and automatic transmission cable
Automatic transmission oil
Message: No. 1 BRIAN » July 25, 2014, 07:59
Re: Automatic transmission oil
Message: No. 2 PAW8965 » July 25, 2014, 08:10
Re: Automatic transmission oil
Message: No. 3 BRIAN » July 26, 2014, 09:46
TPS and automatic transmission cable
Message: No. 4 PAW8965 » Jul 26, 2014, 11:11
BRIAN is our D4BH analogue of the 4D56, the gearbox is fundamentally similar to Mitsu, my fuel injection pump is mechanical. I have a manual, but there’s nothing about TPS and the cable, and I’m not the only one interested. Let’s tell you about the adjustments of these devices, like Mitsu (Delica) and we we will adjust for ourselves
That is, don’t bother with the cable adjustments, or untie it completely? Explain.
Symptoms: 1,2,3 acceleration is confident, 4 turns on and it’s as if they are holding the car. And I started eating more.
Re: TPS and automatic transmission cable
Message: No. 5 BRIAN » Jul 26, 2014, 4:04 pm
Re: TPS and automatic transmission cable
Message: No. 6 PAW8965 » Jul 26, 2014, 4:10 pm
Re: TPS and automatic transmission cable
Post: No. 7 BRIAN » Jul 26, 2014, 4:27 pm
Re: TPS and automatic transmission cable
Message: No. 8 PAW8965 » Jul 26, 2014, 4:34 pm
Re: TPS and automatic transmission cable
Message: No. 9 BRIAN » Jul 26, 2014, 07:56 pm
Re: TPS and automatic transmission cable
Post: No. 10 PAW8965 » Jul 27, 2014, 10:43 am
Re: TPS and automatic transmission cable
Message: No. 11 BRIAN » July 27, 2014, 2:10 pm
Re: TPS and automatic transmission cable
Message: No. 12 PAW8965 » Jul 27, 2014, 5:20 pm
Yes, I spent the whole day doing this; it was an exciting activity, let me tell you. and still achieved a positive result. First, I'll tell you the background story.
Last year, on vacation from Yakutia to the mainland. , driving back, near Chelyaba, due to a loose bolt on the knee pulley (for some reason, I didn’t use the air conditioner), the landing hole of this pulley breaks. I made it to the village of Miasskoye (car service station, Route M51). There it was repaired for a day and a half. Further to the house, 2 rocker arms broke in turn, and already at home the third. I found out that the veneer groove on the timing drive pulley (on the knee) + the balance shaft pulley (also on the knee) was broken. and it turned out like this. I ask for advice. according to D4BH. Okay, I think, we’ll win. For now, I’m thinking, I’ll order it, before the parts arrive, I’ll fix these (you have to drive, I’m out of the habit of walking, public traffic breaks) In short, I turned the pulleys 180 degrees, cut the keys, fitted the new keys, fitted them ,collected. but missed a bit. When combining the timing marks and fuel injection pump, the knee mark did not reach 0.5 degrees. I started the revs up a little. I decided to compensate for this by turning the injection pump a little later (a little bit), it started to pull worse, I turned the feed cycle, Accordingly, I lowered the idle speed, the car seemed to be moving. I continued driving. When I went on a long-distance trip, I realized that Behemoth had an increased appetite - the tank at 550 (as before) was no longer enough. I checked the injectors, valve clearances, blew, fuel lines, meshes, changed the filter I twisted and changed the injection angle earlier, later, by instrument, by ear, by smell. A guy eats diesel fuel. During my events, involuntarily (not even though), by accident, for experimental purposes, for other reasons - in short, I changed the settings (settings) of the devices about the topic.
And against the background of excessive appetite. The box began to swear, there were dips, then kicks, some kind of intermediate gears between the main ones... I started digging for information, and found something at Delikaclub (brothers). to be continued
Re: TPS and automatic transmission cable
Message: No. 13 PAW8965 » Jul 27, 2014, 6:06 pm
Hort wrote: The oil level is normal. I recently replaced the kick down cable because the old one was broken. Experiments with cable tension did not bring any results. Those. Even if the cable is loosened completely, the switching point still does not shift. Those. The transmission works clearly, but the switching occurs at 3-3.5 rev. I want to try to diagnose the box through the connector, but I don’t know what program to do this with, since the Deliko scanner does not see the box, probably the program is not suitable.
Checking the solenoid block
Automatic transmission tuning includes checking the solenoid unit. Due to incorrect operation of the electric valves on the control plate, the machine can not only be pushed or kicked, but also go into emergency mode.
To carry out the procedure for checking the serviceability of the electrical valves of the hydraulic plate, you must take the following steps:
- Drive onto the overpass.
- Drain the operating oil and tighten the bolts on the pan. Then remove it.
- Disconnect the filter device.
- Remove the hydraulic unit.
- Disconnect the contacts of each solenoid valve.
- Now you will need to call them.
- To determine whether the solenoid is working or not, you need to know the resistance rate. It can be found in the instruction manual. For example, for EV1 modifications at a temperature of 20 plus Celsius, the resistance is 65 Ohms.
And also at a service station, experienced mechanics can connect a computer and use it to check the faulty solenoid. After checking, you need to remove the faulty one and install a new one.
When checking solenoids, you must remember that they are different. Here are some types:
- by functional value: TCC and EPC. The first is responsible for blocking the fluid coupling, the second is responsible for distributing oil through the channels;
- The Shift solenoid is responsible for downshifting and upshifting;
- linear - the simplest and easiest to replace solenoid valves;
- VFS is complex to control, but simple in design, like linear ones. Its service life is noticeably limited.
How to check the operation of the box
In the following procedure, it is important to prevent the power unit from overheating. Otherwise, you may lose your automatic transmission. Checking the operation of the automatic transmission is as follows:
- Start the engine. Warm up the automatic transmission to 70 degrees. This is the operating temperature of the machine.
- Drive onto a level area and immobilize the vehicle, preventing it from moving backwards or forwards. Preferably using a handbrake and wheel chocks or stones if there are no chocks available.
- Move the selector lever to the “Forward” position.
- Press the gas pedal all the way down.
- Allow the engine to gain maximum speed, then move the selector lever to the “Neutral” gear shift position.
- Move the rocker selector to the “Reverse” position. Repeat all the steps as in the “Drive” position.
- Experts recommend spending no more than 5 seconds at each stage of the check so as not to overheat the machine.
- If there are sharp sounds or noise, the procedure must be stopped.
Basic checks and adjustments of an automatic transmission on a car (A4A42)
Checking the oil level (ATF) in the automatic transmission
Drive the car for a while until the oil (ATF) in the gearbox reaches normal operating temperature (70–80°C).
Place the car on a flat, horizontal area.
Press the brake pedal and move the automatic transmission selector lever sequentially through all positions (holding it in each of them for a few seconds) to fill the entire automatic transmission control hydraulic system and the automatic transmission torque converter with oil (ATF), and then set the selector lever to the “N” position.
Before removing the oil dipstick, clean the area around it from dirt. Remove the dipstick and check the condition of the gearbox oil (ATF). The following conditions require a major overhaul of the gearbox:
– the oil (ATF) in the automatic transmission has a burnt smell;
– the oil (ATF) in the automatic transmission is noticeably black;
– the oil (ATF) in the automatic transmission is contaminated with a large number of metal particles.
Check that the automatic transmission oil (ATF) level is within the “NO” range of the dipstick. If the oil level (ATF) is below the specified level, add it to about.
Automatic transmission oil (ATF): GENUINE HYUNDAI ATF SP-II M.
If the oil level (ATF) in the automatic transmission is below normal, the oil pump will capture oil along with air, which will lead to various malfunctions. Air that enters the automatic transmission hydraulic system along with the oil (ATF) forms bubbles, which cause oil foaming. As a result, the pressure in the hydraulic system will become unstable, which in turn will lead to a delay when changing gears (late gear engagement) and slipping of friction clutches or brakes, etc. If the level is higher than normal, then due to the rotation of the planetary gears, excessive foaming of the oil (ATF) will occur, which will result in the same consequences as with a low oil level (ATF), and will cause premature deterioration of the oil.
In both cases, air bubbles cause overheating, oil oxidation (ATF) and varnish deposits, which damage valves, clutches and actuators. Foaming also causes oil (ATF) to be released through the automatic transmission crankcase breather, which is mistaken for a leak.
Rice. 3.72. Oil dipstick
Make sure that you carefully study the condition of the automatic transmission oil (ATF) using the oil dipstick before installing it in place (Fig. 3.72).
Checking the operation of the automatic transmission selector lever
Move the automatic transmission selector lever through all positions, check the smooth movement of the selector lever and its controllability. Check that the selector lever position is indicated correctly.
Make sure that the selector lever can be moved to each position.
Start the engine and make sure that the car moves forward when shifting from “N” to “D” and backward when shifting to “R”.
If the selector lever is faulty, adjust the automatic transmission control cable and the selector lever clutch. Check the moving parts of the selector lever assembly for wear.
Adjusting the starter interlock switch (automatic transmission selector switch)
Place the selector lever in the “N” position (neutral position).
Rice. 3.73. Locknut securing the automatic transmission control cable to the manual control lever