Payment for goods and downloading of the book in electronic form (PDF format) is made on the website.
To do this, you need to find the book you are interested in and click on the “Buy” button. The price of the book is indicated on the button.
For convenience, the price on the website for residents of Russia, Belarus and Kazakhstan is presented in rubles.
For residents of Ukraine in hryvnias, and for all other countries - dollars.
After clicking on the “BUY” button, a payment window will open where you can select a payment system with which you can pay for the selected book using any bank card (Visa, MasterCard, MIR, etc.)
When you click on the “Pay by bank card” button, the Portmone payment system will open, which is the easiest way to make a payment.
In addition, the website offers four payment systems for payment:
- Yandex (payment from any bank cards, Yandex Money account, QIWI Wallet, terminals, etc.);
- Portmone (payment from any bank cards, Portmone account);
- PayPal (payment from any bank cards, PayPal account);
- WebMoney (payment from any bank cards, payment from WebMoney wallets).
Payment via Yandex Cashier
After selecting payment via Yandex, the Yandex Cashier payment system will launch, where you need to select a convenient payment method (bank card, QIWI, Yandex Money account, etc.)
After specifying payment details and confirming payment, payment for the goods will occur.
If you have a bank card in a currency other than the ruble, then the money will be debited from the card at the rate of the Central Bank of Russia at the time of the purchase.
This payment method is optimal for residents of Russia, Kazakhstan and Belarus.
Official website of the Yandex Kassa payment system https://kassa.yandex.ru
Payment via Portmone
After selecting payment through Portmone, the payment system will launch, where you need to select the payment method: bank card or Portmone account.
The price in the Portmone payment system is converted into dollars at the exchange rate of the Central Bank of the country where you are located.
If you have a bank card in a currency other than the dollar, then the money will be debited from the card at the rate of the Central Bank of your country at the time of the purchase.
After specifying payment details and confirming payment, payment for the goods will occur.
Official website of the Portmone payment system https://www.portmone.com
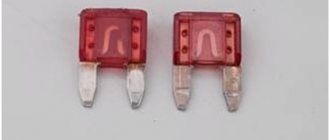
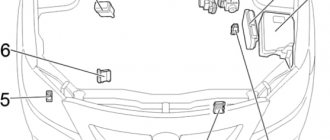
Replacing the fuse
In order not to waste time calling the tester, you can identify the burnt part by eye. It will be darkened or have melted lead inside. You cannot install a bug or replace it with a more powerful fuse to avoid a fire in the wiring. Relays are replaced using exactly the same principle.
Still, do not forget to figure out exactly why the fuse blew. It may be a short circuit in the signal module.
In very rare cases, the signal itself fails. Chinese horns have a particularly short lifespan. The cost of signals varies depending on the quality and originality from 150 to 1500 rubles, depending on the quality.
Payment via PayPal
After selecting payment via PayPal, the PayPal payment system will launch, where you need to select the payment method: bank card or PayPal account.
If you already have a PayPal account, then you need to log into it and make a payment.
If you do not have a PayPal account and you want to pay using a bank card via PayPal, you need to click on the “Create an Account” button - shown with an arrow in the picture.
PayPal will then prompt you to select your country and provide your credit card information.
After specifying the information required to make the payment, you must click on the “Pay Now” button.
Official website of the PayPal payment system https://www.paypal.com
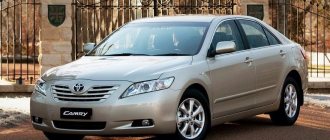
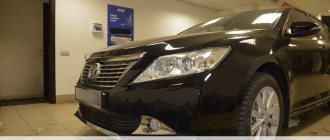
Replacing the steering wheel on Camry 40
The multifunction steering wheel on the Camry is extremely comfortable. You can adjust the volume, interior temperature and take calls without taking your eyes off the road. But quite often car owners notice this personally with the steering wheel buttons on the Camry 40 or subsequently the body stops functioning. There is no need to completely replace the steering wheel to restore performance. It will not be difficult to access the buttons separately to repair them.
Camry steering wheel buttons
Why do I need a multi-wheel
Toyota Camry steering wheel buttons allow you to control many vehicle functions:
- Adjust the volume of the audio system;
- Switch audio tracks, radio stations, select radio modes;
- Accept and end a telephone conversation, turn on the speaker;
- Manage climate control.
It is worth noting that many modern speakers allow you to reprogram the buttons, assigning them to launch certain functions. Thus, you can determine the car owners of the steering wheel buttons for Toyota Camry 50, 40 or 30 according to your preferences. Toyota Camry steering wheel buttons The number of buttons and their location depends on the vehicle configuration and body version. Some wheels have plastic caps instead of control buttons. In this case, you can simply disassemble the steering wheel and install the necessary types of buttons. It's easy to do.
How to remove steering wheel buttons
Despite the fact that Toyota is a very high-quality car, over time the LEDs on the steering wheel buttons may burn out. To repair or replace them, you only need to remove the airbag. Therefore, you must not forget to disconnect the terminals from the battery. After this, you need to wait a couple of minutes for the capacitors to discharge.
After the airbag is safely removed, you need to unfasten the plastic latches located on the inside of the steering wheel and remove the unit for repair or replacement.
Types of buttons on the steering wheel and their reasons
The main reason why the steering wheel buttons do not work on the Camry 40 is damage to the hinge. This is a flexible wire, twisted into a spiral, necessary to connect the steering wheel to the vehicle's on-board electronics. If the joint is completely damaged, the buttons not only stop working: the airbag located in the steering wheel is turned off and a signal is given. The train is usually damaged due to an unqualified obstacle. It has a 2.5 turn limit, and if the steering wheel is replaced when the spider or steering wheel is replaced, the train will break if it is in the extreme position. An original spare part will cost the car owner 6-8 thousand rubles, a duplicate. From 1000 rubles. Loop on the steering wheel. Steering wheel buttons from Camry Experienced car owners are advised to first check the cycle, if any Toyota Camry does not work on the steering wheel buttons. The next most common problem. Mechanical damage to buttons. This can happen both due to natural wear and tear of the plastic, and due to strong impact on the buttons. The backlight is less likely to fail, and usually the cause lies in a malfunction of the vehicle's electrical equipment. The internal hinges connecting the button blocks to the main steering hinge are rarely damaged and can only be caused by unskilled obstructions.
First, you need to find out whether the car radio supports multimedia steering wheel, and if the result is positive, adjust the buttons in the speaker menu.
Types of malfunctions of the buttons on the steering wheel and their causes
The main reason why the steering wheel buttons on the Camry 40 do not work is damage to the cable. It is a flexible wire twisted into a spiral, necessary to connect the steering wheel to the on-board electronics of the car. If the cable is completely damaged, not only the buttons stop working: the airbag located in the steering wheel and the signal are turned off. The cable is usually damaged due to unqualified intervention - it has a limit of 2.5 turns, and if you move the steering wheel when replacing the crosspiece or steering shaft, then later, when it is in the extreme position, the cable will break. An original spare part will cost the car owner about 6-8 thousand rubles, a duplicate - from 1000 rubles.
Loop on the steering wheel. Buttons on the steering wheel of a Camry Experienced car owners advise checking the cable first if the buttons on the steering wheel do not work on a Toyota Camry. The next most common problem is mechanical damage to the buttons. This can occur both due to natural wear and tear of the plastic, and as a result of strong impact on the buttons. The backlight fails much less often - and usually the reason lies in the incorrect operation of the car's electrical equipment. The internal cables connecting the button blocks to the main steering cable are damaged quite rarely, and this can only be caused by unqualified intervention. It is important to know! If, after installing a new sound system, the radio control buttons on the Toyota Camry steering wheel do not work, the problem most likely lies in the settings.
First, you need to find out whether the car radio supports the multimedia steering wheel, and if the result is positive, configure the buttons in the speaker system menu.
How to replace or install buttons
To complete the procedure, you will need a set of screwdrivers: flat, figured and asterisks. This is done as follows:
- The plastic caps located on the edges of the steering wheel have been removed. It is better to remove them by removing the additional plastic card. This will protect the plugs from damage and scratches.
- Then remove the 2 screwdriver bolts located under the covers. They are equipped with plugs and will not get lost.
- By unscrewing the bolts, the airbag pulls towards itself, then the disconnector is disconnected and the airbag moves to the side.
- Easy access to steering wheel buttons.
After disassembling the airbag, removing the buttons on the Camry 40 steering wheel and their further installation is not a problem. Be careful when installing the cable from the right button block. If the cable is not positioned correctly in the steering wheel, there is a high risk of damage. If the main carrier steering wheel is damaged due to a damaged main joint, continue to remove the steering column. Replace or install buttons on Camry steering wheel
When you have to disassemble the steering wheel
Most often, according to statistics, the steering wheel has to be removed after the airbags are deployed. Also, sometimes the cable located in the steering wheel that goes to the control buttons does not work and needs to be replaced. The steering wheel also has to be disassembled when repairing the switch block located on it. In addition, the steering wheel bushing often wears out, causing it to bounce and bite, making driving unsafe.
Also, replacement and repair are often required if, after an accident, the body has changed its geometry and damaged the control symmetry.
Finally, in some cases, the steering wheel is changed solely for aesthetic reasons. For example, if the Camry 40 steering wheel braid has scuffs, the owner of the car decided to install a beautiful steering wheel with a wood trim, or even decided to install a compact and fashionable multi-function steering wheel. Recently, it has also become fashionable to do restyling by installing a sports steering wheel with inserts made of a special material that increases grip on the palms. There are more and more such steering wheels on Avito, and their prices are quite reasonable.
Video: Camry 40 Steering Wheel Buttons Not Working
Repair of sound signal Toyota Vista Camry sv40.41
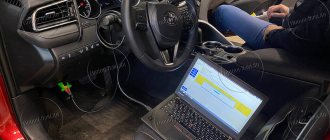
I removed the steering wheel, pushed the terminal out of the battery, then the person removed it to remove the skin, he did not turn off anything, the steering wheels were not measured for different brands of cars, the main thing is not to turn on the ignition when removing the pad from the chip, otherwise an error occurs. I also took the front seats off to pull the covers, I don't even remember the battery when I packed up and was done. Conclusion: the pillow will not light up unless it receives a signal (I don't know what plus or minus is given for the explosion). We repair the horn on Toyota Vista, Camry sv40,41 with our own hands and save money using improvised means.
Removing the airbag and steering wheel of Toyota Corolla E140 / 150
If only the signal, then this is not a fact that you need to remove the steering wheel, the relays there are so tricky that they cleverly burn out. They seem to click, but they don't work. My advice to you. Open the hood and find the alarm relay in the fuse box, so you need to replace it with another one in the same places and check the signal. Removing the airbag and steering wheel of Toyota Corolla E140 / 150.
Replacement of flexible cable for Toyota Prado 150 Dimass body
Prius. This is the 20th case, a smart key, when you turn on the panic mode (red button on the key) it signals how bad it is, you press the signal on the steering wheel, there is no signal where they are. I don't understand where I was looking under the hood. I didn’t take anything off from the front because I recently bought a car and I’m wondering what to do. Because I suspect that this is the reason why my signal is not working (some plug is missing)! If it’s not difficult, please send me a photo of how to remove the steering wheel cushion Dear Toyota72, by the way, I suspect that you are from Tyumen, I would like to meet and talk, if anything happens, I’ll write you a personal message. I am changing the cable for a Toyota Land Cruiser Prado 150 because the signal was not working. When diagnosing a car.
How to disassemble the steering wheel on a Toyota Camry 40 V 3.5 l.
Regardless of whether your Camry is right-hand drive or left-hand drive, before removing the steering wheel, you must disconnect all battery terminals. This will protect you from false deployment of the airbags.
Then you need to pry off the plastic plugs located on the sides of the steering wheel with a screwdriver, after which the fastening bolts will open. Then you need to evenly unscrew the bolts holding the airbag, pull it towards you a little and disconnect the control connector located at the rear.
Causes of knocking
The steering column is a moving mechanism that is in daily motion and, accordingly, is subject to gradual mechanical wear. In addition, this device is not partial, but includes a number of small parts that can create an unpleasant sound if damaged. It is one thing when an unpleasant sound can only create a negative acoustic effect, another issue arises when the steering column ruptures, becomes unusable, which threatens to create a dangerous situation and can lead to an accident.
Therefore, diagnosing the steering mechanism and eliminating identified problems is the most important task for the owner.
Knocking repair methods
However, some owners with extensive repair knowledge can diagnose and then repair mechanical problems.
Types of breakdowns and ways to eliminate them:
- With frequent or daily passage of bumps, burrs and holes, some steering column mechanisms, in particular the fluoroplastic bushing, may fail, while atypical vibrations may appear on the wheel (especially when the position is zero), and a strange hum may occur during turns . Over time, destruction of other parts of the column may begin, which, in turn, will lead to failure of this entire mechanism.
- Also often the cause of detonation is the steering shaft driveshaft. Under the influence of mechanical destruction, this device is destroyed, creating vibration and extraneous hums, which only intensify over time. The best option is to purchase a new assembly (for a model of 40 bodies, this unit from the original manufacturer will cost about 7,000 rubles).
- The steering column itself (which may have been damaged in an accident or other impact) is also subject to wear. For safety reasons, if there is any extraneous sound, this part should also be replaced with a new one.
- Often the crosspiece connecting the rail and column to each other fails. If such a problem occurs, the best solution is to replace this crosspiece with a new saw (for example, a saw, you can buy a different part from other models). In this case, the cost of the cross will be about 2000 rubles.
How to remove the steering wheel without using special equipment
Under the place where the airbag is located there are holes whose diameter is 6 mm. The same holes are drilled in a small metal plate, with only one hole in the middle located strictly between them.
The plate must be screwed to the steering wheel with small bolts, after leaving nuts between the end of the shaft and it. The bolt, when screwed into the nut, presses evenly over the entire area on the shaft and after 5-6 turns presses the steering wheel away from the shaft. This way you can save on purchasing a special puller, which may never be needed again in your life.
Payment via WebMoney
After selecting payment via WebMoney, the payment system will launch, where you need to select the payment method: bank card or WebMoney wallet.
If you already have a WebMoney wallet, then you need to log into it and make a payment.
If you do not have a WebMoney wallet and you want to pay in another way, you need to select any of the methods that WebMoney offers and make the payment
After specifying payment details and confirming payment, payment for the goods will occur.
Official website of the WebMoney payment system https://www.webmoney.ru/
How to fix a car horn, instructions for use
According to the Russian Federation Traffic Regulations and the list of faults presented therein, it is prohibited to operate a vehicle with a non-functioning sound signal.
An ordinary situation, let's say. Early morning, you are driving your car to work and suddenly, unexpectedly and shamelessly, you are “cut off” by a neighbor in the flow of traffic, wedging into your lane. Your further actions are naturally predictable, you immediately hit the brakes and hit the horn with your palm as hard as you can. But bad luck, instead of a powerful signal bursting out of the depths of the car hood, there is deathly silence..? Of course, you managed to avoid an accident, but you failed to warn the boor or just a sleepy, unwary driver. The morning didn't start out well as you had planned.
Of course, there are options and situations that are much worse, when a non-working sound signal led to truly tragic consequences. An inattentive pedestrian running onto the road, or a cyclist running out onto the road, or worse, any teenager or a very small child... A terrible situation, what is there to hide, which might not have happened if the car’s sound signal were working at that moment.
In this article, dear readers, we will figure out how to fix the signal yourself. Let's get started.
As a rule, the circuit of such a sound signal consists of the following elements: - the signal itself, the switch, the fuse and the relay. Battery voltage is supplied through the fuse to the relay coil and contacts. When you press the sound signal, the relay is activated and the electrical circuit is closed, and then the sound signal is activated. Some vehicles do not use such a relay, which means the voltage is supplied directly through the horn switch directly to the horn. In this article, dear friends, we will look at the possibilities of how you can check and repair each of the components of this simple system yourself.
Downloading a book
After successfully completing the payment (by any method) and returning to the KrutilVertel store from the payment system website, you will be taken to the successful payment page:
On this page you need to indicate your e-mail, where access to download the book will be sent.
If you are already registered on our website, then simply follow the link to your personal account.
The book you purchased will be in your personal account, from where you can always download it.
Please note that after making the payment, you need to return back from the payment system website to the KrutilVertel website.
If for some reason you did not return back to the site and closed the payment system tab with a message about the successful completion of the payment, please let us know - we will send you a letter indicating access to download the book.
Camry 40 signal does not work
The problem was a worn-out rod through which contact goes from the steering wheel to the steering column. To get to the desired rod, you need to remove the steering wheel, first removing the airbag. Before removing the airbag, you need to disconnect the battery and wait at least 2 minutes, then you can remove it. To remove the pillow you will need a hexagon with an asterisk. The bolts sit there, seem to be tight, but they unscrew.
Remove the plastic and unscrew this bolt.
This is how he looks closer
Turn the steering wheel and find two more bolts, left and right
Second bolt, right
We remove the plastic, it sits on latches and is easily removed
We remove these plugs on the steering wheel, on the right and left, they are also latched.
The bolt is under the black plastic
We pry it out with a screwdriver, and here is the bolt we need
Now unscrew the same screw on the other side
Carefully remove the pillow. The primer says that you can’t put it on the front side, I was also afraid to put it on all these mechanisms, so I just put it 
In the center of the photo, the rod we need to get to, this photo was taken during the assembly process, the tin has already been soldered
This is what the steering wheel looks like now, after removing the cushion, make marks, unscrew the nut and remove it. The marks are needed so that you can then position the steering wheel without distortion.
The steering wheel has been removed. In order to remove the steering wheel, the book says that you need a special puller to press it out. We knock on the steering wheel from different sides, it should come off and come off easily. It came out fine for me
The rod that did not reach the track on the steering wheel is already soldered here
Take a soldering iron, coat the rod with flux, and solder solder on it
I managed to make a droplet, 1-1.5 mm long, this is enough to make reliable contact
We put everything back together, if you want, you can also trim the soldering a little with a file, and it would be a good idea to lubricate the track on the steering wheel with graphite grease (conductive).
Problems when paying with bank cards
Sometimes difficulties may arise when paying with Visa/MasterCard bank cards. The most common of them:
- There is a restriction on the card for paying for online purchases
- A plastic card is not intended for making payments online.
- The plastic card is not activated for making payments online.
- There are not enough funds on the plastic card.
In order to solve these problems, you need to call or write to the technical support of the bank where you are served. Bank specialists will help you resolve them and make payments.
That's basically it. The entire process of paying for a book in PDF format on car repair on our website takes 1-2 minutes.
If you still have any questions, you can ask them using the feedback form, or write us an email at [email protected]
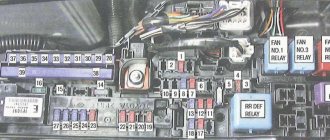
Blocks in the cabin
Layout diagram
Designation
- Fuse box
- Body electrical control unit
- Turn signal relay (hazard warning lights)
- Distribution block No. 3
- ID unit (vehicles with Smart System) Key transponder (vehicles without Smart System)
- Distribution block (CAN)
- Distribution block No. 4
- Air conditioner amplifier
- Certification block
- Tire pressure monitoring unit
- Airbag central unit
- Audio amplifier
- Gearbox selector lock block
- Key signal amplifier
- Steering lock block
Fuse box
Installed on the left under the instrument panel. To gain access, you must remove the protective cover.
Scheme from the block cover
Scheme
Description
| 1 | 25A RR DOOR RH - Rear right window lift |
| 2 | 25A RR DOOR LH — Rear left window lift |
| 3 | 7.5A FUEL OPN - Gas tank flap |
| 4 | 15A FR FOG - Front fog light |
| 5 | 7.5A OBD - Diagnostic connector |
| 6 | 7.5A ECU−B NO.2 — Glass lifts |
| 7 | 10A STOP - Brake lamps, auxiliary brake lamp, gear selector lock, fuel injection system, body electrical control unit, ABS, vehicle stability control, traction control, brake assist, throttle control system |
| 8 | 30A TI&TE - Tilt and Telescopic Steering |
| Reserve | |
| 9 | 7.5A AM1 - Fuel injection system |
| 10 | 7.5A A/C - Air Conditioning |
| 11 | 25A PWR - Glass lifts |
| 12 | 25A DOOR NO.2 — Body electrical control unit |
| 13 | 30A S/ROOF - Hatch |
| 14 | 15A TAIL - Side lights, license plate lights, reverse lights, front turn signals, body control unit |
| 15 | 7.5A PANEL - Navigation, heated seats, hazard lights, air conditioning, audio system, clock, glove box lights, vehicle stability control, traction control, instrument panel lights, steering wheel switches |
| 16 | 10A ECU IG NO.1 - Body Electrical Control Unit, Wiper and Washer, Sunroof, Tire Pressure Monitoring System, Cooling Fan, Navigation, Auto Dimming Interior Mirror |
| 17 | 7.5A ECU IG NO.2 - ABS, vehicle stability control, traction control, brake assist, gear selector lock, automatic transmission, cruise control |
| 18 | 10A A/C NO.2 - Air conditioning, heated rear window |
| 19 | 10A WASH - Windshield wiper and washer |
| 20 | 20A S-HTR — Heated seats |
| 21 | 10A GAUGE NO.1 - Hazard warning lights, reversing lamps, fuel injection system, battery charging system |
| 22 | 25A WIP - Windshield wiper and washer |
| 23 | 7.5A H−LP LVL — Electric headlight range control |
| 24 | 15A INJ - Fuel injection system, starting system |
| 25 | 10A IGN - Fuel injection system, anti-theft system, airbags, steering lock system, front passenger classification system, throttle control system, keyless entry system |
| 26 | 7.5A GAUGE NO.2 - Instrument cluster, clock, multi-information display |
| 27 | 7.5A ECU-ACC - Clock, shift lock, body control unit, power mirrors, keyless entry system |
| 28 | 20A CIG - Cigarette lighter |
| 29 | 20A PWR OUTLET |
| 30 | 7.5A RADIO NO.2 - Audio system, navigation |
| 31 | 10A MIR HTR — Heated mirrors |
Fuses 28 and 29 at 20A are responsible for the cigarette lighter and rear socket.
Fuses 32 at 30A POWER - Window regulators and 33 at 30A P/SEAT - Power seats are located separately on the top of the unit.
Relay
Several relay elements are attached to the back of the block.
Scheme
Purpose
- R1 Fog light
- R2 Side light
- R3 Auxiliary relay
- R4 Window lifters
- R5 Ignition (IG1)