4475 Apr 20
Every car part has its own resource, and the ignition switch is no exception. Despite the fact that the Toyota brand is reliable, malfunction of this unit is a frequent occurrence. You should not ignore jams, because this can lead to the key falling out of the hole, and the car can be started with an ordinary screwdriver. This article covers all generations of Corolla AE from 100 to 140.
Why you shouldn't lubricate a jamming lock
There are 2 types of breakdowns of this unit: electrical and mechanical, which will be discussed in the article. For any type of breakdown, this part must be removed from the car to repair it.
Under no circumstances should the wedging lock be lubricated! The fact is that as the lock parts wear out, they produce metal shavings, which become full of them inside. In addition to this, small particles of dirt and dust are brought into the hole. Now imagine what will happen when all this dirt mixes with lubricant and clogs all the grooves. The key will simply stop turning.
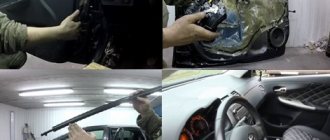
Removing the ignition switch from a Corolla
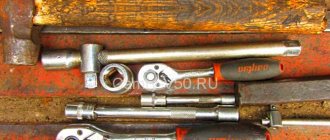
To replace this element on a Corolla, use a chisel, 2 screwdrivers and a hammer. Sequence of work:
- For safety, it is necessary to disconnect the terminal with the “-” sign from the battery.
- The steering column is covered at the top and bottom with two casings secured with screws that need to be unscrewed. For convenience, you can also remove the steering column pad, which is attached in the same way.
- After removing the covers, you need to disconnect all the wire plugs.
- The lock itself is fixed to a metal bracket with 4 bolts. For anti-theft purposes, these bolts are tightened at the factory, and the heads are specially broken off, but they can be unscrewed using a chisel and a hammer. It is necessary to rest the tool against the side so that when you knock on it, the bolt turns counterclockwise.
Vulnerabilities of locks (pin and frame)
As mentioned above, cylinder locks are divided into two classes - pin and frame. The figure shows what the lock mechanism of the first of two types looks like.
The entire block shown in the photo is called “larva”. This unit is replaceable, which is typical for all car models. Next, we look in detail at how the two types of mechanisms work, as well as what vulnerabilities they are susceptible to.
Pin mechanism in domestic cars
As the name suggests, the mechanism must contain pins. And indeed it is. Each pin in the figure is marked “blue” (elements “4”).
However, pins “4” are called “code”, and there are also locking pins (elements “5”). It is clear that the cylinder does not turn when the key notches do not match the correct code. By the way, part “4” may not return to the groove if handled carelessly, but this property is more likely to be characteristic of low-quality products.
There are several methods for hacking pin mechanisms: reading the code, bumping, using master keys. When reading, a special probe is led from the internal pin to the external one. In this case, you need to monitor and remember at what exact moment the click will be heard, which is caused by pin “5” hitting the cylinder. The “bumping” method looks simpler: instead of a key, they use a special blank and hit it with a hammer. The workpiece is rotated at the appropriate moment, and the cylinder rotates with it.
Note that it is possible to make a bumper blank for a modern lock, where code holes are used instead of notches.
Well, master keys, when it comes to pin locks, are almost never used today. The master key itself, which allows you to select the code “on the spot,” is an expensive device. By the way, increasing the number of pins protects against hacking with a master key. In VAZ cars, for example, cylinders with 6 pins are used (all apartment locks are equipped with 5 pins).
It should be noted that hacking with a master key and reading does not leave any traces. “Bumping” still leaves them, but only until the first unlocking.
It is important to know that a mechanism made of mild or second-grade steel is better resistant to “bumping”.
True, this applies less to other methods. It turns out that the most not recommended is the use of new larvae. But advice to buy used parts would seem ridiculous. We'll leave the choice to the owner.
Frame or plate mechanism
Let's ask ourselves a pressing question: are there locks that are immune to “bumping”, but are cylinder locks? The answer will be yes. For flat keys, frame mechanisms were invented, the structure of which is different from pin ones:
Here, as we see, the notches press on the plates, arranging the latter in a certain order. When the plates (frames) are aligned, the cylinder can be rotated. In other cases, of course, unlocking cannot be performed.
To increase resistance to burglary, car locks are equipped with double-sided frame mechanisms (one side is shown in the figure). If the key has grooves on both sides, the system will be double-sided. This type of locks is used by the following companies:
- Japanese: Toyota, Lexus, Nissan, Infiniti;
- Korean: KIA, Hyundai;
- German: BMW.
“Bumping” is excluded when using plates. But other methods, labor-intensive and complex, remain quite effective. In general, the cylinder can simply be drilled out, which is not neglected.
The photo shows a kit designed for opening Japanese or Korean cars.
Picks are called “combs,” but tweezers are called “pulls.” There is a similar set for BMW cars:
Of course, you still need to be able to handle such equipment, and this is precisely why plate cylinders are drilled more often than pin cylinders.
It must be remembered that if you notice even the slightest traces of a break-in, you should not try to unlock it even once.
Perhaps the mechanism remains in working order, but traces of the crime will be destroyed as soon as the standard key works. This is what recommendations look like all over the world: if you have suspicions, contact the police, and don’t make life easier for car thieves. Do not “erase” traces of someone else’s crime.
Concluding the review, you have to make an unpleasant conclusion. If the cylinder is equipped with pins, it will be “knocked”. And if frames are used, everything will depend on the qualifications of the hijackers: either they will start using master keys, or they will simply drill out the cylinder. The old cylinder with pins may pose difficulties, but they will try to drill it out if the mechanism does not give in.
Replacing the larva
Replacing a Corolla AE 100 ignition switch with a new original one is an expensive undertaking. The cost of such work to order: $100. Buying this spare part at a disassembly site is not the best option, because it is unknown how long it will last, even though it costs 2,500 rubles. It may happen that the device breaks down again in a month.
The most reasonable option in the event of a breakdown is a new cylinder or repair of the old one, because this is the part that most often breaks.
In order to pull out the cylinder, you need to turn the key to the ACC position (120 degrees), and then press the stopper with a screwdriver as in the photo.
Using another screwdriver, remove the cover shown by the second red arrow.
Door lock
1. The kit usually includes several keys.
Depending on the vehicle configuration, there are two types of keys: for models with a remote control system for the central locking system, or a key for models without a remote control system for the central locking system. The key allows you to start the engine, open the doors, trunk/rear door and glove box. Models without remote control system for central locking (one of the options).
Models with remote control system for central locking (one of the options).
2. To unlock/lock the driver's door and front passenger door from the outside, you must insert the key into the door lock and turn it back/forward.
Note : (hatchback, station wagon) on some models, unlocking/locking the driver's door unlocks/locks all doors, including the rear door.
The front doors can be closed without a key.
To do this, move the door lock button to the locking position, pull the door opening handle towards you and, holding the handle, close the door. Note : Even if the button is in the lock position, the driver's door can be opened from the passenger compartment by pulling the inside door release handle.
For rear side doors, set the door lock button to the lock position and close the door.
3, (Models with central locking) There is a central locking main switch located inside the vehicle on the driver's door panel, located as shown in the figure. When you press the front of the switch, the side doors and the rear door (except for the sedan) are automatically locked so that the doors cannot be opened from inside or outside the vehicle. When you press the rear part of the switch, the side doors and the rear door (except for the sedan) are automatically unlocked, so that the doors can be opened both from the outside and from the inside.
When you unlock or lock the driver's door with the key, all doors are automatically unlocked/locked, including the rear door (except for the sedan).
4. (Modification) The heads of the main and additional keys have built-in microcircuits that perform the function of an immobilizer. This function is used to block the engine (prevent car theft). The head of the key contains a transmitter that sends a signal to the signal receiver. If the signal does not correspond to the registered one, then engine starting is blocked. When the key is removed from the ignition switch, the immobilizer system indicator on the instrument cluster begins to flash.
Attention: when starting the engine with a key wearing a ring, do not press the ring on the key handle, as this may damage the key transmitter. In this case, the engine may not start or may stall after starting.
5. Some modifications are equipped with a central locking remote control system. Unlocking and locking the side doors, including the back door (except for the sedan), is carried out by pressing a button on the key. When you press the button, the LED lights up. The distance to the car should be no more than 1 m.
The front doors can be closed without a key. To do this, move the door lock button to the locking position, pull the door opening handle towards you and, holding the handle, close the door.
Note : the remote control system does not operate if the key is in the ignition switch, any of the doors are not tightly closed, or the transmitter battery is low (see chapter “Body Electrical Equipment”).
6. Additional door locking is possible on the rear side doors. This function allows you to lock the door so that it can only be opened from the outside. It is recommended to use this function whenever small children are in the vehicle. To lock the door, move the lever to the locked position.
Source of the article: https://avto-remont-toyota.ru/blokirovka-dverej-2.html
Restoring the ignition switch yourself
Mechanical failure
This unit works thanks to special metal plates - pins (also called “levers”), which are spring-loaded from below. They are the ones who identify the key by falling into its grooves. Due to the fact that the pins for the Toyota key are made of soft brass, they quickly wear out due to friction. This is what causes most breakdowns. Repairs are carried out by replacing old plates with new ones. Price per set: 100 rubles. In addition, it is worth paying attention to the springs: they must keep the plates at the same height. If somewhere the pins sag compared to the others, then the springs in them need to be replaced with new ones.
If you don’t want to repair the ignition switch yourself, you can simply take it to a service center or buy a new cylinder with a key.
Electrical fault
If the key turns without jamming, but the car does not react in any way, then in 100 percent of cases it is an electrical issue. The most common cause of this problem is contact oxide. In this case, it is worth cleaning the terminal connections from plaque. If stripping does not produce results, then you should ring each wire. According to the diagram below, the terminals are connected as follows: hold the first contact of the ohmmeter at position “1”, and alternately touch positions 2–7 with the second contact. There must be the same resistance between all terminals, otherwise the wires need to be changed.
Door lock, lock cylinder and outside handles - removal and installation
Warning. When working in doorways, wear heavy-duty gloves to avoid cutting your hands on sharp edges.
Door lock Removal
1 Lift the door glass completely, remove the trim panel and carefully peel off the plastic film (see paragraph 15).
2 Through the large hole in the door frame, disconnect the rod connecting the outside handle to the latch. Do the same with the rod of the inner handle and the rod of the outer lock (see Fig. 17.2).
3 The rods are secured with plastic clips. Release the part of the lock that engages with the rod and pull the rod, releasing it from the mounting hole. On models with a power door lock, disconnect the wiring connectors from the lock actuator.
Rice. 17.2. Disconnect the plastic clips from the actuator rods leading to the outer door handle and door lock cylinder
Rice. 17.4, a. Door lock mounting parts - models produced before 2000
Rice. 17.4,6. Door lock mounting parts - models produced since 2001
4 Remove the screws securing the latch to the door (see Fig. 17.4, a, b). Remove the assembly
latch through the hole provided in the door frame. In models produced since 2001, it is necessary to unscrew the bolt securing the interior handle, then disconnect the handle from the door and remove the handle together with the latch from the hole in the door as a single unit.
5 The door lock is installed in the reverse order of removal.
External handle and door lock cylinder Removal
6 Close the window, remove the door trim panel and carefully peel off the plastic film (see paragraph 1-5). Warning. To avoid scratching the paintwork, cover the area around the handle hole with wide masking tape.
7 Through the access hole in the door frame, release the plastic fasteners securing the actuator rods of the outer door handle and lock to the latch (see Fig. 17.2).