Owners of used Toyota Corolla often encounter problems with the correct and uninterrupted operation of the robotic gearbox. The Japanese have long admitted their mistakes when creating MMT for their cars. The occurrence of any breakdowns with the robot entails unscheduled repairs and initialization of all parameters. In order for the initialization of the Toyota Corolla robot to be successful, you need to perform a number of “procedures” that will help to properly configure the entire transmission system.
What is a box robot?
At service stations, one of the frequently required services is the initialization of the robotic gearbox for some Toyota models, in particular for the Corolla.
Robotic transmissions are conventional manual transmissions with several additional features that make driving a car much easier. Shifting gears and clutches of the robot box occurs automatically: the gearbox reads the information transmitted by the driver, takes into account the driving conditions of the vehicle, after which the electronic control unit (ECU) processes this information and itself controls the operation of the box with a certain algorithm.
Modern robotic gearboxes are distinguished by the comfort characteristic of automatic transmissions, but at the same time, the fuel efficiency and reliability of operation remain the same as that of conventional mechanics. The robot also has a significant price advantage compared to classic automatic transmissions.
Disadvantages of Toyota Corolla robotic gearboxes
Corollas with this type of gearbox were sold for several years (since 2006), but due to shortcomings, they were discontinued. Here are a number of their characteristic disadvantages:
- Frequent failures, due to which you have to frequently perform initialization, sometimes every 5-7 thousand kilometers.
- Overheating of the clutch disc is often observed, which leads to its premature wear and the need for replacement after 60 thousand km.
- The control unit quickly fails, and it also has to be replaced with a new one.
- The gearbox takes a long time to respond, this is especially noticeable when driving in traffic jams.
Today, at most specialized warranty service stations for Toyota vehicles, the initialization procedure, replacement of the transmission control unit, and even replacement of the entire clutch kit along with the ECU are done free of charge under warranty. But sooner or later the warranty period ends, and the car owner has to solve this problem on his own.
Functions performed by MMT Toyota Corolla
The robot is one of many “projects” of the leader of the Japanese automobile industry, which simplifies the entire process of driving a car. The system is designed so that the driver does not think about “mechanical” gearbox shifting. Thus, the robot controls the transmission much better than the well-known automatic machine.
Read also:
- Which oil is better 5w30 or 5w40 for Toyota
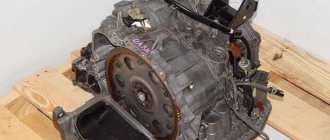
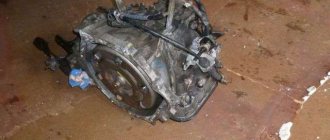
Robotic gearbox Toyota Corolla
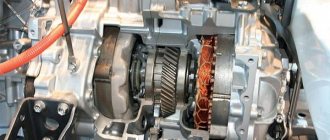
MMT included an ECU control unit and sensors that send signals when the car is moving. The transmission system itself has remained virtually unchanged; it contains a clutch and a manual gearbox, which in turn is driven by a robotic drive - an actuator. The control mechanism completely connects the entire system, thereby making it automatic or semi-automatic, and also allows for manual operation.
A characteristic advantage of the MMT Toyota Corolla is driving comfort; of course, the automatic transmission is smoother and more familiar to everyone, but the robot has a number of abilities that an “automatic” cannot do. For example, in MMT, fuel consumption remains at the level of “mechanics”, and reliability in operation and the cost of maintenance are much cheaper than “automatic”. But be that as it may, any box has its pros and cons.
Problems with the Toyota Corolla robot
The Japanese made the debut of their first car with a multi-modal transmission at the end of 2006. Sales of cars with a robot did not last long on the market, as Toyota admitted its shortcomings and mistakes in creating such an interesting and attractive gearbox. Therefore, the Japanese were forced to discontinue this type of gearbox and introduce insurance for purchased cars for a short period of time. Owners of the Toyota Corolla robot faced the following number of problems:
- Failures in the control unit system, which led to frequent problems and unscheduled initialization procedures, sometimes every 10 thousand kilometers
- If it does not function properly, the box can cause the clutch disc to overheat and cause premature wear. There have been cases where the clutch required replacement after 50-60 thousand kilometers.
- Interruptions in shifting from one gear to another. Most often this happened in long traffic jams. MMT “thinks” for a long time; this reaction leads to the car moving slowly or causing jerking.
- Problems associated with the ECU, which caused the above-mentioned failures and malfunctions in the system. We had to do a complete update of this control unit.
Today, Toyota “insurance” for robotic gearboxes still exists. Specialized car services are ready to completely replace all elements of the MMT system. You can use the warranty card, but no one knows how long the “free” service will last.
What is robot box initialization, and in what cases should it be performed?
Initialization is a reset and zeroing of the previous settings of the electronic transmission control unit. This procedure is carried out every time there is a malfunction of the gearbox and after performing the following repair work in the transmission system:
- Replacement of the entire gearbox or its parts, which involved partial or complete disassembly of the gearbox;
- Replacement of the ECU, electric drive for gear selection and shifting, sensors for shifting mechanisms and gear selection;
In these cases, the ECU or transmission is initialized, the control system is configured, and calibrated.
- Replacement of the electric drive for engaging and disengaging the clutch, clutch travel sensor, clutch disc and its housing, release bearing, flywheel and crankshaft. In this case, after initialization and configuration, no additional calibration is required.
Important! Initialization must be carried out only for those nodes and elements of the robot box that have been replaced.
What problems arise?
The first Toyota Corolla with a robotic gearbox appeared in 2006. The transmission was imperfect and had a number of problems. The control unit often malfunctioned; initialization had to be done every 10 thousand km. If this was not done, the clutch disc began to overheat, which is why it had to be changed every 50 thousand km. In traffic jams, the car moved jerkily, and the ECU also malfunctioned.
Initializing the Toyota Corolla clutch and robot box means resetting all ECU settings. A 2007 Corolla or a car of a different year may require initialization if any part of the mechanism was replaced (for example, after replacing the clutch, sensors, electric drive), if the ECU stops working normally. Calibration is needed if the system produces unknown errors or malfunctions.
In what cases should initialization not be performed?
The ECU should not be initialized without a good reason. Frequent initialization is harmful to the clutch and leads to accelerated wear of its parts (especially the clutch disc). In addition, all the positive effects from it are short-lived. The most common misconceptions regarding the frequency of initialization:
- There is a misconception that the position of the clutch feed mechanism rack may indicate the need for this procedure.
- It also cannot be carried out in order to eliminate jerks and shocks at low speeds.
- The opinion that after initialization the car starts easier is also incorrect.
How to initialize?
It is better to entrust the initialization, configuration and calibration of the robot box to specialists. If you do not have this opportunity, follow the steps of the following instructions as accurately and carefully as possible.
- Put the car on the parking brake.
- Jumper pins 4 and 13 in the diagnostic connector, then wait 15 seconds.
- With the ignition on, quickly press the brake pedal 7 times (after which 2 beeps should sound).
- While pressing and holding the brake pedal, move the gear selector to the following positions depending on the initialization destination. When initializing the ECU: NEV-—-M-—-M—M—EN. To initialize the clutch: NE- M- +- M-— - M- +- M- — -EN.For transmission: NE- M- — -M- — -M- +- M- +- E- N.
- Release and then press the brake pedal again (3 series of 2 beeps should sound).
- Within 2 seconds, press the brake pedal 3 times. If the procedure is completed successfully, sound signals should sound: 2 - when initializing the control unit, 3 - clutch, 4 - transmission.
- Turn off the ignition and disconnect the inserted jumper from the diagnostic connector.
If the buzzer does not emit sound signals or the interval between them is more than 0.5 seconds, you should turn off the ignition, wait at least 15 seconds and start all over again (from step 1).
Chip tuning Toyota Corolla X (E150) in auto repair shops in Moscow
15 car repair companies
- Afto-service
- st. Polikarpova, 27, building 3
- +7 (495) 99… show all
- Stomobil
- TSM Motors
- Comandante
- Tiger box
- London-auto
- Dvs
- Autoelite service
- Gag-auto
- RF-motors
- Apollo Motors
- Lr-technik
Popular companies
Setting up the transmission system
After initialization, you should configure the robot control system. To do this, follow these steps:
- stop the car;
- move the gear shift knob to position N;
- turn off the ignition, then turn it on for 40 seconds;
- turn off the ignition again for 15 seconds;
- Turn on the ignition, start the engine and depress the brake pedal.
If everything is successful, the N lever position indicator will start flashing. After 10 seconds it should light up steadily, indicating that the setup is complete.
Important! The specified initialization and configuration methods are used in the absence of a portable calibration device. Setting up the robot box of a Toyota Corolla car using the device has a number of significant differences.
Top
Robot "Multimode" - functions and purposes
As mentioned earlier, the Toyota Corolla Multimode CVT is an excellent option for those drivers who are tired of thinking about manual gear shifting. The MMT consists of automatic and electric clutch control elements. The main component that performs the specified functions by the system is the actuator. This is one of the few elements that experiences wear and tear on its components (brushes, bushings and the drive motor itself).
MMT Toyota Corolla
“Multimode” is an improved variator created by Toyota for even smoother torque shifts. The new variator “Multidrive S” released by the Japanese has become even more productive. Now fuel consumption is reduced by 10-15%, and gear smoothness is reduced to a minimum.
More on the topic:
The advantageous characteristic of the Multimode variator is the ability to travel in emergency mode. After any malfunction, the sensor transmits a signal to the TCM, which turns on the emergency lamp. In such situations, autonomous driving mode is activated.
How to set up a Toyota Corolla robot
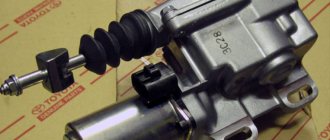
The Japanese began producing an improved robotic transmission with the release of the 2007 Corolla. Although until 2009, owners of these cars encountered significant difficulties in operating the robot. Since 2009, a modernized actuator (gear shifter) has been released. This drive was developed taking into account all the mistakes of previous models. Now, every year, even more practical actuators are produced, when replacing them you will forever forget about sudden MMT failures.
Actuator Toyota Corolla
Robot adaptation is, in other words, individual tuning and adjustment of the clutch. Diagnostics can be carried out using special devices or without them. If you decide to adapt the Toyota Corolla robot yourself, then follow the step-by-step instructions.
Self-adaptation of the Toyota Corolla robot:
Block DLC3 and contacts CG and TC
- Turn off the ignition and put the car on the handbrake.
- We make a paper clip (jumper) of contacts CG (4) and TC (13) in the DLC block. Now we wait about 15 seconds until the system prepares for diagnostics.
- Turn the key to ignition mode. When turning the ignition on, do not press the brake or start the engine.
- Immediately after turning on the ignition, pump the brake 6-7 times for 3-4 seconds.
- Wait for the return buzzer signal, it will be executed in 2 clock cycles.
- After two short signals, hold down the brake pedal and carry out the following gear shift combination: N – E – M – “plus” – M – “plus” – M – “plus” – M – “plus” – M – E – N, then release the pedal and wait 5-10 seconds.
- Press the brake again.
- We are waiting for the buzzer to respond, a short signal will appear, which will mean that the clutch clamp is adjusted. Release the brake.
- Then press the brake pedal and hold it. We move the gearbox lever to the “minus” position. Let's release the pedal.
- Turn off the ignition and wait 10-15 seconds.
- Remove the clip from contacts CG (4) and TC (13) in the DCL block
After carrying out a number of adaptation works, it is necessary to finally complete it, check all elements for serviceability and compliance with the specified parameters.
You won't need the DLC3 block for final setup. Just follow the instructions:
- Set the box position to “neutral”.
- Turn on the ignition and wait about a minute.
- Turn off the ignition and wait 15-20 seconds.
- Turn on the ignition again.
- We start the engine in the “neutral” position and hold the brake pedal.
- Pay attention to the instrument panel. When the engine is running, you will see the “N” indicator flashing. We wait until the “neutral” indicator stops flashing, you can turn off the engine. This completes the adaptation of the Toyota Corolla robot.
Firmware for Toyota, Lexus with Denso ecu from (Armeev) ADAKT
Firmware set for Toyota and Lexus gasoline cars with Denso CAN 1-gen units (based on 7F00XX processors)
In the firmware for gasoline cars, the calibrations of the control system (basic, minimum, corrections for technical fluid, fuel injection, VVT position), fuel supply (mixture compositions and dynamic enrichment), calibrations of the torque model, VVT phases and much more have been changed, which in general makes it possible to achieve tangible results on all types of engines. At the same time, it should be noted that an increase in power of more than 5-7% on naturally aspirated gasoline engines is impossible without changing the engine design. You need to understand this and be able to explain it to clients.
Firmwares are presented in tuning, tuning + Euro-2 formats
This includes the following firmware packages:
1. Firmware package for gasoline cars Toyota, Lexus with engines 1KR-FE, 1NR-FE, 1NZ-FE, 1NZ-FXE, 1ZR-FE, 2NZ-FE, 2SZ-FE, 2ZR-FE, 2ZR-FXE, 3NR- FE and others with a volume of 1.0, 1.2, 1.3, 1.5, 1.6, 1.8 liters. Currently includes firmware based on 35 serial versions for models Alion, Avensis, Corolla, Corolla Fielder, Vlos, Verso, Prius, IQ, etc.
Toyota Scion 89663-52D02_MOD.bin 89663-52D02_MOD_E2.bin 89663-52E32_MOD.bin 89663-52E32_MOD_E2.bin
Toyota Alion_ZRT26_1.8_R4 89663-20221-A_MOD.bin 89663-20221-A_MOD_E2.bin 89663-20260-A_MOD.bin 89663-20260-A_MOD_E2.bin
Toyota Allion_NZT260_1.5 89663-20212_MOD.bin 89663-20212_MOD_E2.bin
Toyota Avensis_AZT25_1.8_R4 89663-05501_MOD.bin 89663-05501_MOD_E2.bin
Toyota Avensis_ZRT27_1.8_R4 89663-05850-A_MOD.bin 89663-05850-A_MOD_E2.bin 89663-05851_MOD.bin 89663-05851_MOD_E2.bin 89663-05C20-A_MOD.bin 89663-05C2 0-A_MOD_E2.bin
Toyota Corolla_E120_1.6_VVT-i 89663-02G31_MOD.bin 89663-02G31_MOD_E2.bin 89663-02G32_MOD.bin 89663-02G32_MOD_E2.bin
Toyota Corolla_Fielder_NZE1_1.5 89663-12343_MOD.bin 89663-12343_MOD_E2.bin 89663-12541_MOD.bin 89663-12541_MOD_E2.bin
Toyota Corolla_NRE150_1.3 89663-02E71_MOD.bin 89663-02E71_MOD_E2.bin
Toyota Corolla_ZRE1_1.6_VVT-i 89663-02482_MOD.bin 89663-02482_MOD_E2.bin 89663-02492_MOD.bin 89663-02492_MOD_E2.bin 89663-02502_MOD.bin 89663-02502_MOD_ E2.bin 89663-02503_MOD.bin 89663-02503_MOD_E2.bin 89663-02511_MOD. bin 89663-02511_MOD_E2.bin 89663-02512_MOD.bin 89663-02512_MOD_E2.bin 89663-02G42_MOD.bin 89663-02G42_MOD_E2.bin 89663-02G40-B_MOD.bin 89663-02G 40-B_MOD_E2.bin 89663-02G40-B_ORI_E2.bin 89663-02G41_MOD .bin 89663-02G41_MOD_E2.bin
Toyota Corolla_ZRE1_1.8_R4 89663-02661_MOD.bin 89663-02661_MOD_E2.bin
Toyota iQ_KGJ10_1.0_R4 89663-74030-B_MOD.bin 89663-74030-B_MOD_E2.bin
Toyota Prius_NHW20_1.5_Hybrid 89663-47041_MOD.bin 89663-47041_MOD_E2.bin 89663-47080-A_MOD.bin 89663-47080-A_MOD_E2.bin 89663-47101_MOD.bin 89663-4710 1_MOD_E2.bin 89663-47102_MOD.bin 89663-47102_MOD_E2.bin 89663- 47120-A_MOD.bin 89663-47120-A_MOD_E2.bin 89663-47121_MOD.bin 89663-47121_MOD_E2.bin 89663-47140_MOD.bin 89663-47140_MOD_E2.bin 89663-47111_MOD .bin 89663-47111_MOD_E2.bin
Toyota Prius_ZVW3_1.8_R4_Hybrid 89663-47351_MOD.bin 89663-47351_MOD_E2.bin 89663-47161_MOD.bin 89663-47161_MOD_E2.bin 89663-47162_MOD.bin 89663-47162_ MOD_E2.bin 89663-47172_MOD.bin 89663-47172_MOD_E2.bin 89663-47290-A_MOD. bin 89663-47290-A_MOD_E2.bin
Toyota Verso_ZGR2_1.8_R4 89663-0F430_MOD.bin 89663-0F430_MOD_E2.bin 89663-0F460_MOD.bin 89663-0F460_MOD_E2.bin
Toyota Vlos_NCP9_1.5 89663-0D401_MOD.bin 89663-0D401_MOD_E2.bin
Toyota Yaris_NCP9_1.5 89663-52F01_MOD.bin 89663-52F01_MOD_E2.bin 89663-52F11_MOD.bin 89663-52F11_MOD_E2.bin
2. Firmware package for gasoline cars Toyota, Lexus with engines 1AR-FE, 1AZ-FE, 2AR-FE, 2AZ-FE, 2TR-FE, 3ZR-FE, 3ZR-FAE, 4GR-FSE, 5GR-FE, etc. volumes of 2.0, 2.4, 2.5 and 2.7 liters. Currently includes firmware based on 70 production versions for Camry, RAV4, Solara, SAI, Siena, Vanguard, Harrier, Highlander, Hilux, Hiace, Prado, 4runner, Fortuner, Venza, Mark X, IS, GS, RX models and so on.
Lexus GS250_GRL1_2.5_V6 89663-30E00-A_MOD.bin 89663-30E00-A_MOD_E2.bin
Lexus IS250_GSE2_2.5_V6 89663-53262_MOD.bin 89663-53262_MOD_E2.bin 89663-53662_MOD.bin 89663-53662_MOD_E2.bin 89663-53700-A_MOD.bin 89663-53700-A _MOD_E2.bin 89663-53C71_MOD.bin 89663-53C71_MOD_E2.bin 89663- 53E80-B_MOD.bin 89663-53E80-B_MOD_E2.bin
Lexus RX270_AGL1_2.7_V6 89663-48531_MOD.bin 89663-48531_MOD_E2.bin 89663-48C10_MOD.bin 89663-48C10_MOD_E2.bin
Toyota Camry_ACV4_2.4_R4 89663-33661_MOD.bin 89663-33661_MOD_E2.bin 89663-33681_MOD.bin 89663-33681_MOD_E2.bin 89663-06431_MOD.bin 89663-06431_MOD_E2. bin 89663-33A50_MOD.bin 89663-33A50_MOD_E2.bin 89663-33A51_MOD.bin 89663 -33A51_MOD_E2.bin 89663-33A52_MOD.bin 89663-33A52_MOD_E2.bin 89663-33A53_MOD.bin 89663-33A53_MOD_E2.bin 89663-33A61_MOD.bin 89663-33A61_MOD_E2. bin 89663-33A70_MOD.bin 89663-33A70_MOD_E2.bin 89663-33A71_MOD.bin 89663 -33A71_MOD_E2.bin 89663-33A72_MOD.bin 89663-33A72_MOD_E2.bin 89663-33701_MOD.bin 89663-33701_MOD_E2.bin 89663-33720-A_MOD.bin 89663-33720-A_MOD _E2.bin 89663-33721_MOD.bin 89663-33721_MOD_E2.bin 89663- 33D30_MOD.bin 89663-33D30_MOD_E2.bin 89663-33730-B_MOD.bin 89663-33730-B_MOD_E2.bin 89663-33A60_MOD.bin 89663-33A60_MOD_E2.bin
Toyota Camry_ACV41_2.0_R4 89663-06460-A_MOD.bin 89663-06460-A_MOD_E2.bin
Toyota Camry_ACV5_2.0_R4 89663-06B40_MOD.bin 89663-06B40_MOD_E2.bin 89663-06E10-A_MOD.bin 89663-06E10-A_MOD_E2.bin
Toyota Camry_ASV4_2.5_V6 89663-33B51_MOD.bin 89663-33B51_MOD_E2.bin
Toyota HiAce_TRH2_2.7_V6 89663-26450-A_MOD.bin 89663-26450-A_MOD_E0.bin 89663-26450-A_MOD_E2.bin 89663-26800-A_MOD.bin 89663-26800-A_MOD_E2.bin
Toyota Land_Cruiser_Prado_TRJ15_2.7_V6 89663-60F31_MOD.bin 89663-60F31_MOD_E2.bin 89663-60F32_MOD.bin 89663-60F32_MOD_E2.bin 89663-60F42_MOD.bin 89663-60F4 2_MOD_E2.bin 89663-60F52_MOD.bin 89663-60F52_MOD_E2.bin 89663-60F91_MOD.bin 89663 -60F91_MOD_E2.bin 89663-60F92_MOD.bin 89663-60F92_MOD_E2.bin 89663-60R21_MOD.bin 89663-60R21_MOD_E2.bin 89663-60R90_MOD.bin 89663-60R90_MOD_E2. bin
Toyota Mark_X_GRX12_2.5_V6 89663-22173_MOD.bin 89663-22173_MOD_E2.bin
Toyota Mark_X_GRX13_2.5_V6 89663-0P110-A_MOD.bin 89663-0P110-A_MOD_E2.bin 89663-22301_MOD.bin 89663-22301_MOD_E2.bin 89663-22341_MOD.bin 89663-22341_ MOD_E2.bin
Toyota Matrix_AZE14_2.4_R4 89663-02802_MOD.bin 89663-02802_MOD_E2.bin 89663-02822_MOD.bin 89663-02822_MOD_E2.bin 89663-02882_MOD.bin 89663-02882_MOD_E2 .bin
Toyota Noah_ZRR70_2.0_R4 89663-28494_MOD.bin 89663-28494_MOD_E2.bin 89663-28502_MOD.bin 89663-28502_MOD_E2.bin
Toyota RAV4_ACA3_2.0_R4 89663-42601_MOD.bin 89663-42601_MOD_E2.bin 89663-42602_MOD.bin 89663-42602_MOD_E2.bin 89663-42632_MOD.bin 89663-42632_MOD_E2 .bin
Toyota RAV4_ACA3_2.4_R4 89663-42490-A_MOD.bin 89663-42490-A_MOD_E2.bin 89663-42521_MOD.bin 89663-42521_MOD_E2.bin 89663-42544_MOD.bin 89663-42544_MO D_E2.bin 89663-42711_MOD.bin 89663-42711_MOD_E2.bin 89663- 42721_MOD.bin 89663-42721_MOD_E2.bin 89663-42731_MOD.bin 89663-42731_MOD_E2.bin 89663-42831_MOD.bin 89663-42831_MOD_E2.bin 89663-42840_MOD.bin 8 9663-42840_MOD_E2.bin 89663-42C72_MOD.bin 89663-42C72_MOD_E2.bin
Toyota RAV4_ZSA3_2.0_R4 89663-42B82_MOD.bin 89663-42B82_MOD_E2.bin 89663-42F40-A_MOD.bin 89663-42F40-A_MOD_E2.bin 89663-42M20_MOD.bin 89663-42M20_MO D_E2.bin
Toyota SAI_AZK1_2.4_R4_Hybrid 89663-75010-A_MOD.bin 89663-75010-A_MOD_E2.bin
Toyota Siena_ASL3_2.7_V6 89663-08241_MOD.bin 89663-08241_MOD_E2.bin
Toyota Solara_ACV40_2.4_R4 89663-06281_MOD.bin 89663-06281_MOD_E2.bin 89663-06601_MOD.bin 89663-06601_MOD_E2.bin
Toyota Tacoma_TRN2_2.7_V6 89663-04252_MOD.bin 89663-04252_MOD_E2.bin 89663-04161_MOD.bin 89663-04161_MOD_E2.bin
Toyota Vanguard_ACA3_2.4_R4 89663-42D70_MOD.bin 89663-42D70_MOD_E2.bin
Toyota Venza_AGV1_2.7_V6 89663-0T110-A_MOD.bin 89663-0T110-A_MOD_E2.bin 89663-0T121_MOD.bin 89663-0T121_MOD_E2.bin 89663-0T150-A_MOD.bin 89663-0T150- A_MOD_E2.bin 89663-0T160-A_MOD.bin 89663 -0T160-A_MOD_E2.bin 89663-0T220_MOD.bin 89663-0T220_MOD_E2.bin
3. Firmware package for gasoline cars Toyota, Lexus with engines 2JZ-GE, 2GR-FE, 2GR-FSE, 3MZ-FE and others with a volume of 3.0, 3.3 and 3.5 liters. Currently includes firmware based on 60 production versions for Avalon, Alphard, Camry, Crown, Siena, Tacoma, Vanguard, Harrier, Highlander, Mark X, RX, GS, etc. models.
Lexus ES350_GSV40_3.5_V6 89663-33752_MOD.bin 89663-33752_MOD_E2.bin
Lexus GH450_GWS191_3.5_V6_Hybrid 89663-30F00-A_MOD.bin 89663-30F00-A_MOD_E2.bin
Lexus GS300_GRS19_3.0_V6 89663-30650-A_MOD.bin 89663-30650-A_MOD_E2.bin 89663-30653_MOD.bin 89663-30653_MOD_E2.bin 89663-30654_MOD.bin 89663-306 54_MOD_E2.bin 89663-30660-A_MOD.bin 89663-30660-A_MOD_E2 .bin 89663-30663_MOD.bin 89663-30663_MOD_E2.bin 89663-30664_MOD.bin 89663-30664_MOD_E2.bin 89663-30674_MOD.bin 89663-30674_MOD_E2.bin 89663-306 80-A_MOD.bin 89663-30680-A_MOD_E2.bin 89663-30C51_MOD. bin 89663-30C51_MOD_E2.bin 89663-30G00-A_MOD.bin 89663-30G00-A_MOD_E2.bin 89663-30G01_MOD.bin 89663-30G01_MOD_E2.bin
Lexus GS350_GRL1_3.5_V6 89663-30S31_MOD.bin 89663-30S31_MOD_E2.bin 89663-30S82_MOD.bin 89663-30S82_MOD_E2.bin 89663-30W20-A_MOD.bin 89663-30W20- A_MOD_E2.bin
Lexus GS350_GRS19_3.5_V6 89663-30630-B_MOD.bin 89663-30630-B_MOD_E2.bin 89663-30C02_MOD.bin 89663-30C02_MOD_E2.bin 89663-30C12_MOD.bin 89663-30C 12_MOD_E2.bin 89663-30F61_MOD.bin 89663-30F61_MOD_E2.bin 89663- 30N40_MOD.bin 89663-30N40_MOD_E2.bin
Lexus GS350_GSV40_3.5_V6_Hybrid 89663-33D11_MOD.bin 89663-33D11_MOD_E2.bin
Lexus GS450h_GWS191_3.5_V6 89663-30B10-A_MOD.bin 89663-30B10-A_MOD_E2.bin
Lexus GS450h_GWS191_3.5_V6_Hybrid 89663-30B02_MOD.bin 89663-30B02_MOD_E2.bin 89663-30B11_MOD.bin 89663-30B11_MOD_E2.bin 89663-30F01_MOD.bin 89663- 30F01_MOD_E2.bin
Lexus IS350_GRS19_3.5_V6 89663-30F51_MOD.bin 89663-30F51_MOD_E2.bin
Lexus IS350_GSE2_3.5_V6 89663-53214_MOD.bin 89663-53214_MOD_E2.bin 89663-53432_MOD.bin 89663-53432_MOD_E2.bin 89663-53620-A_MOD.bin 89663-53620-A _MOD_E2.bin 89663-53621_MOD.bin 89663-53621_MOD_E2.bin
Lexus RX350_GGL1_3.5_V6 89663-48320-B_MOD.bin 89663-48320-B_MOD_E2.bin 89663-48M50_MOD.bin 89663-48M50_MOD_E2.bin 89663-48Q20_MOD.bin 89663-48Q2 0_MOD_E2.bin
Lexus RX350_GGL1_3.5_V6_Hybrid 89663-48J00-A_MOD.bin 89663-48J00-A_MOD_E2.bin
Lexus RX350_GSU3_3.5_V6 89663-48621_MOD.bin 89663-48621_MOD_E2.bin 89663-48641_MOD.bin 89663-48641_MOD_E2.bin 89663-48670-A_MOD.bin 89663-48670- A_MOD_E2.bin 89663-48672_MOD.bin 89663-48672_MOD_E2.bin 89663- 48681_MOD.bin 89663-48681_MOD_E2.bin
Lexus RX400h_MHU_3.3_V6_Hybrid 89663-48A01_MOD.bin 89663-48A01_MOD_E2.bin 89663-48C30-A_MOD.bin 89663-48C30-A_MOD_E2.bin 89663-48270-C_MOD.bin 896 63-48270-C_MOD_E2.bin
Toyota 4Runner_GGL1_3.5_V6 89663-35302_MOD.bin 89663-35302_MOD_E2.bin
Toyota Alphard_GGH2_3.5_V6 89663-58100-A_MOD.bin 89663-58100-A_MOD_E2.bin
Toyota Avalon_GSX3_3.5_V6 89663-07071_MOD.bin 89663-07071_MOD_E2.bin 89663-07072_MOD.bin 89663-07072_MOD_E2.bin 89663-07090-A_MOD.bin 89663-07090-A_MOD _E2.bin
Toyota Camry_GSV40_3.5_V6 89663-33340-A_MOD.bin 89663-33340-A_MOD_E2.bin 89663-33642_MOD.bin 89663-33642_MOD_E2.bin 89663-33652_MOD.bin 89663-33652_MO D_E2.bin 89663-33E90_MOD.bin 89663-33E90_MOD_E2.bin
Toyota Crown_GRS20_3.0_V6_D-4 89663-30E30-A_MOD.bin 89663-30E30-A_MOD_E2.bin 89663-30E40-A_MOD.bin 89663-30E40-A_MOD_E2.bin
Toyota Crown_GRS20_3.5_V6 89663-30E20-A_MOD.bin 89663-30E20-A_MOD_E2.bin
Toyota Crown_GWS20_3.5_V6_Hybrid 89663-30E70-B_MOD.bin 89663-30E70-B_MOD_E2.bin
Toyota Highlander_GSU4_3.5_V6 89663-48G00-A_MOD.bin 89663-48G00-A_MOD_E2.bin
Toyota Highlander_MHU_3.3_V6 89663-48271_MOD.bin 89663-48271_MOD_E2.bin
Toyota Siena_GSL3_3.5_V6 89663-08221_MOD.bin 89663-08221_MOD_E2.bin
Toyota Sienna_GSL3_3.5_V6 89663-08211_MOD.bin 89663-08211_MOD_E2.bin
4. Firmware package for gasoline cars Toyota, Lexus with engines 1UR-FE, 1UR-FSE. 1GR-FE, 2GR-FXE, 2UZ-FE, 3UZ-FE and others with a volume of 4.0, 4.3, 4.6 and 4.7 liters. Currently includes firmware based on 60 production versions for the LC200, LC Prado, 4runner, FJ Cruiser, Tacoma, Celsior, Crown, Majesta, Tundra, Sequoia, LS, GX, LX, etc. models.
Lexus GS430_UZS19_4.3_V8 89663-30584_MOD.bin 89663-30584_MOD_E2.bin 89663-30861_MOD.bin 89663-30861_MOD_E2.bin
Lexus GS460_URJ15_4.6_V8 89663-60K01_MOD.bin 89663-60K01_MOD_E2.bin
Lexus GS460_URS19_4.6_V8 89663-30G41_MOD.bin 89663-30G41_MOD_E2.bin
Lexus GX460_URJ15_4.6_V8 89663-60D40_MOD.bin 89663-60D40_MOD_E2.bin 89663-60E10-B_MOD.bin 89663-60E10-B_MOD_(2).bin 89663-60E10-B_MOD_E2.bin 8966 3-60E70-B_MOD.bin 89663-60E70-B_MOD_E2 .bin 89663-60E71_MOD.bin 89663-60E71_MOD_E2.bin 89663-60E72_MOD.bin 89663-60E72_MOD_E2.bin 89663-60E73_MOD.bin 89663-60E73_MOD_E2.bin 89663-60E 74_MOD.bin 89663-60E74_MOD_E2.bin 89663-60E80-B_MOD.bin 89663 -60E80-B_MOD_E2.bin 89663-60J90_MOD.bin 89663-60J90_MOD_E2.bin 89663-60Q90-A_MOD.bin 89663-60Q90-A_MOD_E2.bin
Lexus GX470_UZJ12_4.7_V8 89663-60521_MOD.bin 89663-60521_MOD_E2.bin 89663-60522_MOD.bin 89663-60522_MOD_E2.bin 89663-60710_MOD.bin 89663-60710_ MOD_E2.bin 89663-60730-A_MOD.bin 89663-60730-A_MOD_E2.bin 89663- 60731_MOD.bin 89663-60731_MOD_E2.bin 89663-60840-A_MOD.bin 89663-60840-A_MOD_E2.bin
Lexus LS430_UCF3_4.3_V8 89663-50132_MOD.bin 89663-50132_MOD_E2.bin 89663-50133_MOD.bin 89663-50133_MOD_E2.bin
Lexus LS460L_USF4_4.6_V8 89663-50422_MOD.bin 89663-50422_MOD_E2.bin
Lexus LS460_USF4_4.6_V8 89663-50361_MOD.bin 89663-50361_MOD_E2.bin 89663-50362_MOD.bin 89663-50362_MOD_E2.bin 89663-50420-B_MOD.bin 89663-50420- B_MOD_E2.bin 89663-50551_MOD.bin 89663-50551_MOD_E2.bin 89663- 50552_MOD.bin 89663-50552_MOD_E2.bin 89663-50610_MOD.bin 89663-50610_MOD_E2.bin 89663-50B91_MOD.bin 89663-50B91_MOD_E2.bin
Lexus LX460_USF4_4.6_V8 89663-50A90-A_MOD.bin 89663-50A90-A_MOD_E2.bin
Lexus LX470_UZJ10_4.7_V8 89663-60650-A_MOD.bin 89663-60650-A_MOD_E2.bin 89663-60651_MOD.bin 89663-60651_MOD_E2.bin
Lexus LX470_UZJ12_4.7_V8 89663-60D00-A_MOD.bin 89663-60D00-A_MOD_E2.bin
Toyota 4_Runner_GRN28_4.0_V6 89663-35801_MOD.bin 89663-35801_MOD_E2.bin
Toyota Celsior_UCF3_4.3_V8 89663-50151_MOD.bin 89663-50151_MOD_E2.bin
Toyota Crown_UZS18_4.3_V8 89663-30562_MOD.bin 89663-30562_MOD_E2.bin
Toyota FJ_Cruiser_GSJ1_4.0_V6 89663-35450-A_MOD.bin 89663-35450-A_MOD_E2.bin 89663-35550-A_MOD.bin 89663-35550-A_MOD_E2.bin 89663-35830-B_MOD.bin 8966 3-35830-B_MOD_E2.bin
Toyota Land_Cruiser_GRJ15_4.0_V6 89663-60G63_MOD.bin 89663-60G63_MOD_E2.bin
Toyota Land_Cruiser_Prado_GGJ12_4.0_V6 89663-60561_MOD.bin 89663-60561_MOD_E2.bin
Toyota Land_Cruiser_Prado_GRJ15_4.0_V6 89663-60E61_MOD.bin 89663-60E61_MOD_E2.bin 89663-60E62_MOD.bin 89663-60E62_MOD_E2.bin 89663-60Q60_MOD.bin 89663-60Q6 0_MOD_E2.bin
Toyota Land_Cruiser_URJ2_4.6_V8 89663-60L70-A_MOD.bin 89663-60L70-A_MOD_E2.bin 89663-60M00-A_MOD.bin 89663-60M00-A_MOD_E2.bin 89663-60Q10_MOD.bin 89663-6 0Q10_MOD_E2.bin 89663-60U50-B_MOD.bin 89663 -60U50-B_MOD_(2).bin 89663-60U50-B_MOD_E2.bin
Toyota Land_Cruiser_UZJ1_4.7_V8 89663-60652_MOD.bin 89663-60652_MOD_E2.bin
Toyota Land_Cruiser_UZJ2_4.7_V8 89663-60B81_MOD.bin 89663-60B81_MOD_E2.bin 89663-60C00-A_MOD.bin 89663-60C00-A_MOD_E2.bin 89663-60C01_MOD.bin 89663-60C0 1_MOD_E2.bin 89663-60C02_MOD.bin 89663-60C02_MOD_E2.bin 89663- 60C03_MOD.bin 89663-60C03_MOD_E2.bin
Toyota Majesta_UZS18_4.3_V8 89663-30561_MOD.bin 89663-30561_MOD_E2.bin
Toyota Sequoia_UCK4_4.7_V8 89663-0C330-A_MOD.bin 89663-0C330-A_MOD_E2.bin
Toyota Sequoia_UCK6_4.7_V8 89663-0CC31_MOD.bin 89663-0CC31_MOD_E2.bin
Toyota Tacoma_GRN2_4.0_V6 89663-04450_MOD.bin 89663-04450_MOD_E2.bin 89663-04550-B_MOD.bin 89663-04550-B_MOD_E2.bin
Toyota Tundra_UCK5_4.7_V8 89663-0C790-A_MOD.bin 89663-0C790-A_MOD_E2.bin
Toyota Tundra_USK5_4.7_V8 89663-0C530-A_MOD.bin 89663-0C530-A_MOD_E2.bin 89663-0C550-A_MOD.bin 89663-0C550-A_MOD_E2.bin
5. Firmware package for gasoline cars Toyota, Lexus with engines 2URGSE, 2URFSE, 3URFE, 3URFBE and others with a volume of 5.0, 5.7 liters. Currently includes firmware based on 40 production versions for models LC200, Tundra, Sequoia, LS, GX, LX, etc.
Lexus GX570_URJ2_5.7_V8 89663-60C26_MOD.bin 89663-60C26_MOD_E2.bin
Lexus LS600h_UVF4_5.0_Hybrid 89663-50521_MOD_E2.bin 89663-50521_ORI_E2.bin 89663-50522_MOD_E2.bin 89663-50870-A_MOD.bin 89663-50870-A_MOD_E2.bin 89663-53B70_MOD.bin 89663-53B70_MOD_E2.bin
Lexus LX570_URJ2_5.7_V8 89663-60C21_MOD.bin 89663-60C21_MOD_E2.bin 89663-60C22_MOD.bin 89663-60C22_MOD_E2.bin 89663-60C22_spd_rpm.bin 89663-60C30 -B_MOD.bin 89663-60C30-B_MOD_E2.bin 89663-60C31_MOD.bin 89663- 60C31_MOD_E2.bin 89663-60C32_MOD.bin 89663-60C32_MOD_E2.bin 89663-60C34_MOD.bin 89663-60C34_MOD_E2.bin 89663-60C35_MOD.bin 89663-60C35_MOD_E2. bin 89663-60C36_MOD.bin 89663-60C36_MOD_E2.bin 89663-60C51_MOD.bin 89663- 60C51_MOD_E2.bin 89663-60M30_MOD.bin 89663-60M30_MOD_E2.bin 89663-60M50_MOD.bin 89663-60M50_MOD_E2.bin 89663-60P50_MOD.bin 89663-60P50_MOD_E2. bin 89663-60Q00_MOD.bin 89663-60Q00_MOD_E2.bin
Toyota Land_Cruiser_URJ2_5.7_V8 89663-60C20-A_MOD.bin 89663-60C20-A_MOD_E2.bin
Toyota Sequoia_USK6_5.7_V8 89663-0C710-B_MOD.bin 89663-0C710-B_MOD_E2.bin 89663-YWL09_MOD.bin 89663-YWL09_MOD_E2.bin 89663-YWL01_MOD.bin 89663-YWL01_ MOD_E2.bin 89663-YWL11_MOD.bin 89663-YWL11_MOD_E2.bin 89663- 0CA11_MOD.bin 89663-0CA11_MOD_E2.bin 89663-0CA21_MOD.bin 89663-0CA21_MOD_E2.bin 89663-0CA71_MOD.bin 89663-0CA71_MOD_E2.bin 89663-0CA81_MOD.bin 89663-0CA 81_MOD_E2.bin 89663-0CA91_MOD.bin 89663-0CA91_MOD_E2.bin 89663- YWL23_MOD.bin 89663-YWL23_MOD_E2.bin 89663-YWL19_MOD.bin 89663-YWL19_MOD_E2.bin 89663-0CK11_MOD.bin 89663-0CK11_MOD_E2.bin
Toyota Tundra_USK5_5.7_V8 89663-0C572_MOD.bin 89663-0C572_MOD_E2.bin 89663-0C582_MOD.bin 89663-0C582_MOD_E2.bin 89663-0C590-A_MOD.bin 89663-0C590-A_MOD _E2.bin 89663-0C592_MOD.bin 89663-0C592_MOD_E2.bin 89663- YWF29_MOD.bin 89663-YWF29_MOD_E2.bin 89663-0C600-A_MOD.bin 89663-0C600-A_MOD_E2.bin 89663-0C601_MOD.bin 89663-0C601_MOD_E2.bin 89663-0C602_MOD. bin 89663-0C602_MOD_E2.bin 89663-0C821_MOD.bin 89663-0C821_MOD_E2 .bin 89663-0C830-A_MOD.bin 89663-0C830-A_MOD_E2.bin 89663-0C831_MOD.bin 89663-0C831_MOD_E2.bin 89663-0C841_MOD.bin 89663-0C841_MOD_E2.bin 89663 -0C850-A_MOD.bin 89663-0C850-A_MOD_E2.bin 89663-YWF06_MOD.bin 89663-YWF06_MOD_E2.bin 89663-YWF14_MOD.bin 89663-YWF14_MOD_E2.bin 89663-YWF18_MOD.bin 89663-YWF18_MOD_E2.bin 89663-0C851_ MOD.bin 89663-0C851_MOD_E2.bin 89663-0C852_MOD.bin 89663-0C852_MOD_E2.bin 89663-0C852_Version_6.bin 89663-0C891_MOD.bin 89663-0C891_MOD_E2.bin 89663-0CA01_MOD.bin 89663-0CA01_MOD_E2.bin 89663-0CA31_MOD.bin 89663-0CA31_MOD_E 2.bin 89663-0CA41_MOD.bin 89663-0CA41_MOD_E2.bin 89663-0CA51_MOD.bin 89663-0CA51_MOD_E2.bin 89663-0CA60_MOD.bin 89663-0CA60_MOD_E2.bin 89663-0CA61_MOD.bin 89663-0CA61_MOD_(2).bin 89663-0CA61_MOD_E2.bin 89663-0CA61_MOD_E 2_(2).bin 89663-YWF22_MOD.bin 89663-YWF22_MOD_E2. bin 89663-YWF34_MOD.bin 89663-YWF34_MOD_E2.bin 89663-0CD10-A_MOD.bin 89663-0CD10-A_MOD_E2.bin 89663-YWF28_MOD.bin 89663-YWF28_MOD_E2.bin 89663-YWF 25_MOD.bin 89663-YWF25_MOD_E2.bin 89663-0CD70-A_MOD .bin 89663-0CD70-A_MOD_E2.bin 89663-0CG10-A_MOD.bin 89663-0CG10-A_MOD_(2).bin 89663-0CG10-A_MOD_E2.bin 89663-0CG10-A_MOD_E2_(2).bin 89663-0CG50-A_MOD .bin 89663-0CG50-A_MOD_E2.bin 89663-0CJ54_MOD.bin 89663-0CJ54_MOD_E2.bin 89663-0CK03_MOD.bin 89663-0CK03_MOD_E2.bin
Toyota Tundra_USK6_5.7_V8 89663-0CB01_MOD.bin 89663-0CB01_MOD_E2.bin
6. Firmware package for automatic transmission ECUs of Toyota and Lexus cars, in which the control program is located in a separate processor. Currently includes firmware based on 4 serial versions for LC models
Toyota Land_Cruiser_VDJ200_4.5_V8_TD_Transmission_Ctrl_AB60F 89665-60650_MOD.bin 89665-60500_MOD.bin 89665-60651_MOD.bin 89665-60652_MOD.bin 89665-60571_MOD.bin
A detailed list of all six packages is here: toyota_lexus.rar
In total, at the moment there are about 270 firmware for the most popular and current models.
All the above 6 packages in one archive The whole set:
Armeev_Toyota_Lexus_Denso.rar
Calibrations:
Vasiliy Armeev
Firmware classification:
MOD
- tuning modified calibrations with factory toxicity standards
MOD_E2
- tuning modified calibrations with Euro 2 toxicity standards
Video: Toyota Corolla 300N/MC 1.6 robot, acceleration to 100 km/h
Owners of Toyota Corolla cars produced between 2006 and 2008 often encounter problems with the operation of a robotic gearbox.
The manufacturer admitted a flaw in the creation of the MMT, which entails the initialization of all parameters and subsequent premature repairs.
To successfully initialize the robot box on a Toyota Corolla, it is necessary to perform certain sequential actions; this is the only way to correctly configure the operation of the entire transmission.
Services and prices
Use the quick navigation function by type of service and car make to access cost information and detailed descriptions of services CHIPTUNING45
- home
- Services and prices
- Chip tuning
- Chip tuning of passenger cars
- Chip tuning of Toyota cars
- Chip tuning Toyota Corolla
Chip tuning of Toyota cars in Kurgan
The CHIPTUNING45 company provides professional chip tuning of Toyota cars in Kurgan. We guarantee quality, reliability and affordable prices. To view information about the cost and detailed description of the service, select the Toyota car model you are interested in from the list.
- remove the strips located to the left of the radio;
- the same measures with a visor attached to clips;
- Unscrew the 2 bolts with a Phillips screwdriver of a suitable size and remove the panel, disconnecting the wires;
- carry out the analysis using a six-pointed star screwdriver;
- once the flimsy cover is removed, remove the structure from the frame;
- using a star polyhedron, unscrew 6 bolts: they hold the displays;
- remove the arrows sitting on the pins by prying them up with a screwdriver from below and marking the ends of the places with masking tape;
- Unsolder the old diodes by heating the soldering iron tip to 400 degrees.
What is a robot
Before doing any work with a robotic gearbox, you need to understand what it is. This transmission greatly simplifies driving due to the automatic operation of the clutch and gear shifting. The box reads the information that is transmitted by the driver, while taking into account how the car is moving, then the information is processed in the ECU, after which the box operates according to a certain algorithm.
It is important to know that the operation of modern robotic gearboxes is more comfortable, and the reliability of operation and fuel consumption remain the same as that of a manual gearbox.
Main problems of the box
Due to problems that arose with the MMT box, the manufacturer discontinued it, and additional extended insurance was introduced for cars already purchased. The main problems faced by car owners were as follows:
Frequent failures occurred in the control unit system, as a result of which the initialization procedure had to be done almost every 10,000 kilometers;
- Overheating of the clutch disc, and as a result, premature wear. It happened that it had to be changed at 50,000 kilometers;
- Gears began to shift intermittently;
- Due to the problems mentioned above, it was necessary to do a complete update of the ECU.
It is important to know that the “insurance” from the manufacturer for such boxes is still valid, and if any problems arise, when you contact a specialized service, they will provide a free warranty replacement of all failed elements of the MMT system.
What is this procedure?
This procedure configures or resets all ECU parameters. As a rule, it is done during the replacement of any repair work when the elements of a given transmission were replaced, for example:
- The MMT kit is completely changed, or parts of the box or clutch are partially updated (in this case, the transmission itself is initialized);
- Sensors, electrical unit or electric drive are changed (in this case the unit is initialized)
Calibration or adjustment is done in case of failures or in case of unknown errors.
It is important to know that it is not recommended to carry out the ECU initialization procedure without compelling reasons. If you do it often, it will lead to the fact that the clutch and its parts will quickly wear out. And its effect will be short-lived.
There are a number of common opinions regarding this procedure that are erroneous, for example:
- After it, the car begins to move off easier;
- It is carried out in order to eliminate jerks that occur at low speeds;
- If the clutch supply drive rack is not positioned correctly, you need to reset the system.
Therefore, all work related to this procedure should be carried out only if there are compelling reasons for this, with the agreement (consultation) of a specialist.
Reset
The reset procedure is as follows:
- The car is installed on the handbrake;
- Using a paper clip in the block, contacts 13 and 4 are closed between TC, CG and DLC3;
- Turn on the ignition and press the brake pedal seven times, after which short signals will sound, which notify that the diagnosis has begun;
- The brake pedal is pressed again and the gearshift knob changes gears in the following order:
- The brake pedal is released and pressed again until a series of signals appears (notifying that adjustment is in progress)
- If all work is done correctly, the following sound signals will sound:
If long beeps are heard during or after setup, this indicates that the setup was not performed correctly. To solve the problem, you need to reboot the system; to do this, pull out the key and insert it back after about twenty seconds, then do all the steps again.
- The ignition is turned off and the closed contacts are disconnected.
Transmission setup
After initialization on the Toyota Corolla is completed, it is necessary to configure the system that controls the robot, for this:
- The car stops;
- The gearshift knob is moved to the neutral position “N”;
- The ignition is turned off, after which it turns on for about forty seconds;
- The ignition turns off again for about fifteen seconds;
- The ignition is turned on, the engine starts and the foot brake is applied.
If everything is done correctly, the indicator showing the neutral position “N” will blink, and after ten seconds it will stop blinking and just start to light up, this is a signal that the setup is complete.
Exterior tuning
Tuning with taste Conventionally, car modification is divided into 3 parts:
- exterior – modification of the body, updating of optics;
- interior – making comfortable changes in the interior and using innovative technologies;
- a technical part, updating of which allows you to increase the power and dynamics of the car without excessive consumption of fuel.
Most owners of the 2008 Corolla 150 do not go further than body tuning. Having installed aerodynamic body kits, which are usually sold as a whole package, and also updated the optics, they prefer to leave everything that way. However, the presence of a fairing on the Corolla 2009, door sills, a bumper with smoothed corners or a spoiler on the trunk will already change the appearance of the car. But you can add a few more highlights.
How do you like this Corolla 150?
Masters from professional tuning studios rarely ignore the rims of the 2010 10th generation Corolla. It’s difficult to compete with them when it comes to modifying a car, but you can take some points into account. The original wheels are replaced with 16- or 17-inch products made of lithium or titanium alloy. Additional lighting under the bottom in the dark will give the car a mysterious and mystical look. There is a simpler option - these are paintable discs, onto which a marbled texture, rainbow stains or any other pattern are applied.
Unusual wheels for Corolla 150. Do you like them?
When using various accessories to tune the body of the Corolla 150 2011, you should know when to stop so that instead of modernizing the car, it does not turn into a laughing stock. Therefore, it is advisable to purchase ready-made kits to modify the exterior.
We improve headlights, safe movement on the roads
The life and safety of all road users depends on high-quality road lighting.
Experts recommend periodically replacing Corolla headlights if they become scratched or scuffed, as their presence will interfere with the clarity of the illumination. You can install exactly the same light sources as they were, but it is better to tune the optics on the 10th generation Corolla 2013.
Really nice optics
Updating optics can be divided into several stages:
- Replacing light bulbs is the simplest and most affordable tuning option. Instead of conventional light sources, you should choose xenon or LED ones. For example, Led star is an excellent solution for replacing standard lamps with more modern lighting devices.
- Installing modules instead of the factory headlight. Modular optics consists of 3 types of sections: side lights, high beam and low beam. When choosing, you should pay attention to the manufacturer and equipment. The most popular modular headlights are eagle eyes, which come with a lens included.
- Protective decor that is attached to the lamp itself - a colored film that protects parallel glass from minor damage - or next to it, like eyelashes on headlights.
As you can see, tuning optics is both a full-fledged replacement with a better one, and an update of individual elements. After all, decorating brake lights and installing fog lights is only a small part of the changes that are suitable for “optimizing” the lighting fixtures on the 2012 Corolla 150. You can also use not transparent glass, but black sonar headlights, complemented by strips of daytime running lights.
Which optics do you like better, this one or the top one?