4894 Apr 20
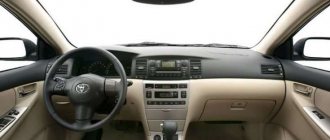
The process of operating a car involves the occurrence of various types of malfunctions, ranging from engine breakdowns to scratches on the hood of the vehicle. One of the most commonly at risk parts is the rear view mirrors located on the sides of the car. They “suffer” in dense traffic or over time they become cloudy and lose their information content (the same applies to the interior reflective element). Toyota Corolla is equipped with fairly informative mirror elements, but to increase the reflection area, many drivers equip their vehicle with larger “reflectors”.
Corolla e120 how to remove mirror caps. How to remove and disassemble the side rear view mirror
Mirror
for Toyota Corolla:
rear view
and side
The process of operating a car involves the appearance of various kinds of defects, ranging from engine breakdowns to a scratch on the hood of the vehicle. One of the most frequently at risk parts is the rear view
located along the edges of the machine.
They “suffer” in dense traffic or over time they become cloudy and lose their information content (the same applies to the interior reflective element). Toyota Corolla Auto Club dismantling the mirror I would be grateful if you could advise me how. on the Toyota Corolla
, but to increase the reflection area, many drivers equip their vehicles with larger “reflectors”.
“Toyota Land Cruiser”: mirror repair
Hi all! Today we will talk about a broken side rear view mirror lock. Sometimes it is discovered by owners of Toyota Land Cruiser Prado 150 and Toyota Land Cruiser 200.
The problem may appear due to natural wear and tear of the locking mechanism, but sometimes it is a consequence of mechanical damage to the side mirror housing. The latter happens when removing snow from the body or when the car is moving in heavy traffic.
Signs of a breakdown of the “TLCP 150” mirror clamp is that it cannot be installed in the desired position, since it rotates 180°. This happens even when the driver's door is opened and the ignition is turned on and requires returning it to its original position.
We have repeatedly fixed this breakdown, so we can conclude that the Toyota Land Cruiser side mirror mechanism is the weak link that can cause the car owner a lot of unpleasant moments. Don't forget about this and use the mirror carefully.
Our car service technicians carry out restoration work that allows the car owner to save money by not purchasing a new side window. We carry out high-quality work and provide a guarantee, and the price for repairing the rotating mechanism of the side mirror of a “Toyota Land Cruiser” in our car service center will definitely please you.
If you encounter such a breakdown, do not rush to buy a new mirror, contact us and we will promptly solve your problem.
Removing and replacing side parts
To replace side mirrors on a Corolla 120 and 150 body you will need:
- A flathead screwdriver with a wrapped tip (can be wrapped with tape or tape) - this step will prevent mechanical damage to many parts of the car.
- New reflective elements.
In order to complete the dismantling process, a number of steps must be performed. First remove the holder for the inside handle of the front doors. To do this, use a screwdriver (which was wrapped in tape or tape) to release the three fasteners. Next, using the same screwdriver, you should remove the upper panel of the armrest and disconnect the connector for the heating wires located under it. It's worth seeing that everything should be filmed quite well.
The next step is to disassemble the facing panel. The replacement process can take place either on a removed hub or a Toyota Corolla stud. To do this, you will need to use a screwdriver to remove the door armrest cover, unscrew two screws, remove 9 clamps and release 5 more clamps. How to disassemble a side mirror? Only after these steps can you remove the panel located on the inner glass seal. After which, having released two more grips, you should dismantle the door handle located inside the vehicle interior.
The lower frame bracket trim is removed differently on cars with 4 and 6 speakers. For vehicles with 4 speakers, simply release the retainer and clip and remove the part. For cars with 6 speakers, do the same, also disconnect the wire connector.
The next step is to remove
Toyota
side mirror .
hello! we tore off the mirror on a toyota vitz car - does anyone know how to disassemble the side electronic mirror - you need to pull the mirror itself out. It is necessary to release the latch, disconnect the connector, and also unscrew the 3 bolts that hold the rear view mirror
.
It is dismantled along with the cover.
Mirrors on Camry 40
Car mirrors are by no means just a decorative element; they ensure the safety of the car and everyone in it, allowing the driver to have a good view of the roadway to the sides and behind. Therefore, the quality of mirrors and their functionality are very important. In this case, functionality means the ability to change the viewing angle and reliable fixation of the mirrors in a given position.
The most common problem in cars is the side view mirrors. This is due to the very design of the cars, because it is these elements that most protrude beyond the design of the car, giving the driver the opportunity to see the road and vehicles moving on the sides. Like any other parts, these parts must be replaced. You can buy mirrors for Toyota Camry 40 both in specialized auto stores and on one of the websites on the Internet.
To install the alternative exterior mirror housing with built-in turn signal, you need to remove the door trim using a plastic spatula or other flat tool. To do this, you need to pry and pull out the decorative insert from the door handle, under which there are two Phillips screws located below and above.
They need to be unscrewed. By prying the door opening “hook” housing insert, we take it out. We take out the fastening “piston”, which is located in the corner of the casing, pressing on the core. You need to remove the triangular trim and now you can easily remove the trim, gradually, from the speaker to the bottom of the door trim.
When you snap off all the pins, remove the filing from the groove. We disconnect the cables from the door opening mechanism that are stretched from the inside of the casing, and then disconnect the wiring connector for the E.S.P. buttons. and disconnect the connector that goes to the lampshade. We remove the mirror.
How to remove a TOYOTA side mirror
Karina, Corona, Kaldina Yes, and a lot of things like that.
It is important to remember that fasteners should be removed fairly easily.
Next, you need to remove the mirror cloth. It should be noted that the canvas is removed differently on cars with and without heated mirrors. For models that do not have heating, the following scheme is relevant: the lower part of the visor is sealed with protective tape, then you should tilt the part down, by pressing on it from above, unhook the two grips, disconnect the two guides located in the upper part, remove the mirror
.
On models with heating, the circuit is similar, but the connectors must be disconnected. And only after these manipulations can you disassemble the mirror
on a Toyota Corolla. The new part must be installed in the reverse order.
Photo report on installing mirrors with turn signals in Camry V40
So, dear owners of pre-restyling V40 (2006-2008), finally got around to a photo report on installing alternative exterior mirror housings with built-in turn signals.
The process is as follows: The first step is to remove the front door trim. The process is not complicated..))
Use a flat tool (preferably a plastic spatula) to loosen and remove the decorative insert from the door handle.
Under it (top and bottom) there are two Phillips mounting screws. We unscrew them naturally.
Next, using the same flat tool, we lift and remove the insert from the body of the door opening “hook”.
There is another screw under the removed insert.
There is a fastening “piston” in the corner of the casing. To remove it, you must first press on the core.
Using a “pull” motion, remove (with a slight movement, snapping off the fastening clips) the triangle cover.
Now you can begin to remove the casing.
For this purpose, starting from the speaker, push the bottom of the door trim away from the door by moving it towards you.
After making sure that the pistons are unlatched, move upwards and remove the casing from the groove where the glass seal fits.
Now you need to disconnect the cables from the door opening mechanism located on the inner surface of the casing.
You should also disconnect the wiring connector that goes to the E.S.P. buttons.
And disconnect the connector that goes to the lamp.
Now you can start removing the mirror.
10mm head. unscrew the three nuts and remove the mirror from its seat. Naturally, we disconnect the wiring connector as well.
The work is then divided into two stages:
Stage No. 1 - Installation of a new case.
We place the mirror on a soft surface and unwind the standard insulation on the incoming wiring harness.
Now you should remove the mirror element. For this purpose, press on the top edge of the mirror so that the mirror tilts upward as much as possible.
Through the gap formed at the bottom, using a small tool (a screwdriver as an option), we release the mirror element from the fastening latches.
Disconnect the terminals suitable for the mirror element and remove the element.
Remove the upper mirror housing. For this purpose, use a screwdriver to bend the fastening latches from the inside.
Next, for the convenience of laying the wire, you should unscrew the three screws (Torx) and remove the rotating part of the mirror.
Now you can start pulling the wire. To make this operation easier, generously lubricate the wiring area with WD-40 liquid, and attach a thin, rigid wire to the wire from the turn signal of the new housing being installed that is to be pulled, using electrical tape.
We fix the laid wire together with the standard one using electrical tape and assemble the mirror.
After the mirror is assembled, we install it in place and begin laying the wiring from the door to the salon.
To make it easier to drag the wire from the turn signal into the cabin, remove the speaker.
In the Kari V40, the standard wiring from the door to the passenger compartment goes along a corrugated cable without connecting connectors, so there will be no problems with the routing of the wire.
To make it easier to pull the wire through the corrugation, I also recommend “spraying” VE-Dashka into the corrugation and attaching the wire to the wire being pulled through. Or even better, a flexible, thin steel spring that can be removed from a used wiper.
We fix the laid wires to the standard harnesses using zip ties or electrical tape.
Both turn signals should be connected in the left threshold. We call the wires and determine the pair needed to connect.
These are what you need to connect:
Yellow is left, green is right.
We connect the “+” to them from the wires pulled from the turn signals in the mirrors, isolate and assemble the car in the reverse order.
We admire the work done. ))
For those who are too lazy to bother themselves, you are welcome to come to us for installation. Because our “hands” have long been full. ))
How to select a rear view element?
As noted earlier,
rear view
mirror is the most susceptible to damage. How to disassemble it yourself, now pull the mirror in direction 2 from the Ford Focus fender 3. Sometimes there are cases when it is possible to repair the part, but the most common times are when the only solution is to replace the mirror. Currently, you can purchase both the original part and a high-quality replica. Replacing the battery in a Toyota Corolla key is shown in this photo report. How to change the battery in a 2010 Corolla key and the part number for the correct battery. Reliability and 100% “compatibility” with the car speak for the original. But the advantages of a replica include its relatively low cost and availability.
So, how to choose a new mirror
for
Toyota Corolla
120 and 150 body?
Before choosing a new mirror
, you need to decide whether it will be from an official dealer or purchased externally.
Pay attention to the rusty screws! The mirror was on the neighbor's car for about 2 years. I have them in the same condition, however, in the summer I sealed them with 3M electrical tape. 1500 km in heat and rain - there is not even a hint of peeling off. I'll see what happens after winter.
Removing and replacing side parts
To replace side mirrors on a Corolla 120 and 150 body you will need:
- A flathead screwdriver with a wrapped tip (you can wrap it with tape or tape) - this step will prevent mechanical damage to many parts of the car.
- New reflective elements.
In order to carry out the dismantling process, a number of actions must be performed. First remove the holder for the inside handle of the front doors. To do this, use a screwdriver (which was wrapped in tape or tape) to release three fasteners. Next, using the same screwdriver, you should remove the upper panel of the armrest and disconnect the connector for the heating wires located under it. It is worth noting that everything should be filmed quite well.
The next step is to disassemble the facing panel. To do this, you will need to use a screwdriver to remove the door armrest cover, unscrew two screws, remove 9 clamps and release five more clamps. Only after these steps can you remove the panel located on the inner glass seal. After this, having released two more grips, you should dismantle the door handle located inside the vehicle interior.
The lower frame bracket trim is removed differently on cars with 4 and 6 speakers. For vehicles with 4 speakers, simply release the retainer and clip and remove the part. For cars with 6 speakers, do the same, and also disconnect the wire connector.
The next step is to remove the Toyota side mirror. It is necessary to release the latch, disconnect the connector, and also unscrew the 3 bolts that hold the rear view mirror. It is dismantled along with the cover.
It is important to remember that fasteners should be removed fairly easily.
Next, you need to remove the mirror cloth. It should be noted that the canvas is removed differently on cars with and without heated mirrors. For models that do not have heating, the following scheme is relevant: the lower part of the visor is sealed with protective tape, then you should tilt the part down, by pressing on it from above, unhook the two grips, disconnect the two guides located in the upper part, and remove the mirror. On models with heating, the circuit is similar, but the connectors must be disconnected. And only after these manipulations can you disassemble the mirror on a Toyota Corolla. The new part must be installed in the reverse order.
Replacing the mirror element
- Replacing mirror elements may be required for the following reasons:
- 1. The mirror element cracked due to impact or temperature changes
- 2. Replacing a regular mirror element with a heated mirror element
3. Mirror elements from the car were stolen.
The question arises: How to replace the mirror element? What is the technology and how to remove the mirror element yourself, without being a car service specialist. With little skills this is not difficult.
It should be remembered that when dismantling and installing the mirror element, care must be taken not to allow large loads on the mirror sheet, since it is not rubber and will burst after a critical load threshold. That is, patience and tenderness.
Of course, if the mirror element has already burst or cracked, then you can safely pull it out of the mirror housing, the main thing is not to break off the side mirror of the car itself and not to turn the car over. So, let's begin.
1. When removing the mirror element, it is necessary to turn it out as much as possible so that a gap is formed at the top between the element and the mirror body. Be careful when using electrical adjustment to avoid damaging the mirror motors.
2. The mirror element is usually attached in the center to a round seat with latches that disengage with the seat when dismantled
3. It is necessary to apply force to the mirror element from within the mirror itself, distributing this force as much as possible over the area of the mirror element to avoid distortion. This is achieved in several ways:
• Those whose fingers are not very spread out with their rings can insert them into the gap formed between the mirror body and the mirror element and press from the inside onto the backing of the element until it falls out of the body; with the other hand, of course, you need to catch it.
• Take 2 screwdrivers and hold them in your hand in the form of an inverted V; the ends of the screwdrivers press the element from inside the mirror and dismantle it.
• A rope or twine, folded in half, is inserted into the gap between the element and the mirror, distributed in the center of the mirror, the ends of the twine are clamped in the left hand, the right hand holds the mirror body so as not to damage it.
By smoothly pulling the twine, the mirror element is removed from the mounts and falls out. In this case, the right hand holds the mirror body, so you need to find a third hand somewhere that will catch the falling mirror element.
4. The installation of mirror elements is carried out, as they say, in the reverse order - the latches are inserted into the mounting grooves on the mirror itself and the element is fixed by pressing evenly with the entire palm. It is not recommended to hammer the element with a hammer, press on the edge, or rest with your feet.
- If the mirror element is heated, then it is necessary to provide for the presence of wiring for it in advance.
- And this is a separate replacement for the glass of the mirror element:
Source: https://bokovoe-zerkalo.ru/zamena_zerkalnogo_elementa.html
How to select a rear view element?
As noted earlier, the rear view mirror is the most susceptible to damage. Sometimes there are cases when it is possible to repair a part, but the most common times are when the only solution is to replace the mirror. Currently, you can purchase both the original part and a high-quality replica. Reliability and 100% “compatibility” with the car speak for the original. But the advantages of a replica include its relatively low cost and availability.
So, how to choose a new mirror for a Toyota Corolla 120 and 150 body? Before choosing a new side mirror, you need to decide whether it will be from an official dealer or purchased externally.
Of course, it is better to choose from a dealer, but if this is not possible, then you can turn your attention to “car cambers”.
During the purchasing process, you must adhere to a number of recommendations: you need to decide which drive: mechanical or electric? For example, even if the “original” parts have an electric drive, then it is worth remembering that the control unit on the 2008 and 2012 models is different, and the reflectors from the 2008 model may not fit the 2012 model. When installing the side left and right products, all fasteners should be easy to screw in. The left and right mirrors must be symmetrical. If they have a turn signal, then you should check it before purchasing. The installed element should look like a single whole: there should be no backlash.
- Left Toyota Corolla 120 body - from 2000 to 5000 thousand rubles.
- Reflective elements for Toyota Corolla Verso - from 1,500 to 3,500 thousand rubles.
Price
- Right mirror Toyota Corolla 150 body – from 2000 to 5000 thousand rubles.
- Left Toyota Corolla 120 body - from 2000 to 5000 thousand rubles.
- Reflective elements for Toyota Corolla Verso - from 1,500 to 3,500 thousand rubles.
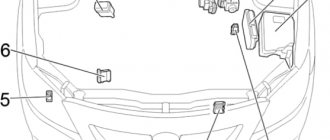
How to remove the side rear view mirror
The side rear view mirror in a modern car is a real “gadget” with various additional accessories built into it. Among them: turn signals, LEDs, heating elements, etc. Accordingly, before proceeding to removing the mirror, it is necessary to minimize the risk of a short circuit during operation.
After this, proceed directly to dismantling the mirror according to the following scheme:
Important: If the position of the side mirrors is electrically adjusted, you will also need to disconnect the corresponding wires.
How to disassemble a car's side mirror
Disassembling the side mirror involves removing the mirror element itself, which is located in a plastic case. This is necessary if the mirror element is broken, you need to repaint the plastic element or perform some other manipulations with these parts separately from each other.
The mirror element is secured in the mirror body using several plastic latches, which are located on its reverse side. Most often there are about 8 such latches, 2-3 on each side. We recommend proceeding as follows to remove the mirror from the housing without damaging any of the elements:
Depending on the car model and the mirror used, the space under the mirror element may be empty or filled with various components. Their dismantling, if necessary, should not cause difficulties.
Remove the Toyota East mirror
alexey76 View profile Go to user's albums
second, remove the mirror glass along with the plastic clip using a thin screwdriver. We move the mirror using the mirror adjustment, or simply with our fingers - position it up, so that the maximum gap opens from below and insert a screwdriver there
[tmp x1=»toyota-opa.ru/forums/index.php?autocom=gallery&req=si&img=4889″ target=»_blank»>link
alexey76 View profile Go to user albums then we remove them from another pair of fasteners (hooks)
alexey76 Viewing profile Go to the user's albums Advertising partners alexey76 Viewing profile Go to the user's albums alexey76 Viewing profile Go to the user's albums alexey76 Viewing profile Go to the user's albums All that remains is to unscrew the screws that hold the mechanism consisting of 2 parts: the first is the engine that folds the mirror, the second is a part consisting of two “twists” that, rotating left and right, turn the mirror glass and pull everything out of the body
link
alexey76 View profile Go to user's albums
You can unscrew the still white rotating screen and pull it off carefully; when you put it back, don’t forget to put the anthers back in place with tweezers or a needle.
Well, that seems to be all, collect as they say in the books in “reverse order”, thank those who helped, those who didn’t understand while I remember, ask, those who are dissatisfied, then go write your own topic
Disassembling the side view mirror
So I had problems with the right mirror after trying to fold it in severe frost.
The problem was that when the ignition was turned on, the mirror folding motor hummed constantly and it was not possible to cure it either by hand or by briefly pressing the folding button.
Then I decided to perform an autopsy.
The mirror is attached to the door with three bolts, two of which can be removed without problems from the outside, you just need to remove the decorative plastic trim from the bottom of the mirror, but very carefully, it is only held on by thin plastic latches, they are very easy to break, but one bolt is set with the head inward, so the door trim needs to be removed.
To remove the casing, perform the following steps:
Unscrew the three screws at the bottom of the door;
Carefully remove the plastic piston in the upper left corner of the door (I removed it very easily, but other people had problems with it)
We remove the door handle tray, to do this we open the hatch, there is a screw under it,
unscrew it, then use a screwdriver between the lock lock button and the opening handle to loosen the tray, first from below, then from above and remove it from the latches, there is another latch in the center, the tray hooks onto it, so when removing it you need to move it to the right
then remove the power window button block
to do this, we move it away from us towards the end in the form of an angle and use a screwdriver to press the latch on the wide end, it will be visible (for me this latch broke off due to strong force, but to be honest, it didn’t make it worse, but it became much easier to remove the block of buttons) , then carefully pull it out by hand, freeing the block from the latches; when removing it, the plastic can very easily crack, so be careful (Figure 1)
Remove the large soft door handle (also known as the armrest)
this is easily done by inserting your hand into the hole in the power window block, simply pulling up, starting from the far left end
Having removed it, you can see two screws in the door, unscrew them (Figure 2)
after all the manipulations, the casing is held only by the side latches and can be easily removed by hand, pull the casing towards you, the latches come out, then removing the casing, pull it up and towards you
The casing has been removed, now we carefully free the upper left corner from the polyethylene, unscrew the third bolt and disconnect the mirror from the connector, there is a small plastic stopper on this connector that prevents it from being easily pulled out, you need to press it and the connector is easily disconnected (Figure 3)
The mirror has been removed, now we climb into its insides
first you need to pull out the mirror itself (glass), to do this, lift it up with your hands and pull it by the lower edge (you need to pull slowly, but with force), the mirror will come out of the grooves (Figure 4)
Then we remove the steel piece that attaches the mirror to the door
one screw is visible immediately below, the other two are hidden under a rubber gasket, which must be carefully removed (Figure 5)
We remove the white plate, it is held on by one screw and unscrew all the screws that are visible (that’s all)
the angle adjustment mechanism is held on by three long thin screws
folding mechanism on three short thick ones and one more small one at the bottom where the wire goes into the mirror (Figure 6)
to do this, you need to remove its cover by pulling it up, shown in Figure 6 with an arrow, in theory this cover is attached to flimsy latches and sealant, but someone had already climbed into the mirror, so the cover was only on glue, the latches were broken and torn out I can do it without much difficulty, the cover is removed and parts of the folding mechanism are visible (Figure 7)
in my case, this part broke, I had to grind a new one (picture 
The cover that we removed contains a motor and a microcircuit. If everything is fine with the motor, DO NOT TOUCH this cover, but if there are problems with it, we’ll take it further)))
first you need to disconnect the wires that go to the microcircuit (Figure 9) to do this we pick out the rubber plug and pull out the wires (in theory this is easy, but I couldn’t get them out, I had to bite them)
Then we remove the bottom, from where the little white drive from the motor sticks out, it is glued, to do this, unscrew the two screws and press the bottom away from the body with a screwdriver (Figure 10)
if necessary, pull out the microcircuit and the motor, which is attached to the holes on two contact pins
during the reassembly process, do not be lazy to add fresh silicone grease to the mechanism, which is sold in all amateur radio stores
Dmitry aka 3DiMaN took part in the creation of this article
,
Alexander aka Baskin
,
Mikhail aka Maroder
.
Photographed by Pavel Yakovlev
.
Remove the Toyota East mirror
And on 32 Viste, use the same procedure to remove the mirror element?
Added after 1 day 1 hour 44 minutes 15 seconds: Well, in general, after reading here and there, I removed my old mirror (cracked), breaking the fastening and some kind of plastic tongue. Later, having looked at where the fastenings were and how they hold the mirror, I was able to remove the whole mirror without consequences and rearrange. This is what I can say for sure: It doesn’t come off easily, but bends and stretches (go too far and you’ll break the mirror. You’ll need to make a report with a photo to make everything clearer without experimenting, where should I put the photo here or in another section?
_________________ Was: Toyota Vista ZZV50 99 without Tahoe (capital by hand) Now: Mitsubishi Outlander CW5W, 05, 2.4, CVT, MMCS, Rockford
_________________ Vista SV50, 3S-FSE (D-4), 2.0l, 1999
Next we look at the locations of the latches themselves. When I tore off the old mirror, it was only then that I realized where it was held and how and where to apply the force to open everything without breaking. 1.2 photos of the location of the latches and claws. 3 photos like this, about half of the spout (scapula), we insert the screwdriver a little to the left of the mount and insert it further (to get between the mirror and the support on which it is attached), you can bend the mirror a little so that you can see what’s there and how (only a little, otherwise and it can be broken)
Added after 16 minutes 4 seconds: Then we see that the screwdriver got between the support (you can see it in the previous photos, white) and the mirror and slowly twist the screwdriver and pull it up, as if shaking top bottom top bottom (not immediately by tension) The right side comes unfastened , and without pulling out the screwdriver, move it to the left to the left fastening and also pull off the 2nd latch, see the result in photo 1. Next, we take the mirror by the bottom with our fingers and push it to the top and slightly pull the bottom towards us to the top. You will feel a slight push (the ears have come out of the grooves) we pull towards ourselves (although you will see for yourself where to pull everything will become visible) And 2 photos are the location of the screwdriver when you remove the mirror (just for reference, so to speak) And for the new mirror we simply insert the ears and lower the bottom We press the base until it clicks into place (only without fanaticism) While I was doing all this, I was afraid to break it
I'll refresh the topic a little. I’ll continue at the same time.
I read an advertisement that a mirror workshop cuts mirrors for cars too. I went with a sample, the order was accepted, 250 rubles. for cutting out the mirror according to the sample. There are actually a couple of BUTs. Our mirror glass is spherical and 2mm thick, but they only have flat glass and at least 3mm thick.
They cut it out and picked it up on the second day.
I sealed the original broken piece of glass with tape on the outside, used a thin screwdriver to slightly move the edge of the black plastic frame, and gradually pulled all the glass out of the frame. By the way, the original glass itself is NOT glued with anything, it is simply inserted into the frame, and because it is thin, it sits under the edges. There is a sticky piece of paper glued to the back side.
The glass in the original frame was spherical, so the frame took the same shape. Just put it on the drying coil in the bathtub for 2 hours and inserted a new flat glass into it. Now the frame is straight. I think we need to take it out again and seal it from the inside with a transparent sealant. The moment that is squeezed out, carefully cut it off with a scalpil. Here is a photo.
PS And if the glass is heated, I think it won’t be difficult to remove the element and move it to a new mirror.
*And one more BUT. the image with the new mirror is different from the old one, now due to the fact that it is not spherical, everything is visible a little closer. But this is not significant. .
_________________ VISTA ARDEO SV50G-BWSMH 06.1998 3S-FSE
Guys, the author posed a question, judging by the title of the topic, about independently removing/installing/replacing the mirror element. Those. is this possible and how to do it. Of course, someone doesn’t bother with such “little things” at all, they put the car in the salon, the grannies unfasten it with a handyman, and let them stress themselves out how to solve the problem. The main thing is that the client is satisfied.
PS And whoever likes to watch the rear landscape in the mirrors at speed while driving, and even simultaneously with both eyes in both mirrors, well, this should not be a technical review. .
_________________ I'm not worried. I don't smoke anymore. I just love to sit in the sun. (from personal observations.)