Prado
The control units record incorrect operation, system failures and Prado 150 errors. Self-diagnosis, carried out manually, can reveal the severity of the problem and decipher the Prado 150 error codes.
We carry out computer diagnostics
Using various scanners, all components and blocks . The best devices are dealer ones , although universal ones of professional or semi-professional quality .
The engine can be diagnosed with the simplest ELM327 scanner.
In this case, some specific Prado 150 errors during engine operation can be ignored by the system, but the main error using the OBDII protocol will be 100% detected . This is sufficient to detect most faults.
Diagnostics are performed in the following sequence , the same when working with any device. Let us list the algorithm step by step .
- turns on .
- diagnostic connector connects to the scanner.
- The scanner connects to a computer or smartphone .
- A Bluetooth connection is established with the smartphone, if necessary.
issued by the program are analyzed, and the car is sent for targeted “treatment” .
Prado 150 errors
Let's list what common Prado 150 error codes are detected during diagnostics. Let's look at the possible reasons .
P0606
Prado error 150 p0606. Its cause can be a number of problems, it is detected only by the scanner and is accompanied by a burning light “Check Engine” dashboard . The appearance of this Prado 150 error code can be caused by a violation of the internal memory , electrical circuits , or problems with the throttle valve . But more often, fault p0606 is located in the engine control module , that is, caused by a breakdown of the ECM .
Rather, the trouble is due to electrical overvoltage, such as when a spark plug blows or when road salt corrodes the ECM contacts . Contact oxidation can be caused by a clogged drain hose from the heater evaporator when water leaks from it onto the ECM housing.
P2757
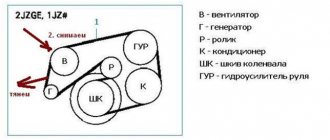
Error p2757 for Prado 150 indicates that you need to check the gear shift solenoid valve (torque converter clutch pressure adjustment). the wiring requires attention , then the connector with the valve , then the throttle . Code p2757 may appear after changing the automatic transmission oil if an electrical circuit is accidentally touched. It also appears when the input and output shaft sensor connectors are confused the rubber ring on the transmission filter . Also, the reason may be in the ECU , but this is for experienced electricians. (https://www. drive2.ru/l/502358617467388521/).
P0400
Error Prado 150 p0400 is accompanied by the slippery road , anti-skid and anti-skid indicators . This code indicates problems in the exhaust gas recirculation system. Cleaning carbon deposits on the EGR valve may not help if the diaphragm , the supply hoses are leaky , the cooling pipe coming from the cylinder head is clogged, etc.
C1751
Error code Prado 150 c1751 indicates a malfunction of the air suspension . In particular, in the relay of a device that closes the electrical circuit of the system. This relay is an intermediary that transmits a signal to the electronic control unit about the degree of filling of the pneumatic cylinders with air. When the device stops operating, the signal from it does not reach the ECU, as a result of which the automatic ride height adjustment stops .
Error code c1751 stands for damage in the compressor relay winding . Although in practice, a breakdown can occur both in the electrical network and directly in the electronic control unit .
Resistance is the main parameter of a working relay. If the measurement does not correspond to the standard factory indicator, then we can confidently conclude that the unit is broken. You can replace the part at a service station , or you can do it yourself .
If the electronic control unit , it is repaired ; if the connectors or wires are damaged, then they are cleaned , repaired or replaced .
Error Code P0810 – Clutch Position Control Error
The P0810 error code is "clutch position control error." Often, in programs that work with an OBD-2 scanner, the name may have the English spelling “Clutch Position Control Error”.
Technical description and interpretation of error P0810
If your OBD-II equipped vehicle has stored code P0810. This means that the powertrain control module (PCM) has detected a clutch position control error. This code applies exclusively to vehicles equipped with a manual transmission.
The PCM controls certain manual transmission functions. Gear shift position and clutch pedal position are among these functions. Some models also monitor the turbine input and output speeds to determine the amount of clutch slip.
The clutch is a mechanical coupling that connects the engine to the transmission. When the clutch master cylinder is depressed, hydraulic fluid is forced into the slave cylinder. The slave cylinder drives the clutch pressure plate. Allowing the engine to be switched on and off from the transmission if necessary.
The primary function of the clutch switch is to act as a safety feature to prevent the engine from starting if the transmission is unintentionally engaged. The PCM and other controllers also use input from the clutch switch for various engine control calculations. These include automatic braking functions, as well as for holding the car downhill.
If the PCM detects a malfunction in the clutch position control circuit or detects that the clutch pedal is not in the correct position for the current conditions, a P0810 code will be stored and the malfunction indicator lamp (MIL) will illuminate. It may take several ignition cycles (with failure) for the MIL to illuminate.
DTC P0810 sets when the PCM or TCM detects a malfunction in the clutch position control circuit. Or when the clutch pedal is in the wrong position for the current conditions.
The check engine light or transmission check light also comes on.
Symptoms of malfunction
The main driver symptom of P0810 is the MIL (Malfunction Indicator Light) illumination. It is also called Check engine or simply “check light”.
They can also appear as:
- The “Check engine” warning light on the control panel will light up (the code will be stored in memory as a malfunction).
- Poor engine starting.
- In some cases, the engine may not start even if the clutch pedal is fully depressed.
- In rare cases, there may be no symptoms at all.
A stored P0810 code can cause various vehicle control, safety and traction functions to fail. For this reason, this error should be considered serious.
Reasons for the error
A P0810 code may mean that one or more of the following problems have occurred:
- Clutch position sensor malfunction.
- Incorrectly adjusted clutch switch.
- Short circuit, broken wiring or connectors in the clutch position sensor circuit.
- Poor electrical connection in the circuit.
- The fuse or fuse link has blown.
- A faulty PCM or other control module may also be a programming error.
How to Troubleshoot or Reset Trouble Code P0810
Some suggested steps to troubleshoot and fix error code P0810:
- Inspect the wiring for damage, fraying, breaks, or short circuits. If the wiring is damaged, repair or replace it.
- Clear all diagnostic trouble codes from the PCM and take it for a test drive to see if the P0810 diagnostic trouble code returns.
- Check the clutch position sensor and replace if necessary.
- Check the fuse or fuse link.
- If everything is OK, the PCM may need to be replaced and reprogrammed.
Diagnosis and problem solving
To eliminate all options for the occurrence of error P0810, you should visually inspect the wiring going to the clutch position sensor. Check all system fuses and replace blown ones if necessary. Also check the battery under load, cable connections and generator power.
Find the diagnostic connector, connect the scanner and get all the stored codes and data. Write down this information as it may help you with further diagnosis. Clear the codes and test drive the vehicle to see if the P0810 code appears again after resetting.
Voltage check
Check the clutch position sensor input circuit voltage. If there is voltage in the input circuit, depress the clutch pedal and check the voltage in the output circuit. If there is no voltage in the output circuit, the sensor may be faulty.
If voltage is present on both sides of the sensor when the pedal is depressed, check the input circuit to the PCM. If there is input to the PCM, it may be due to a faulty PCM or a programming error.
If there is no clutch position sensor input signal at the PCM connector, disconnect all associated controllers. Use a multimeter to check the resistance for all circuits in the system. If necessary, repair or replace shorted as well as open circuits.
It’s not superfluous, if error P0810 occurs, the system fuses will be checked while the clutch pedal is pressed. Fuses that may appear normal when first tested may fail when the circuit is under load.
Often a worn clutch linkage or clutch pedal bushing can be misdiagnosed as a faulty clutch position sensor.
On which cars is this problem most common?
The problem with code P0810 can occur on different machines, but there are always statistics on which brands this error occurs more often. Here is a list of some of them:
- Ford (Ford Fiesta, Fusion)
- Geely (Geely Emgrand ES7)
- Honda (Honda Civic)
- Jeep
- Mercedes
- Peugeot (Peugeot 107)
- Skoda
- Suzuki (Suzuki Swift)
- Toyota (Toyota Auris, Corolla, Yaris)
- Volkswagen
- Volvo
You can sometimes encounter other errors with fault code P0810. The most common are the following: P0805, P0806, P0807, P0808, P0809, P080A.
Decoding error codes on Toyota cars
Technical defects appear sooner or later in cars of all manufacturers, including Japanese ones. The driver can decipher Toyota error codes independently, and it is possible to determine system malfunctions without the use of scanners. If a car enthusiast has never encountered such a problem before, then this article will help you understand all the nuances and perform the work at a professional level.
Toyota Corolla gearbox errors
Toyota Corollas of 2006, 2007 and later years of production are characterized by problems with the gearbox, especially often they happen with modifications equipped with a CVT robot. At the same time, the gearbox malfunction check lights up on the dashboard, and computer diagnostics can identify the following problems:
If a problem occurs when installing a new drive in the assembly, the mechanism clamp must be adjusted before doing this, otherwise P0810 (control error) cannot be cleared.
Toyota car diagnostics
Diagnostics are available on cars of the entire Toyota model range and are divided into two types:
Before starting electronic diagnostics, the driver must ensure that all systems and main mechanisms of the Toyota vehicle are in working order. To do this, you should check the fuses, electrical wiring, and also examine the connections and components of the vehicle for damage.
If any serious problem is detected, it must be eliminated, and only then carry out computer diagnostics, which can happen:
Step-by-step self-diagnosis
For self-diagnosis, the driver needs to work with the DLC 1 and DLC 2 connectors. This abbreviation stands for Data Link Connector, which in English means a connector for connecting data. DLC 1 looks like a plastic box with a lid on top. It is located under the hood, most often on the left. It is easy to find by the inscription Diagnostic.
Diagnostic signature on the connector
In older models, the diagnostic connector is shaped like a yellow circle and is located near the battery. There are no DLC2 parts in cars like the Corolla AE 100.
Fault codes for older car models: Toyota Corona 1992, Karina 1992-97, Toyota Mark are read only by flashing indicators.
In new models, DLC 2 is located directly in the cabin, under the dashboard and “at the feet” near the steering wheel. Most often it is round and is used during inspections carried out using special equipment.
Round DLC2 connector
When performing self-diagnosis by shorting individual contacts of the connector, only by connecting them in the required sequence can you obtain the correct code for decoding.
The following steps will help you find out if there are faults in the engine and/or gearbox system:
- Find the first DLC connector 1 labeled Diagnostic.
- Remove or unscrew the protective cover of the box. Below it there should be a diagram indicating the connector outputs.
- Take a wire, piece of wire, or other thin metal object (such as a paperclip) and install a jumper between the terminals labeled TE1 and E1.
- Turn on the ignition. Check that the furnace or air conditioner is not working.
- Look at the O/D (for transmission) and Check Engine (for engine) lamps. Memorize or write down the number and intervals at which the lights blink.
DLC 1 connector diagram
Everything is fine with the car and no damage to the internal combustion engine or transmission was detected if:
- the indicators flashed evenly with the same interval and duration of illumination more than 11 times;
- The Check Engine light illuminates for a long time and evenly at intervals of 4.5 seconds (this means that the code is supplied using type 10).
Any other combinations of light bulbs indicate a malfunction in the engine systems, gearbox or other mechanisms in the car.
If the circuit on the back of the cover has been erased, you cannot find the contact or you are not sure that you have closed the right one, you must:
- Turn on the ignition.
- Connect one of the wires of the control lamp to ground (to the car body).
- Connect the second wire one by one to each contact of the connector.
- Complete the test when the Check Engine light starts flashing on the dashboard.
It will be more convenient if someone helps you monitor the light bulb while you change the position of the wire.
Recognize fault codes using two flashing light systems.
The first setting option will allow you to find out errors indicated by a two-digit code (type 09):
- indicating the code, the light comes on for a split second;
- the time interval between pulses is also a fraction of a second;
- pause between tens and ones in one code is 1.5 s;
- the break between different codes is 2 and a half seconds;
- series of combinations of different faults are separated by 4.5 s.
Using the 10th setting type, unambiguous codes are determined. Here the light “blinks” the exact error number.
This code should be “read” according to the following rules:
- duration of indicator glow within one pulse – 0.5 s;
- the pause between blinks within one code lasts half a second;
- break between different codes – 2.5 s;
- series of combinations of breakdowns are separated by a pause of 4.5 s.
The video shows diagnostics using type 9 code, author Dmitry Kuzmin:
Failures in the ABS system are determined using the same scheme, but the TC and E1 terminals are closed. The SRS and 4WS fault codes are read by the corresponding sensor with the same contacts closed as in the ABS.
Photo gallery “Self-diagnosis of Toyota cars”
Diagnostic connector DLC 1
Contacts TE1 and E1 on the connector
Closing contacts
Location of the connector under the hood
Troubleshooting
Type 9 error codes common to all Toyota vehicles are represented by two-digit codes.
| Code | Decoding |
| 11 | No power to EFI unit |
| 12 | No signal from the engine speed sensor |
| 13 | No signal from the engine speed sensor at speeds above 1000 rpm |
| 14 | There is no signal from the minus ignition coil or from the minus coil number one (if there are two of them) |
| 15 | There is no signal from the minus of ignition coil number two |
| 16 | There is no connection between the automatic transmission control unit and the engine control unit |
| 17 | Incorrect signal from camshaft position sensor number 1 |
| 18 | Incorrect signal from camshaft position sensor number 2 |
| 21 | Incorrect signal from the oxygen sensor, if the engine is V-shaped, then the heater of the left main oxygen sensor is faulty |
| 22 | Incorrect signal from engine temperature sensor (THW) |
| 23 | Incorrect signal from the intake air temperature (THA) sensor |
| 24 | Incorrect signal from the intake air temperature (THA) sensor |
| 25 | Mixture too lean |
| 26 | Mixture too rich |
| 27 | Incorrect signal from the additional oxygen sensor (left for V-engines) |
| 28 | Incorrect signal from the oxygen sensor (on V-engines, the heater of the right main oxygen sensor) |
| 29 | The additional oxygen sensor is faulty (right for V-engines) |
| 31 | Incorrect signal from the air flow sensor or, if there is none, from the pressure sensor in the intake manifold (vacuum sensor) |
| 32 | Incorrect signal from air flow sensor |
| 34 | Boost faulty |
| 35 | Incorrect signal from the atmospheric pressure sensor in the intake manifold (vacuum sensor) |
| 38 | Automatic transmission fluid temperature sensor |
| 41 | Incorrect signal from throttle position sensor (TPS) |
| 42 | Incorrect signal from the vehicle speed sensor (speedometer) |
| 43 | No starter signal (STA) to engine control unit |
| 46 | Solenoid valve number 4 or its circuits are faulty |
| 47 | The auxiliary throttle position sensor (TPS) or its circuit is faulty |
| 48 | The auxiliary air supply control system is faulty |
| 51 | No idle signal from TPS |
| 52 | Incorrect signal from the knock sensor (if there are two of them, then from the left or from the front) |
| 53 | Problems in knock sensor control circuits (ignition timing) |
| 55 | Incorrect signal from the knock sensor (if there are two of them, then from the right or from the rear) |
| 61 | The main speed sensor or its circuit is faulty |
| 62 | Solenoid valve number 1 or its circuits are faulty |
| 63 | Solenoid valve number 2 or its circuits are faulty |
| 64 | Solenoid valve number 3 or its circuits are faulty |
| 65 | Solenoid valve number 4 or its circuits are faulty |
| 67 | The O/D switch or its circuit is faulty |
| 71 | EGR control system faulty |
| 72 | Fuel cut solenoid |
| 77 | The pressure control solenoid or its circuit is faulty (in the machine) |
| 78 | There is no signal to the fuel pump or its circuits are faulty |
| 81 | The circuit between TCM and ECT1 is faulty |
| 82 | The circuit between TCM and ESA1 is faulty |
| 84 | The circuit between TCM and ESA2 is faulty |
| 85 | The circuit between TCM and ESA3 is faulty |
| 86 | Engine speed sensor is faulty |
| 88 | The circuit from the engine control unit to the automatic transmission control unit is faulty |
| 89 | Communication between the engine control unit and the TRC system control unit is broken |
| 99 | No fault codes |
The general list of unambiguous codes (type 10) for a Toyota car consists of the following items.
| Code | Decoding |
| 1 | No breakdowns |
| 2 | The air flow sensor gives an incorrect signal |
| 3 | Incorrect signal from the communicator |
| 4 | The coolant temperature is outside the normal range, the sensor has failed |
| 5 | Incorrect communication with the oxygen sensor |
| 6 | The fault lies in the number of engine revolutions |
| 7 | Throttle valve in incorrect position |
| 8 | The sensor shows incorrect intake air temperature |
| 9 | Car speed problem |
| 10 | There is no starter signal |
| 11 | The air conditioner is broken or the toggle switch responsible for the neutral position in the car is faulty |
Gasoline internal combustion engines
If the car has an on-board computer or robot, the code will appear on the mileage screen. It will consist of a Latin letter at the beginning, for example P, B, C, and 4 numbers. This is typical for cars such as Toyota Rav 4 Avensis, Corolla, Mark II or Land Cruiser 200, Toyota Prado 120 and others that run on gasoline.
Table for deciphering diagnostic fault codes for gasoline internal combustion engines.
| Codes | Decoding | Analogue on BC |
| 12 and 13 | Problems with the crankshaft position sensor | P0335, P0335, P1335 |
| 14 and 15 | Problems with the ignition system or coils | P1300 and P1315, P1305 and P1310 |
| 18 | VVT-i phase system | P1346 |
| 19 | Accelerator pedal position | P1120 and P1121 |
| 21 | Oxygen sensor | P0135 |
| 22 | Coolant temperature | P0115 |
| 24 | Damage to the intake air temperature sensor | P0110 |
| 25 | Oxygen sensor - lean mixture | P0171 |
| 31 | Absolute pressure sensor | P0105 and P0106 |
| 36 | CPS sensor | P1105 |
| 39 | VVT-i system | P1656 |
| 41 | Throttle position | P0120, P0121 |
| 42 | Vehicle speed sensor problems | P0500 |
| 49 | Fuel pressure D-4 | P0190, P0191 |
| 52 and 55 | Knock sensor failure | P0325 |
| 58 | SCV drive | P1415, P1416, P1653 |
| 59 | Incorrect VVT-i signal | P1349 |
| 71 | EGR system | P0401, P0403 |
| 89 | ETCS drive | P1125, P1126, P1127, P1128, P1129, P1633 |
| 92 | Cold start injector problems | P1210 |
| 97 | Injector faulty | P1215 |
Diesel engines
Many Toyota cars were produced with a diesel engine. The most popular models are the Vitz, Caldina, Avensis (T25), Camry, Camry Grazia, Corolla E150, Auris 2008 sedans, Land Cruiser Prado 120 and Land Cruiser Prado 200 SUVs or the RAV4 crossover.
When writing down codes for diesel cars, you can see the following symbols.
| Code | Decoding |
| 13 | Rotation speed is outside the permissible limits |
| 19 | Incorrect accelerator pedal position |
| 22 | Malfunction in coolant temperature indicators |
| 24 | Incorrect intake air temperature data |
| 35 | Boost pressure is out of range |
| 39 | Fuel temperature sensors do not work well |
| 42 | The fault lies in the vehicle speed sensor |
| 96 | EGR valve position is incorrect |
Failure of other diesel engine parts.
| Code | Decoding |
| 12 | Crankshaft position problem |
| 14 | Damage to the valve that regulates the injection advance angle |
| 15 | The throttle servo is faulty |
| 17 | Incorrect signal coming from the control unit |
| 18 | Damage to the solenoid bypass valve |
| 32 | Failure of correction resistors |
Automatic transmission
Cars of the same brand differ not only in the engine, but also in the gearbox. For the same Toyota Corolla 150, Celsior or Vista, automatic transmission failures will differ from mechanical failures.
If there is a malfunction in the transmission, you will see one of the codes.
| Code | Decoding | Analogue for automatic transmission |
| 37 | Transmission input shaft speed sensor malfunction | P1705 |
| 42, 44, 36 | The problem is in the speed sensor (maybe shaft speed) | P0500 |
| 46 | Accumulator pressure, solenoid faulty | P1765 |
| 62, 63 | Problems with one of the solenoids | P0753 P0758 |
| 64, 68 | Torque converter lock-up clutch, solenoid faulty | P0773 |
Such errors are typical for different models, including Toyota Ipsum, Toyota Highlander 2001 and Caldina.
Other combinations
Special equipment and devices are also used for diagnostics. Such devices will show five-digit codes. They can also be recognized using the on-board computer, which is installed in new cars and hybrid models.
Code on the Toyota screen with on-board computer
Toyota Estima, Toyota Prius, third generation Toyota Harrier and others came out in the hybrid version. These models (in addition to other breakdowns) may experience malfunctions of the high-voltage battery system (HVB). Hybrid installation error codes and their interpretations are given in the table.
The most common non-VVB error codes are:
| Code | Decoding |
| P1604 | Engine starting failed, failure in the intake system |
| B0101 | The security system does not work correctly, there are problems with the airbags |
| In 1801 | The squib circuits on the driver's side are broken. |
| C1201 | Engine operation is incorrect, speed is below the permissible level |
| P0420 | Catalyst system B1 operates below the permissible efficiency threshold |
| P0352З | Problems in the ignition system circuits |
The photo gallery shows errors in the operation of the immobilizer and tires on Toyota cars.
The main advantages and typical disadvantages of Toyota Auris
Toyota Auris is a representative of the compact family car class.
Produced by the largest Japanese company Toyota since 2005. The model is built on the basis of the Toyota Corolla and is designed for use not only in Japan, but also in Europe. A little later it became available to Russian buyers. But the European version is not adapted to domestic roads, so the car has a number of disadvantages. Toyota Auris is presented in two generations. The first received a lot of negative feedback from owners. The model is called “raw” and unfinished. The second generation of the car has been available since 2013 and is more reliable. Passed the Euro NCAR safety test and received 5 stars. In 2015, the model underwent a restyling. Experts advise purchasing an updated car.
Advantages of Toyota Auris
- Excellent anti-corrosion protection of the body;
- Reliable and unpretentious power plants;
- Manual transmission is the best choice;
- Durable chassis;
- Spacious and modern interior;
- Excellent anti-corrosion protection of the body.
The body is well protected from corrosion. Especially for models released before 2009. There are no saffron milk caps or rust on it. Only those cars that have survived an accident encounter such problems. However, their restoration was carried out poorly.
As for cars after restyling, their body treatment leaves much to be desired. Owners complain about rust in the hood and sill areas. The exhaust system is also subject to chemical destruction. Therefore, when purchasing a used Toyota Auris, you need to pay special attention to the body.
Reliable and unpretentious power plants
The model is equipped with several types of power plants:
- Two petrol engines – volume 1.4 and 1.6 liters, power 97 and 124 hp;
- Three diesel engines – volume 1.4, 2.0 and 2.2 liters;
- Hybrid - 1.8 HSD. Installed in cars of recent years of production and is rare.
If you compare Toyota Auris engines with other power plants of cars in the same segment, they are distinguished by their reliability and unpretentiousness. The engines have a chain drive. Therefore, owners of the model are not familiar with the problem of replacing the timing belt.
Fuel consumption is relatively low - in the city 8 - 9 liters per 100 km. If you change the oil in a timely manner, the power plant will last quite a long time. The engines are classified as “indestructible”.
Diesel engines also received good reviews. The main condition is the use of high-quality diesel fuel. They can last more than 350 thousand km. If you skimp on fuel and refuel with poor quality, the injectors will quickly fail. They can be restored, which significantly reduces repair costs.
The best option for purchasing is a Toyota Auris with a 2.0 diesel engine with a power of 126 hp. It is playful and economical. The 1.4 liter engine will consume even less fuel – 4.5 liters per 100 km.
Manual transmission is the best choice
The car is equipped with a manual transmission and a robotic semi-automatic one. Experts recommend giving preference to the first node. It will not cause problems for the owner. Of course, the gearbox is not perfect and shifts unclearly, but in terms of reliability it has no competitors. The Toyota unit is time-tested. Mechanics are presented in two versions - 5- and 6-speed.
The chassis of the Auris surpassed other cars in this segment. She practically does not present unpleasant surprises. It is arranged quite simply - MacPherson in front, torsion beam and trailing arms in the rear.
Replacement of parts and spare parts of the unit takes place according to the manufacturer’s regulations. Silent blocks last for at least 60 thousand km. There are cases where the original suspension lasted 200 thousand km.
Spacious and modern salon
The car interior looks modern and attractive. Made from quality materials. It is spacious, light and safe. There are many shelves and drawers in which you can place everything you need.
Excellent climate control performance was noted. The interior cools quickly in summer and heats up quickly in winter. The audio system plays high-quality music.
The main disadvantages of Toyota Auris
- The paint coating is soft;
- Low beam lamps burn out quickly;
- Problematic 1.3 liter engine;
- Slow and expensive to repair “robot”;
- The steering rack often fails;
- The handbrake cables become sour;
- Poor sound insulation of the interior;
- High cost of spare parts.
The paintwork is the weak point of the hatchback. It's too soft. Chips and scratches quickly appear on the body. Even the slightest mechanical contact will leave a mark. The most vulnerable areas are the bumper, hood, sills. This is also the reason that in some places the paint wears off over time. Pasting with a protective film will help to avoid the problem.
Low beam lamps burn out quickly
The service life of low beam lamps is short. They burn out quickly. The problem is not serious, but it will cause trouble. Making a replacement is not as easy as it might seem. Especially the right light bulb.
In addition, the standard headlight optics are weak. It does not illuminate the road well and it is difficult to see the road at night or during rain.
Problematic 1.3 liter engine
The most popular models in our country are those with a 1.3 liter engine. Its main disadvantages:
- High oil consumption. Cars encounter this problem after traveling 150 thousand km;
- Noisy operation on a mileage of 150 - 200 thousand km;
- The idle speed is floating. The cause of the disease is the failure of the corresponding sensor;
- Whistle during acceleration;
- The motor vibrates uncharacteristically. The reason is wear and tear on the motor mounts;
- Limited resource of the sensor, which is responsible for oil pressure;
- Unreliable rear crankshaft seal. Flows even with low mileage;
- The cylinder block cannot be repaired;
- Leakage and loss of tightness of the pump at 250 thousand km.
Slow and expensive to repair “robot”
The robotic gearbox switches slowly in automatic mode. It is very uncomfortable. Especially when the driver needs to speed up. In addition, its design is not entirely successful. Even the manufacturer himself says this. Even with a short mileage, it may be necessary to replace the clutch and control unit. Repairs will not be cheap - about 60 thousand rubles.
Proper use of the box will help extend the life of the box. During short stops, it is necessary to engage neutral gear.
The steering rack often fails
The steering rack causes trouble for owners. It quickly breaks down. The first problems, as a rule, appear at 120–150 thousand km. She begins to play. Signs of a malfunction are rhythmic tapping on uneven roads.
It's nice to know that repairs can't be done right away. In this state, the unit can travel up to 80 thousand km. Replacing the rack will be expensive. Using non-original spare parts will help you save money.
Handbrake cables become sour
The braking system has one drawback. It consists in souring of the handbrake cables. In addition, the front brake discs are susceptible to corrosion. It is necessary to monitor their condition and clean the affected areas at the first signs of illness. Otherwise, you will need to install new disks.
Interior noise insulation disappoints owners. At speed you can hear the hum of the wheels and engine. This causes discomfort for both the driver and passengers.
Ground clearance is small - 120 mm. This car is suitable for use only in urban conditions. It won't be easy to drive it off-road.
When purchasing a Toyota Auris, it is worth considering how much it will cost to maintain a hatchback. After all, the cost of spare parts and components is quite high. Despite the fact that most machine components are durable and last a long time, over time they still require replacement.
Conclusion.
Toyota Auris is a great option to buy. Stylish, modern, safe and reliable. The main condition is not to choose a model with a robotic gearbox. The rest, if treated with care, will not cause trouble to their owner.
Reset errors
After the repair has been made and the breakdown has been fixed, the error codes may not disappear on their own. There is also a certain sequence of actions to reset them. To do this, we again need a diagnostic connector.
To reset codes you need to:
- Turn on the ignition.
- At the DLC1 connector, short-circuit the TC and E1 terminals with a piece of wire or wire.
- In 3 seconds, press the brake as many times as possible, but not less than 8.
- Make sure the light blinks evenly at half-second intervals.
- Turn off the ignition and remove the jumper from the contacts.
- Make sure that the ABS indicator does not light up.
“Artem0023” explains in the video how to carry out self-diagnosis of Toyota cars step by step:
Resetting the Tire Pressure Sensor Light
When the indicator on the on-board panel lights up, manufacturers recommend checking the pressure in all tires, including the spare tire. If no problems are found, but the indicator continues to light, there are several ways to disable the tire pressure sensor in the Toyota Prado 150:
- The easiest way is to drive 15 km at a constant speed of 80 km/h. After this, you need to stop and turn off the engine. When restarting, the indicator should go out.
- Sometimes the system requires a reboot. The instruction manual will show you which button to press where to restart the system. In the Prado, such a button is located under the steering wheel. To reset the tire pressure monitoring system, you need to turn the ignition key, but do not start the car. Press the reset button and hold until the indicator on the panel flashes 3 times. Start the engine and let it run for 20 minutes to adjust the sensors.
- When restarting the system does not help, try deflating all tires and re-inflating them. To reset the sensors, drive 5 km at a speed of 25 km/h.
- If a failure occurs on your computer, you will have to restart it. To do this, you need to disconnect the negative terminal from the battery using a wrench. Then turn the ignition without turning on the engine and press the horn for 3 seconds. This way the remaining energy in the machine is used. Reconnect the terminal.
If you have tried everything, but the button does not want to go off, use the services of a car service; perhaps one of the tires has a leak or a problem within the system. In any case, a car mechanic will be able to identify the problem.
Diagnostics and elimination of interruptions (malfunctions) on Toyota Land Cruiser Prado 150 Series
Let's list some common Prado 150 error codes that are detected during diagnostics. Let's look at the possible reasons.
P0606
Prado error 150 p0606. Its cause can be a number of problems, it is detected only by the scanner and is accompanied by a burning light on the “Check Engine” dashboard. The appearance of this Prado 150 error code can be caused by a violation of the internal memory, electrical circuits, or problems with the throttle valve. But more often, fault p0606 is located in the engine control module itself, that is, caused by a breakdown of the ECM.
Prado error 150 p0606 is accompanied by a lit “Check Engine” light on the dashboard.
Rather, the trouble is due to electrical overvoltage, such as when a spark plug blows or road salt corrodes the ECM contacts. Contact oxidation can be caused by a clogged drain hose from the heater evaporator when water leaks from it onto the ECM housing.
P2757
Error p2757 for Prado 150 indicates that you need to check the gear shift solenoid valve (torque converter clutch pressure adjustment). First, the wiring requires attention, then the connector with the valve, then the throttle. Code p2757 may appear after changing the automatic transmission oil if an electrical circuit is accidentally touched. It also appears when the input and output shaft sensor connectors are confused, when water gets into the electrical connector near the automatic transmission, or when the rubber ring on the transmission filter is broken. Also, the reason may be in the ECU, but this is for experienced electricians. (https://www. drive2.ru/l/502358617467388521/).
P0400
Error P0400 Land Cruiser Prado 150
Error Prado 150 p0400 is accompanied by burning slippery road, anti-skid and anti-skid indicators. This code indicates problems in the exhaust gas recirculation system. Cleaning the carbon deposits on the EGR valve may not help if the diaphragm is faulty, the supply hoses are leaky, the cooling pipe coming from the cylinder head is clogged, etc.
C1751
Error C1751 Land Cruiser Prado 150
Error code Prado 150 c1751 indicates a malfunction of the air suspension. In particular, in the relay of a device that closes the electrical circuit of the system. This relay is an intermediary that transmits a signal to the electronic control unit about the degree of filling of the pneumatic cylinders with air. When the operation of the device stops, the signal from it does not enter the ECU, as a result of which the automatic adjustment of ride height stops.
Error code c1751 is interpreted as damage to the compressor relay winding. Although in practice, a breakdown can occur both in the electrical network and directly in the electronic control unit.
Resistance is the main parameter of a working relay. If the measurement does not correspond to the standard factory indicator, then we can confidently conclude that the unit is broken. You can replace the part at a service station, or you can do it yourself.
If the electronic control unit is broken, it is repaired; if the connectors or wires are damaged, they are cleaned, repaired or replaced.
Tire pressure monitoring system
A tire pressure monitoring system is not installed in all vehicles. TPMS can be equipped by the manufacturer or installed at the request of the owner of the purchased car. The sensor indicators react to tire pressure and are triggered if there is a slight fluctuation. This system is needed to prevent the use of flat and overinflated tires.
Thanks to the control system you can prevent:
- rapid wear of rubber;
- excess gasoline consumption;
- emergency situations on the roads associated with differences in tire compression and possible skidding.
The system itself is:
- Sensors built into each wheel.
- Antenna.
- A display that displays the tire pressure of the Prado 150.
- Control unit for receiving signals.
A signal is sent from each sensor via an antenna to the control unit. The converted information is displayed on the display. If there is a strong change in pressure, a light on the screen lights up and a sound signal appears.
To prevent negative consequences, the car owner needs to know the reasons for the alarm.
The 2021 Toyota Prado 150 tire pressure sensor may turn on if:
- pressure has dropped (the spare tire is also taken into account);
- a wheel without a sensor is installed;
- the sensor battery is dead;
- The problem is in the TPMS.
System failures can occur when there are powerful radio signal sources. When you move away from them, the problem ends. High voltage power lines cause radio interference, which may also cause the TPMS to malfunction.
But if the sensor itself is faulty, the problem must be solved immediately. A constantly blinking light and an annoying beep prevent the driver from concentrating.