5243 Apr 20
The throttle valve is a key element of the engine power system. It regulates the amount of air supplied to the cylinders, which, in turn, affects the idle speed and the number of revolutions. From time to time, the operating mode of this part changes, so it is necessary to adapt it. Moreover, you must first clean the damper, otherwise all efforts may be useless. Unfortunately, not every motorist knows how these procedures are carried out, although in fact they are not anything complicated.
Removing the throttle
The throttle mechanism must be removed before cleaning and training. This is quite easy to do on a Toyota Corolla E120 and E150. Since 2002, the manufacturer began installing 1.6-liter power units on all cars in the series, so the dismantling process is the same for them.
The order for the Corolla Fielder is somewhat different, since the station wagon appeared in 2000 as a kind of offshoot from the main series. Nevertheless, the difference is insignificant, and it lies only in the principle of operation of the throttle, which is mechanical, so there is no need to look for an electronic sensor.
On later models, starting with the 2008 Corolla, the systems were unified and all powerplants now feature electronic throttle.
Under the hood, the engine is located openly, so finding the necessary elements is not difficult. Those drivers who are getting acquainted with the engine for the first time and do not know what this or that component looks like can see many photos on the Internet that show in detail all the external features of this or that part. The first step is to remove the air filter pipe, which is located on the left side of the power unit and on the right of the gas distribution mechanism. To disconnect the throttle itself, just unscrew the four bolts that secure the part to the timing belt. Now you can start cleaning the throttle body of the Toyota Corolla 150, which will be the same for the 120 models.
Toyota Corolla idle speed sensor: causes of clogging and cleaning
Cleaning the idle speed sensor on a Toyota Corolla
It should be reasonably tensioned, but should not initially open the throttle assembly. If everything is in order with the cable, the tubes have no damage or obvious cracks, there is only one reason for this behavior of the car - a clogged throttle valve.
Step-by-step cleaning of the throttle valve on a Toyota Corolla So, let's start cleaning the throttle. Toyota Corolla idle speed is starting to be worth talking about exactly what tools we need. To remove and clean we will need: A special product for cleaning carburetors; A few clean and dry rags, preferably lint-free; A set of keys, various sockets and screwdrivers - which will help in removing the throttle; You also need a room in which the relevant work can be carried out.
Having decided on the tools and materials, we proceed to removing the throttle.
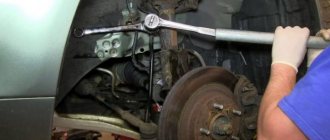
Disconnect the pipe, throttle cable and two sensors. The photo below shows where the throttle is located. Next, we need to unscrew the bolts securing the damper - unscrew several nuts and bolts, and then carefully remove the damper from its place.
Cleaning the throttle valve
First of all, to clean the part you need to buy washing liquid for the carburetor. It costs about 200–300 rubles per can, so you don’t need to worry about the cost of the issue. In addition, you will need a dry cloth that should not leave any lint. So how do you clean your throttle body? Everything is very simple.
You need to spray the purchased liquid onto the part and gently wipe it with a rag. It is worth repeating the procedure several times until the dirt and deposits are completely removed.
Many motorists ask the question: “We clean the intake manifold, but engine performance does not improve. What are we doing wrong? The fact is that this part does not need to be touched at all. Of course, extra flushing will not cause harm, but there is no need to waste time on it. The deposits formed in the collector are insignificant, so they do not interfere in any way.
How often should you clean your throttle body? It is impossible to answer this question with an exact number, since it is recommended to carry out this procedure every time the engine oil is changed. Some people do this twice a year, and others once every two years. After how long the lubricant is changed, the same time it needs to be changed.
The power unit of almost any modern car has a throttle valve. Over time, the mechanical regulator of the valve flow area, which changes the amount of medium flowing in the channel - liquid or gas, becomes clogged and because of this the car begins to behave strangely. In this article we will talk about what ailments can be caused by a clogged throttle body in a car, as well as how to properly clean the throttle body on a Toyota Corolla.
As a rule, with a clogged damper, the engine speed of any car begins to fluctuate slightly, it ceases to be sensitive and swings its speed from one extreme to another; the second reason may be an increase in fuel consumption. Agree, not one motorist will want to have increased fuel consumption and reduced power of his friend. And finally, the end of everything can be the moments when the car simply starts to stall. When this happens, you should really think about the fact that you need to clean the throttle valve.
Tools and cleaning products
First, we need to decide on tools and cleaning products. We will need a brush, rags, a special cleaning agent for the carburetor - you can buy it at any car store, it would be a good idea to have a liquid like WD-40, a small brush and the rest of the tools that will be useful for removing this valve from the Toyota power unit.
Having found all of the above, you can drive the car into the garage and confidently begin the task at hand. So, let's start looking at the step-by-step instructions for cleaning the throttle valve.
Instructions for cleaning the throttle body
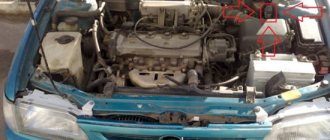
Our very first action after we lift the hood will be to disconnect the terminal from the battery. Only after this we begin to carry out all further actions. After the terminals have been disconnected, remove the plastic casing. The location of the damper is highlighted with a red circle in the photo.
After you have found it, we will need to unscrew the two bolts that hold the throttle cable, bend the fastening, loosen it slightly and finally pull it out. Having pulled out the mount, we put it aside. Next, we need to loosen the clamps that hold the air duct, and then remove it and move it to the side. A picture opens up to us in which we see a damper.
After the air duct has been moved aside, we need to pay attention to the frame, which is held on by two bolts. Unscrew it and remove it. Everything is clearly visible in the photo.
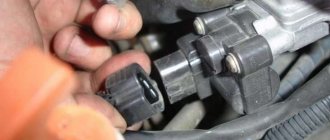
Having removed the metal frame, we proceed to removing the throttle itself. We need to unscrew all the remaining nuts and bolts. There are not many of them: two nuts and one bolt. After which we need to unclip two connectors - the XX sensor and the remote control position sensor. In the photo below, everything is clearly shown with arrows.
After removing all the fasteners, carefully without damaging the rubber seal, remove the throttle from its place. Using pliers or a screwdriver, remove the two remaining hoses from the cooling system. Once the tubes are disconnected, be prepared for antifreeze to start leaking from them.
To stop antifreeze from dripping and spreading dirt, the hoses can be bent upward and the problem will be solved. However, if you touch them, they will break off, straighten out to their original position and begin to flow again. Therefore, we take the two previously unscrewed bolts and screw them into the tube. In this way, we will stop the leak and can continue to go about our business without thinking about them. We do it as indicated in the photo.
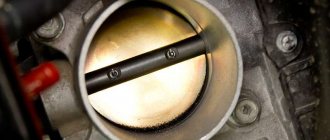
The photo shows the throttle from the reverse side. It is worth paying attention to the amount of dirt that is there. However, that's not all.
Next, after removing the throttle from the power unit, we need to unscrew the XX sensor, which is mounted on three bolts. To do this, we take DW-40 liquid, wet the bolts, a little later take a Phillips screwdriver and unscrew the three bolts. They unscrew easily. The location of the bolts is shown by red arrows in the photo below.
But before unscrewing the bolts, it is worth drawing several lines at the junctions of the two parts. This approach will allow you to perfectly accurately return everything to its place when assembling the part. Remember, there must be at least three marks - one on each side.
After unscrewing the bolts, carefully disconnect the parts from each other. As we can see, there is carbon deposits inside that need to be cleaned. Therefore, we take a cleaner, soft brushes, rags and try to clean all the corners of the disassembled part as much as possible. The photo below shows how much dirt is inside. After cleaning everything should be shiny.
After cleaning the XX, it is necessary to clean the throttle itself, as well as its seat. In order to clean, we need to generously fill everything with purchased carburetor fluid. This is very easy to do, because a can with a tube allows you to do this in almost all inaccessible places.
We give the throttle valve a few minutes to soak and begin cleaning. This should be done as carefully as possible so as not to damage the inner surface or disrupt any mechanism. This is especially true for the inside of this unit. The rubber seal should also be cleaned; if it becomes unusable, it should be replaced. The inside can be cleaned in the same way as shown in the photo. Clean carefully so as not to damage the damper.
After you have spent a little time on cleaning, a lot of cleaner, a toothbrush and a sufficient number of rags, we should get a clean, oil-free and soot-free technical unit that will fall into place in the future after assembly. A photo of a clean throttle body is located below.
After the final cleaning, we put everything back in its place. Before installation, do not forget to put on the hoses, fasten them securely, add a little antifreeze that has leaked from the system, and so on.
At this point the cleaning process is complete, you just need to put everything back in its place and that’s it. This procedure requires only 4-5 hours of continuous work and about 600-800 rubles.
Throttle valve adaptation
Problems with the air supply in the power system occur as a result of a malfunction of the throttle sensor. This can be corrected by adapting this electronic mechanism.
After the driver has successfully cleaned the part, you need to reassemble the entire mechanism in the reverse order, and then proceed to the main procedure.
Training should only take place if a number of preconditions are met. First, the power unit needs to be warmed up to operating temperature. Then you should turn off all electronics (headlights, DRLs, audio system, etc.). The car must be on a flat surface, since adaptation will require moving the gear lever to neutral.
After the car has been prepared, training should begin. First, you need to disconnect the battery terminal for 5 minutes. After waiting 5 minutes, you need to return it to its place. Next, the ignition is turned, but the engine itself does not need to be started. After all the indicators on the dashboard light up, you need to wait 30 seconds.
Leaving the ignition in place, you should again disconnect the terminal from the battery for the same time, then return it to its place, start the engine and wait 15 minutes.
As a result, the idle speed will be adjusted and the air supply will be normalized.
Symptoms due to dirty gas
So why does your Toyota and its throttle body need some respect, care and attention? First, let's explain: a damper is an element that is located in the Toyota valve passage and is responsible for the correct "passage" of gas or liquid. As you know, liquid or gaseous media have small inclusions, so Toyota, like any other car, needs to constantly clean the damper.
Your Toyota Corolla will work great if you clean the damper, and how to do it correctly will be described and shown below. So what happens if the throttle is not cleared? The thing is, if you "start" this important part of the car, the speed of its engine will "walk" as if it were "floating", so the entire Toyota can start consuming an insane amount of fuel. Don't you want your wreath to be "greedy" and go to extremes in terms of revolutions? You don't want to have an underpowered car because of a damp hatch? To avoid such troubles, it is necessary to clean the throttle element.
What tools might you need to clean the lid? There are several: carburetor cleaner, brush and rags. You can easily get all this at any specialized retail outlet.
Intake malfunctions, what to do and what to do?
Typically, malfunctions associated with the throttle valve on the Toyota Corolla 150 occur at high mileage (over 100,000 - 120,000 km). However, there are cases when malfunctions of the throttle assembly occur at short distances (around 60,000 km), in which case the causes of these malfunctions may be:
- a defective part in the throttle assembly (TPS - throttle position sensor) - practically never occurs;
- the so-called “throwing” of the throttle assembly (from the cylinder head side) with exhaust gas products due to the crankcase ventilation system is a common problem;
- the use of a low-quality air filter or its contamination (due to non-compliance with maintenance) is rare.
If problems arise related to a malfunction of the throttle assembly, do not panic ahead of time, because these problems can be easily solved with your own hands; you just need a little time and tools. However, before starting to disassemble the throttle assembly, we first of all strongly recommend diagnosing the electronic control systems (either at a service center or independently using a scanner).
And we warn all those who dare to repair the throttle assembly with their own hands that our editors are not responsible for your actions! You perform all work at your own peril and risk!
The ways to solve problems are as follows:
- with all sensors in working order (TPS and MAF), the throttle assembly is removed from the car, then washed, after which it is installed back and adaptation/learning of the throttle valve is performed;
- if the TPS sensor is faulty, the throttle assembly should be replaced with a new one (since the TPS sensor is installed directly in the throttle body body);
- If the MAF sensor is faulty, it should be washed or replaced with a new one.
The functionality of the sensors can be checked using a scanner; if there are no errors, it can be additionally checked using a multimeter/oscilloscope. More detailed information about sensor indicators can be found in the vehicle manual.
- throttle assembly assembly (with TPS): used - from 3000 rubles, new - from 6500 rubles;
- Mass air flow sensor (MAF): used - from 1500 rubles, new - from 4500 rubles.
Fuel system or dirty intake?
When mentioning a dirty intake, many drivers immediately begin to suspect the fuel injectors for all the troubles. It must be said that such a fear exists, but, alas, it is not always confirmed. Let's first look at the symptoms associated with a faulty fuel system and a dirty intake. So, if the fuel system in a car is faulty, the following problems may occur:
- difficult starting;
- “triple” of the engine, both at idle and while driving;
- significant reduction in traction;
- slow speed increase;
- the car may stall frequently;
- The “Check Engine” icon appears on the dashboard.
Re: Toyota Corolla throttle
Just one person, only the client can announce the king 1.6 petrol. I deliberately stupidly googled about the kings of 01-06, FIVE
models from CDE120 to ZZE123. Still have questions? Without even straining deeply
Where is this datalist? There is no leak, we take a screenshot, take a photo, copy it or copy it with pens and post it here. And the question is, in general, the throttle, well, the throttle, so what? Did the block throw an error? Where is its code?
Would you like me to ask a couple of questions that the walkers asked today? One, very smart-ass, in my opinion, the power steering does not work on the Fabia, which may be, the other has heated glass, Golf-4, I’m not talking about the floating speed and twitching, bad starting in the morning. What could it be? And if you start talking, they say they changed the spark plugs, washed the injectors, checked the pump, nooo, just tell me, what could be?
RSA1976
, I saw your topic on Karmasters, it’s very interesting how people will react to empty parameters in words. And in my opinion, those removed with a cord according to the OBD protocol, it will be so there. I'm talking about opening degrees. Advice, take a normal scanner and remove the parameters, and you will be happy.
